Hardware: DIY Security Key
This project was imagined entirely because I wanted to save money and thought USBs as keys were cool for MFA (Multi-Factor Authentication). The end result while good, could've been improved upon a bit, but it works for me with most services.
One Key to Rule them All
And in the darkness, plug it in upside down
So what is a security key and what makes it pretty cool? Essentially, in addition to other MFA solutions such as TOTP Authenticator codes, fingerprint or facial matching, it acts as a non-primary login authentication tool for many services. It works a bit like TOTP codes, but that only one that your specific USB Key is able to provide to the system requesting it. It's a hardware key for your PC really.
Popular ones include YubiKey or some of Google's old and forgotten solutions. And while I admit the YubiKey is really cool in my eyes because it also supports NFC, allowing it to work on mobile devices, I have some problems with YubiKey.
I am all for letting some services be responsible for many quality of life features for me to take advantage of, unless it comes with security. For me, only if I have the option to self-host or locally provide the service myself using their infrastructure, or if they are completely opened sources, would I then consider using it. YubiKey is neither, so if the company goes belly-up, well, your security keys may still work but the support is questionable.
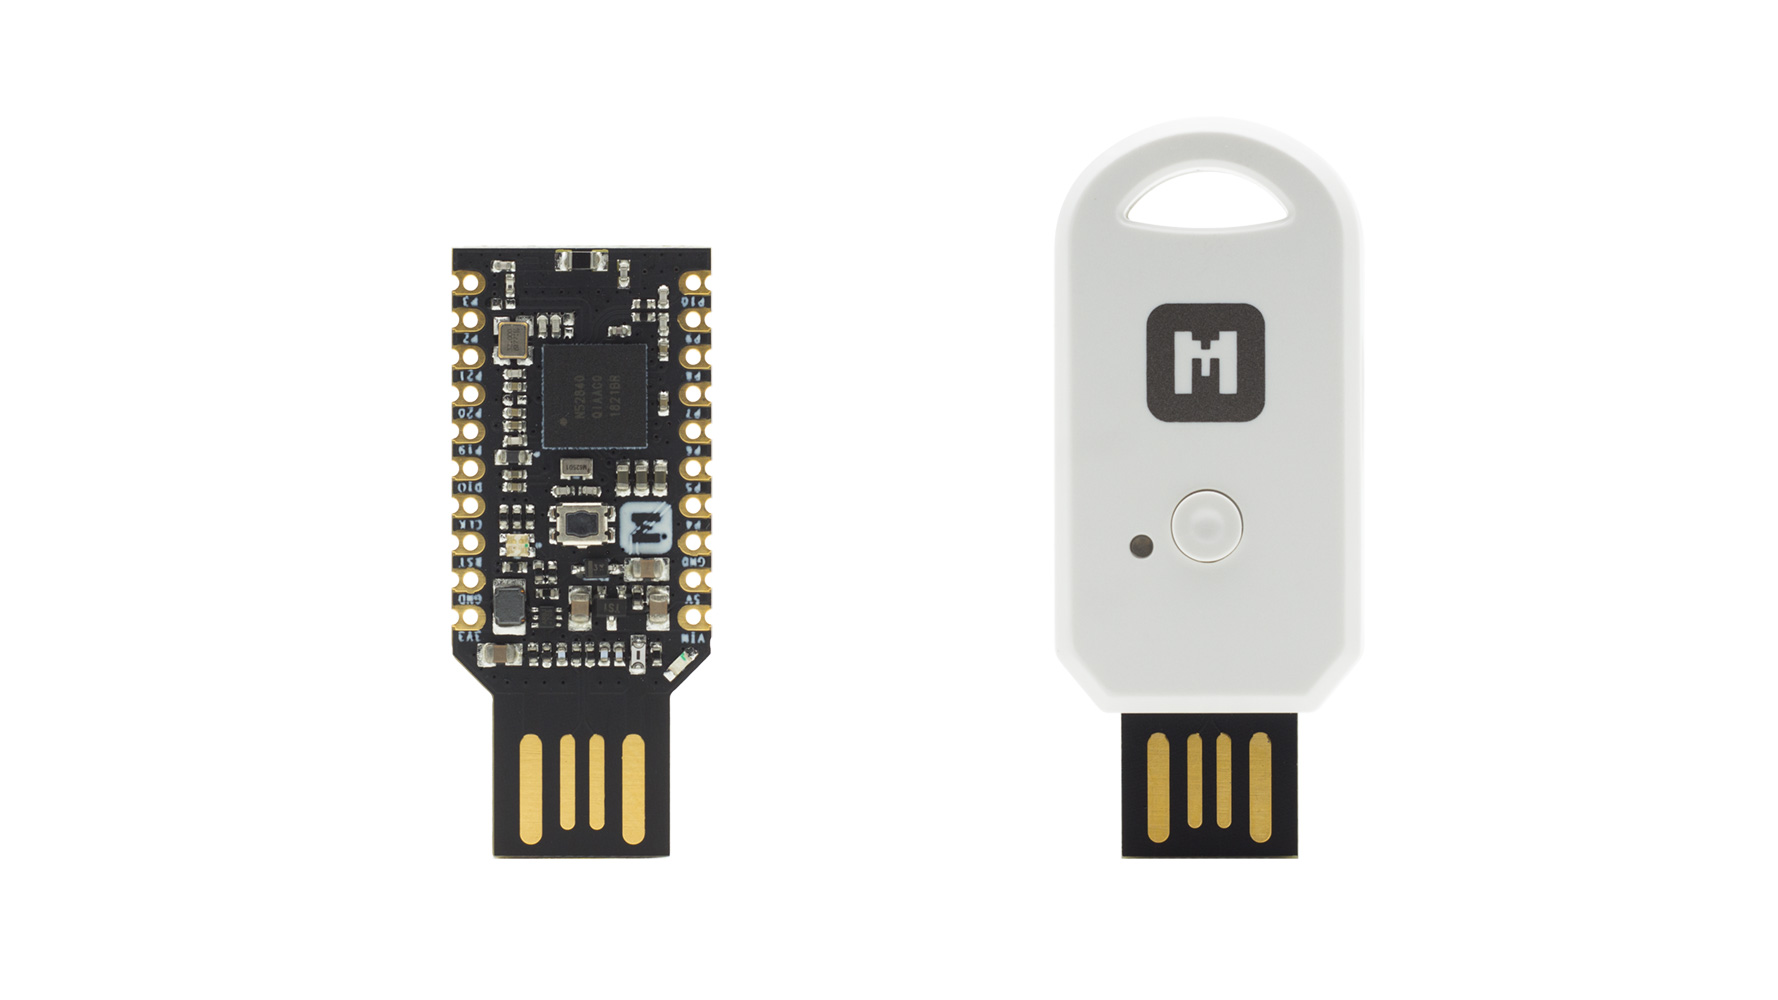
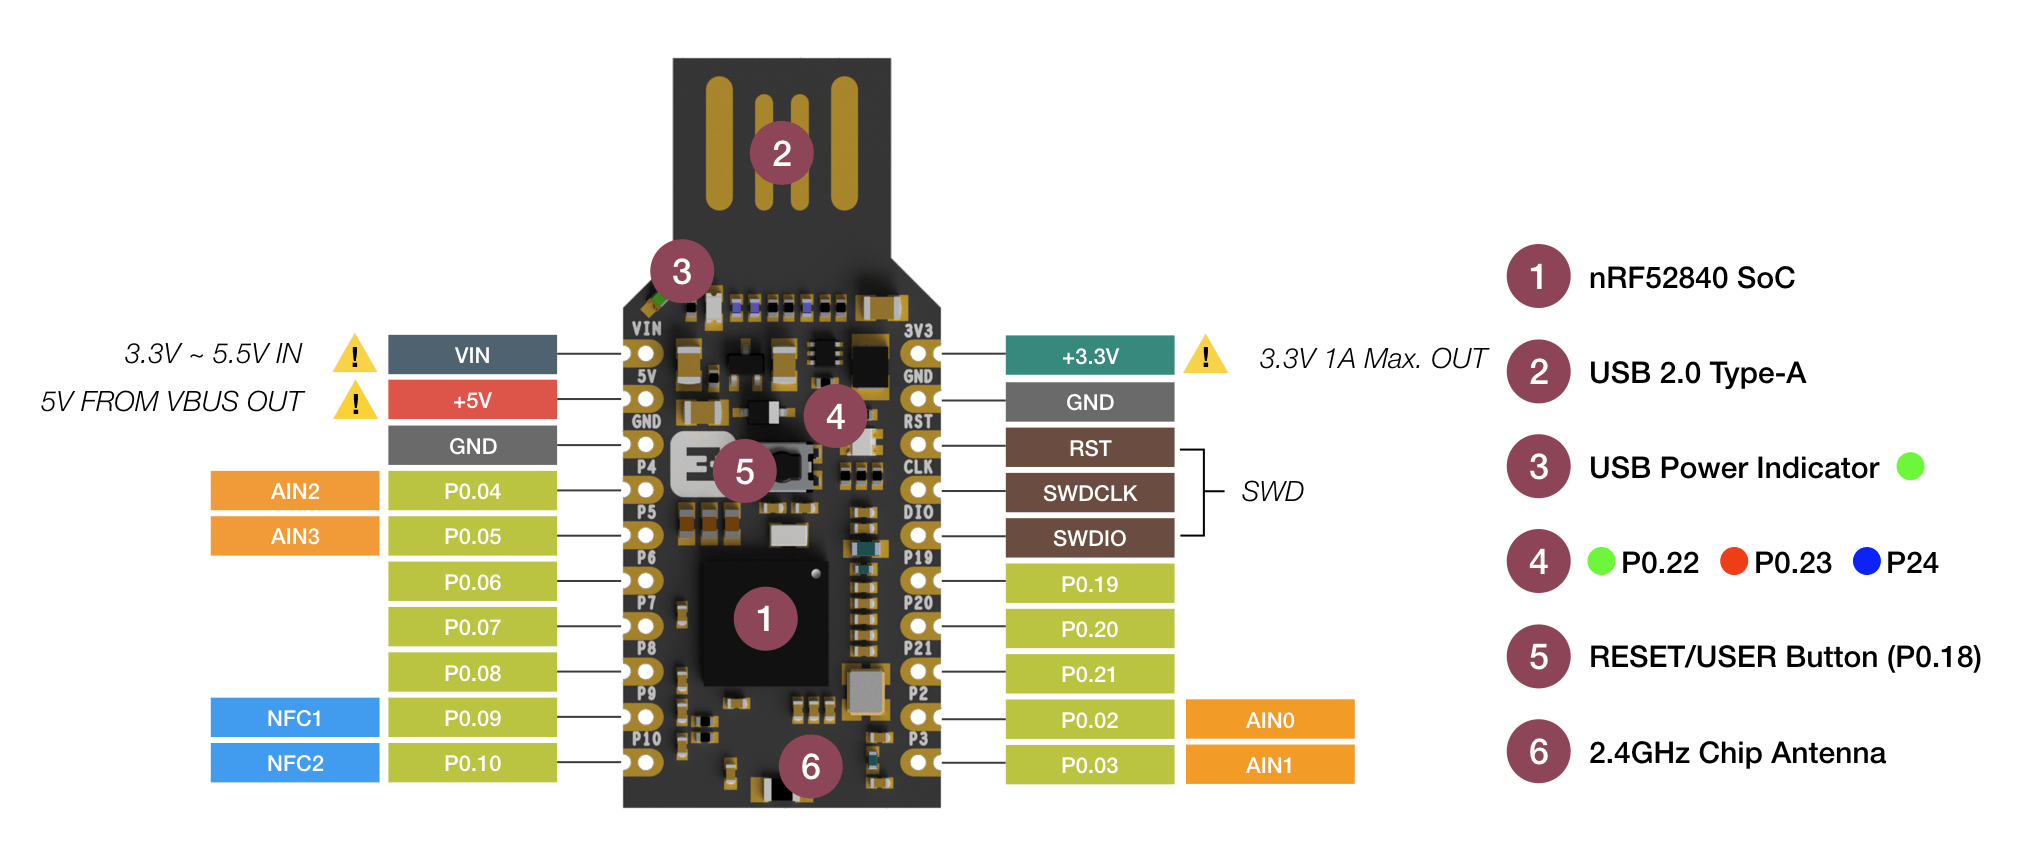
So when I found out about Google's openSK package and a few boards sporting a Nordic chipset such as this MakerDiary board, I figured why not make my own security key! Oh boy I was not expecting the troubles I faced but it was worth it.
The Plan
The first plan never survives past preparation
I had a certain aesthetic I wanted to achieve, one that would be immensely difficult given my lack of access to materials and resources necessary for it. I wanted to embed the security key in between some glass or plexiglass, that has etched fake tracings on it that would light up through diffusion once the key was active/powered, such as from a USB port. Additionally, the wire traces would need to be layered in the glass as well, which was doable, but tough.
Hang on now, what traces if I'm just using the basic USB board? Well, the way the current key worked was once it was plugged in, and you entered it's pin (if one is set), you needed to also hit a physical presence button on the USB key. I wanted to be more advanced than primitive cave man buttons, so I was implementing a Fingerprint sensor & recognizer, so that only my fingers can ever activate it.
Ideally, I would also have NFC as a functionality but sadly, while it is semi possible with the chip on the USB key to support its functionality, the power the NFC antenna would get from the wireless technology would not be enough to power the chip on the board, let alone anything else connected to it. So sadly, no wireless security key for my phone.
The Hardships of Software
Featuring the Hardships of Hardware
Security Key Firmware
The initial plan involved flashing the board with OpenSK, forked by MakerDiary. The problem was in customizing the code so I can disable the presence button and instead replace it with the fingerprint sensor, using some interfacing library for the sensor to the key.
Now, I know that I know a lot of programming languages, but one that I could never get around to learning was Rust. And no matter what I did, I couldn't modify the source code to be able to do this functionality, most likely due to my limited knowledge of how it interacted with the hardware. But this isn't why I gave up on this part of the plan. What happened instead, was that on three different systems, one Windows and two Linux, I was unable to build the binaries from source. I spent over a month trying, and it kept failing. So I sucked it up and decided if I wanted to do this, I would need to do a hardware hack.
Since I could not build the OpenSK firmware, I had to result to using this specific nrf U2F build. I didn't need to build it from scratch as it came with a prebuilt binary, however, it lacks FIDO2 support. It only works as a security key with FIDO 1 and U2F. Additionally, it was no longer related to Google's open source project.
My plan now has changed. Instead of modifying the source code of the key, I had to trick it into thinking I pressed the user presence button. In hindsight, I should have removed the button itself but I kept it on in case I messed up and ruined the key. But hey, if I ever lose my fingerprints, it's a backup!
After scanning through the datasheets of the USB key I had, I noticed that one of the IO pins was mapped directly to the user presence button and would work to activate it. Score!
Fingerprint Sensor
This took way longer than it should have to get working. I had tried so many different approaches that I had eventually stopped documenting everything I did to get to this point, but I'll try my best from memory.
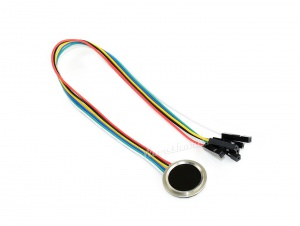
The fingerprint sensor of choice was this Waveshare sensor. It could both store and match fingerprint using onboard storage, and would send predictable signals if it had a match or failure. The only caveat was I had to program it first with my fingerprints.
The documentation from Waveshare for this, frankly, sucks. They have an example Windows program for it, as well as a script for a Raspberry Pi to test it with. I figured it would be easiest to try with the Windows program. Nope. Didn't work. Connected the sensor to a UART cable I had laying around for these purposes and no dice. Could not recognize any bit of it.
So I tried the Raspberry Pi approach, and it seemed a bit promising at first. Until I found logical errors with the code provided officially by Waveshare. In fact, it wouldn't even run because of formatting errors. After I fixed those (and documented them to Waveshare), it recognized the sensor, but would only get trash data in and out from it.
After several weeks of back and forth from Waveshare, they were ultimately not able to figure out what was going wrong. I decided to give up on the RPI and go back to trying to get the Windows program to work. I connected my UART USB cable to it and the cable into my PC.
It. Bloody. Worked. Until it didn't. It turns out the main problem I was facing earlier, and currently, was due to the configuration of the program, as well as its documentation. There are certain values you need to enter in on the program, named P1 and P2, as IDs. The problem with these IDs is that they needed to be very specific values, like 0 and 1. I apologize but I forget what I put in for them, but it was some trial and error until it worked.
Otherwise, the process with the program is that you need to first add a user with a particular ID and scan a fingerprint to remember it, saving values and such. Once you save enough fingers, test them all, do Counts with the proper IDs etc. To sanity check, power it off, unplug it and retry with it plugged in if it can recognize the same fingers.
I don't have any screenshots of the software, nor the procedure, because now Windows decides it's a virus and won't let me download it and it deleted the old executable I had ages ago. There are ways around this to fix it but for the sake of this, it can be referenced in their user manual here which while lacking in detail, did help when it came to understanding the hex values.
But once I had all my fingerprints recorded, half the battle was done! Now came how it can interface with the security key. I knew that I could power it with 5v from a pin off the key, but how about the data line? I can't just wire one thing to the pin on the key for the presence button override because the sensor takes multiple wires and needs logic to decipher the random values it spits out. So this is where the tiniest chip/microcontroller I had laying around comes in.
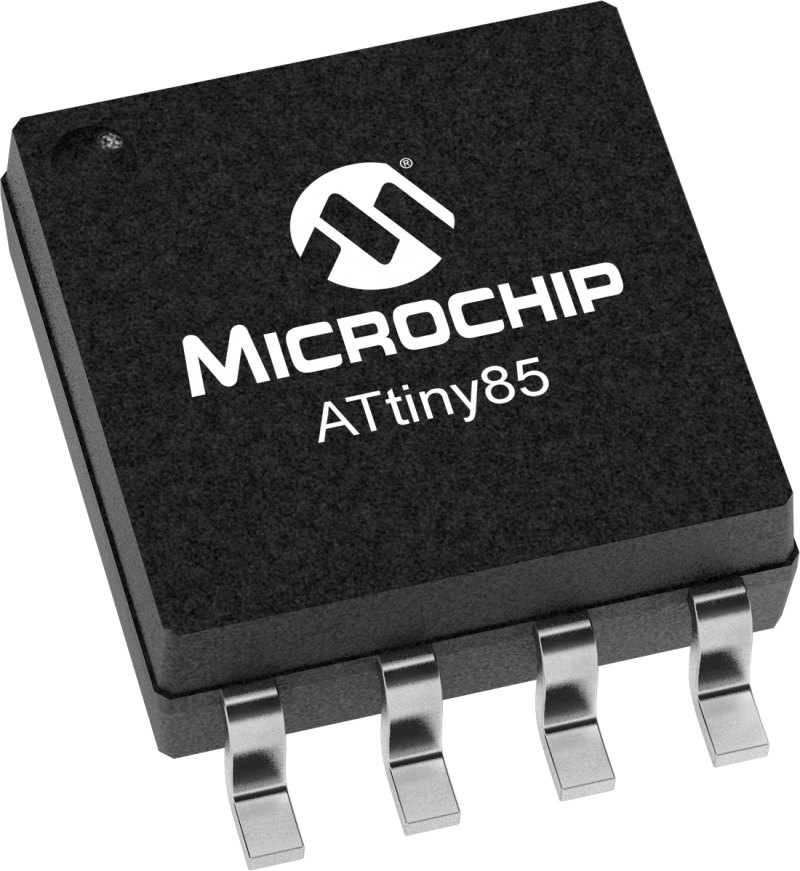
Hardware Hacking with ATtiny85
The ATtiny85 is a remarkably small chip that I have only used one time before, but bought in a small pack of 5 back then. I needed it for its small size to drive a vibration motor and LED fading with a capacitive touch Witcher Medallion I made years ago, since it was all embedded inside of it.
It can be programmed kind of like any other microcontroller. I used the Arduino IDE of course, downloaded what I needed for the aTtiny85 to be set as the board. Of course, it has no USB port, it's bigger than even a micro USB port, how can I program it?
Back to the Arduino Uno! I had flashed it to work as a programmer for the ATtiny85. Ironically, this is the first time I've ever used a breadboard. Unfortunately, I once again don't have the documentation for how I wired it up, but there are hundreds of tutorials on how to flash an ATtiny chip with an Arduino.
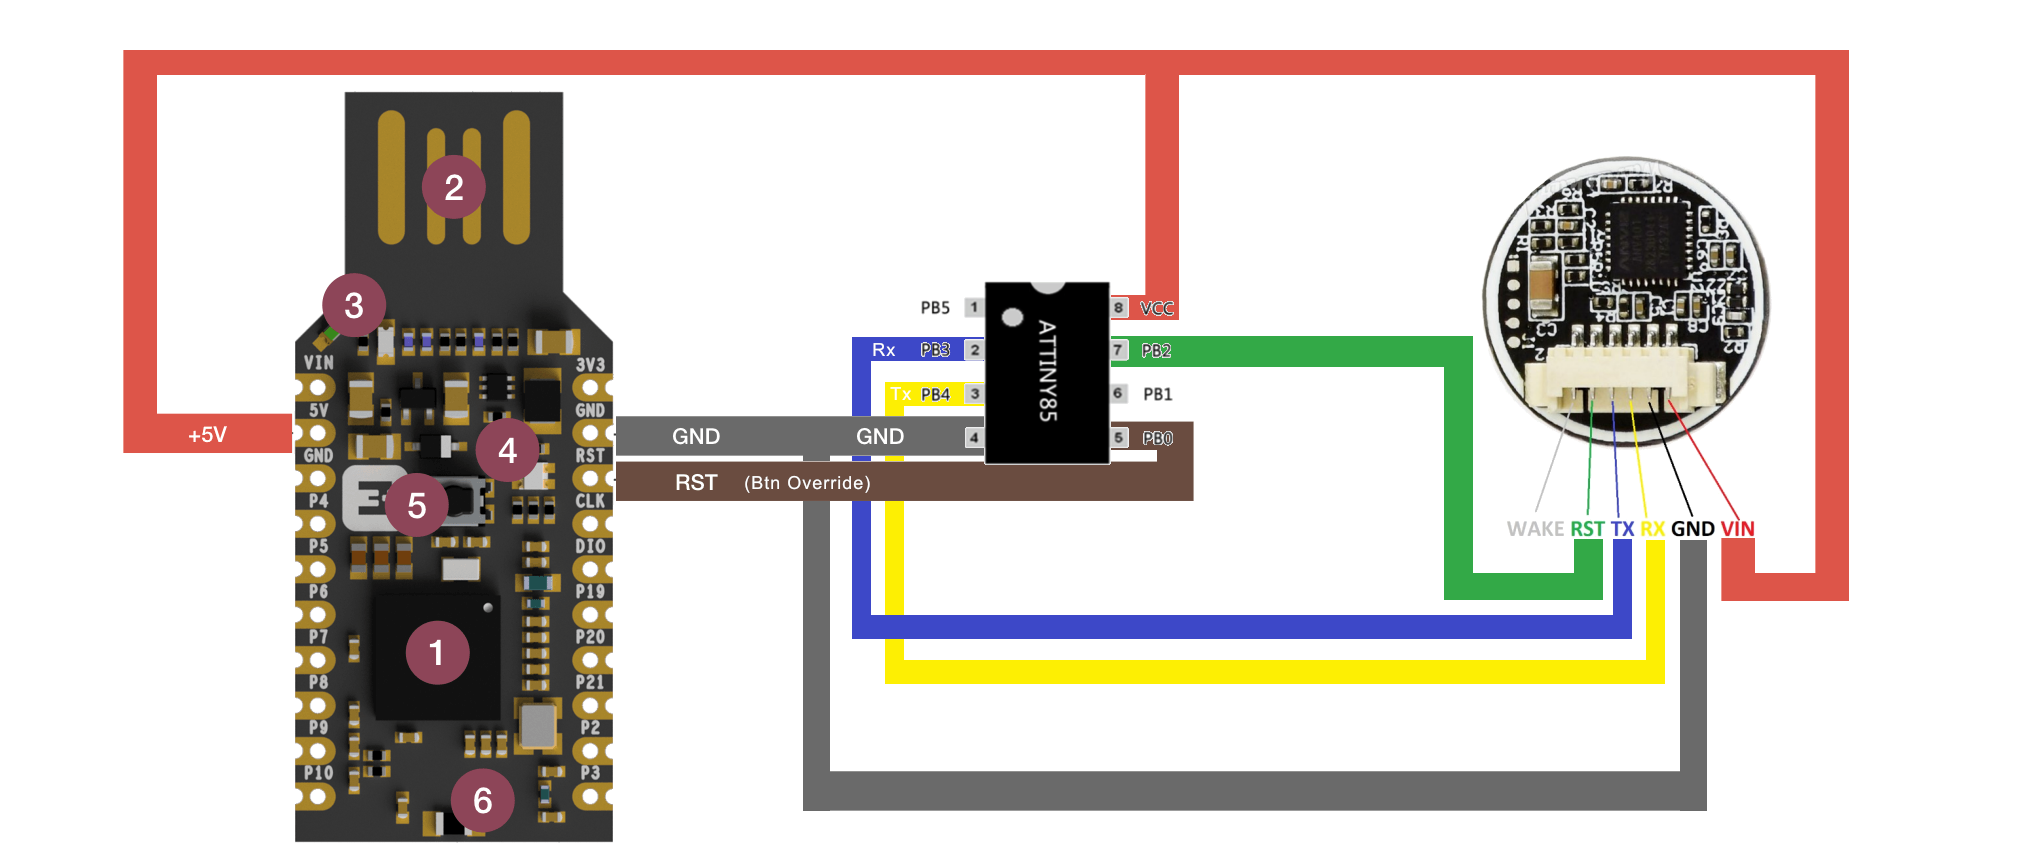
The code I loaded the ATtiny chip with would read the fingerprint sensor's status, decipher if it was a pass or fail based on the reply. If it passes, it would send a HIGH signal to a pin for 2 seconds, which would be connected to the user presence override pin on the security key.
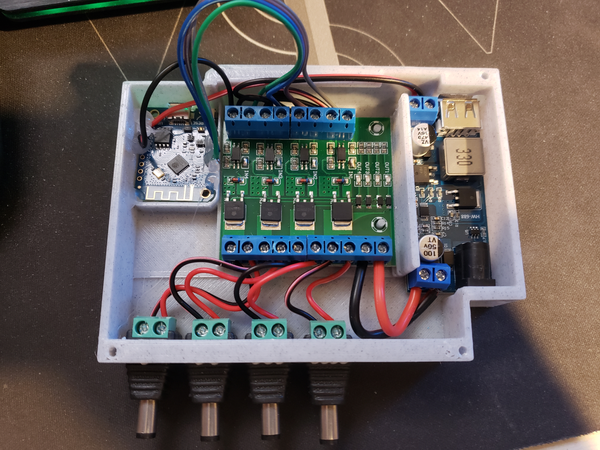
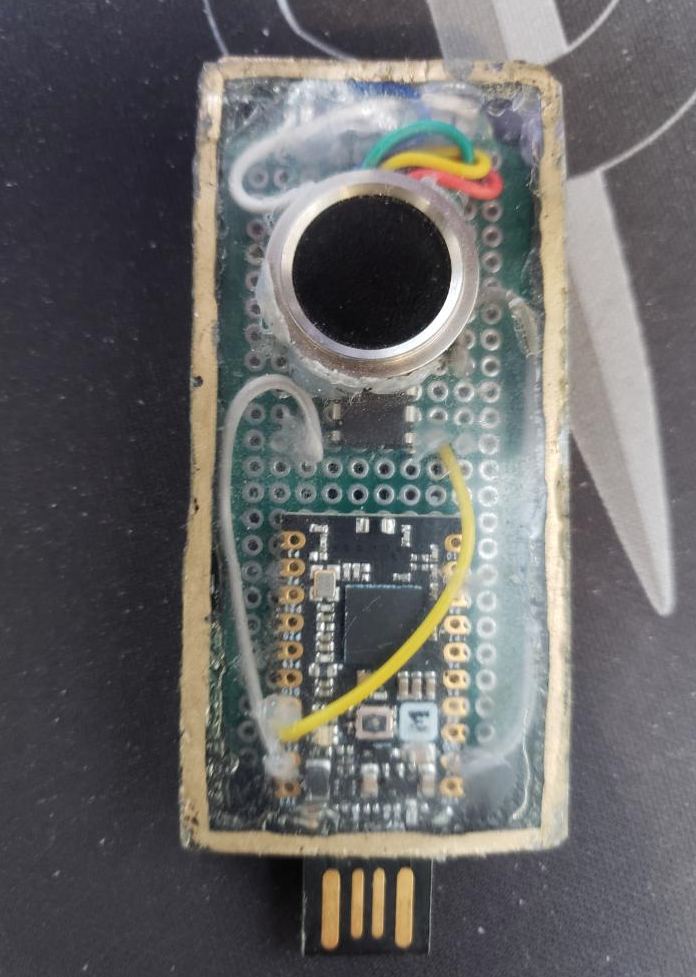
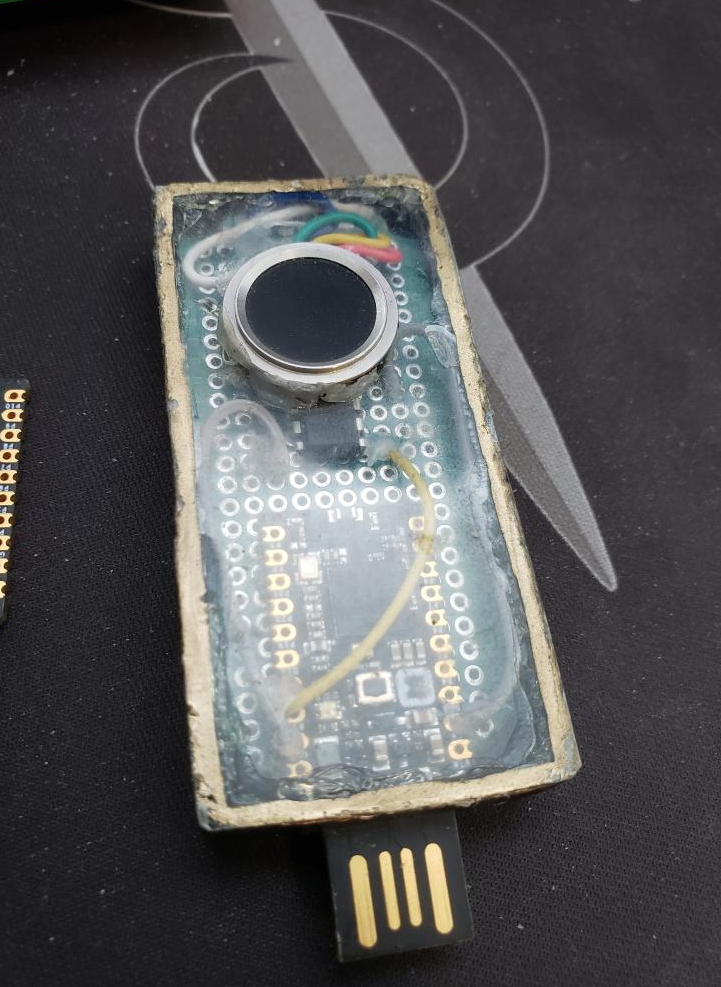
Once flashed, I disassembled the Uno parts and swapped around the pins on the breadboard and added both the fingerprint sensor and the USB key. The final layout is pictured below.
Final Assembly & Testing
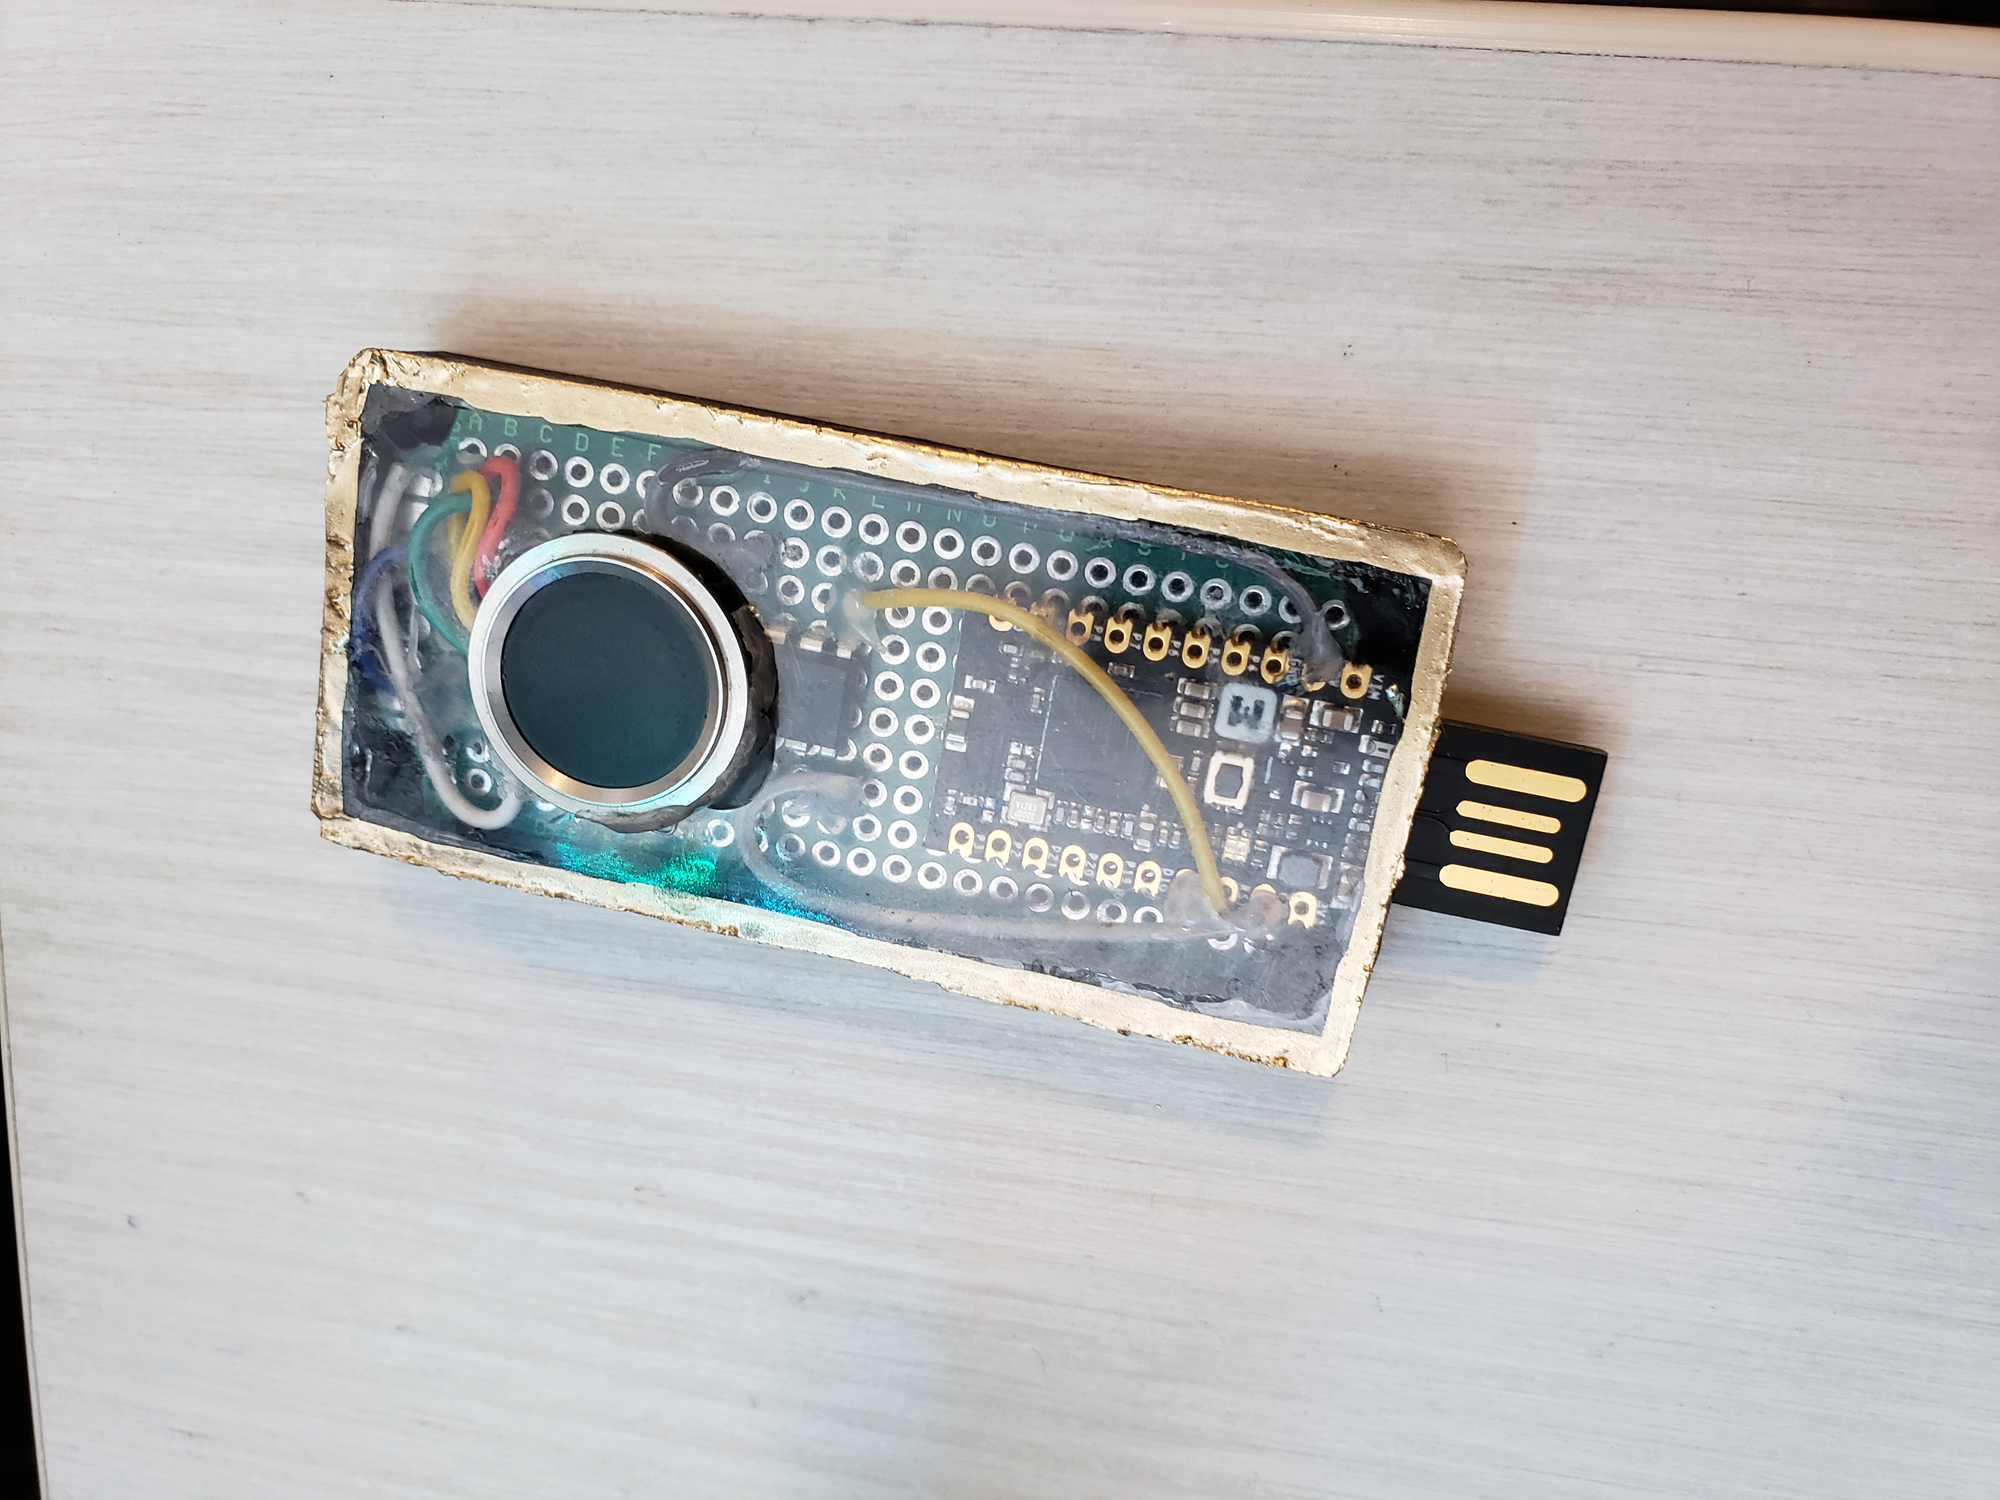
So, it's ugly. But I like it.
The original idea for the lit up engraved plexiglass didn't work out, because I, once again, do not have the tools needed to cut plexiglass. Because of that, I gave up on the other challenges needed to make it work because I'd never make the core of it to be perfect. Plus all these extra components I need in it would make it harder to make.
So instead I 3D printed a small container for it, with room for a proto board that everything was soldered onto, a slot for the USB business end, and then painted it black. I then had some plastic sheet and glued it on top with a hole cutout for the fingerprint sensor. This was to let me see inside of it, but also to prevent me from hitting the presence button which is still technically functional as a bypass to the whole fingerprint thing.
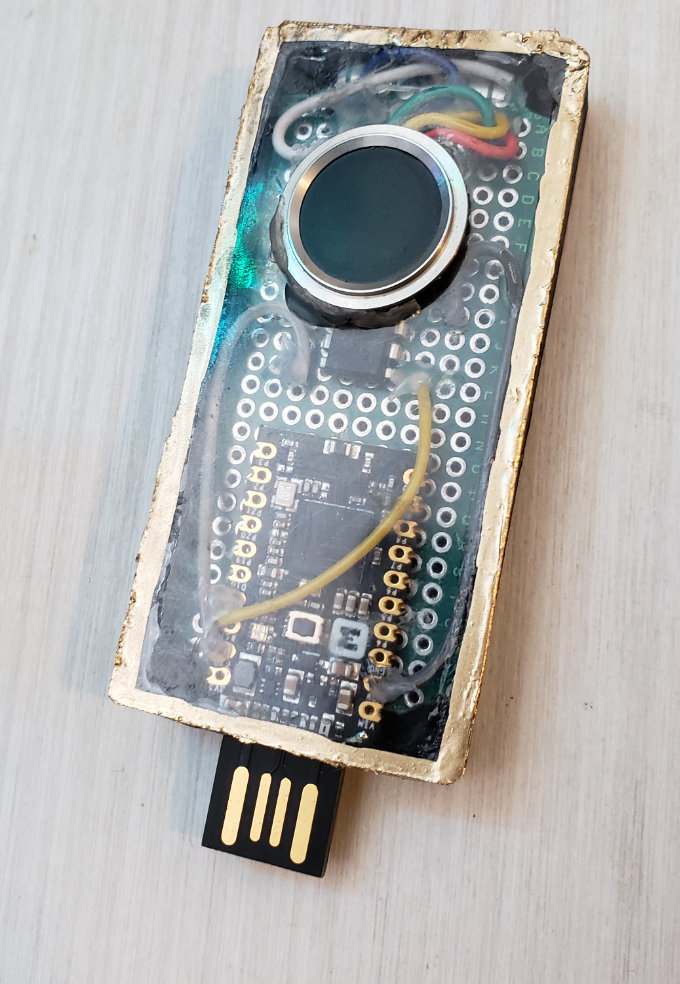
The 3D files aren't included here as they are very basic shapes, and I lost them so, yeah. To compensate, have a picture of assembly before things were final. Or as I like to call it, the sketchiest thing I've ever plugged into my computer.

There's some hot glue mess in there because I didn't want to deal with wires breaking off by accident, and sure wires everywhere it's a bit ugly but it works. I accented the casing with some gold as well.
So what do I use the key for? It doesn't work with all possible security key solutions, but should support most U2F and FIDO 1 things. I primarily have mine hooked up to my Twitter, GitHub, and Microsoft accounts, as well as a few others.
Resources
Materials
- MakerDiary USB Key
- Waveshare Fingerprint Sensor
- ATtiny85
- Electronics Wire
- Perf Board (or testing DIY circuit board things)
- Hot glue & Super glue
- Case (Can be 3d printed)
Software
- Arduino IDE
- Firmware for Security Key
- Waveshare Fingerprint Sensor Software & Documentation
Tools
- Soldering Iron
- Computer
- Arduino Uno
- UART USB breakout cable
- Breadboard
Disclaimer & Notes
- This security key will only work with FIDO (1, not 2) and U2F security key implementations. FIDO2 is not supported as I couldn't use OpenSK. I hope one day I will be able to do this with an updated v2 build.
- I am not liable if you make your own key and lose access to one or many of your online accounts, or create a faulty security key and lose data. There is a lot of risk making your own security device such as this, and this is merely my experience with making one.