Making the Necromancy of Thay
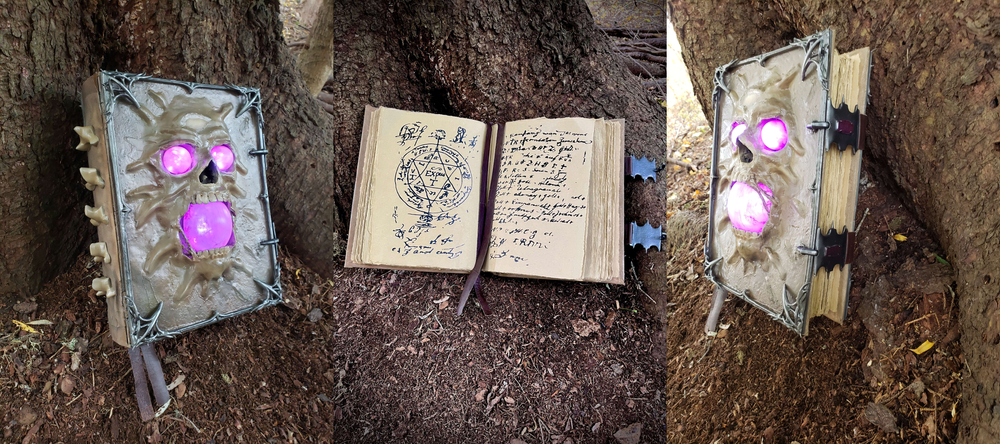
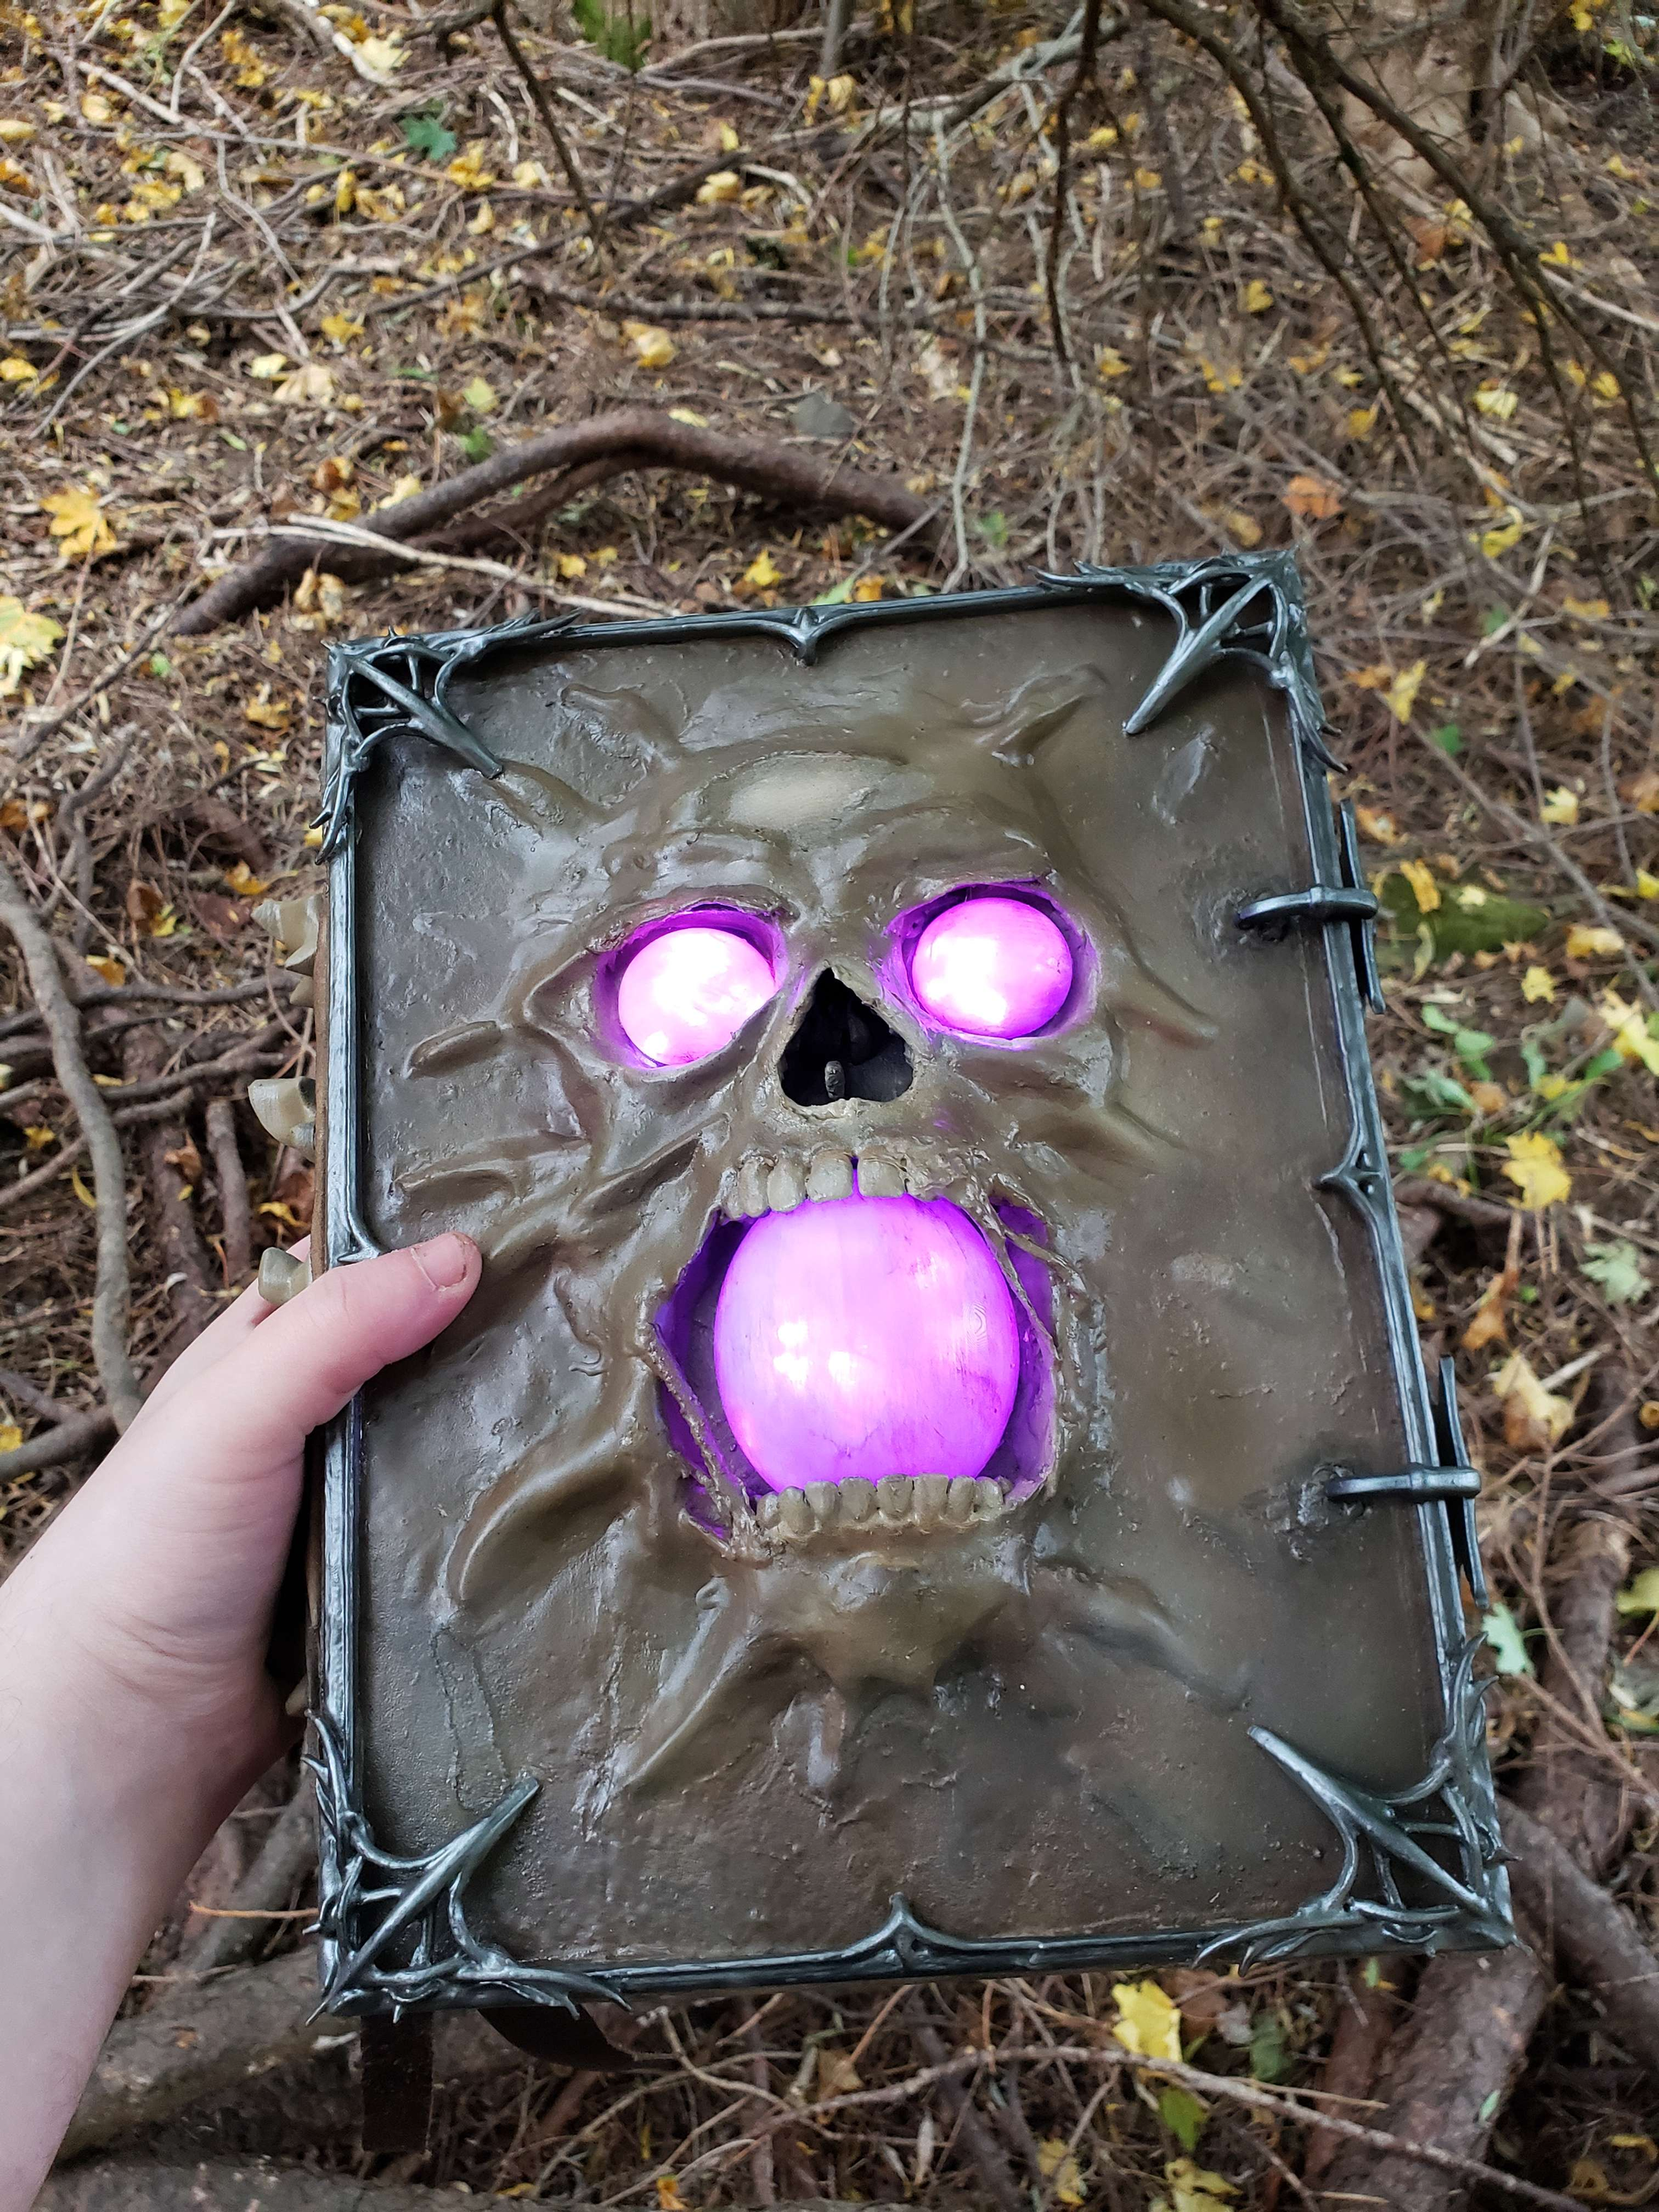
The Necromancy of Thay was an item I had instantly fallen in love with from Baldur's Gate 3, so of course I had to make it.
I found this funny book in my basement and I hear voices telling me to read it, what should I do?
— WolfwithSword (@_WolfwithSword) October 29, 2023
~ Necromancy of Thay, from #BaldursGate3 @larianstudios
Why did I make it so big lol#crafts #BG3 #Necromancy #Halloween #3dprint #3dprinting #book #DIY #prop #cosplay pic.twitter.com/SqD7JEVEXN
Designing Challenges
The majority of the book was 3D printed but with various materials and technology. But it had a few primary problems that needed to be tackled. I feel it is necessary to understand how these challenges were solved or processed in order to understand how the assembly and files are designed as they are.
Covers & Hinge
I knew I wanted to make this book legitimate with pages and all, so a hinged book cover was essential.
What I settled on was a tricky concept. The covers would be 3D printed in various pieces, but the hinge itself would rely on two factors. The first, it would use Flexible-PLA for the first few layers - just enough to get the whole thin part I designed to be completely solid in flexible PLA. Then the rest would print in standard PLA but solid for a few layers to ensure good adhesion. The second factor would be some print-in-place hinges that would exist in the same part. This would allow for the book covers to have satisfying opening/movement, and flexibility to accommodate the pages I would be adding.
Of course the Flexible-PLA is likely optional but it certainly was helpful in later stages of assembly and general usage.
Gems
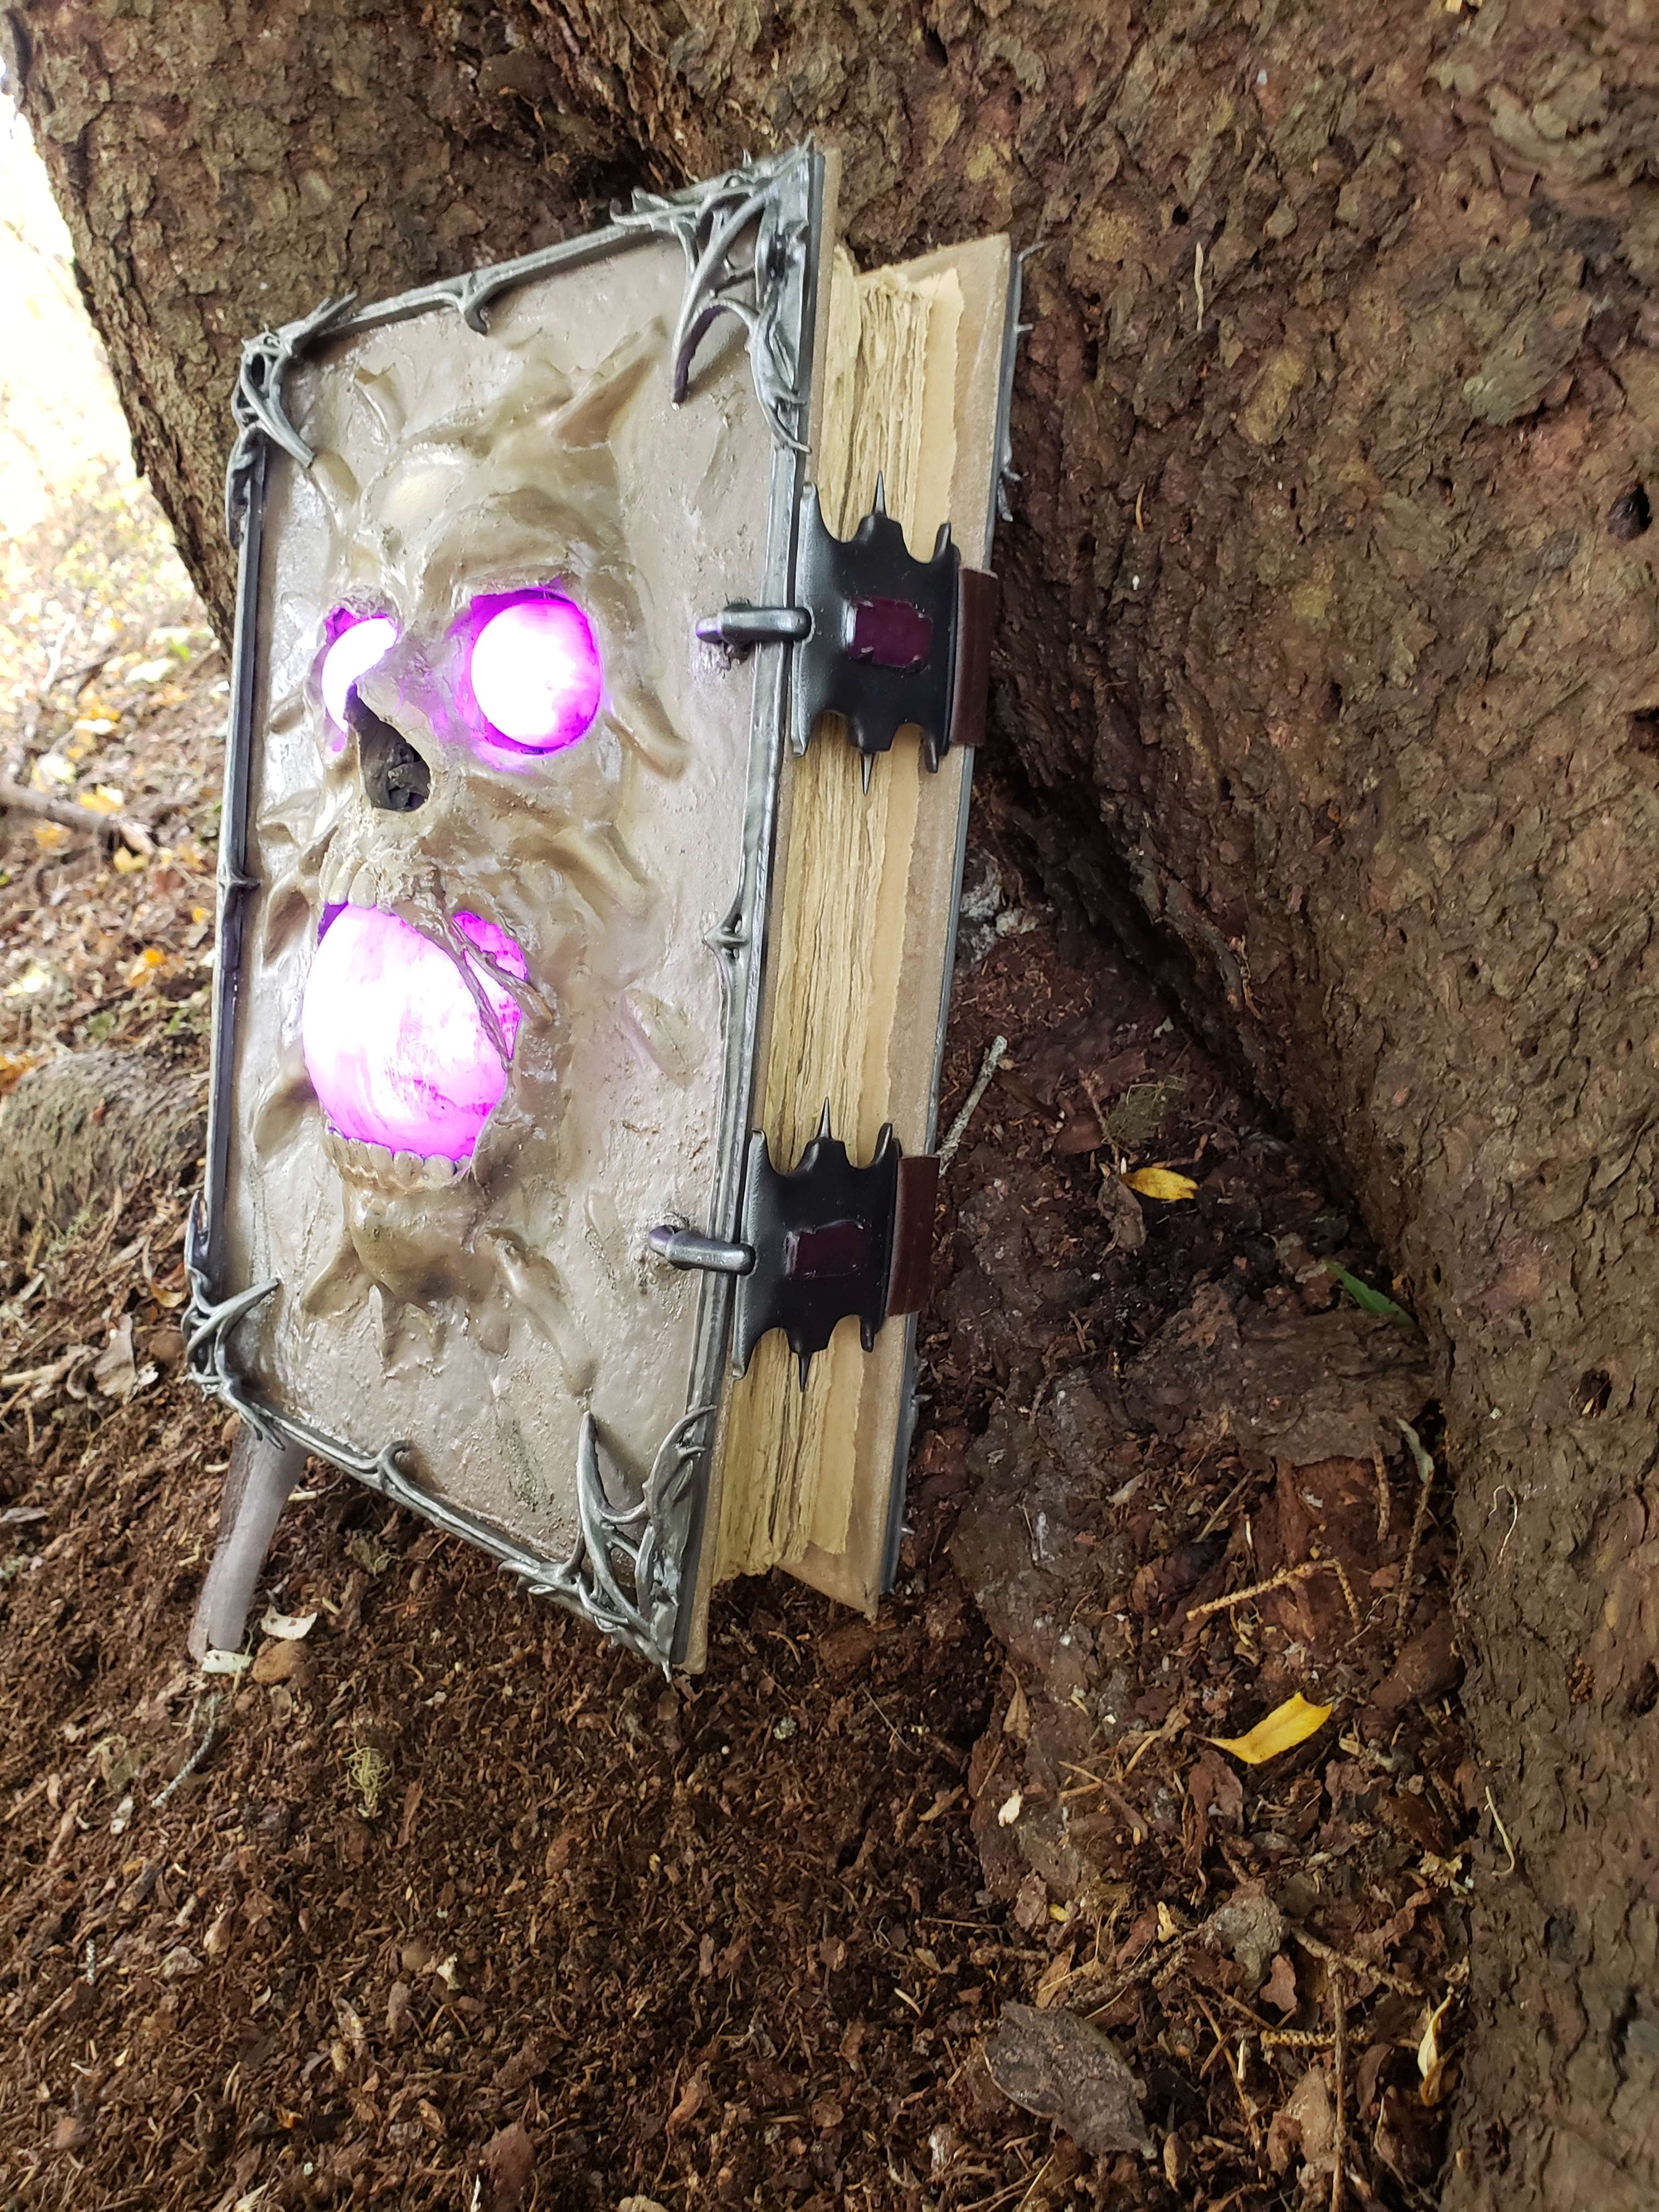
The gems would be tricky to do for a variety of reasons. But I knew I wanted them to fit well and be pretty gem-like. So they were resin printed in a clear-flexible resin. Why a flexible (tough) resin? So I could forcibly squeeze the mouth gem into the skull's face.
Additionally, the buckles were also resin printed due to the embedded gems in them too. Except this time, I had printed around the gems inside to give the illusion they were real.
Materials & Files
List of materials used, links to files, etc
The files can be found here, but alternatively are uploaded on Printables.
Resin Parts
Certain parts were printed in a clear, tough/flexible resin. This was done for the purposes of looking gem-like after post-processing, and for the mouth gem to be squeezed into place.
Printed in clear/flexible resin
- Gems/eye_gem_x2.stl
- Gems/mouth_gem_x1.stl
- Buckles/buckle_x2.stl
FDM Parts
Most other parts were printed in traditional FDM printing, but used a variety of types of filament.
ABS or ASA
- Face/SkullFace_x1.stl
- Filagree/*.stl
(every piece of the filagree) - Spine/spine_bones.stl (Optional)
*Will explain later why these were in ABS/ASA
Standard PLA
- Covers/back_bot.stl
- Covers/back_top.stl
- Covers/front_bot.stl
- Covers/front_top.stl
- Covers/connectors/horizontal_connector_long_x2.stl
- Covers/connectors/horizontal_connector_short_x2.stl
- Covers/connectors/vertical_connectors.stl
- Spine/spine_bones.stl (Optional, I used ABS to make smoothing them easier)
Mix - Flexible/Soft PLA & Standard PLA
- Covers/flex_spine_bottom.stl
- Covers/flex_spine_top.stl
For the mix of flexible & standard PLA, both the flex_*.stl files were printed in solid Flexible PLA for the first 1-1.2mm, then manually swapped to standard PLA. The next 2-3 layers (at 0.2 layer height) were solid, then whatever infill or thickness desired.
The reason for this was to bond the flexible hinge to the sturdy print-in-place hinges/covers. I also recommend printing some flat scrap Flexible-PLA to bond the pieces on the back with a soldering iron.
TPU could work, but may have bonding issues with PLA. I highly recommend looking around for a Flexible/Soft PLA.
Alternatively, you could keep it all as Standard PLA if you do not want the central spine to have some give to it.
Non-Printed Parts
Some parts were not 3D printed, either because it was impossible, easier, or something else entirely.
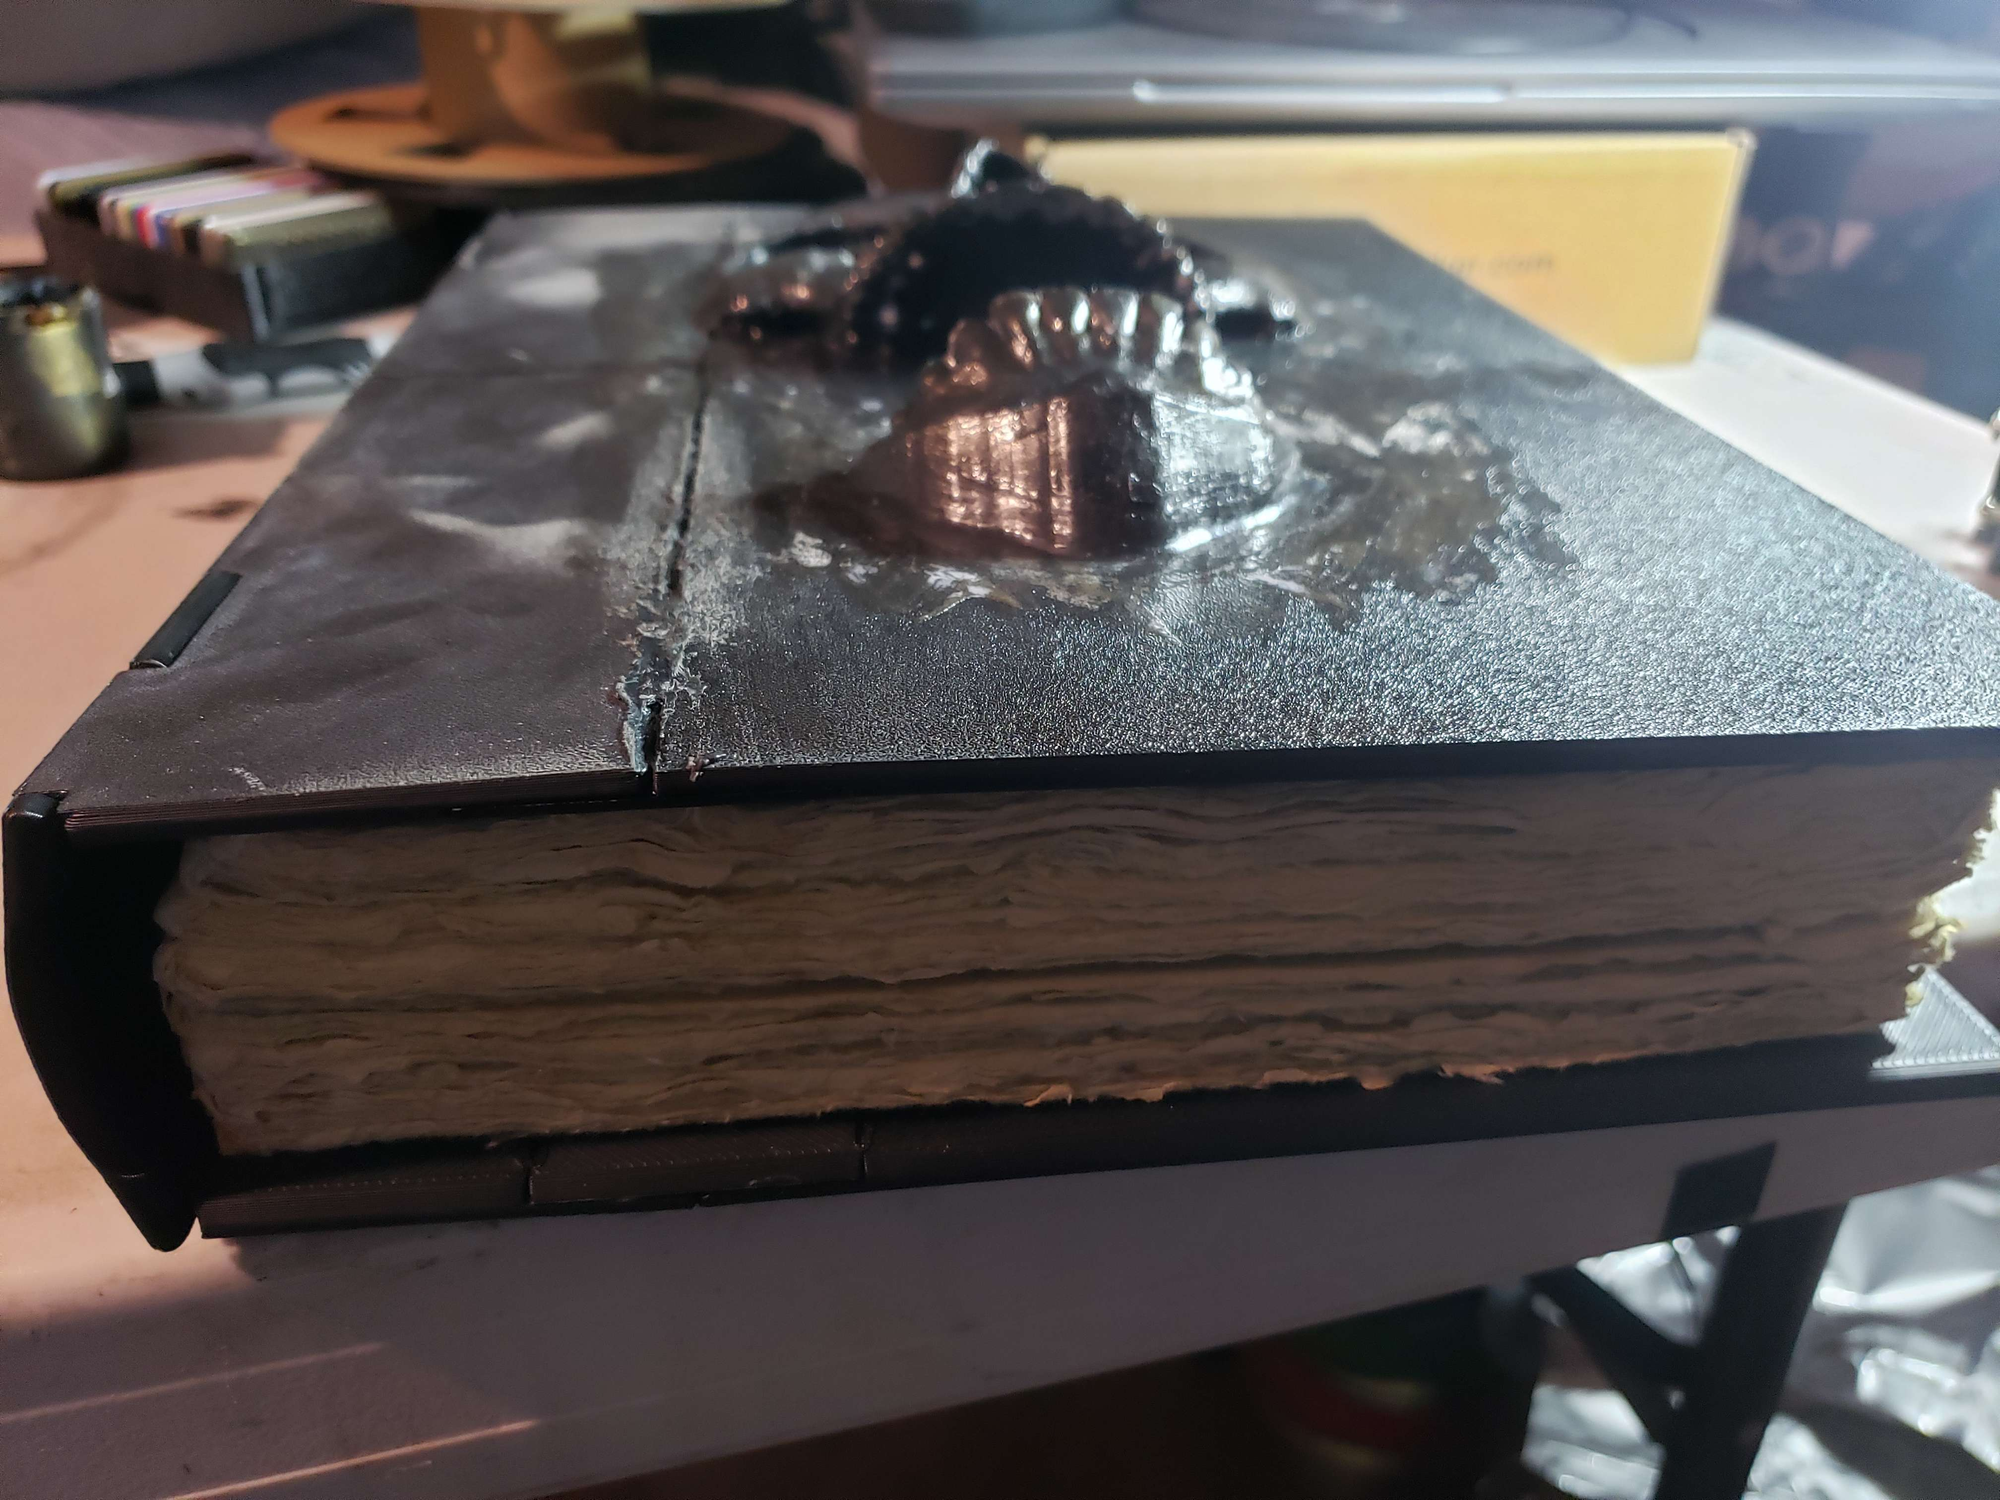
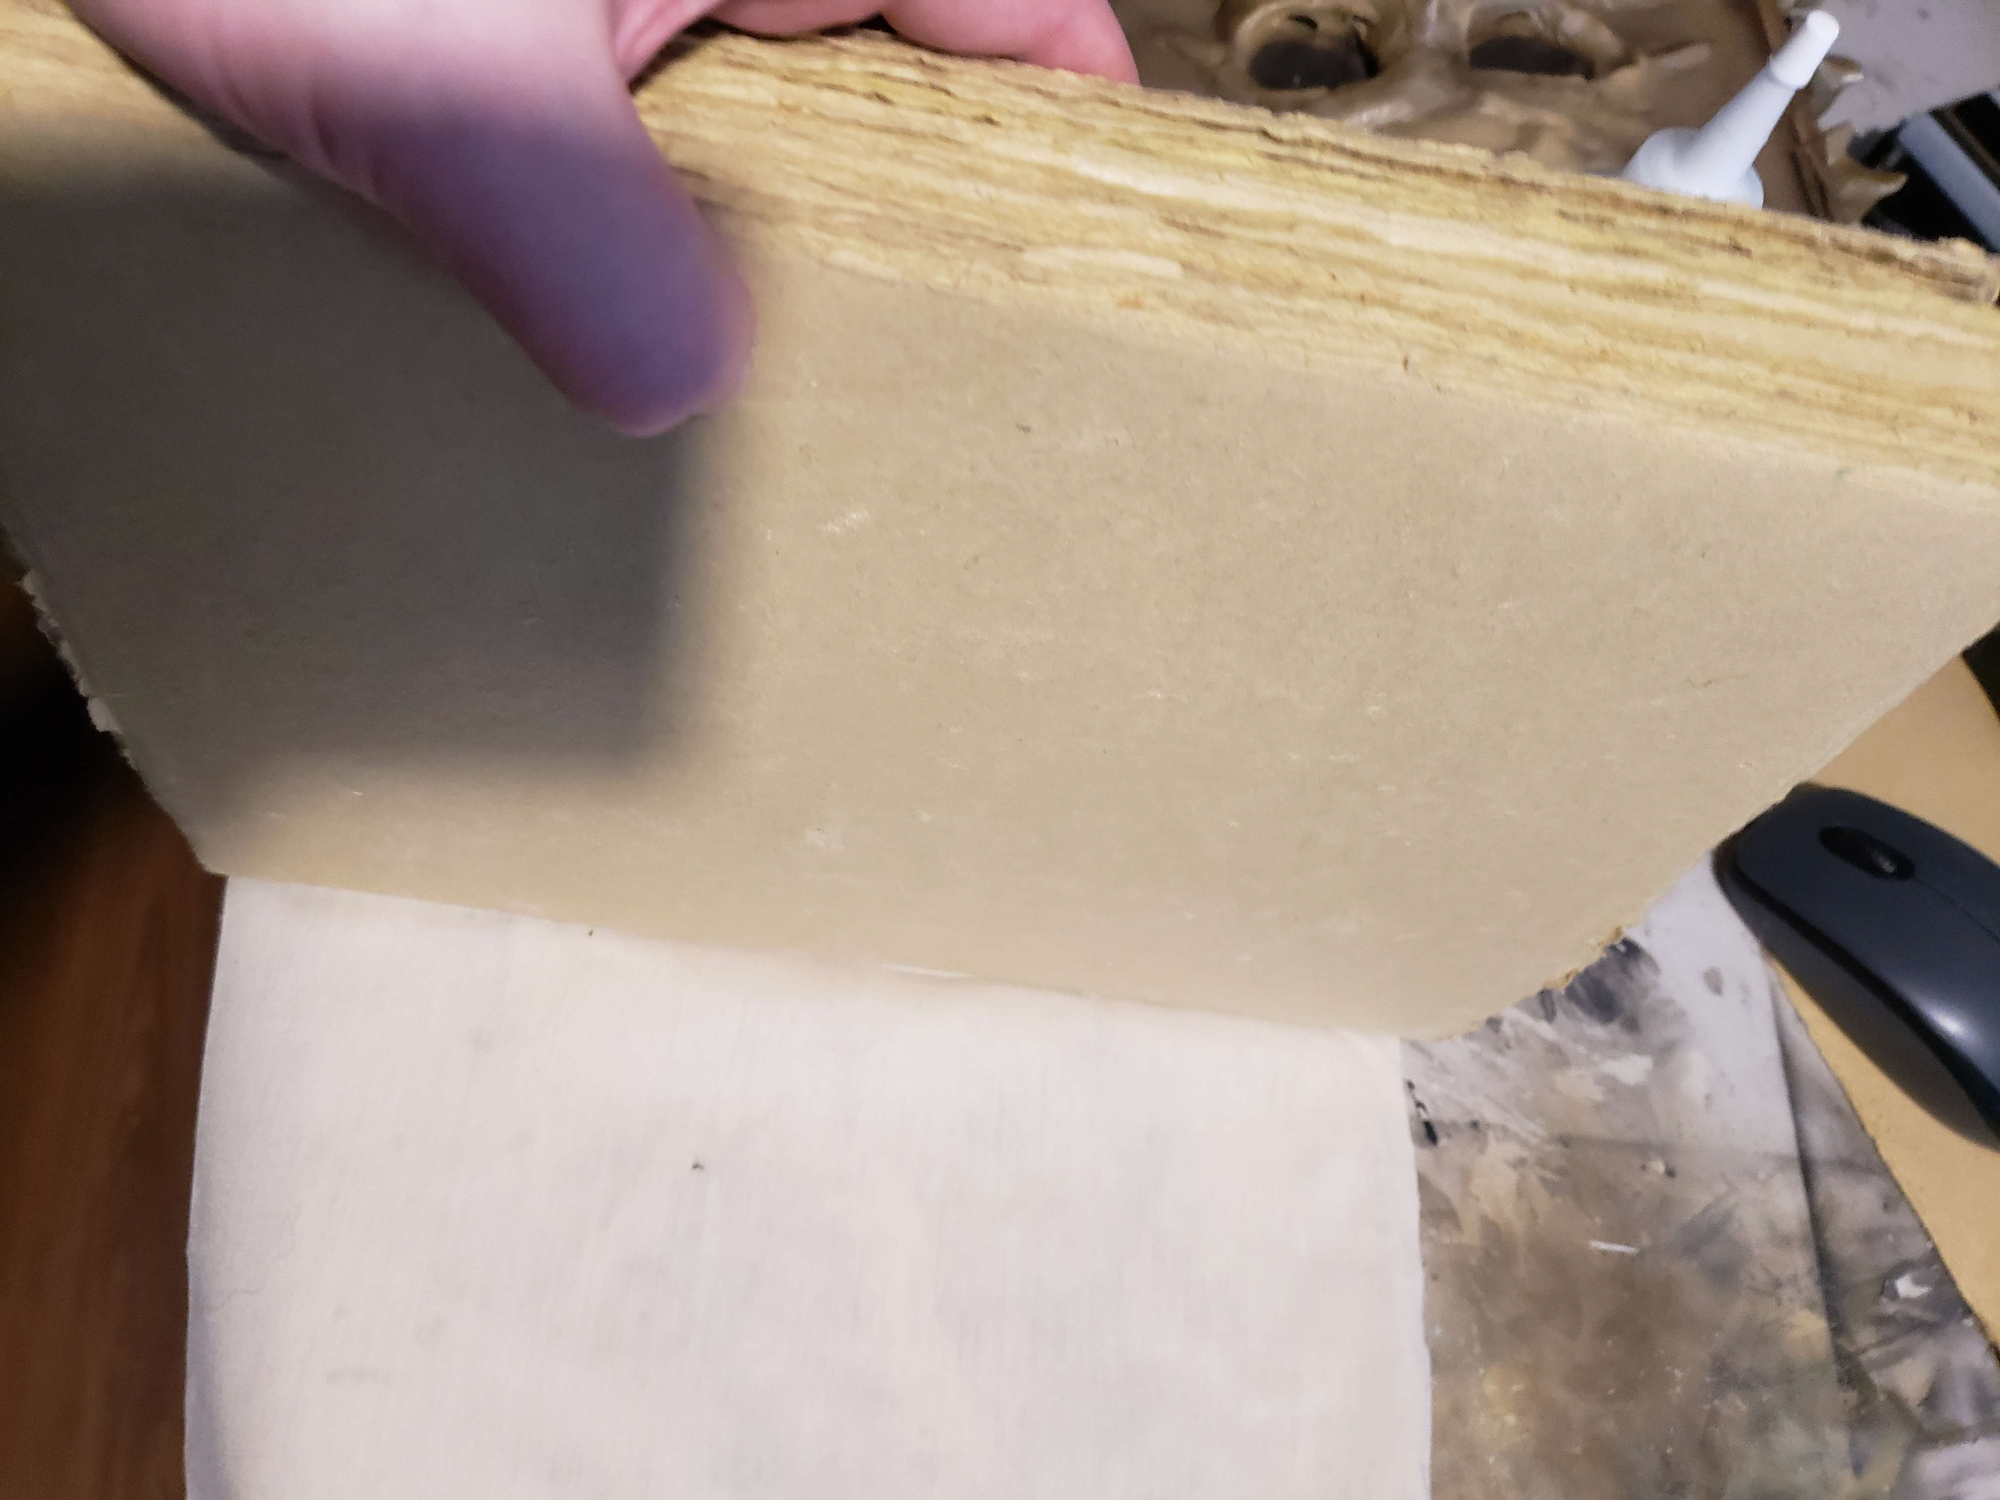
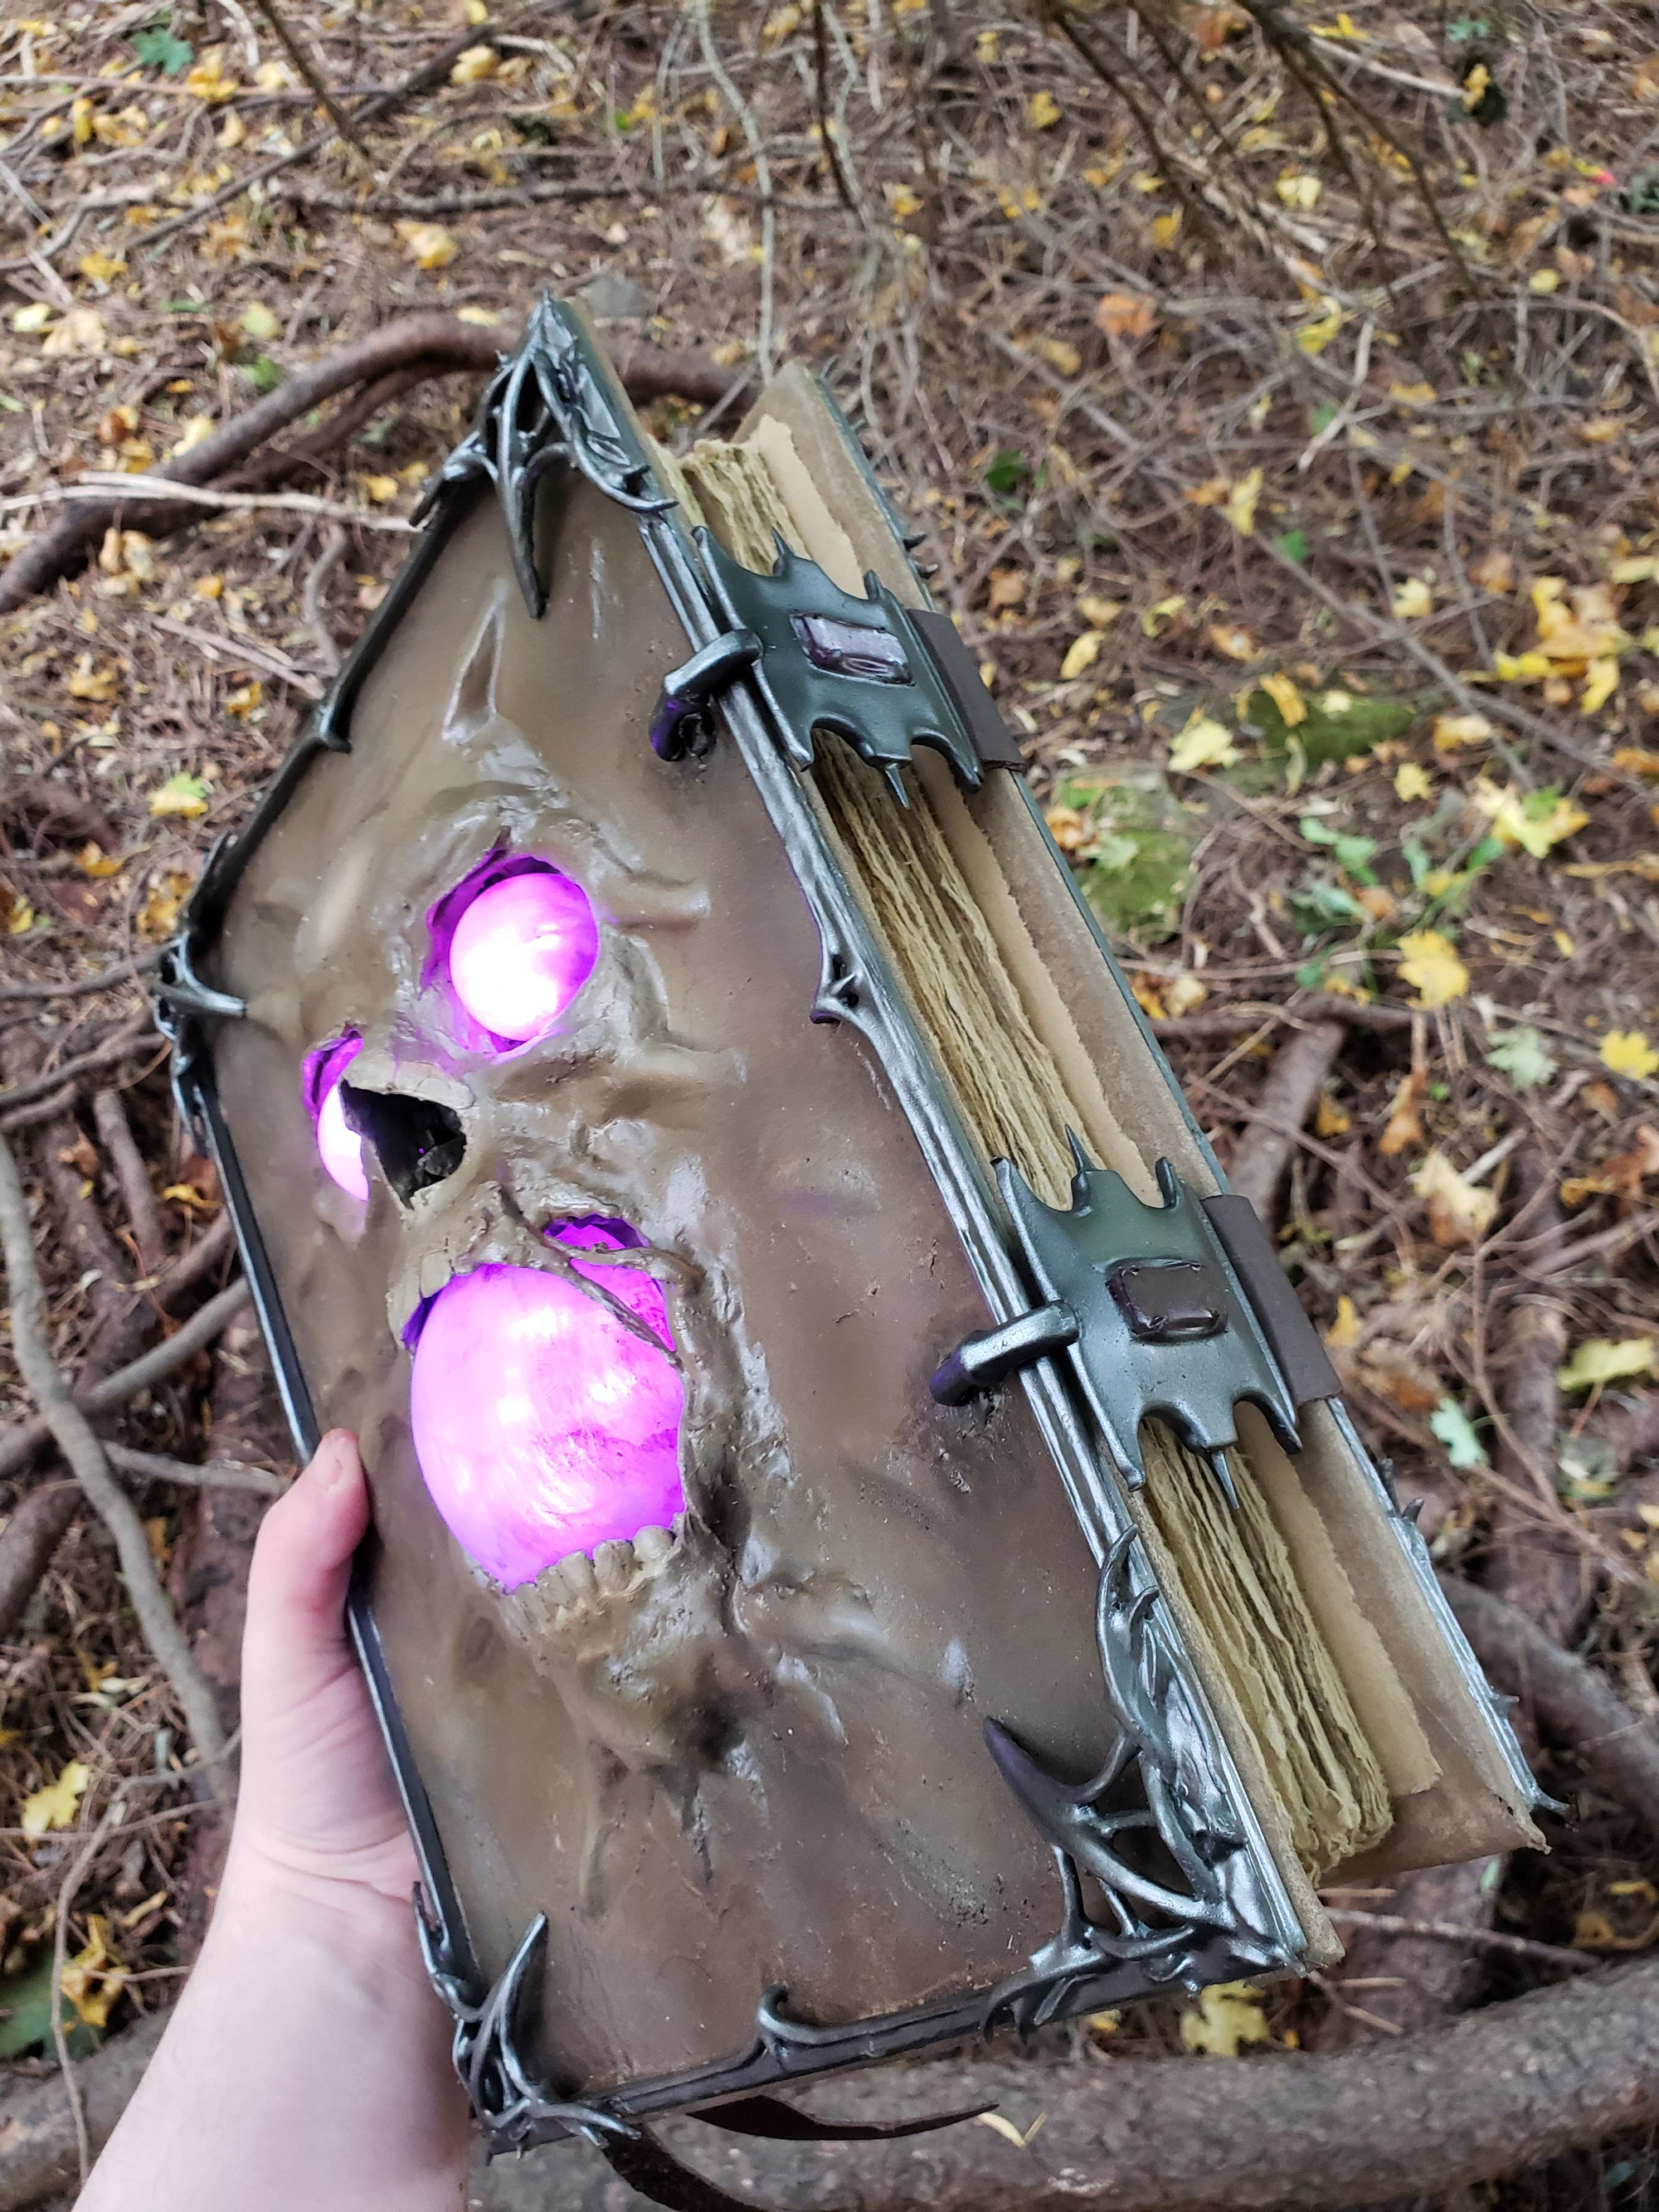
- The pages were pre-bound, recycled cotton pages, "antique" looking journal inserts. 144 page count, 150 GSM, standard A4 sized. It contains two of these, which I then bound together using bookbinder's glue, and a backing of scrap linen cloth.
- This is not the same link I used, as I had contacted an Amazon store (E-Tailor) privately as they did not publicly offer 144pg, 150 GSM pre-bound in A4 size. It's worth a shot to message others. In total it should be about 2" thick when two are bound together (~288pgs).
- Book Binder's Glue
- Linen for bookbinding. Any scrap cloth will do honestly as long as it's thin and strong. This cloth was also used to wrap the entirety of the front and back covers, in addition to being used for binding the pages into the covers.
- Packing Paper used for the inner covers.
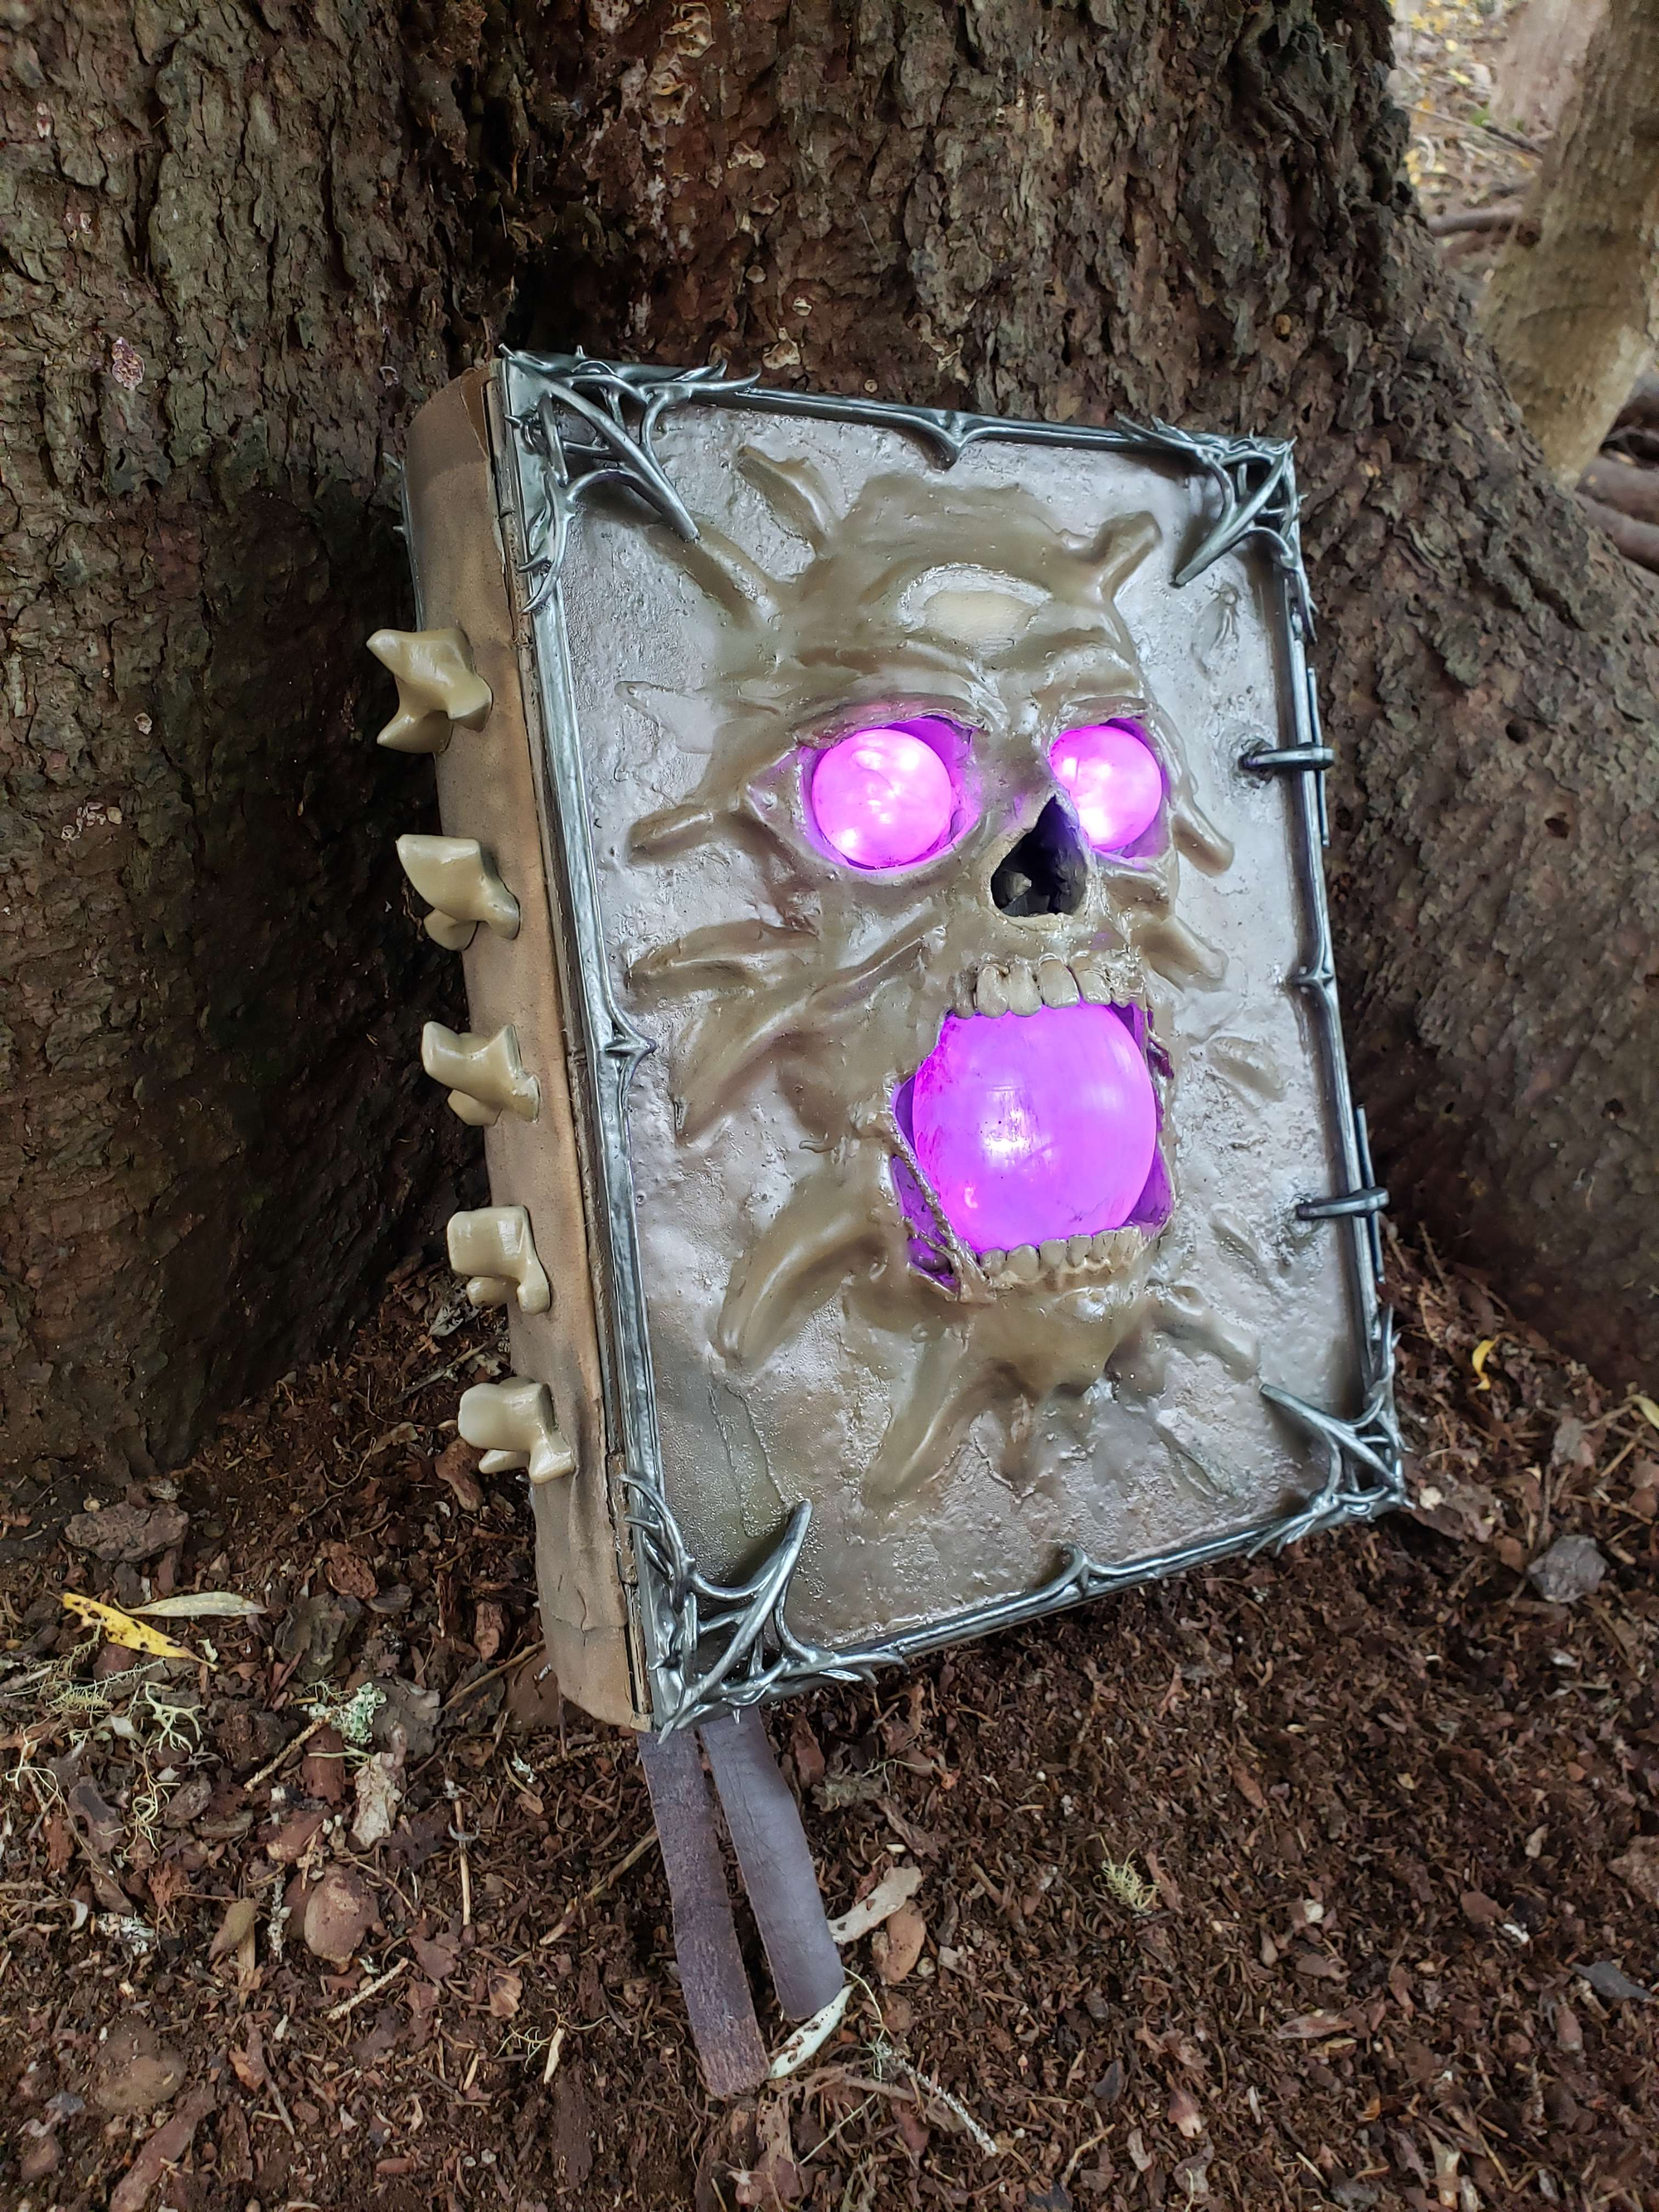
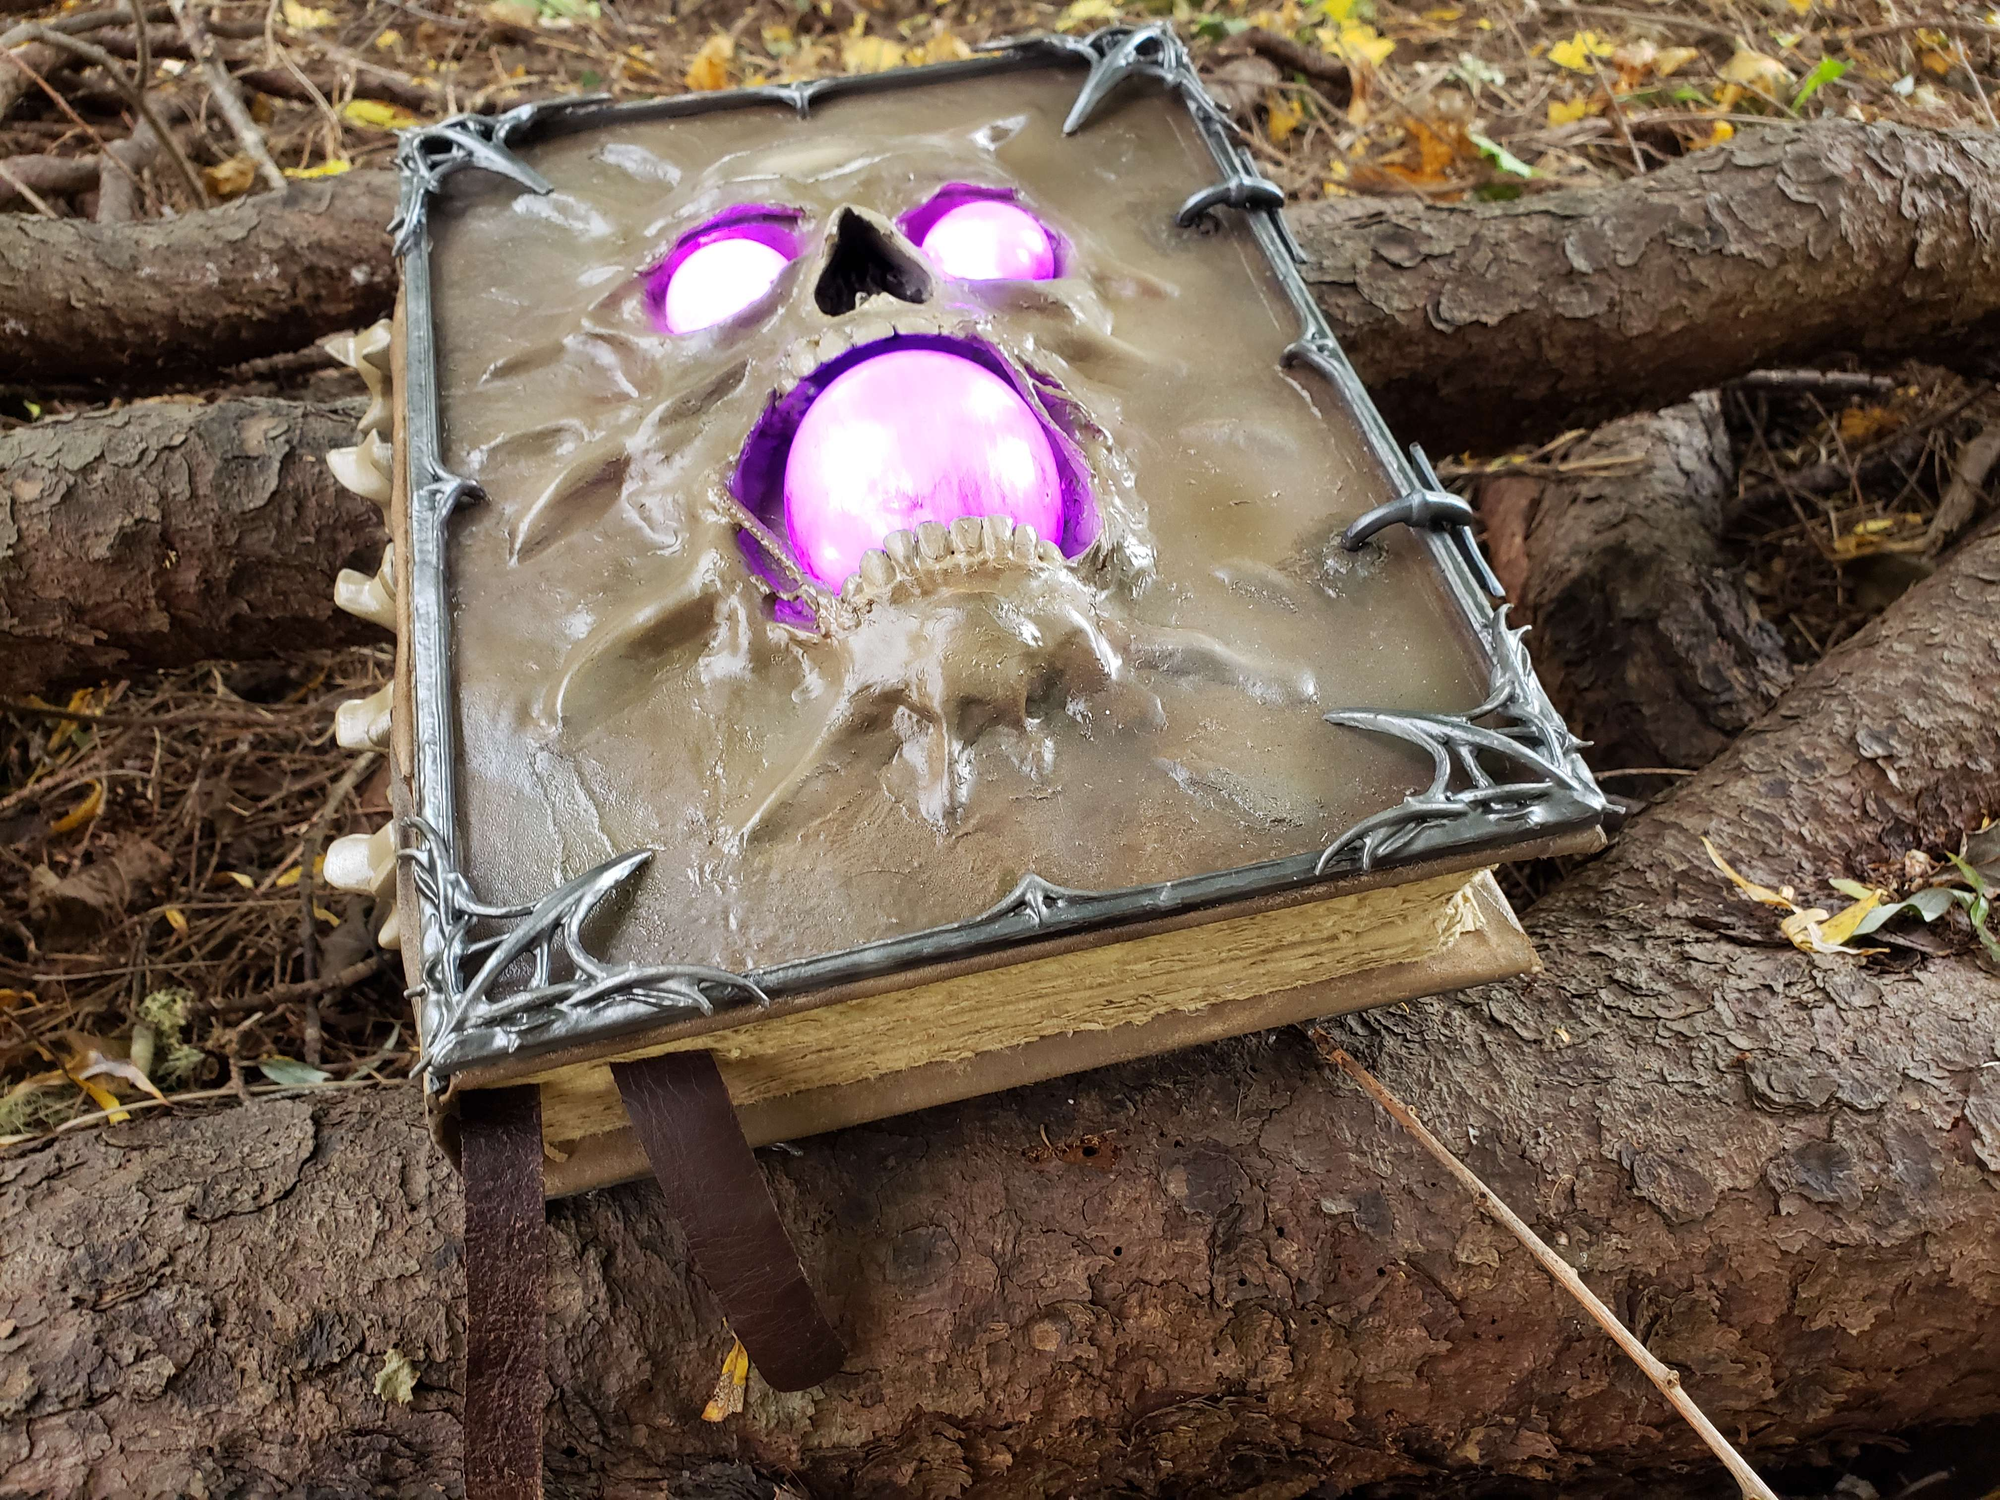
- The skull-face and front cover was enhanced with more details using primarily air-dry clay for all the bumps and skin-bits. Afterward, I used some liquid latex to add texture, build up the 'eyelids', add 'skin' around the sockets, nose and teeth to make them look bare in contrast, and then some liquid latex on some string for the flesh-strands over the mouth.
- Electronics-wise, there are two different sets of fairy-lights used inside, a pink and a purple. Both are battery powered, stored in the forehead, and fished through the skull face to give it two contrasting colours. Similar alternatives should work as long as they have the same 2x coin-cell battery and thin wire.
- Purple Fairy Lights (x1)
- Pink Fairy Lights (x1)
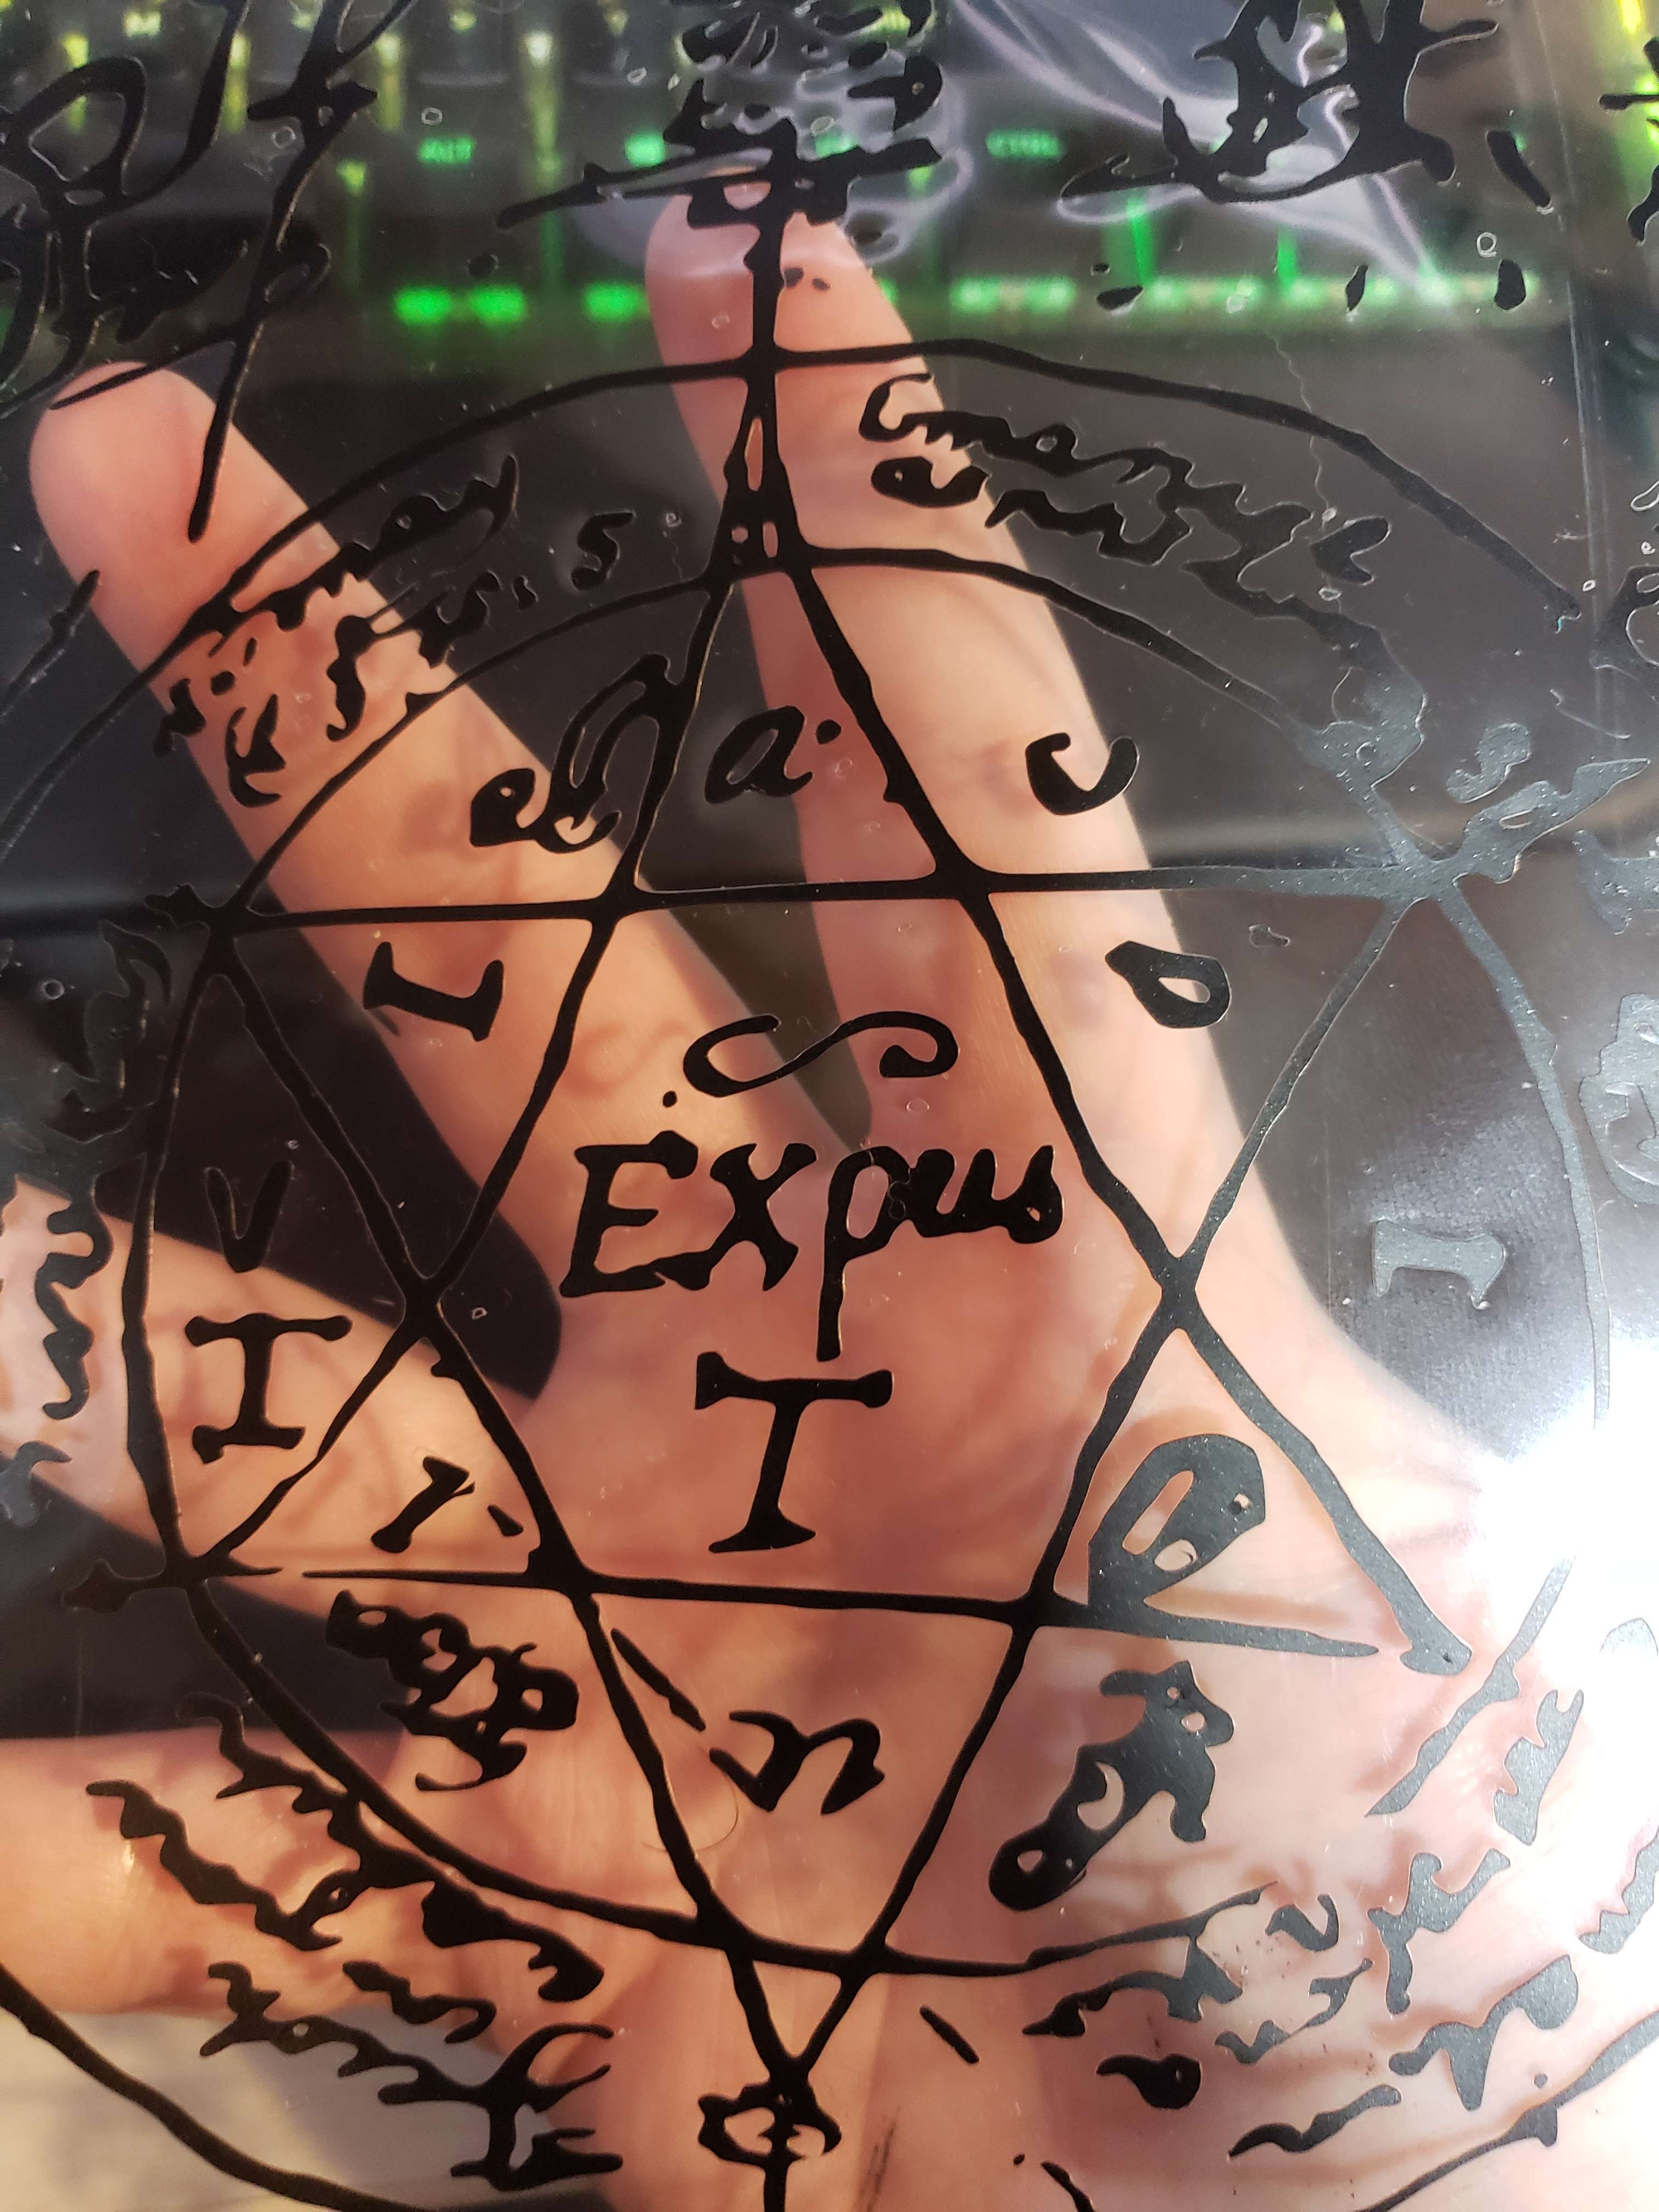
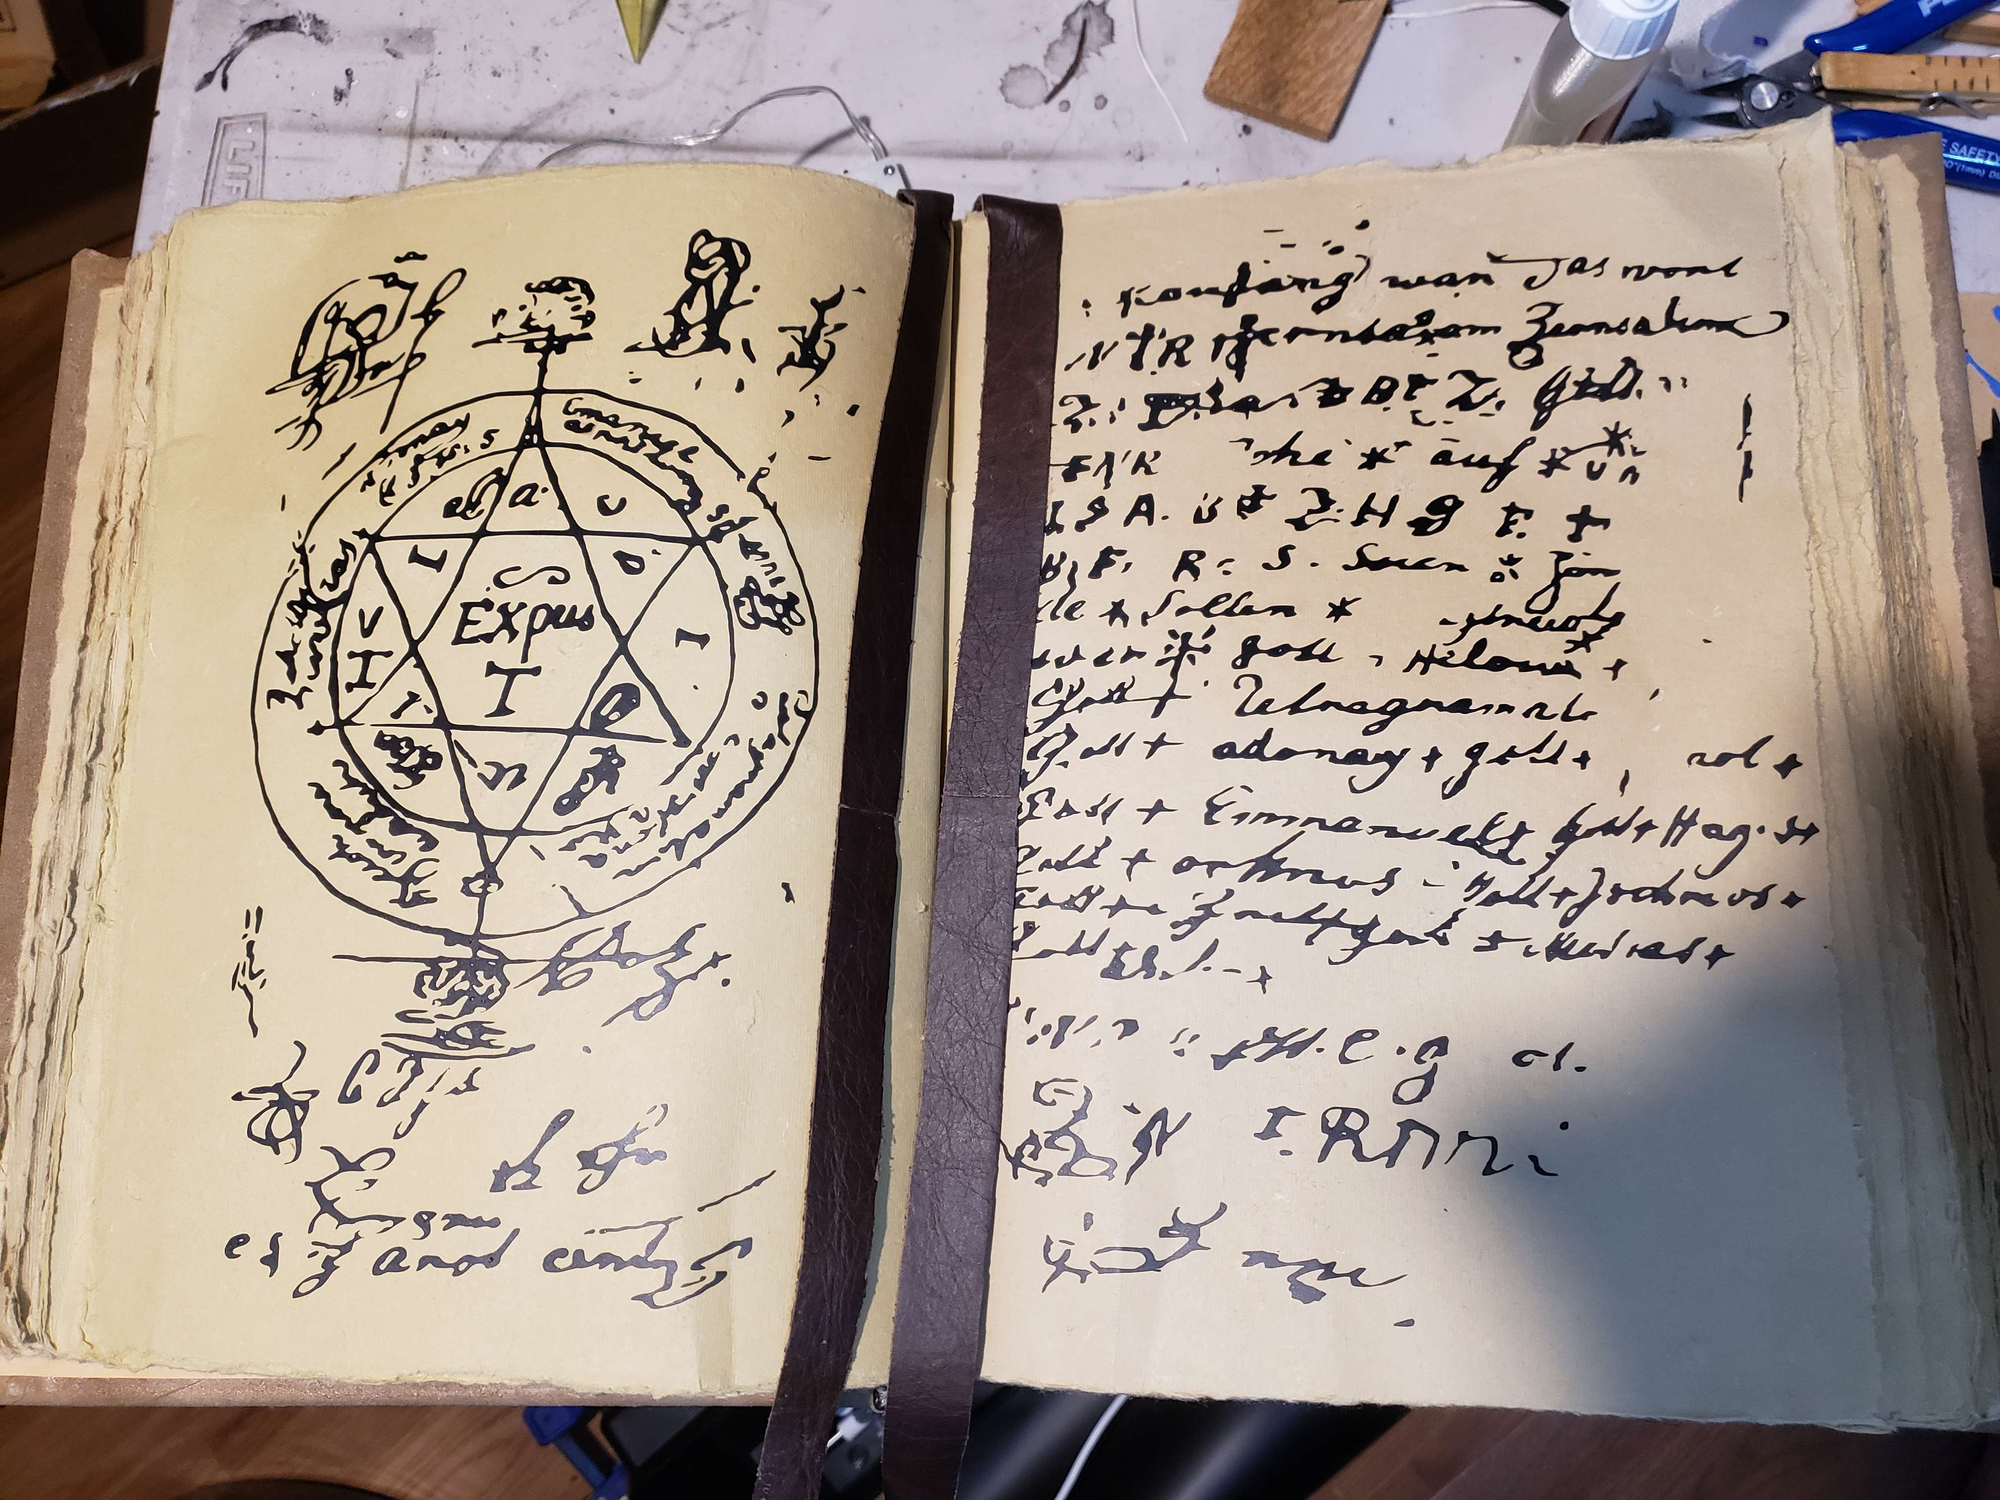
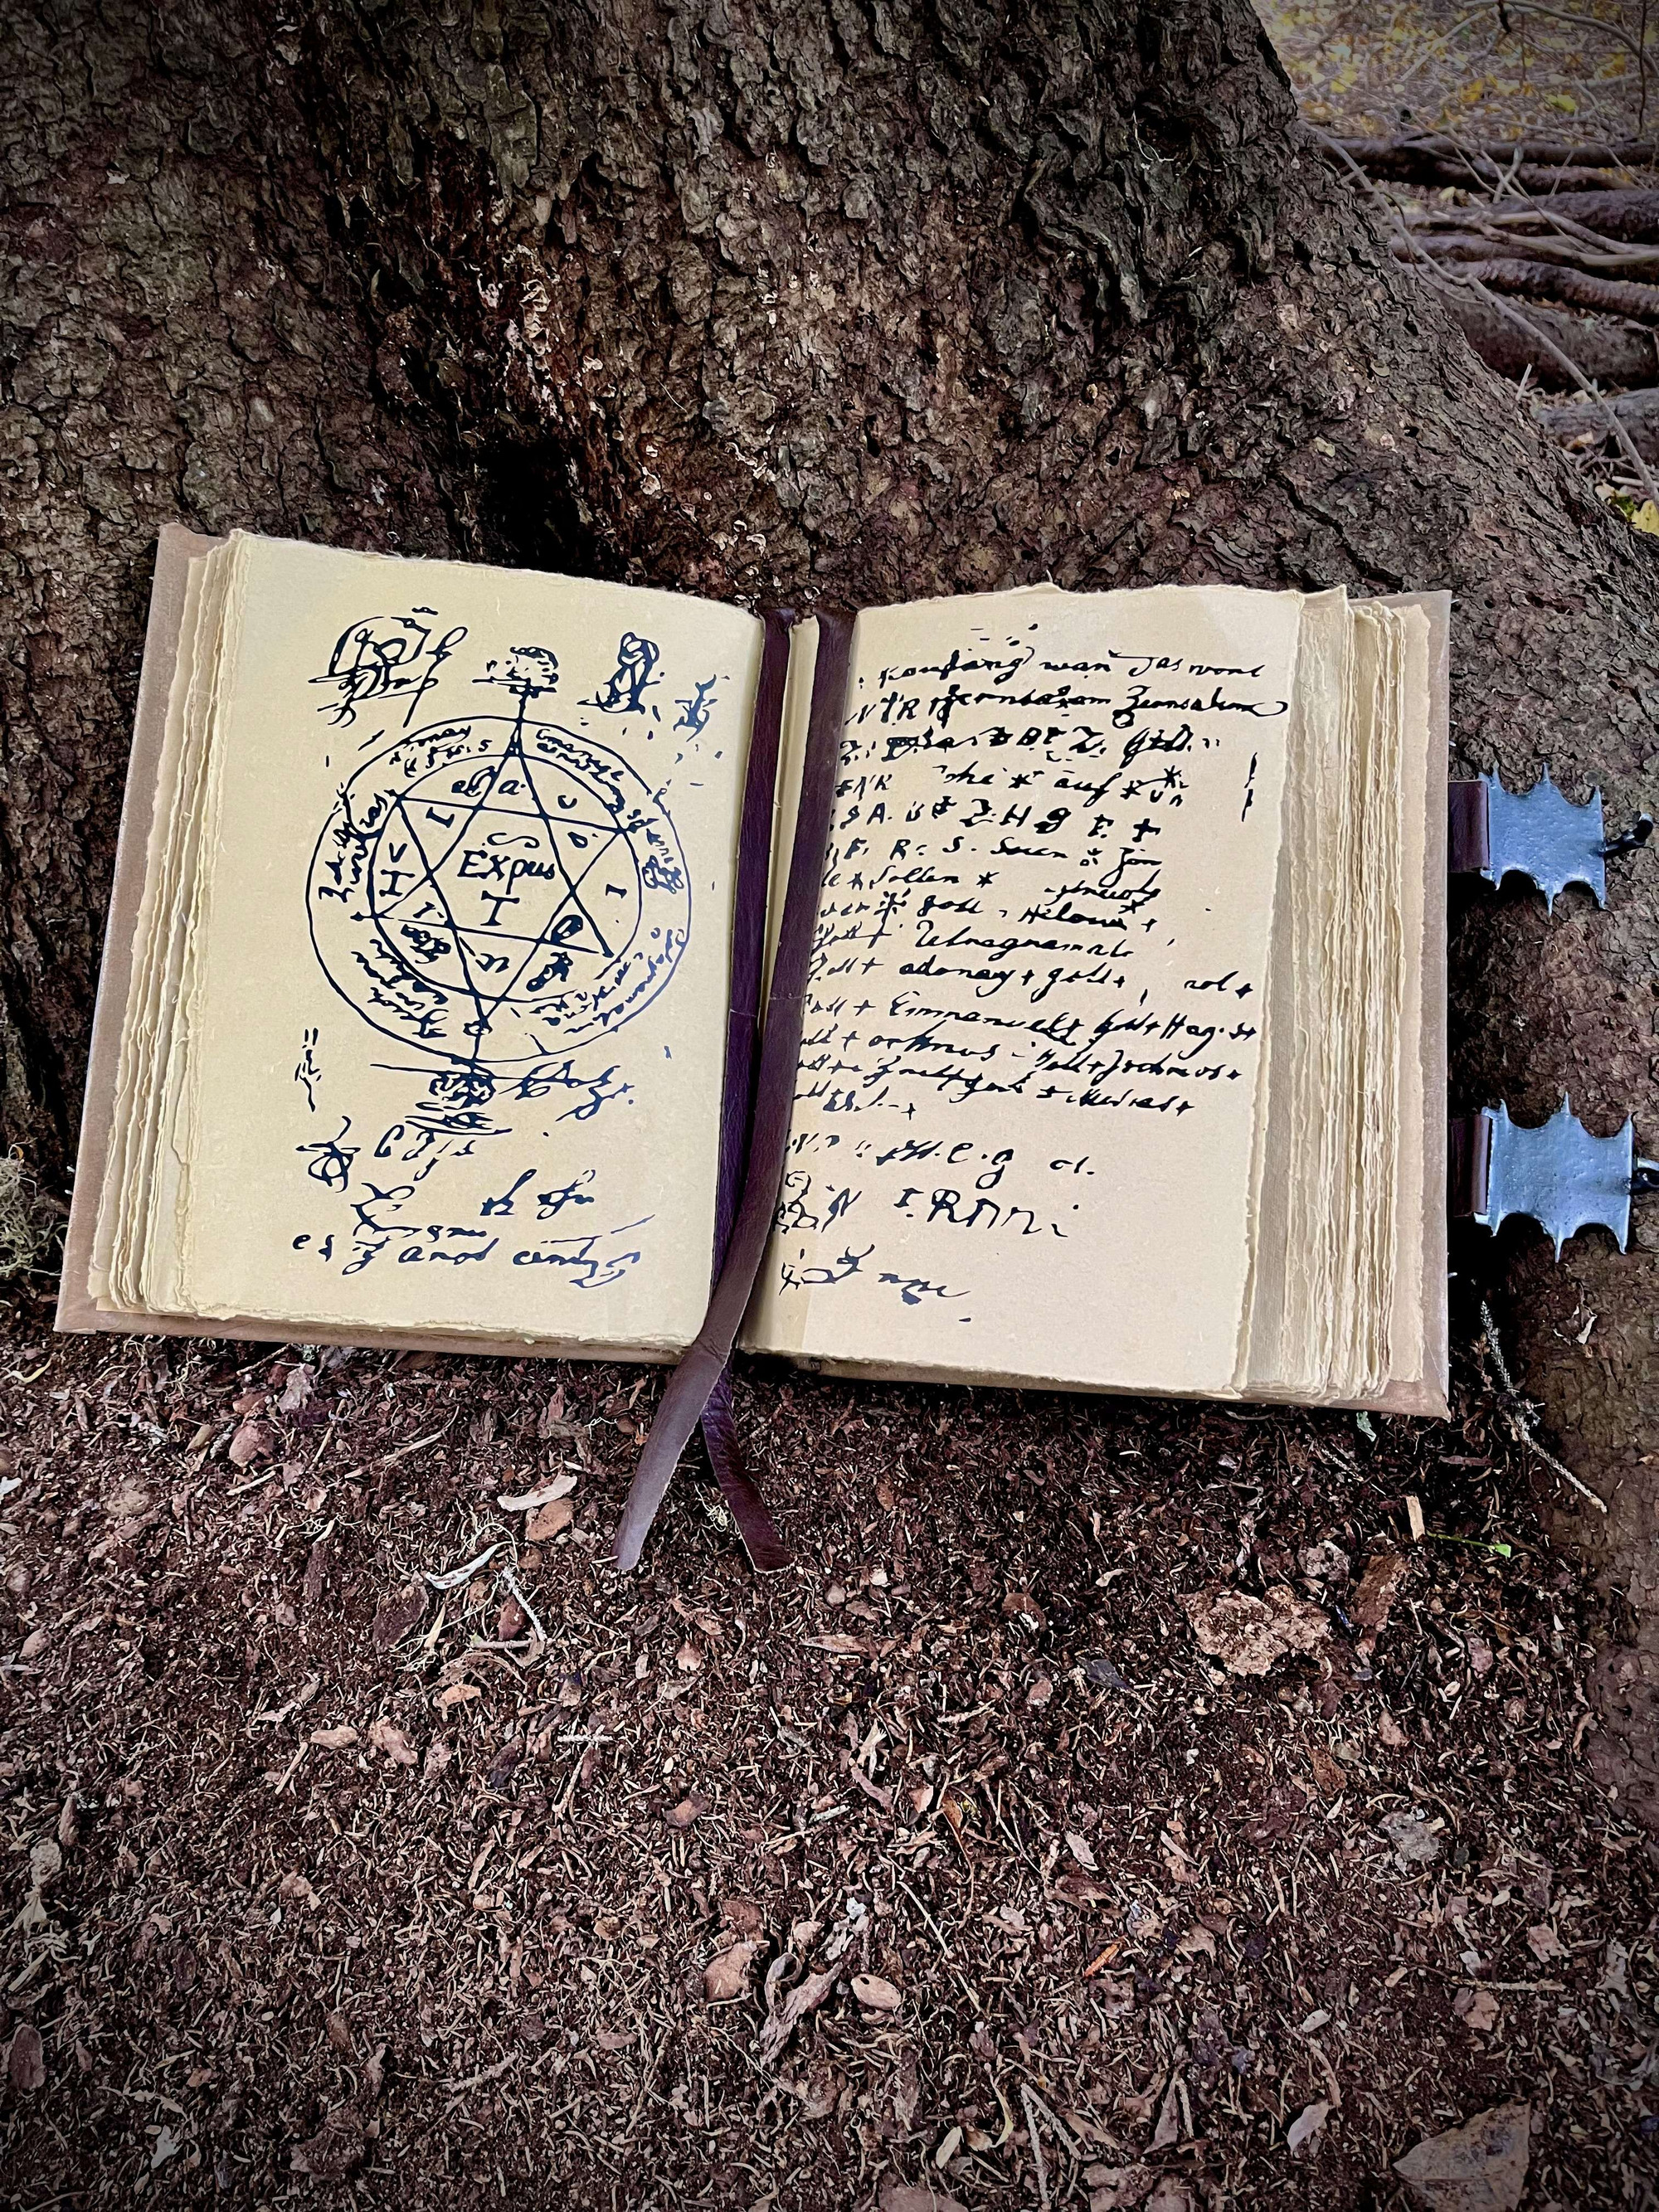
- The text on the pages was vinyl-cut in a matte-black vinyl on my silhouette vinyl cutter. I've attached their images in the project. For scaling, have them be slightly smaller than A4 sized so they fit on the pages with some margin for error.
- I've attached both transparent versions and ones with background, depending on the software you use and how good it is at creating cut-paths around the black in the images.
- Pages/left_page_bw.png
- Pages/right_page_bw.png
- Pages/left_page_bw_transparent_v3.png
- Pages/right_page_bw_transparent_v3.png
- I've attached both transparent versions and ones with background, depending on the software you use and how good it is at creating cut-paths around the black in the images.
Misc
Various paints were used, mostly airbrushed or dry-brushed on various pieces. Alcohol-inks were used on the clear resin pieces.
I used genuine leather strips and sheets for the "bookmarks" and the belts of the buckles, as well as super-glue to keep them on. Glue was also used for attaching the spine bones to a sheet of cloth on the back-spine.
Acetone was used to smooth the ABS/ASA printed parts, bond them together if they were separated (such as the filagree corners). Additionally, an acetone-ABS slurry was used to bond the skull-face to the front cover. More on that in the assembly category.
Small neodymium magnets and small magnetic steel discs were used to make it so the buckles could latch and remain in place when the book is "closed".
Post-processing & Assembly
Book Covers
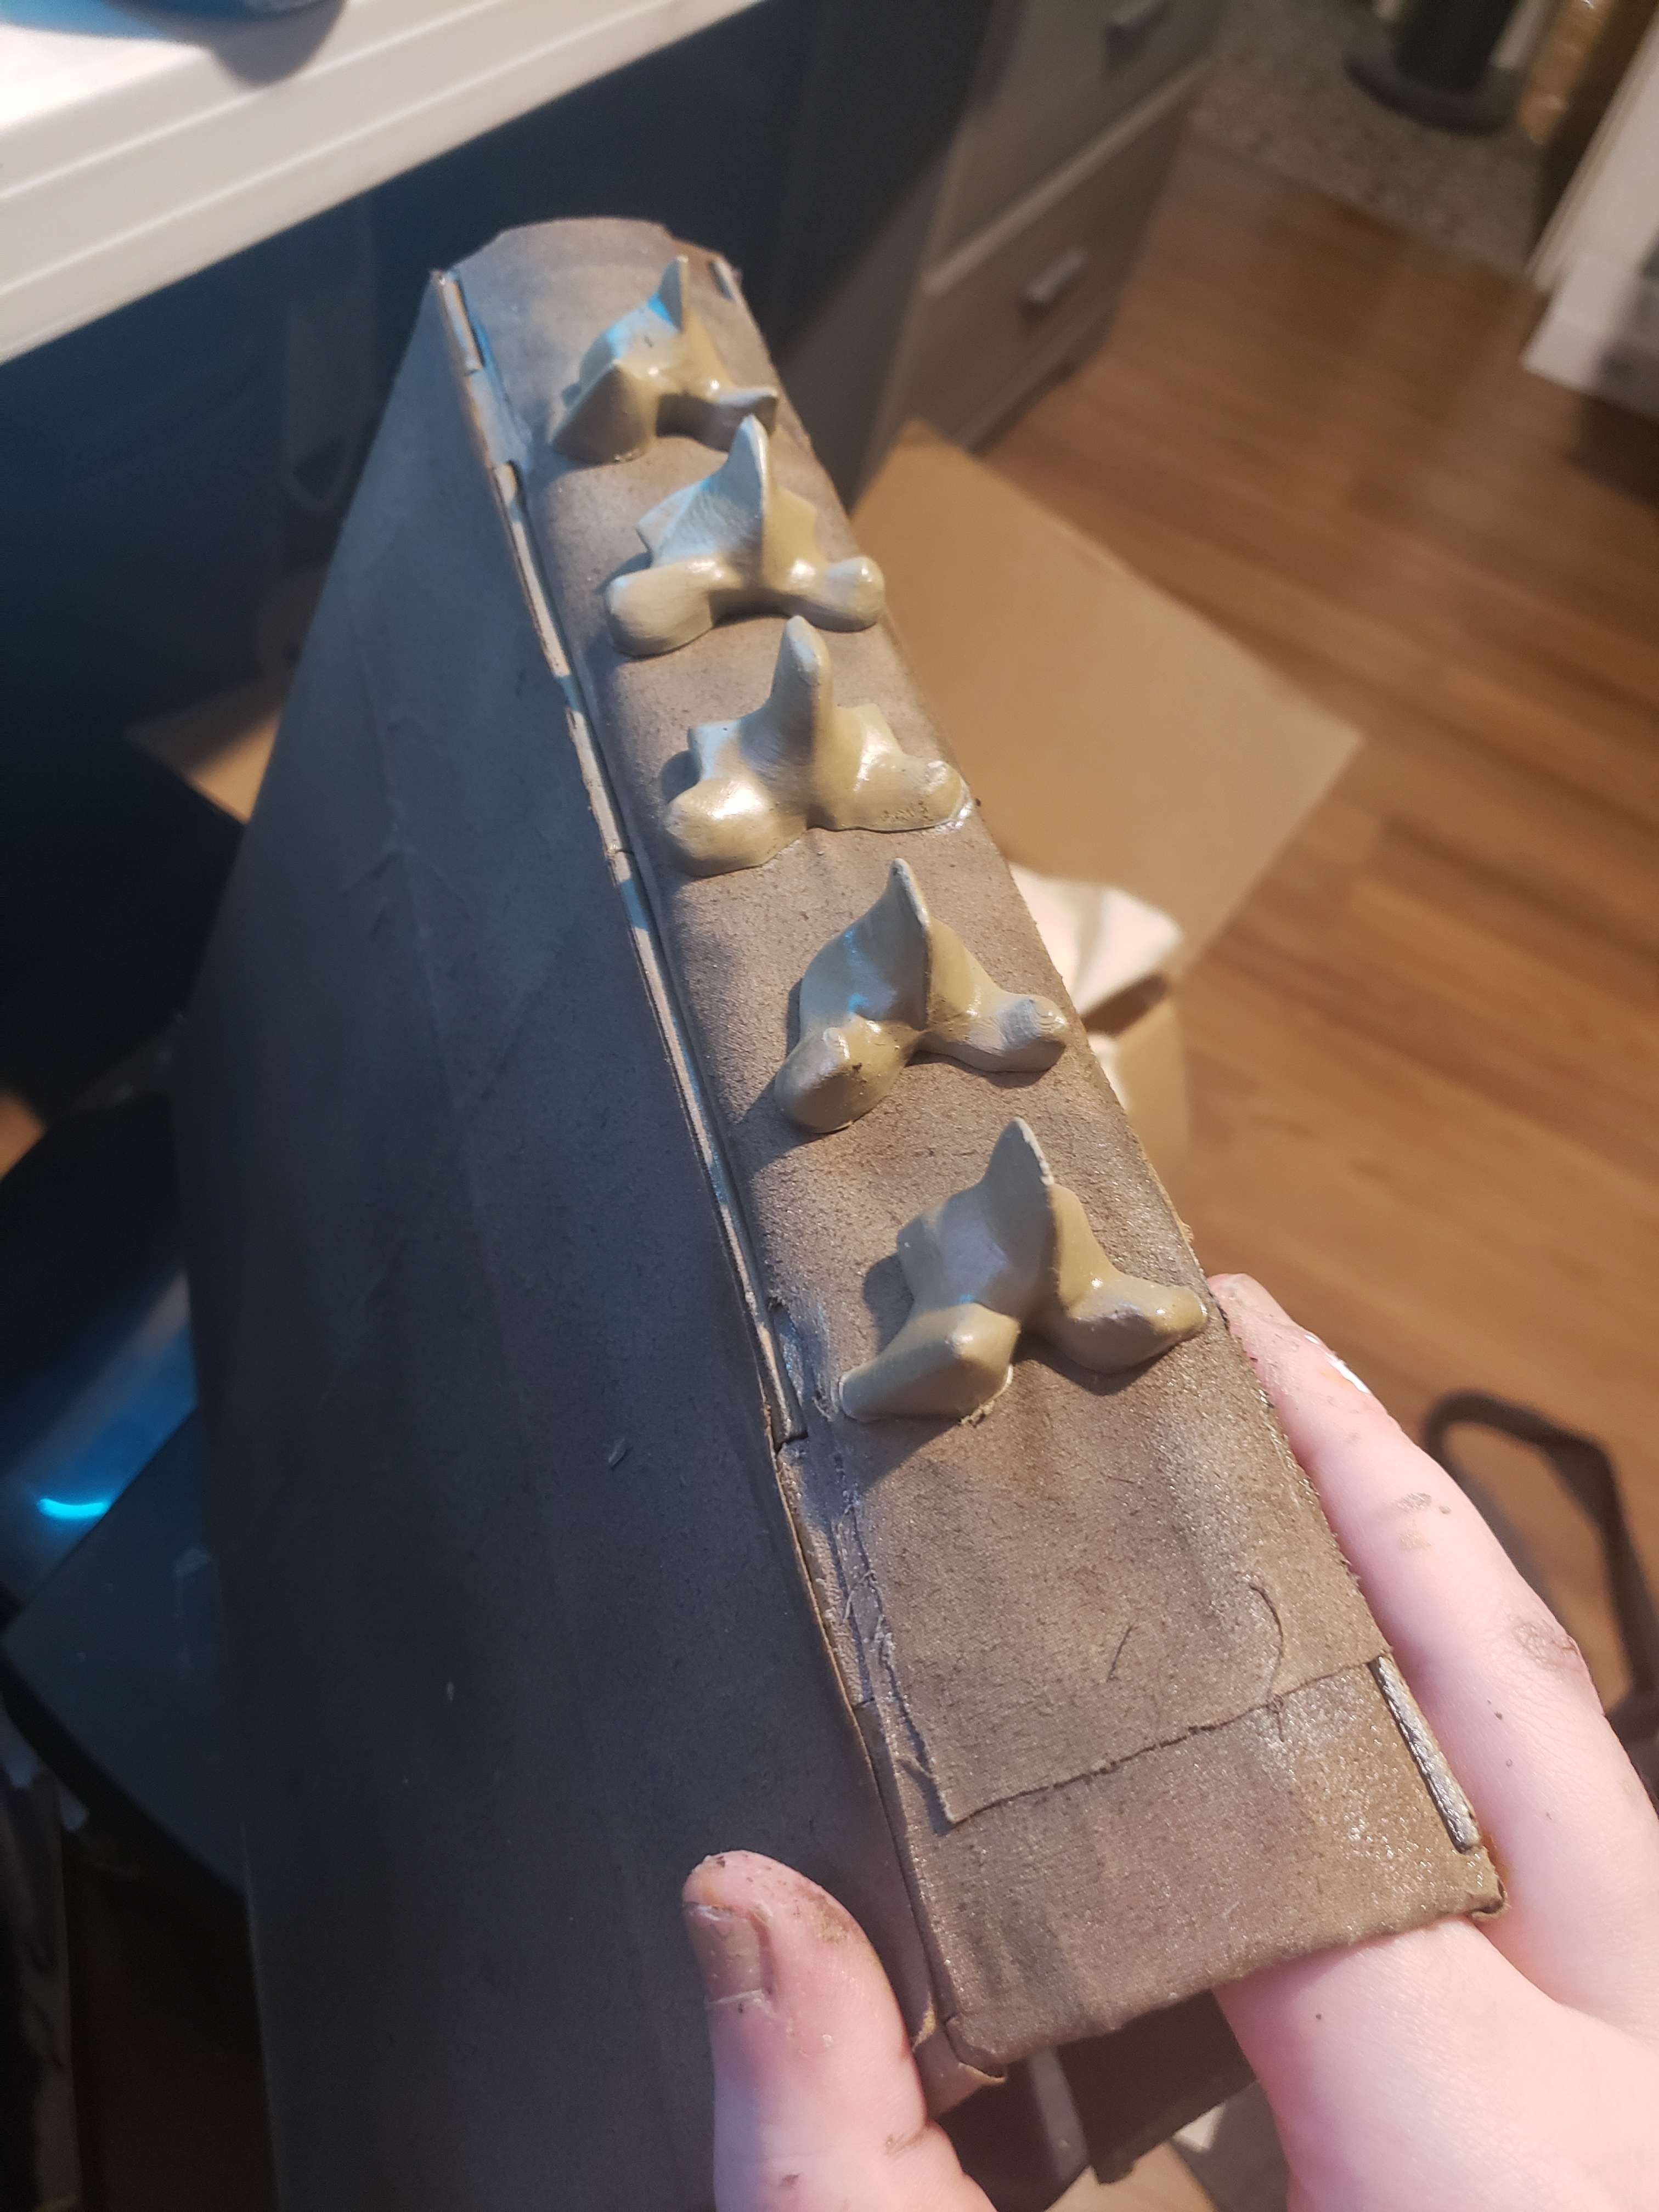
Th covers are split up into 6 main pieces and multiple connecting pieces. Their assembly should be mostly straight-forward. I would recommend using a soldering iron to PLA-weld the covers together at the seams on both sides, then use super-glue in the slots for the "connectors", then PLA-weld those at their seams as well (careful not to solder on dried super-glue, it stings).
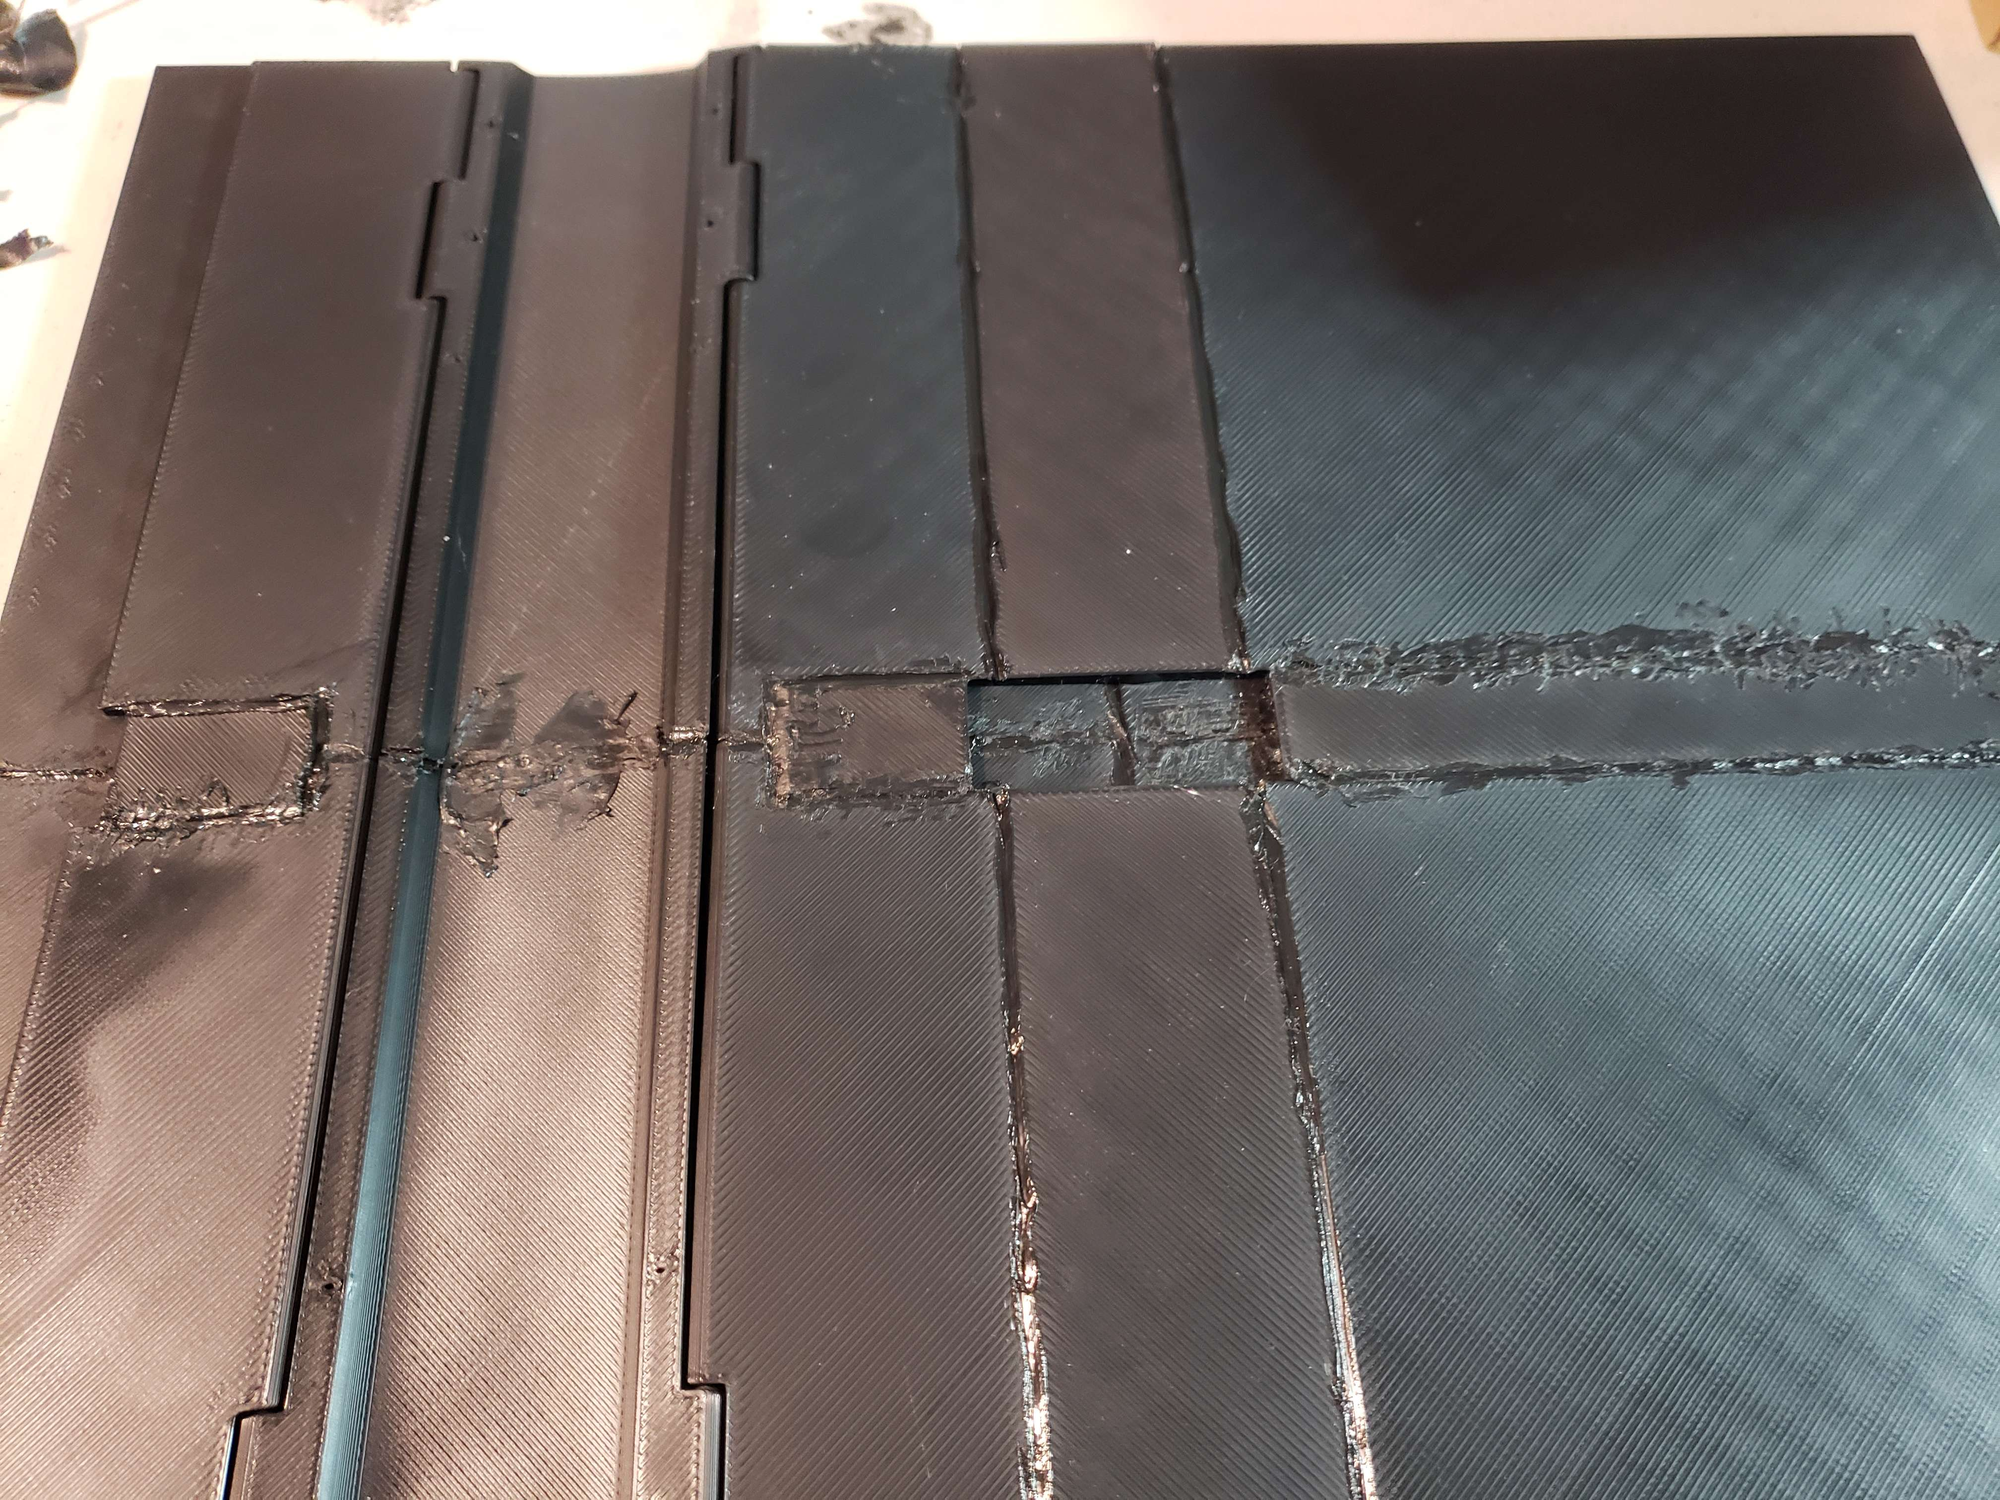
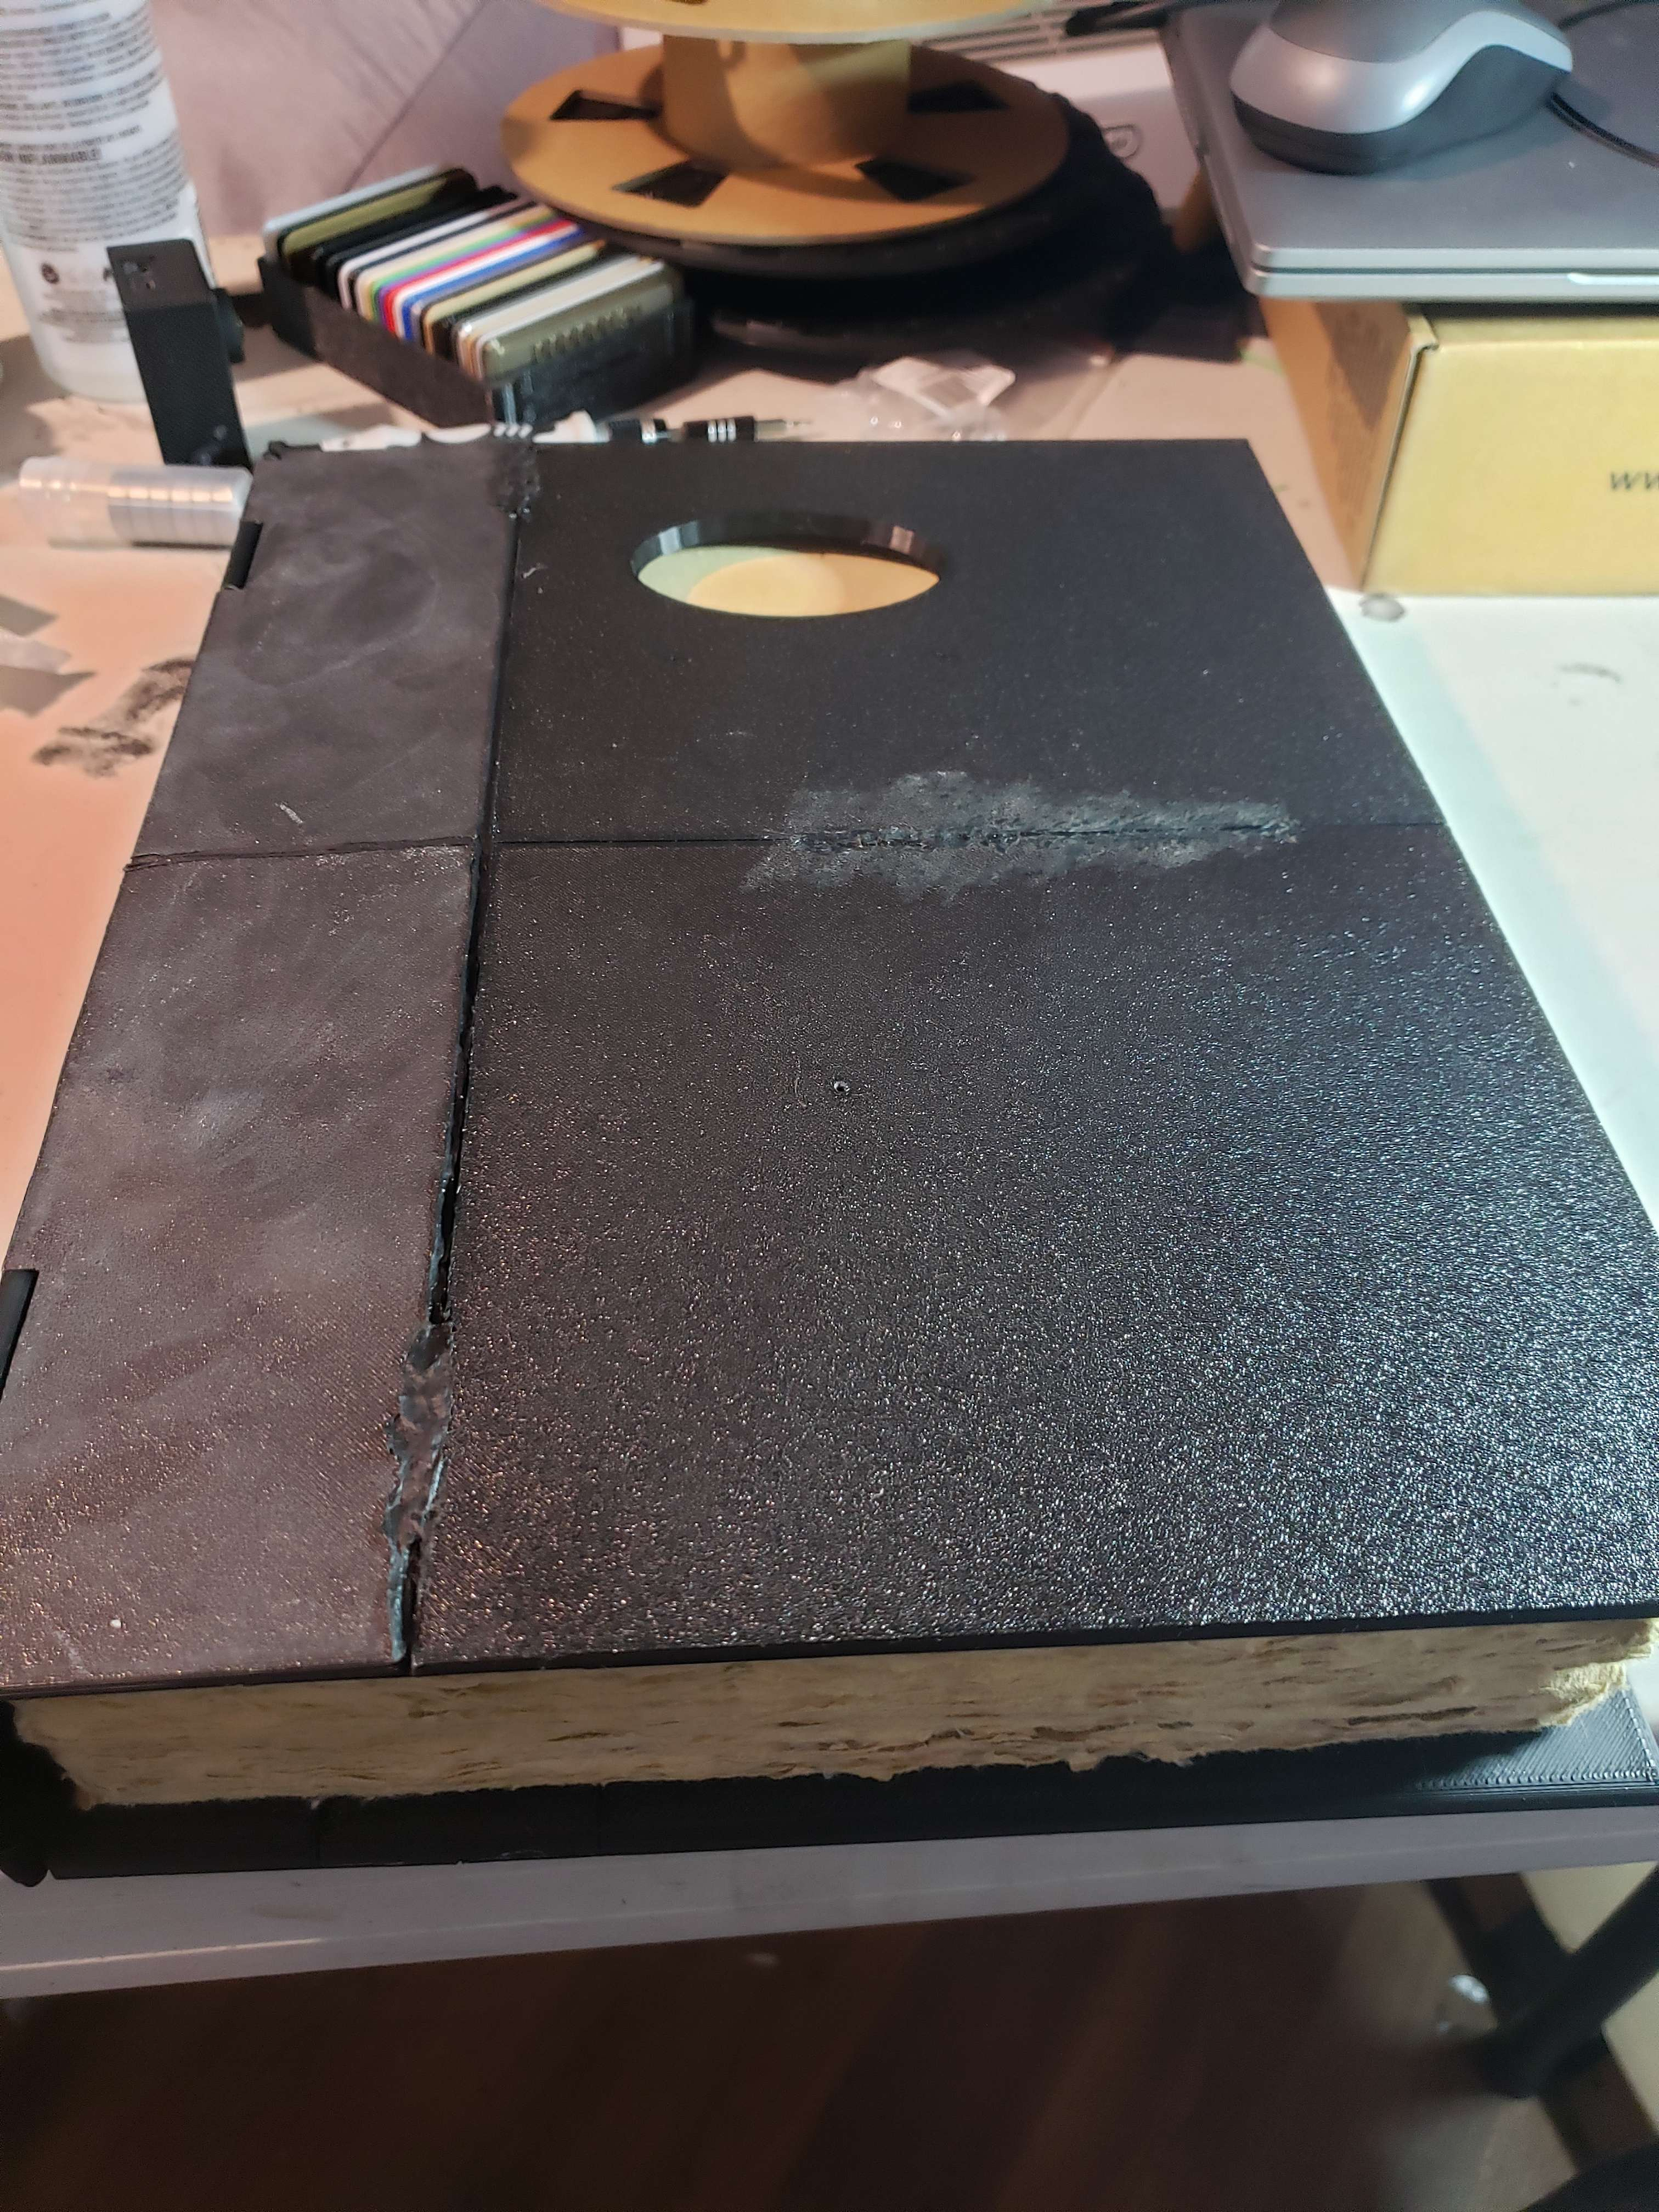
In-Progress assembly of the cover pieces
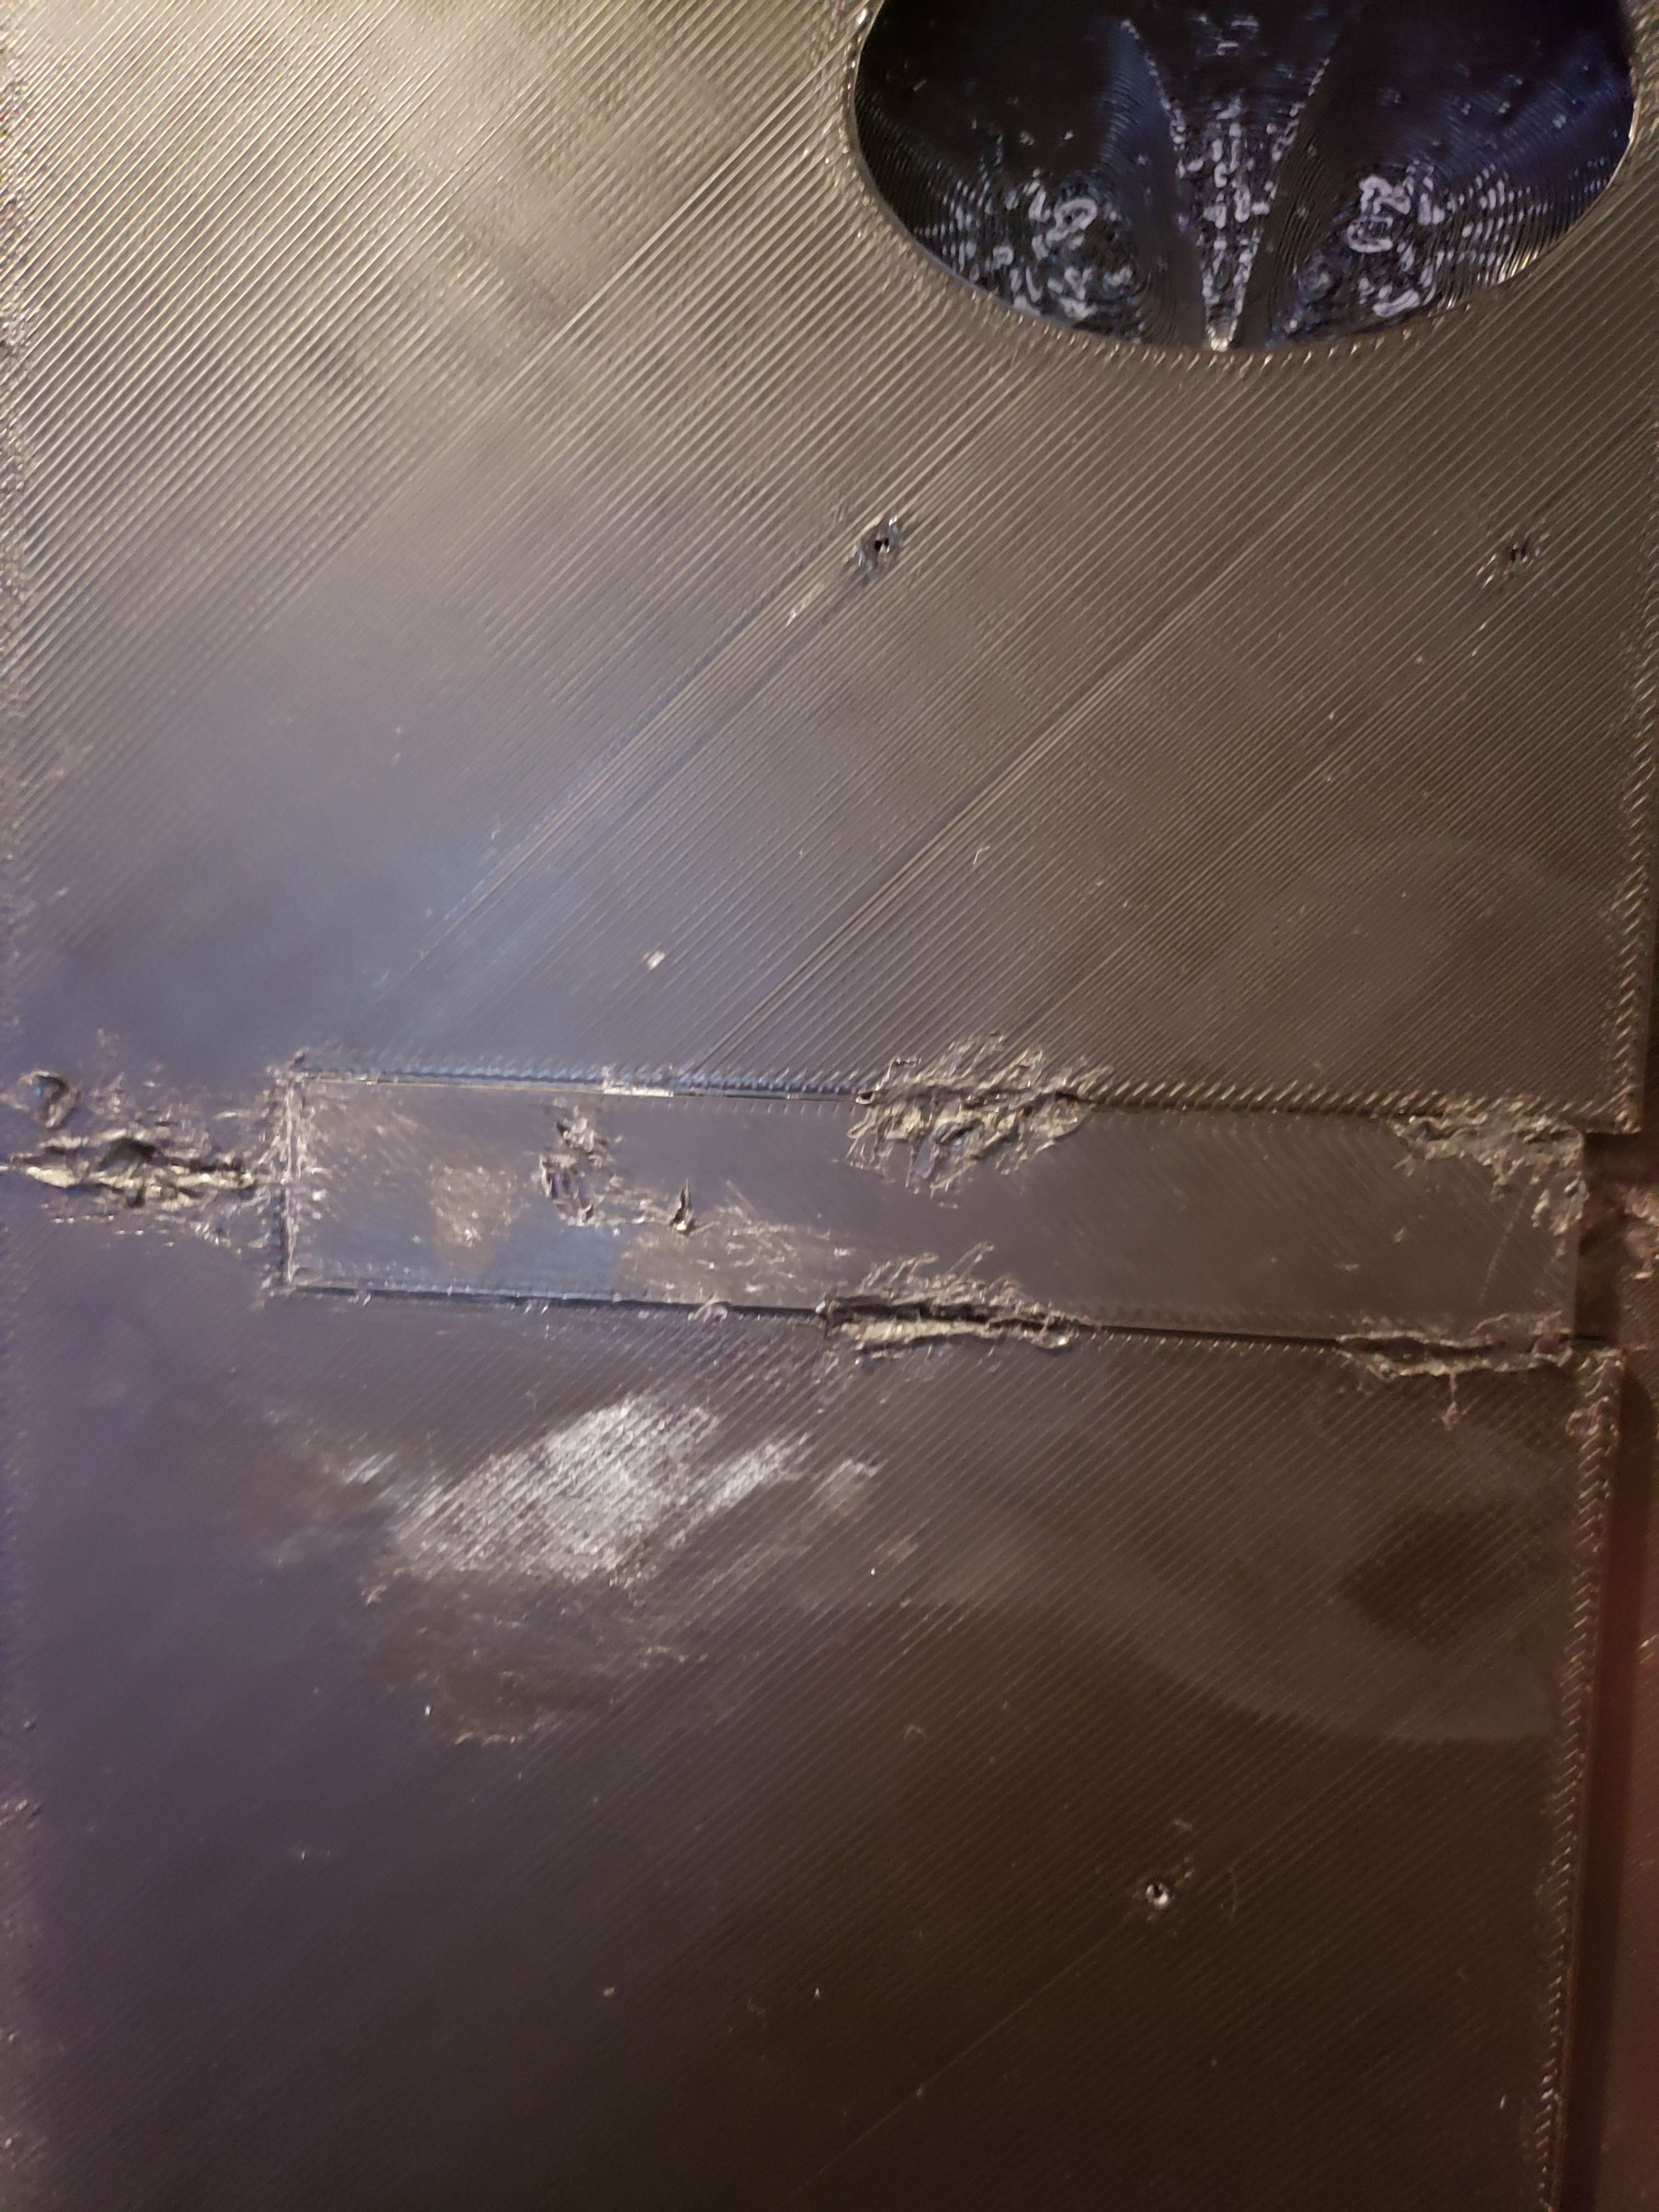
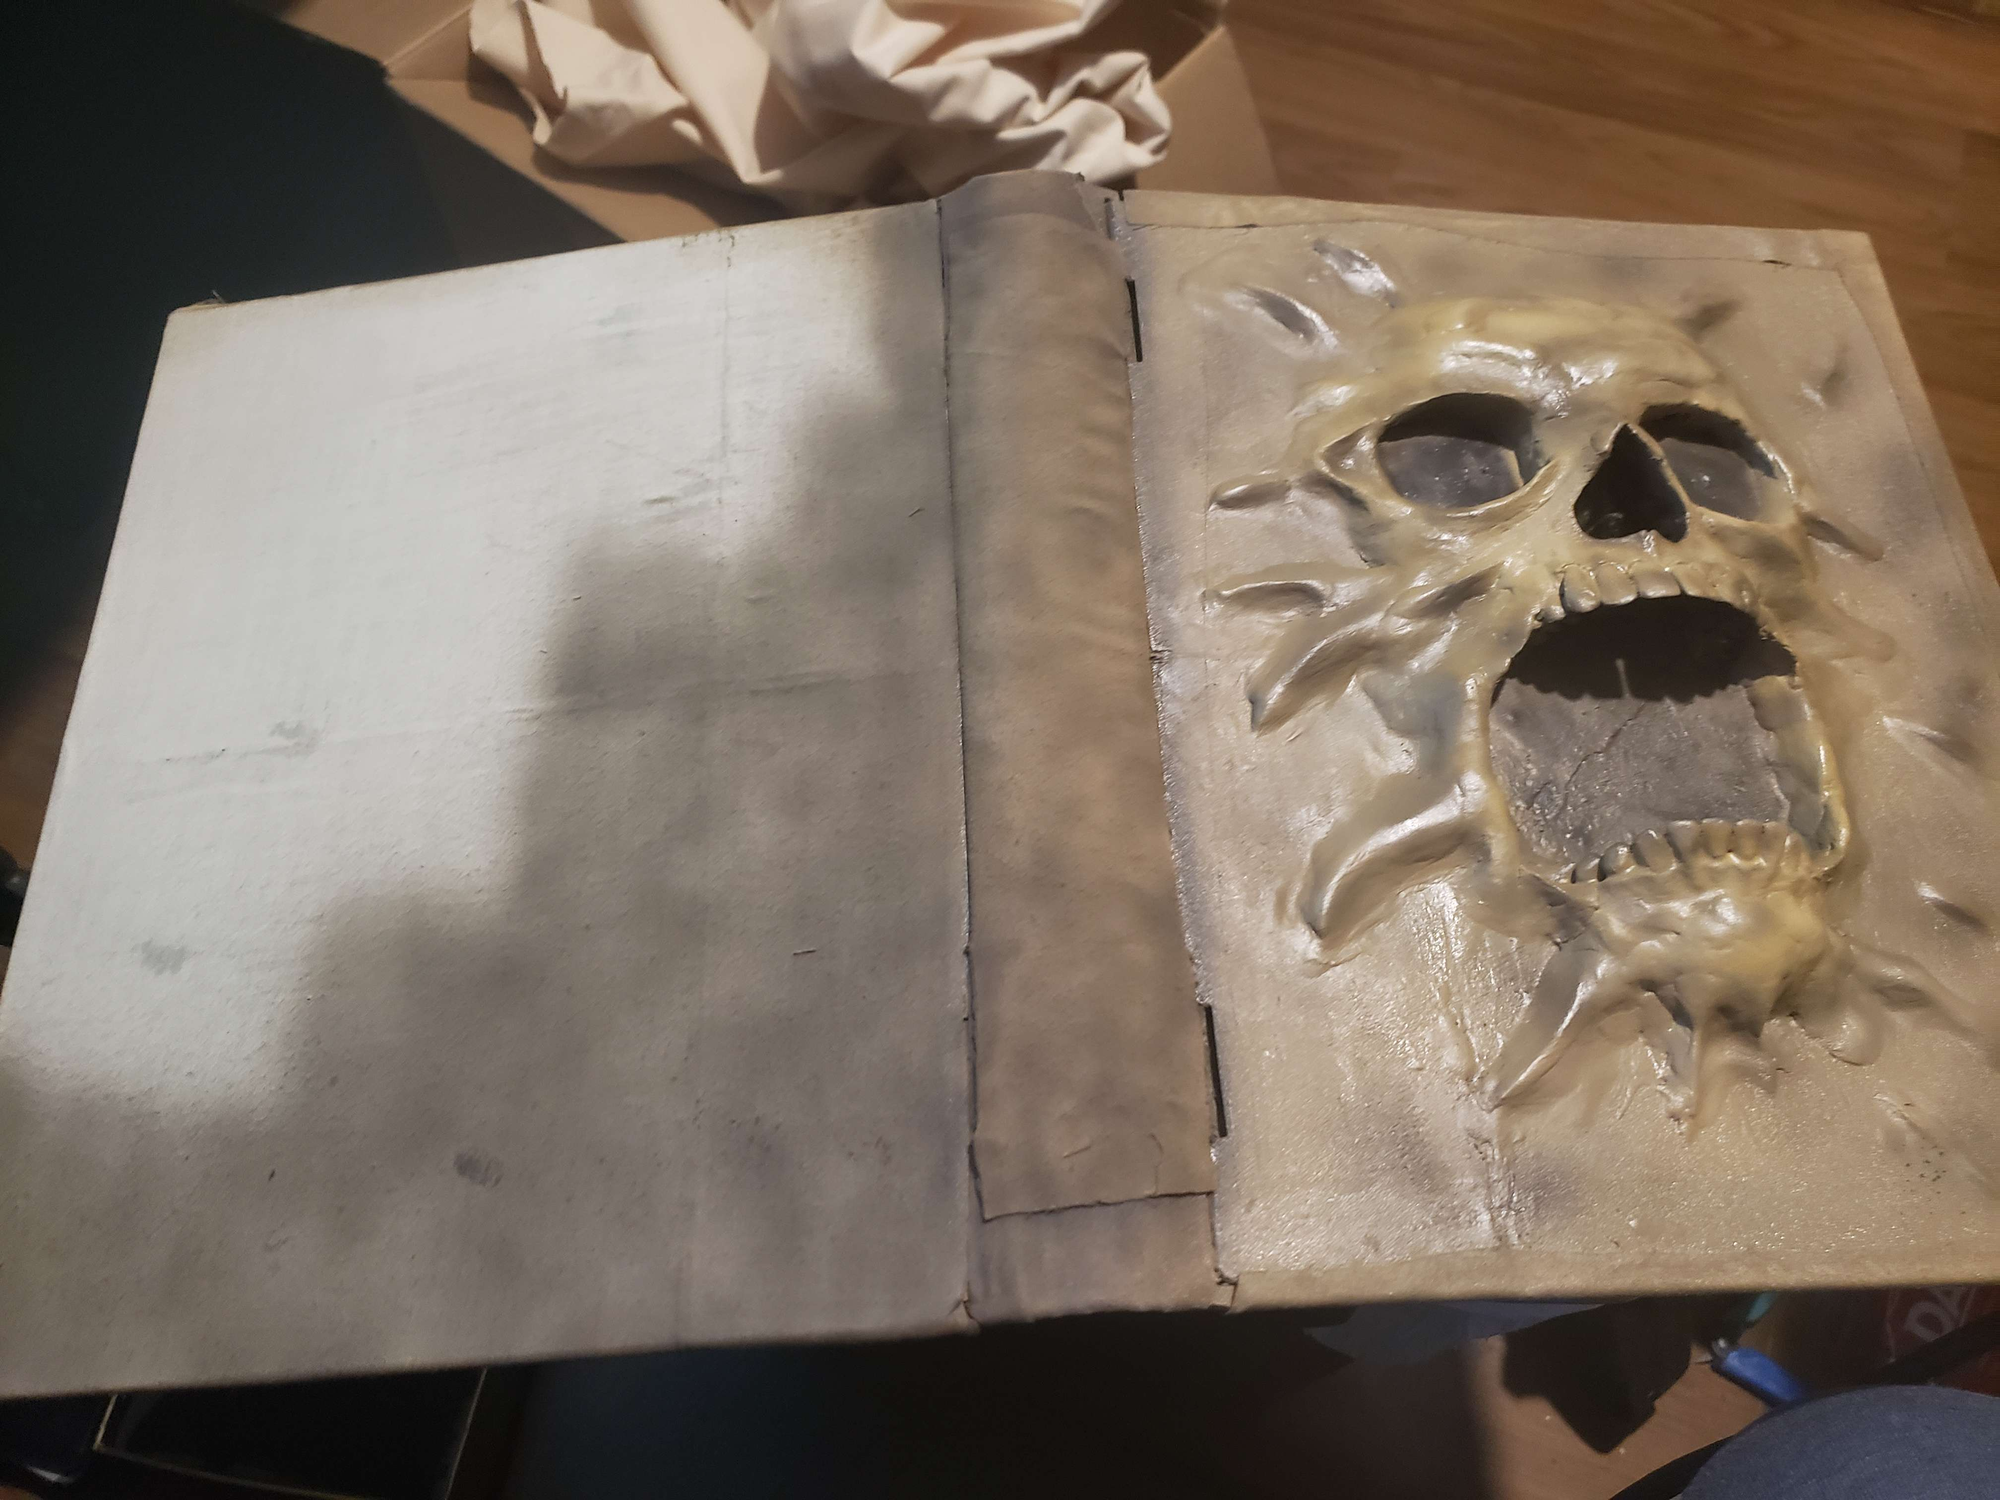
For the skull-face, it is printed with a very thin layer of ABS/ASA at the bottom to keep the jaw and forehead attached. This serves two other purposes. It has 3 tiny holes in it that light up to tiny holes in the front-cover which will help with positioning the skull-face. Second, because it is ABS/ASA, if you make a slurry with scrap ABS and acetone, brush it onto the book cover then place the entire skull face on it, centering using the holes (1.75mm filament scraps should fit in them). Then brush some slurry on top and along both sides of the edges of the thin-layer until it is bonded after drying. Yes, the slurry will make the ABS/ASA bond to even PLA with enough surface coverage.
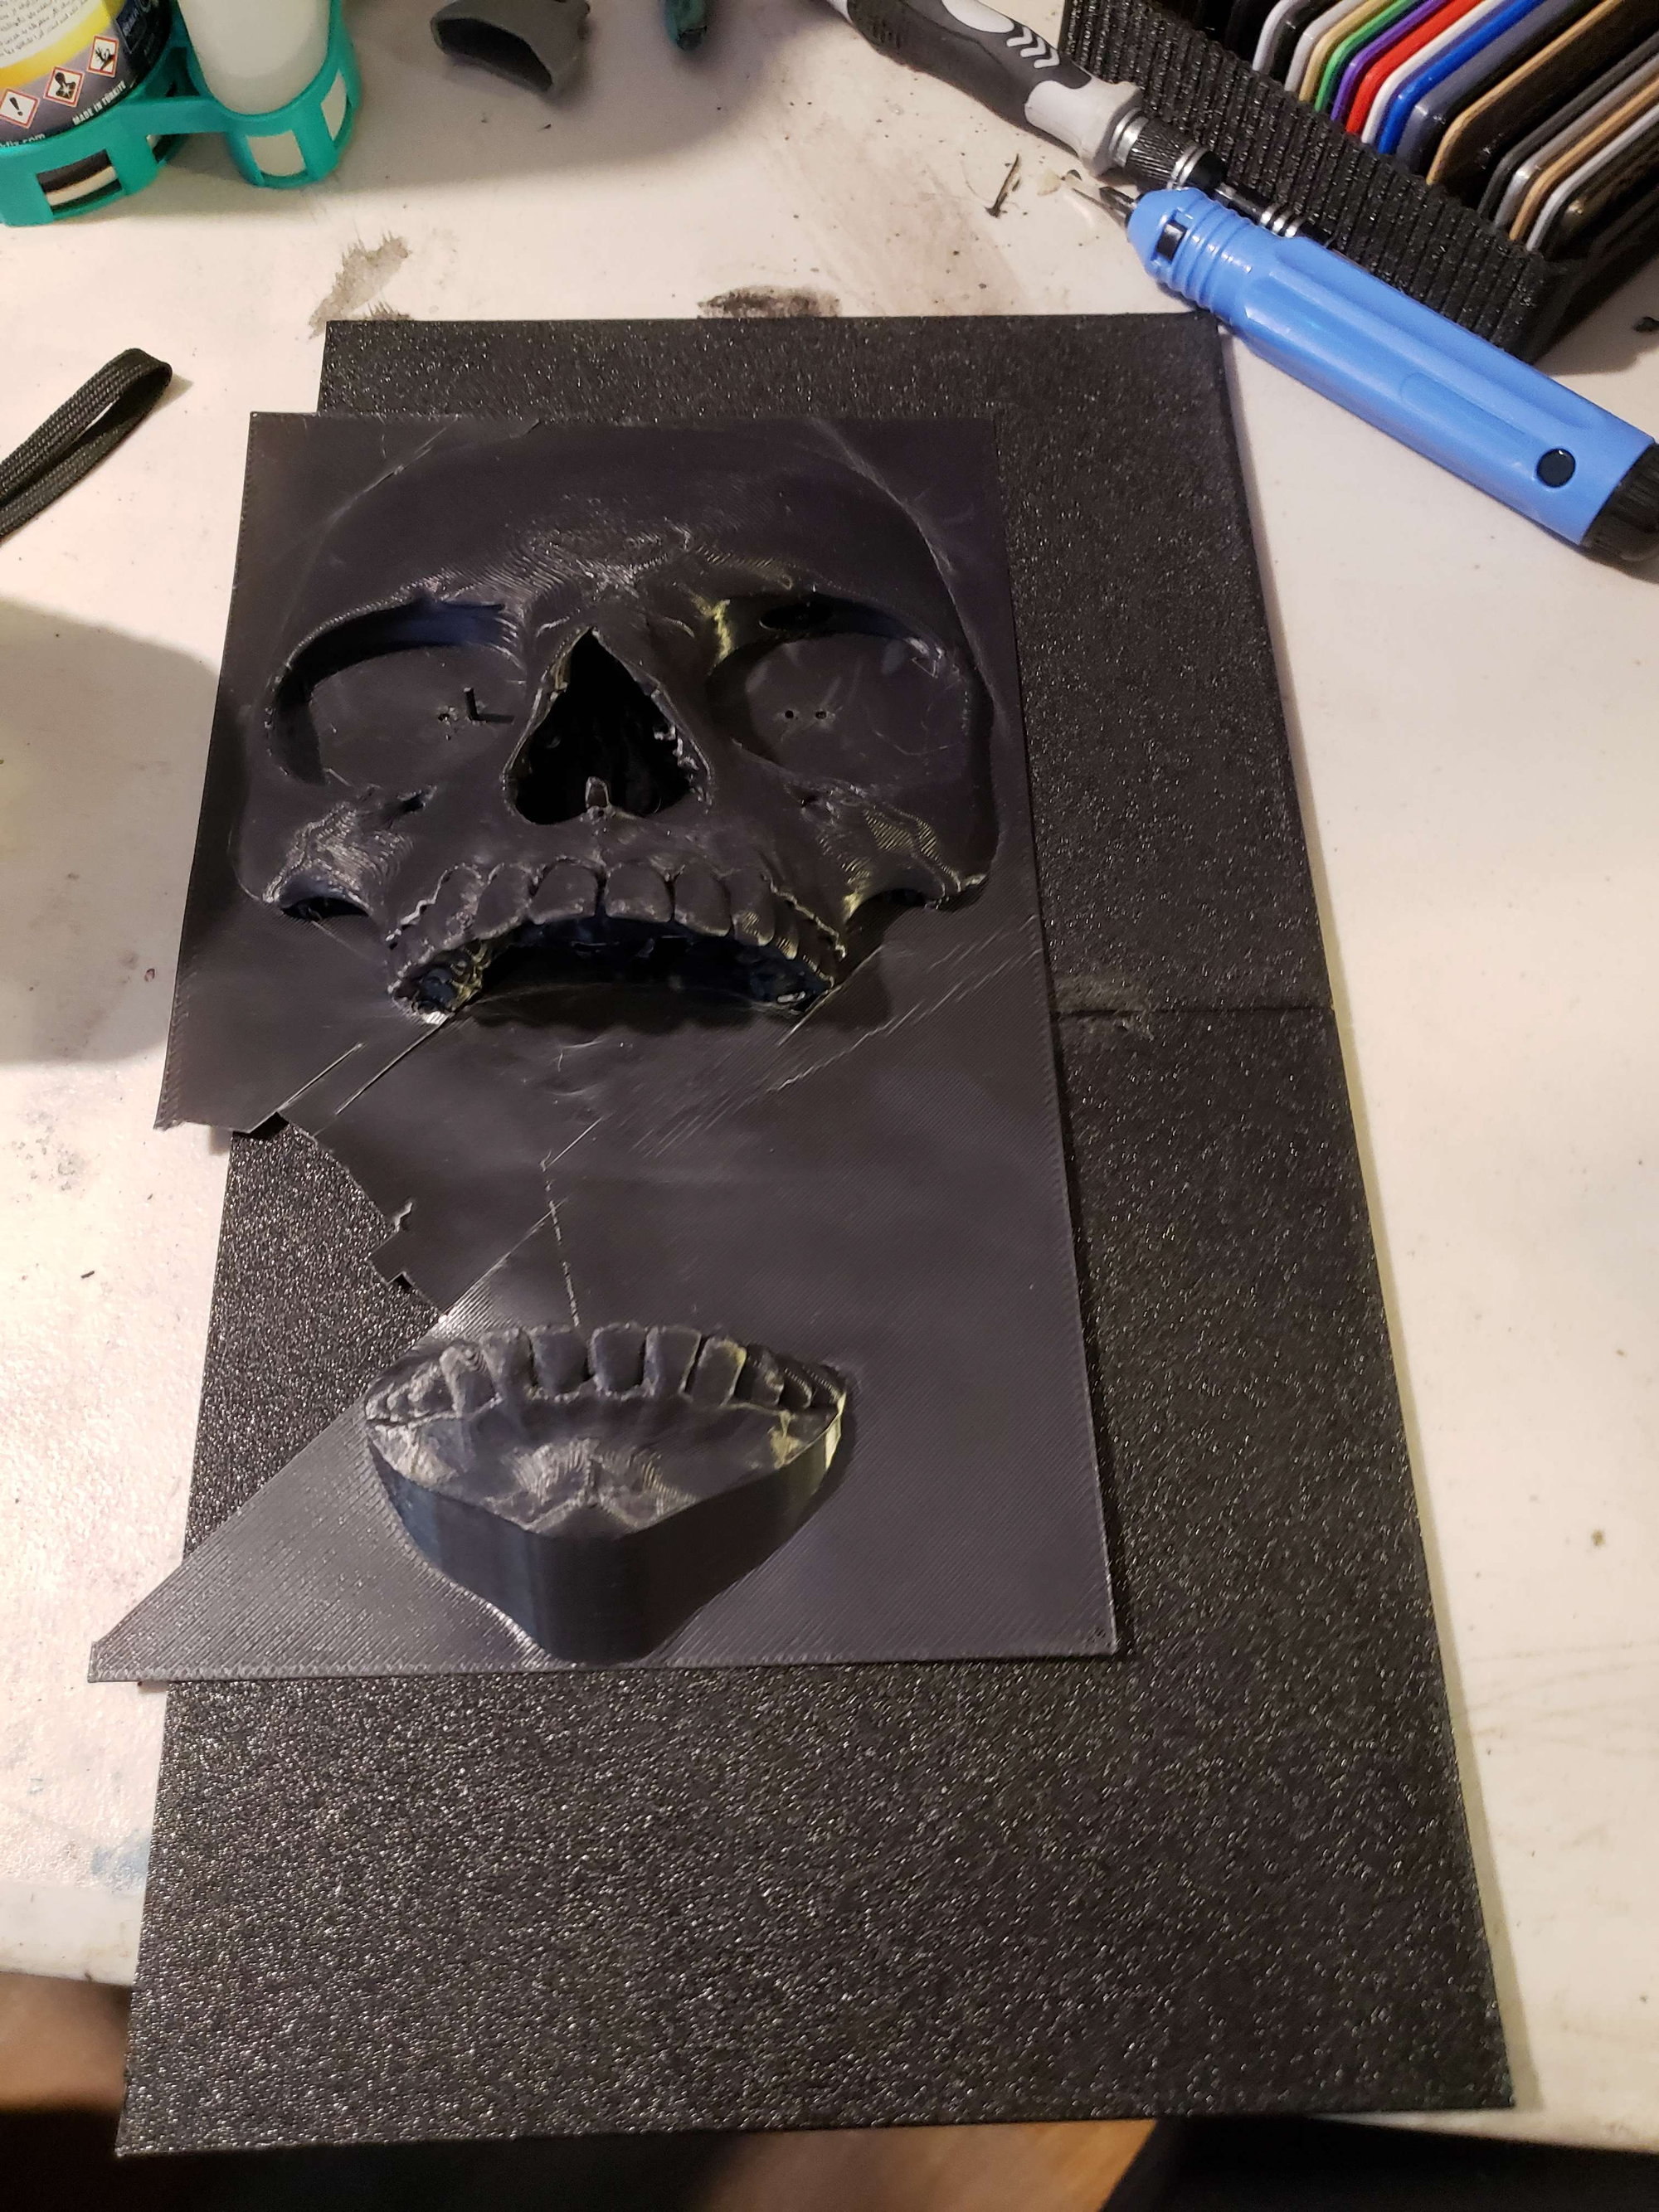
Stages of adding the skull to the PLA covers using an ABS Acetone slurry
Scrap cloth was used to wrap around the covers (not so much on the front-face, just the edges here) to help hide the printed-nature of the covers and cover up the corners and edges. Additionally, cloth was fed through the slits in the print-in-place hinges to wrap around the spine to later glue the spine-bones to.
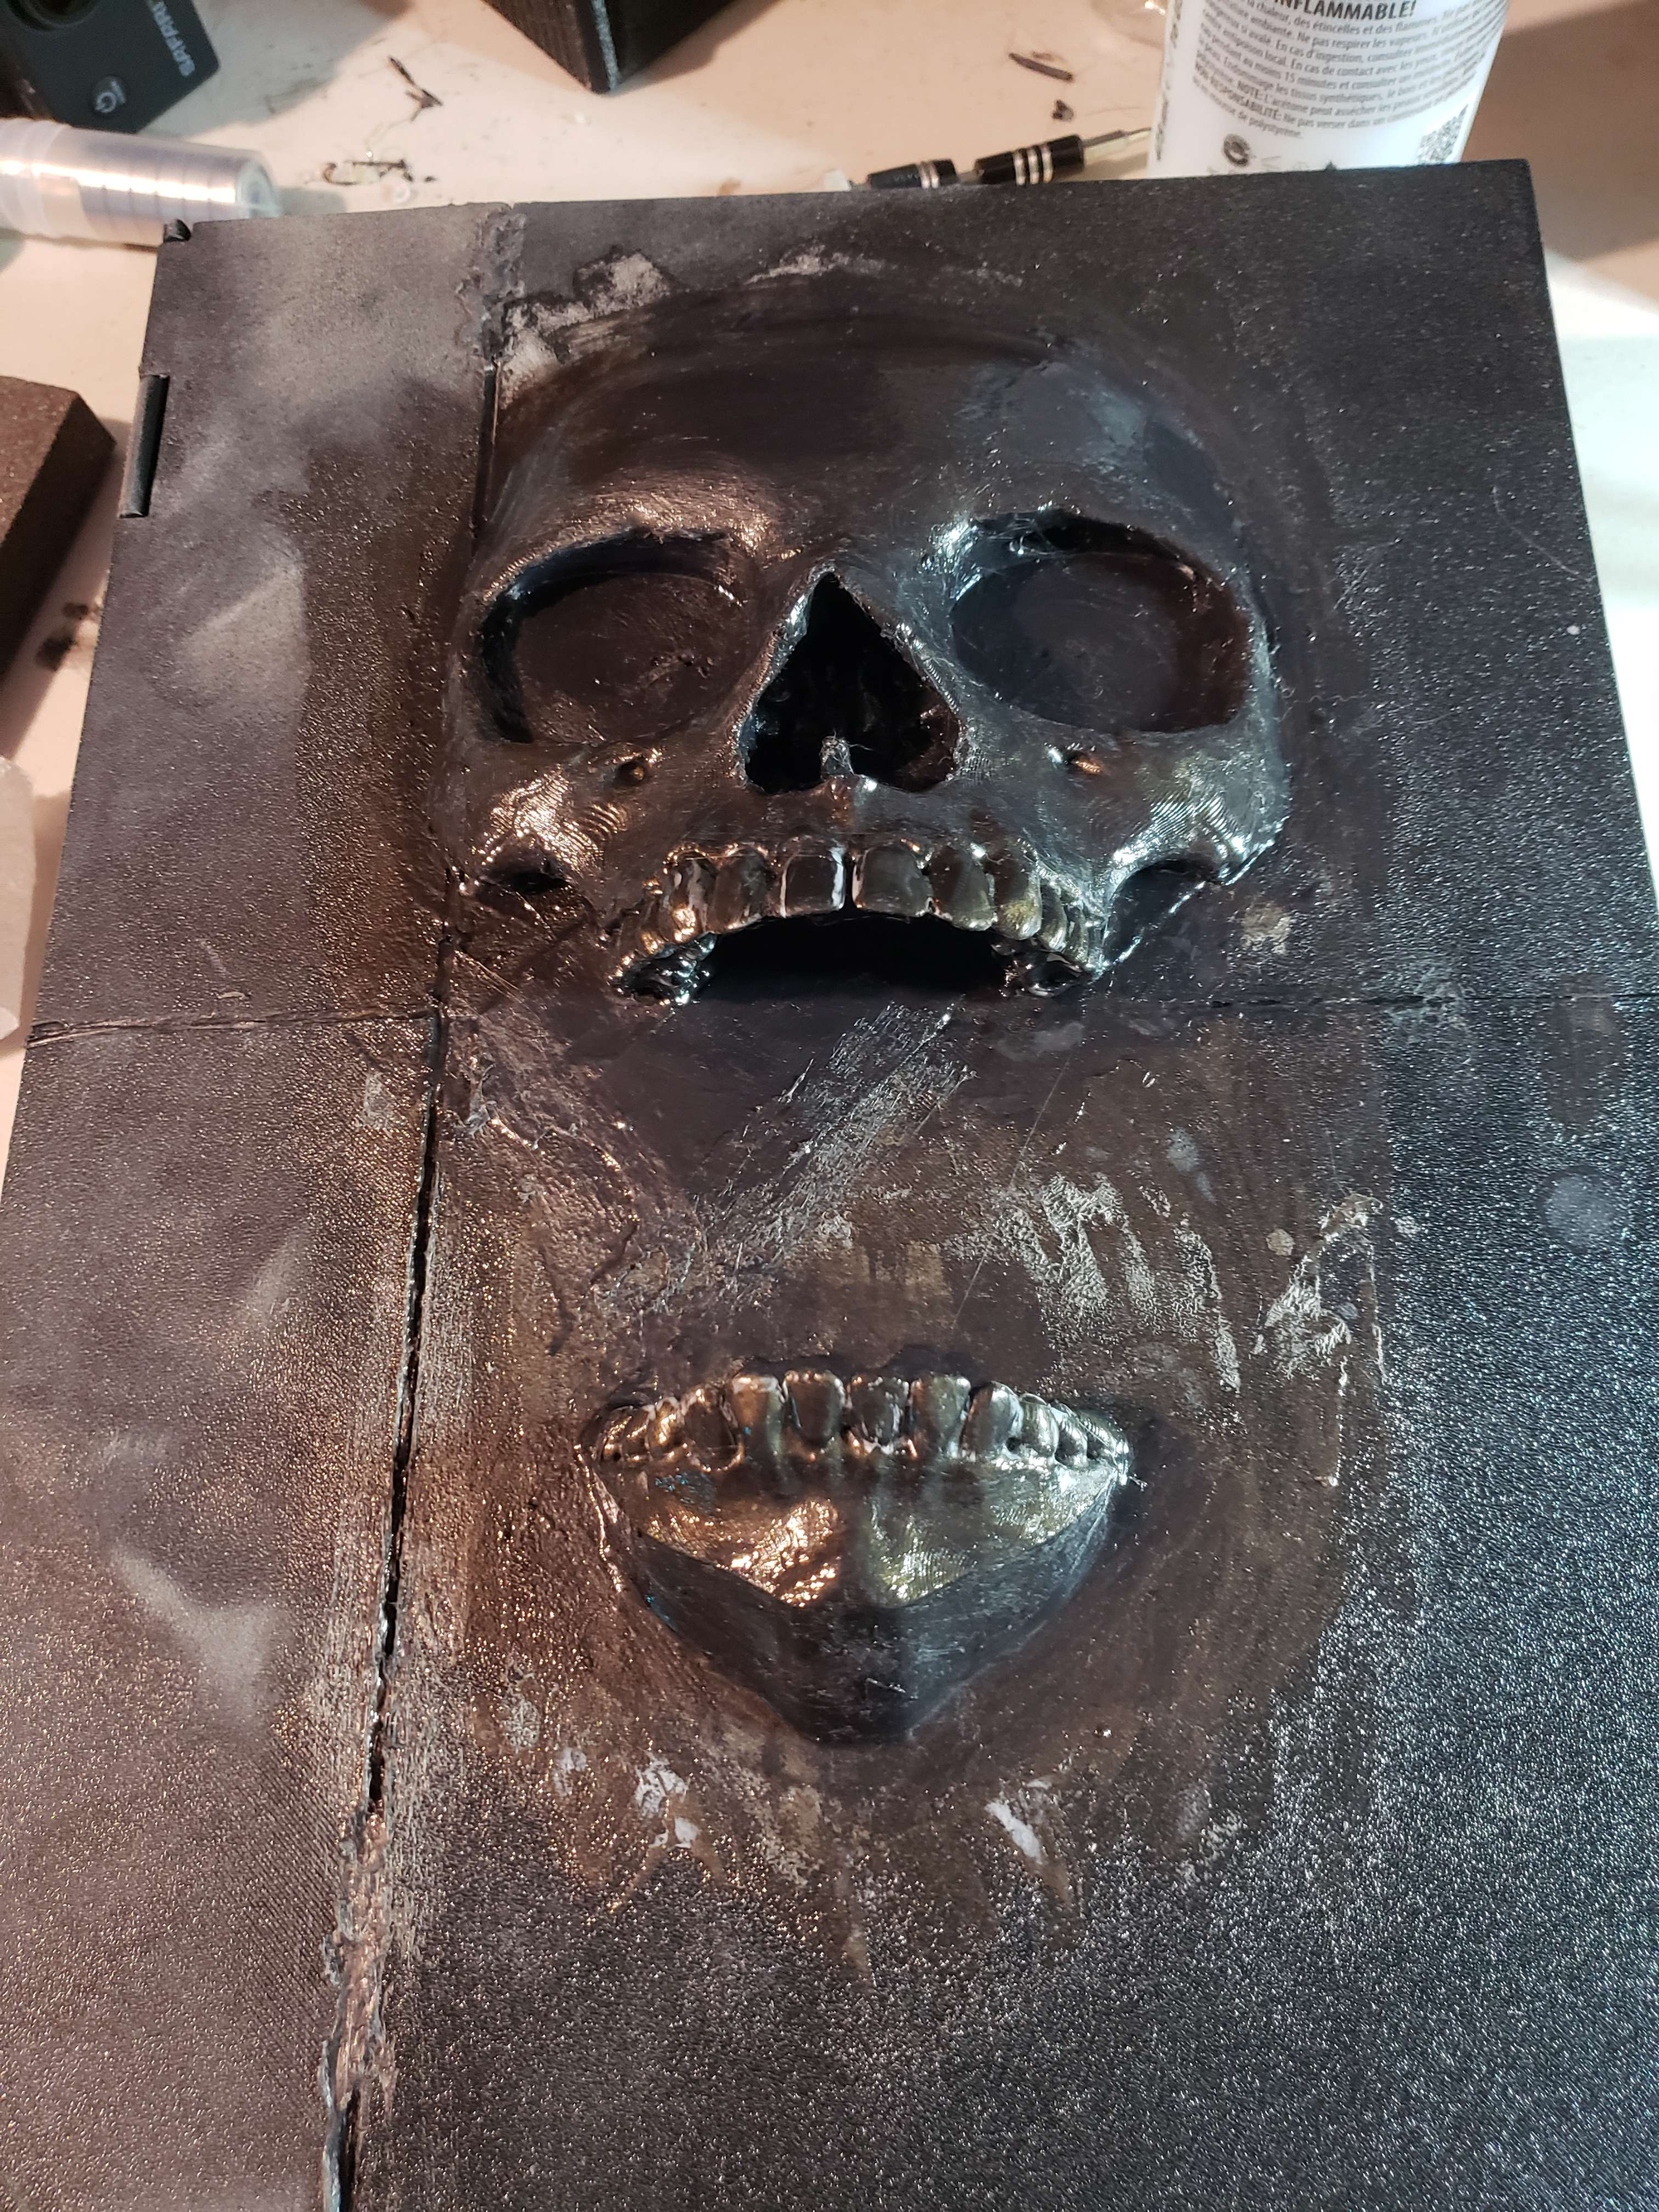
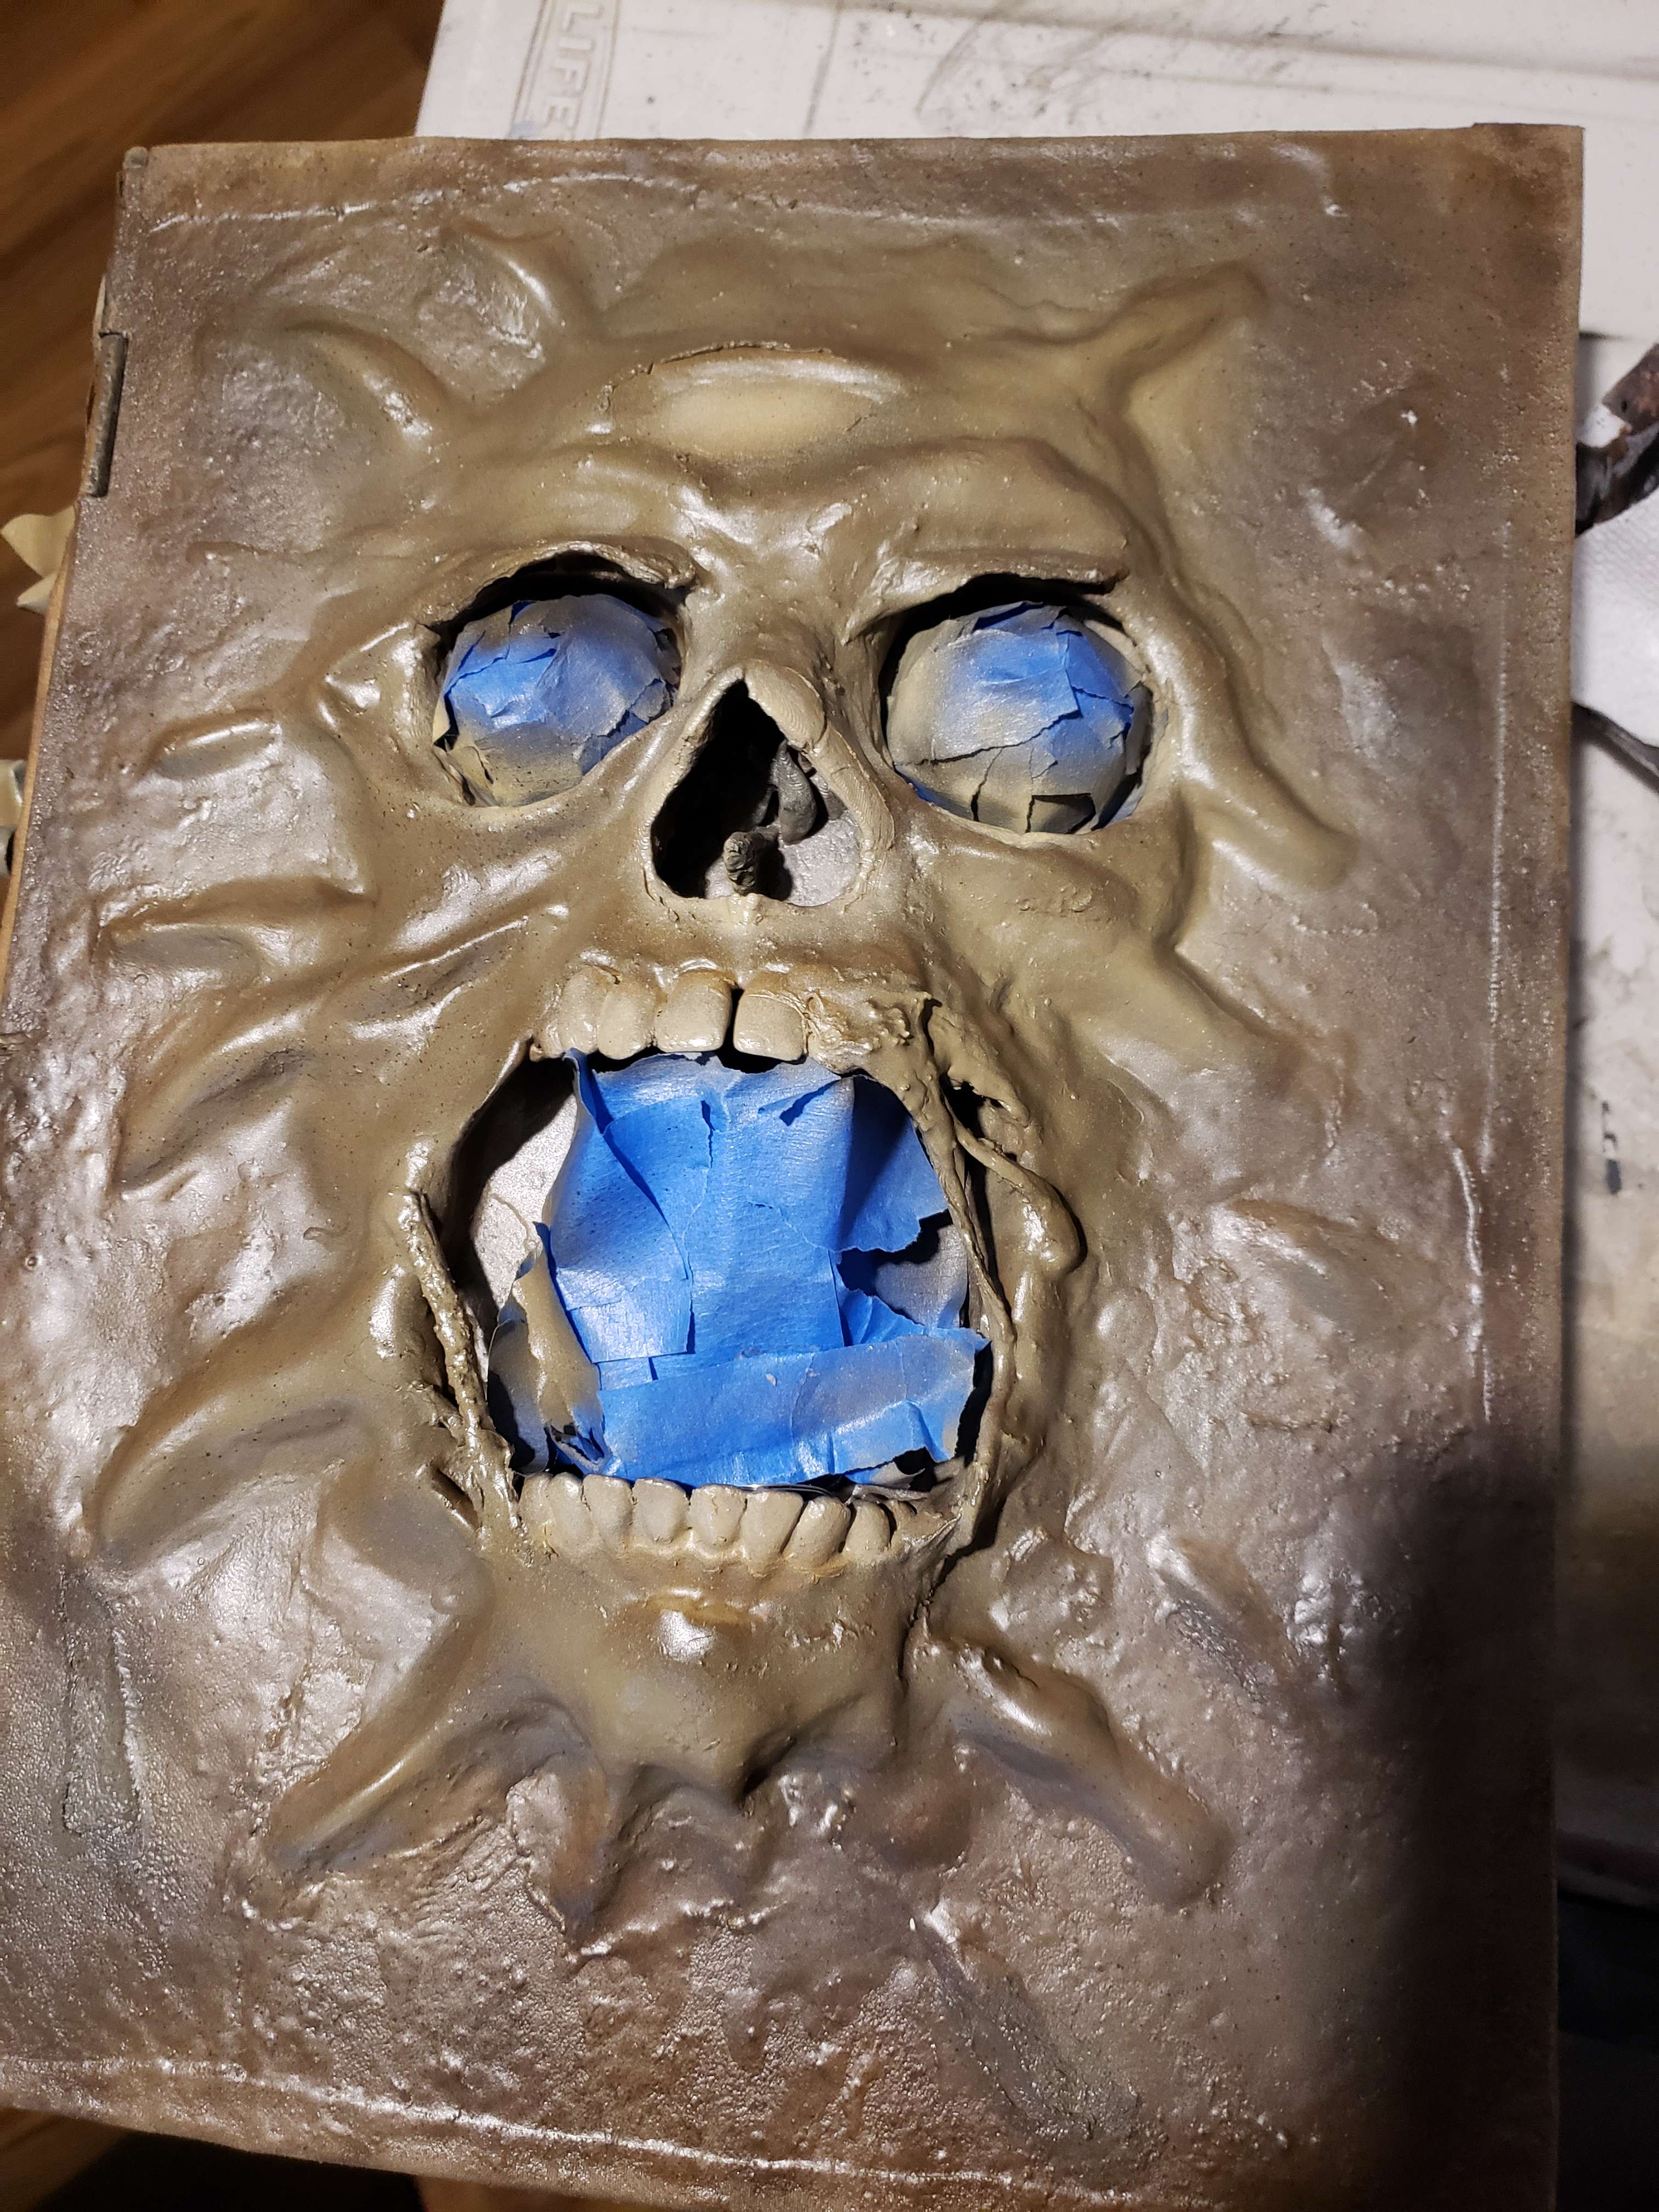
Wetted clay was used over the skull-face to add details. After painting and smoothing, liquid latex was used for texture and stringy bits. Small bits of flat metal were embedded inside the front cover such that later when I add magnets to the buckles, they will connect.
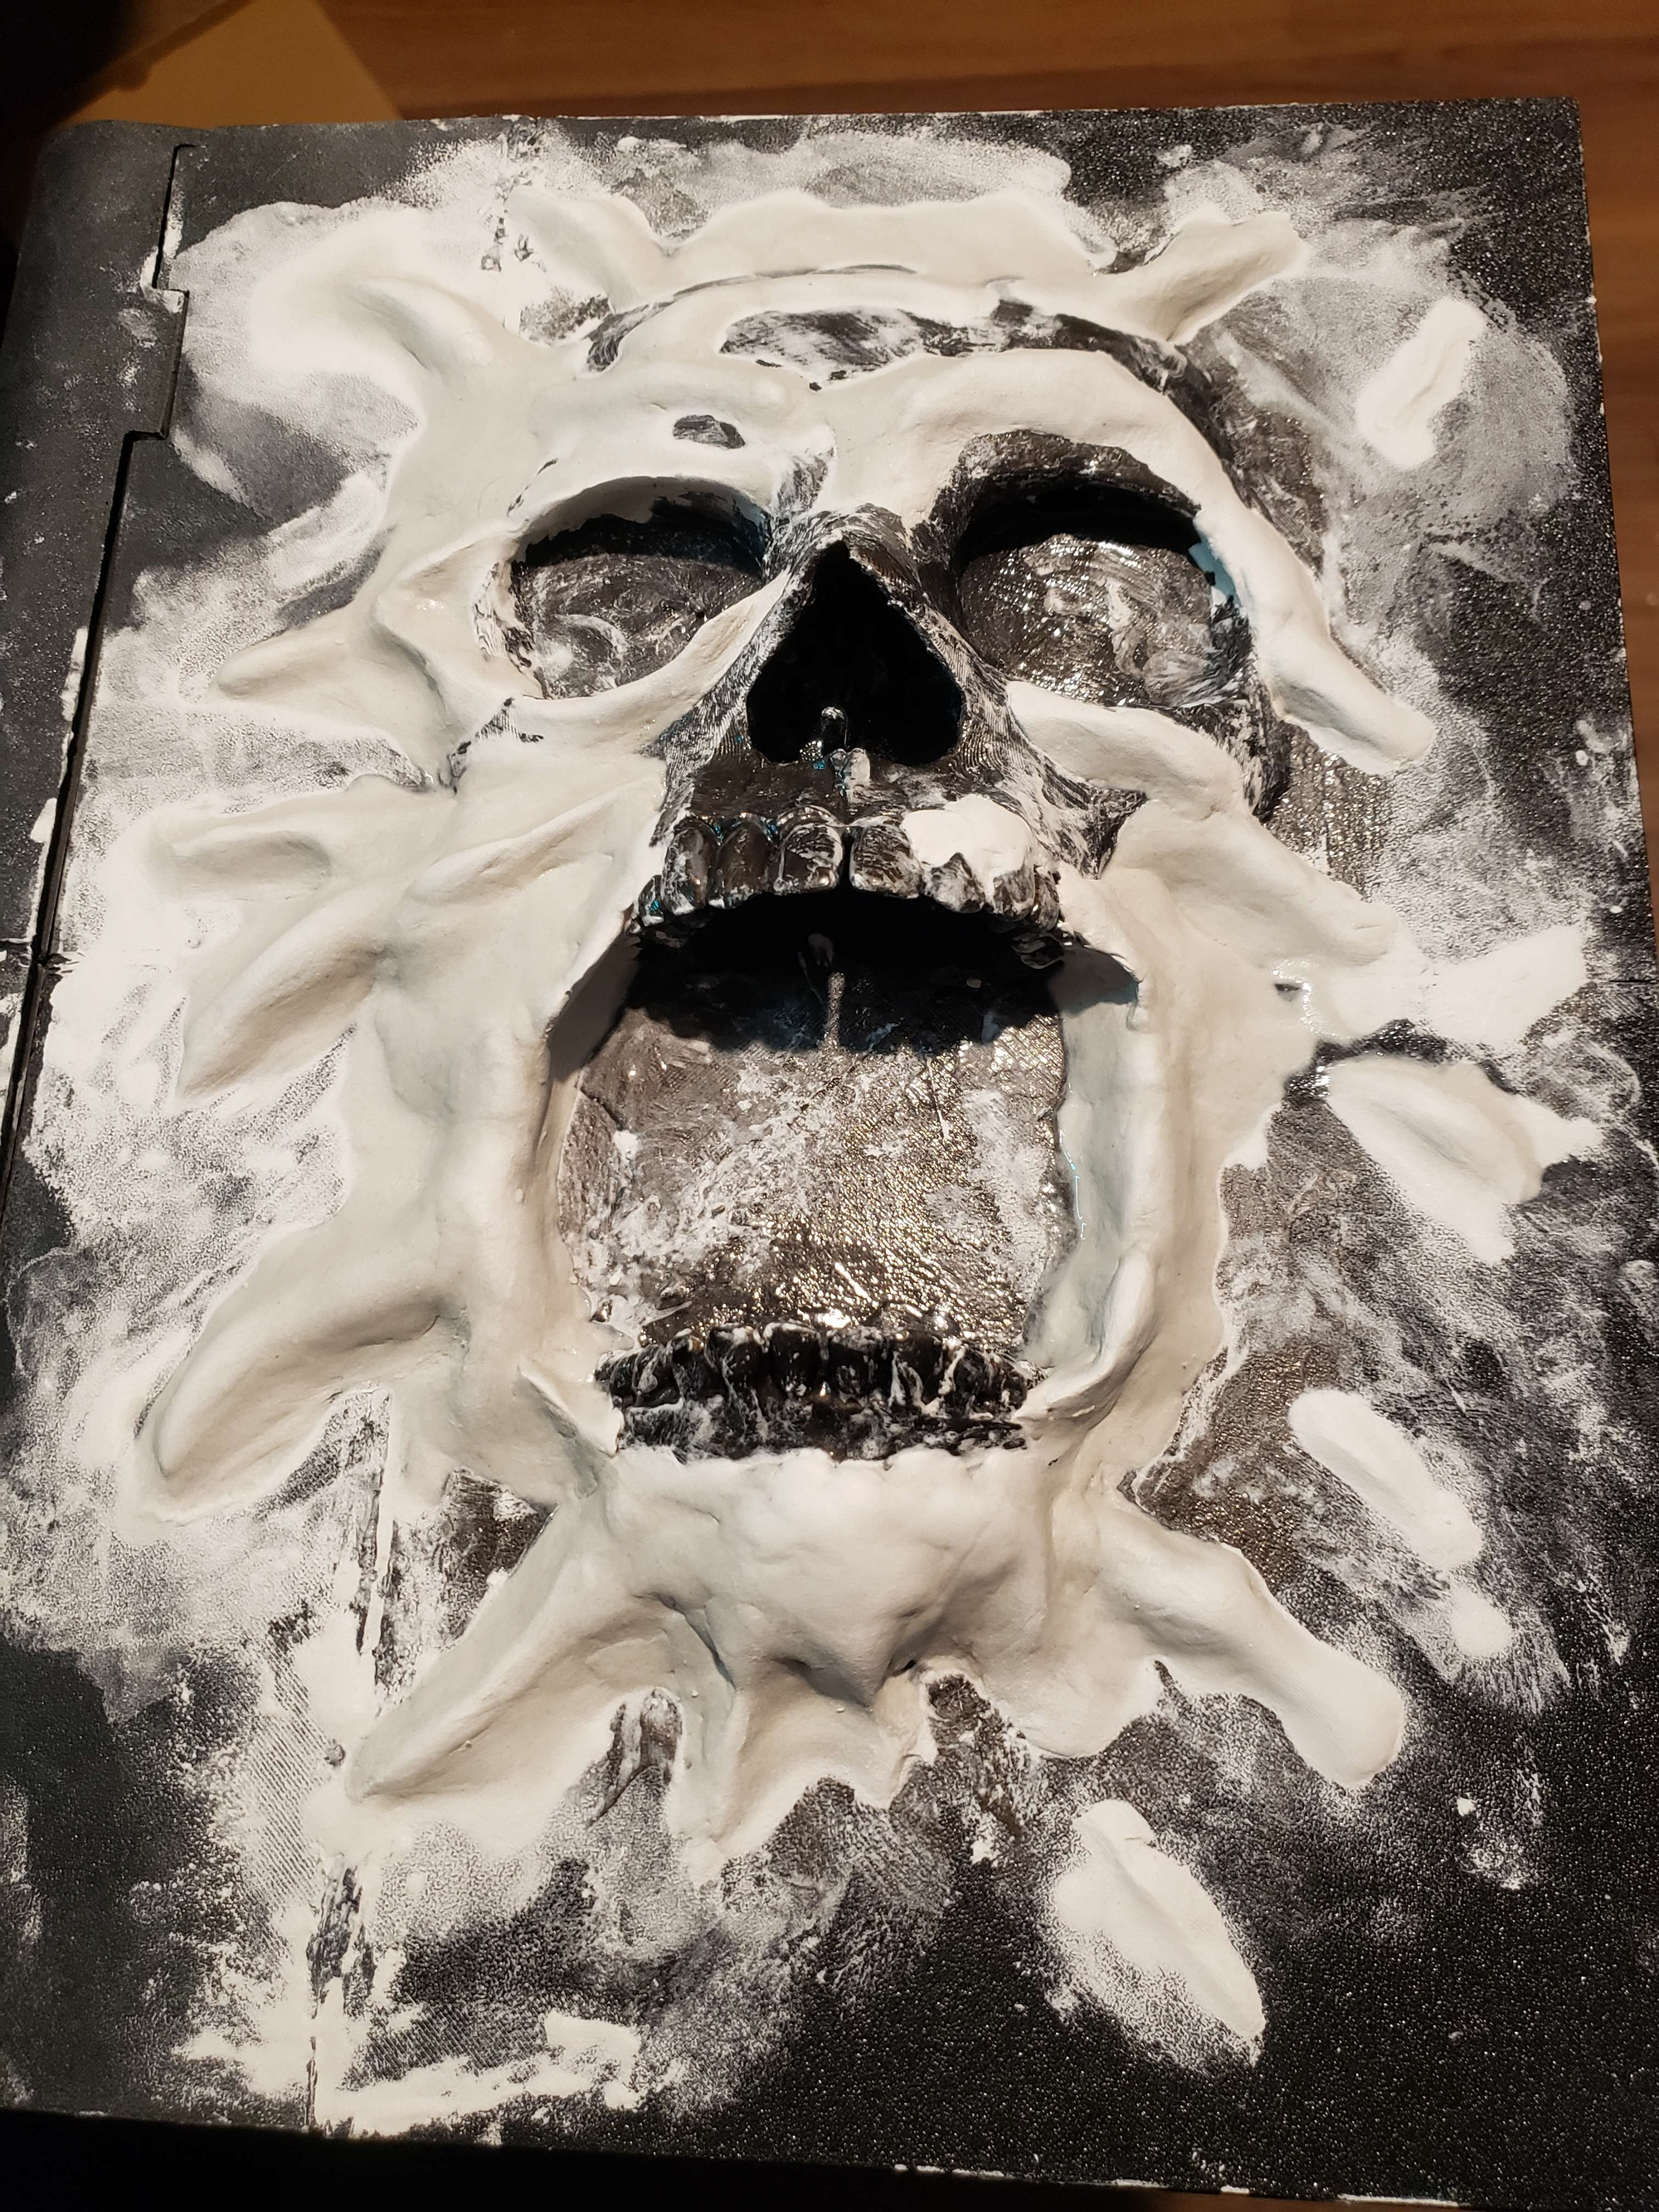
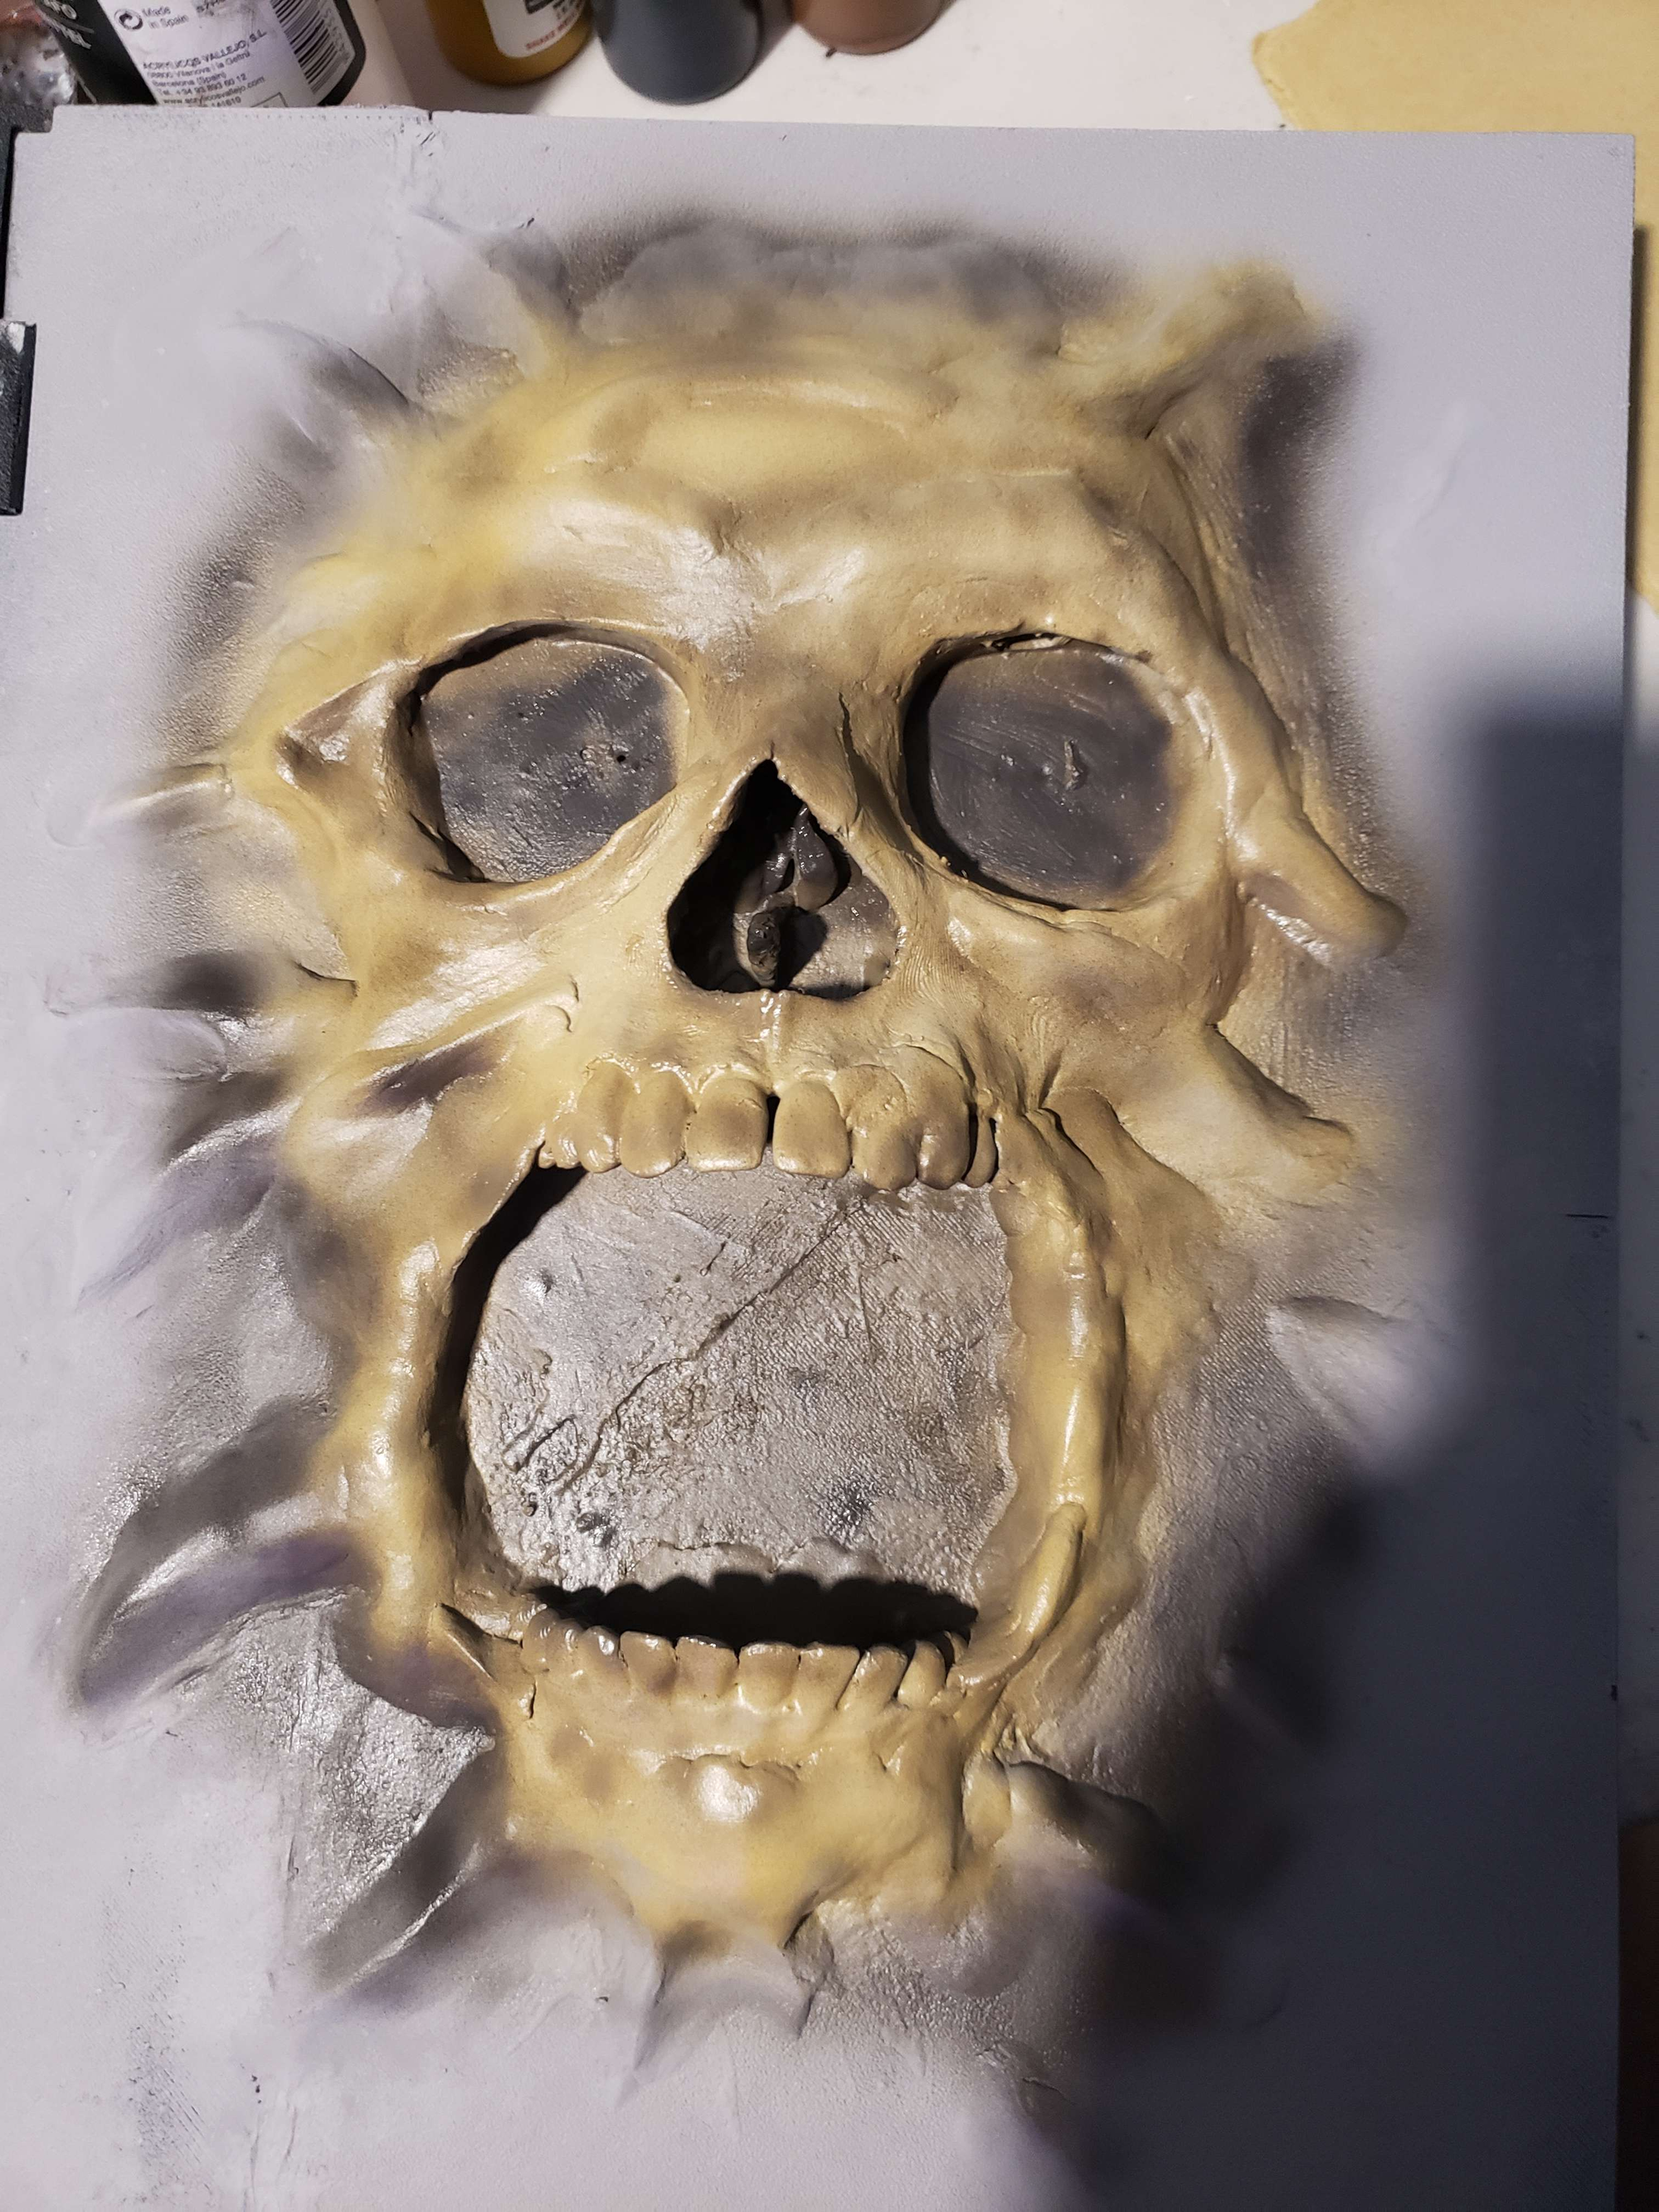
Adding clay, then painting the skull face. Then adding cloth to both covers
Regarding the filagree pieces, they were printed in ABS/ASA as well in order to facilitate smoothing it and to use acetone/slurry as a "glue" to bond all 4 corners together. This was then super-glued to the covers.
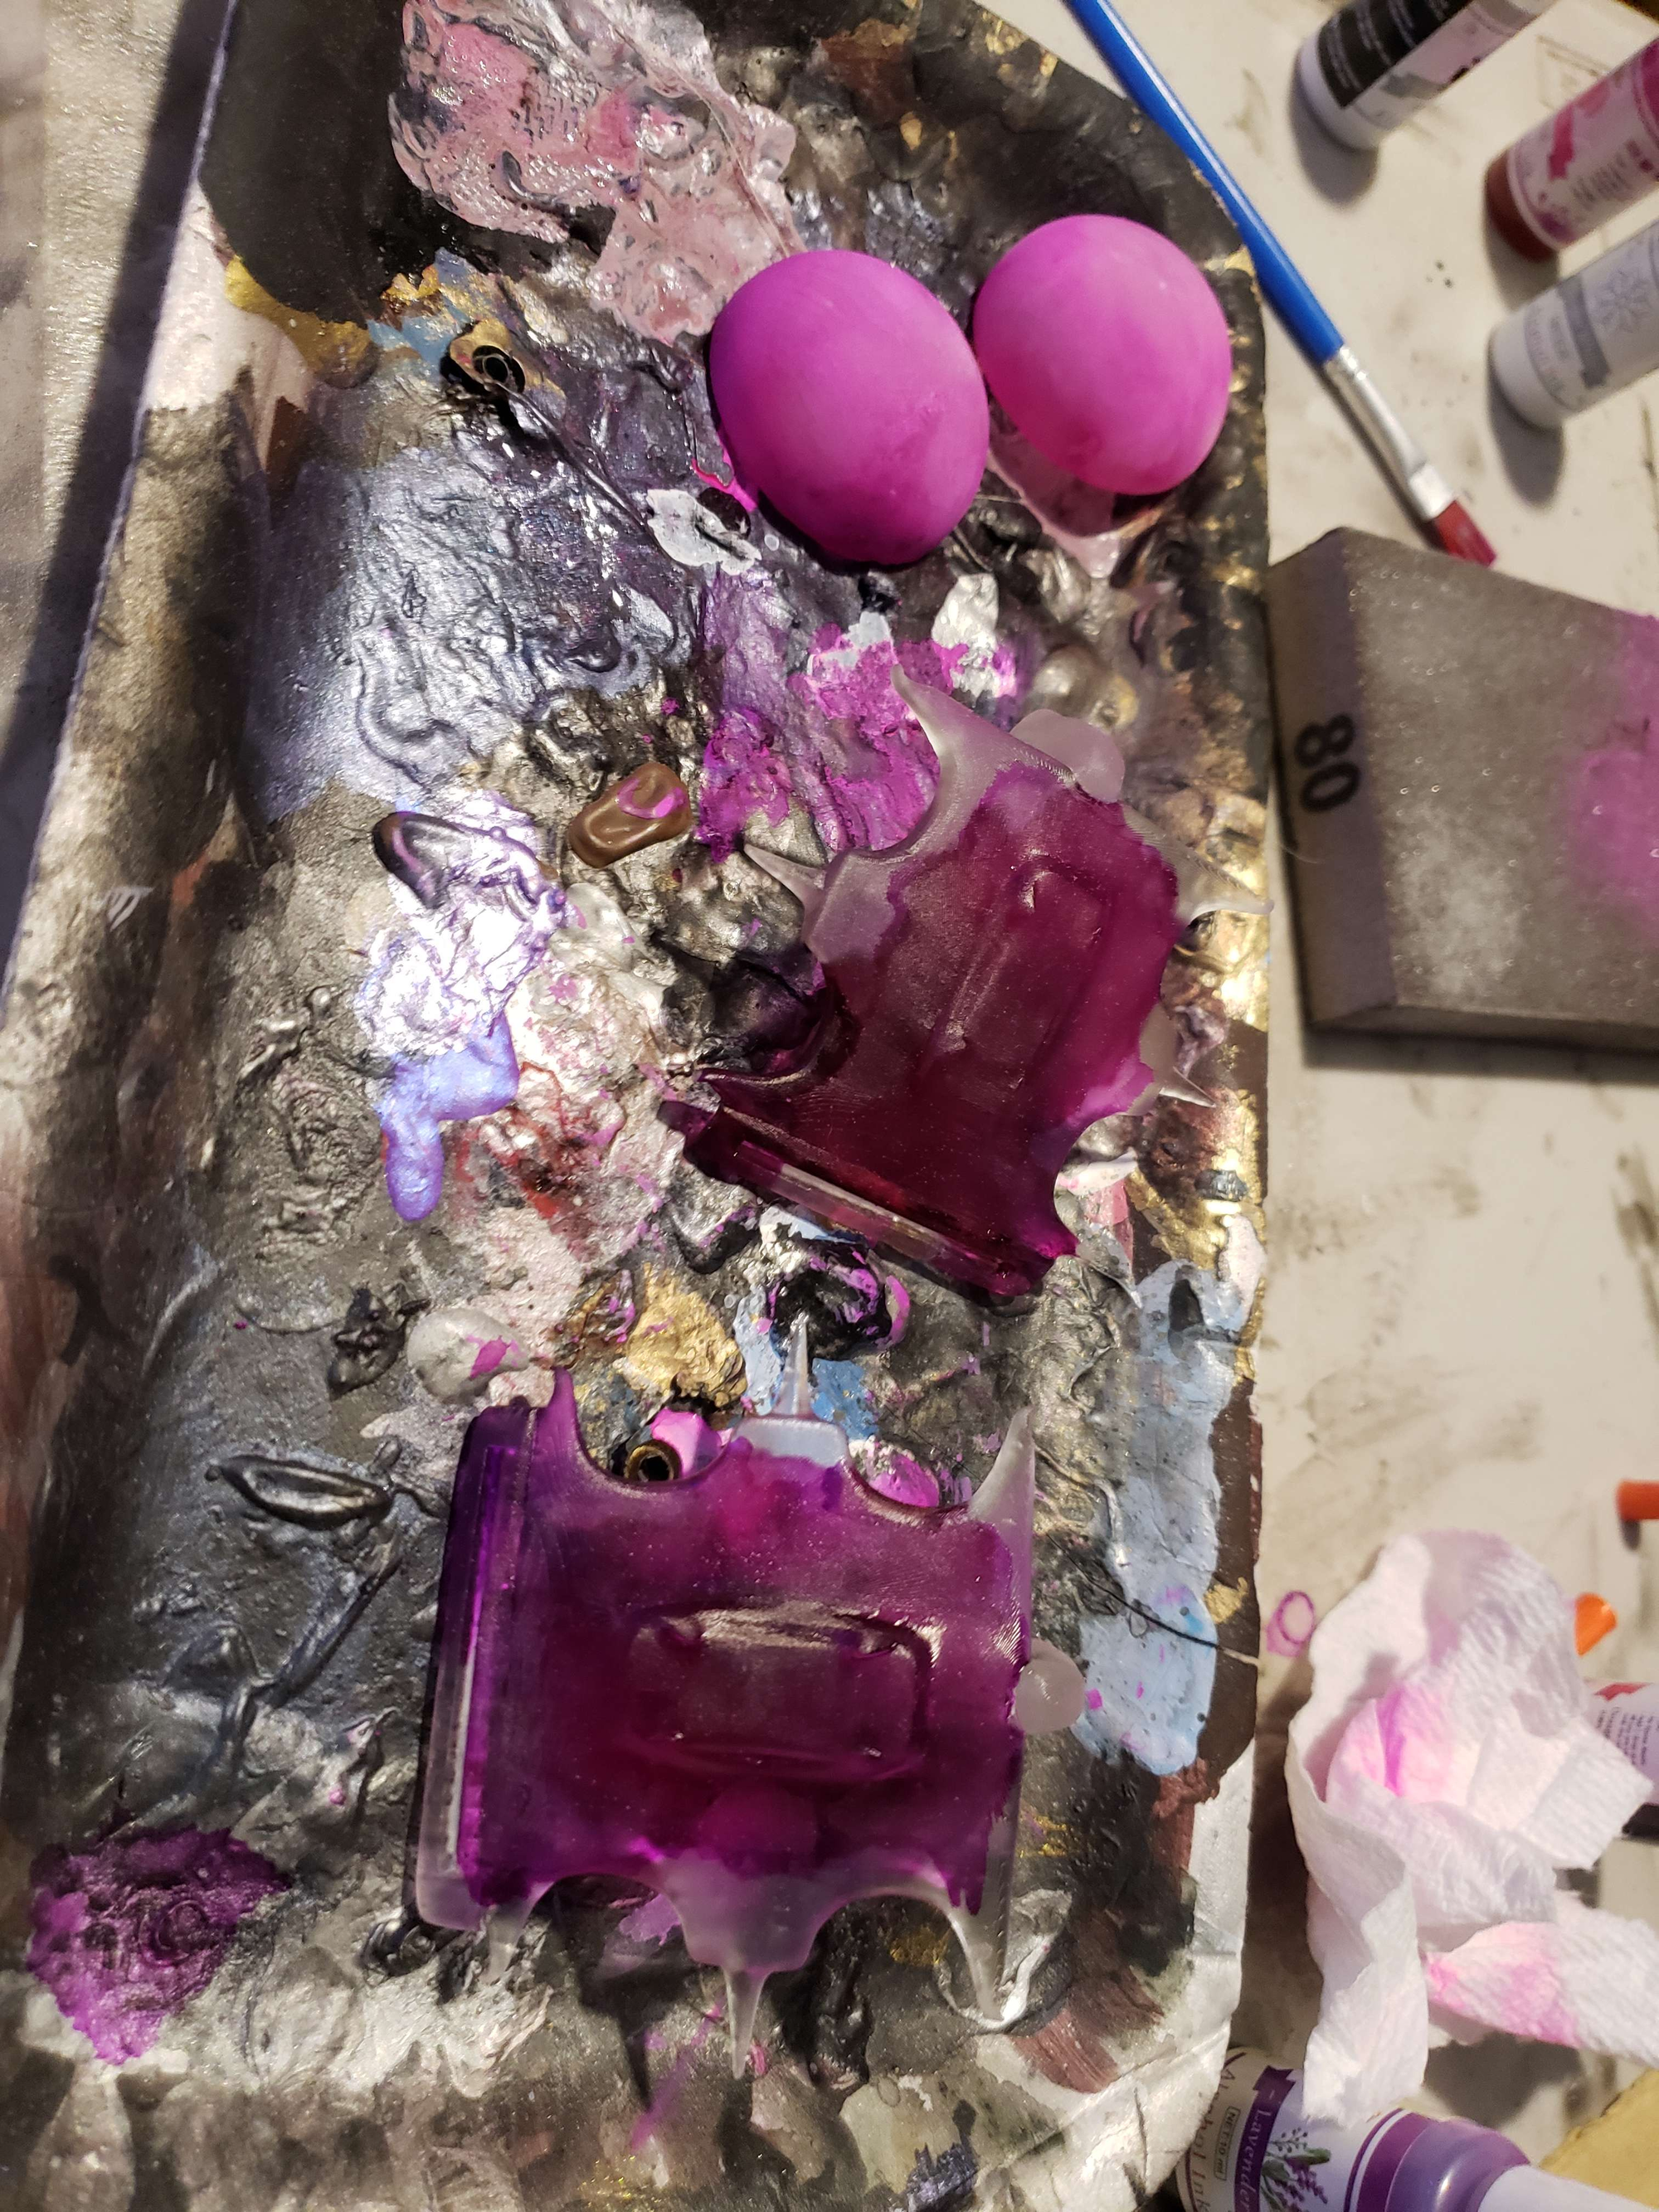
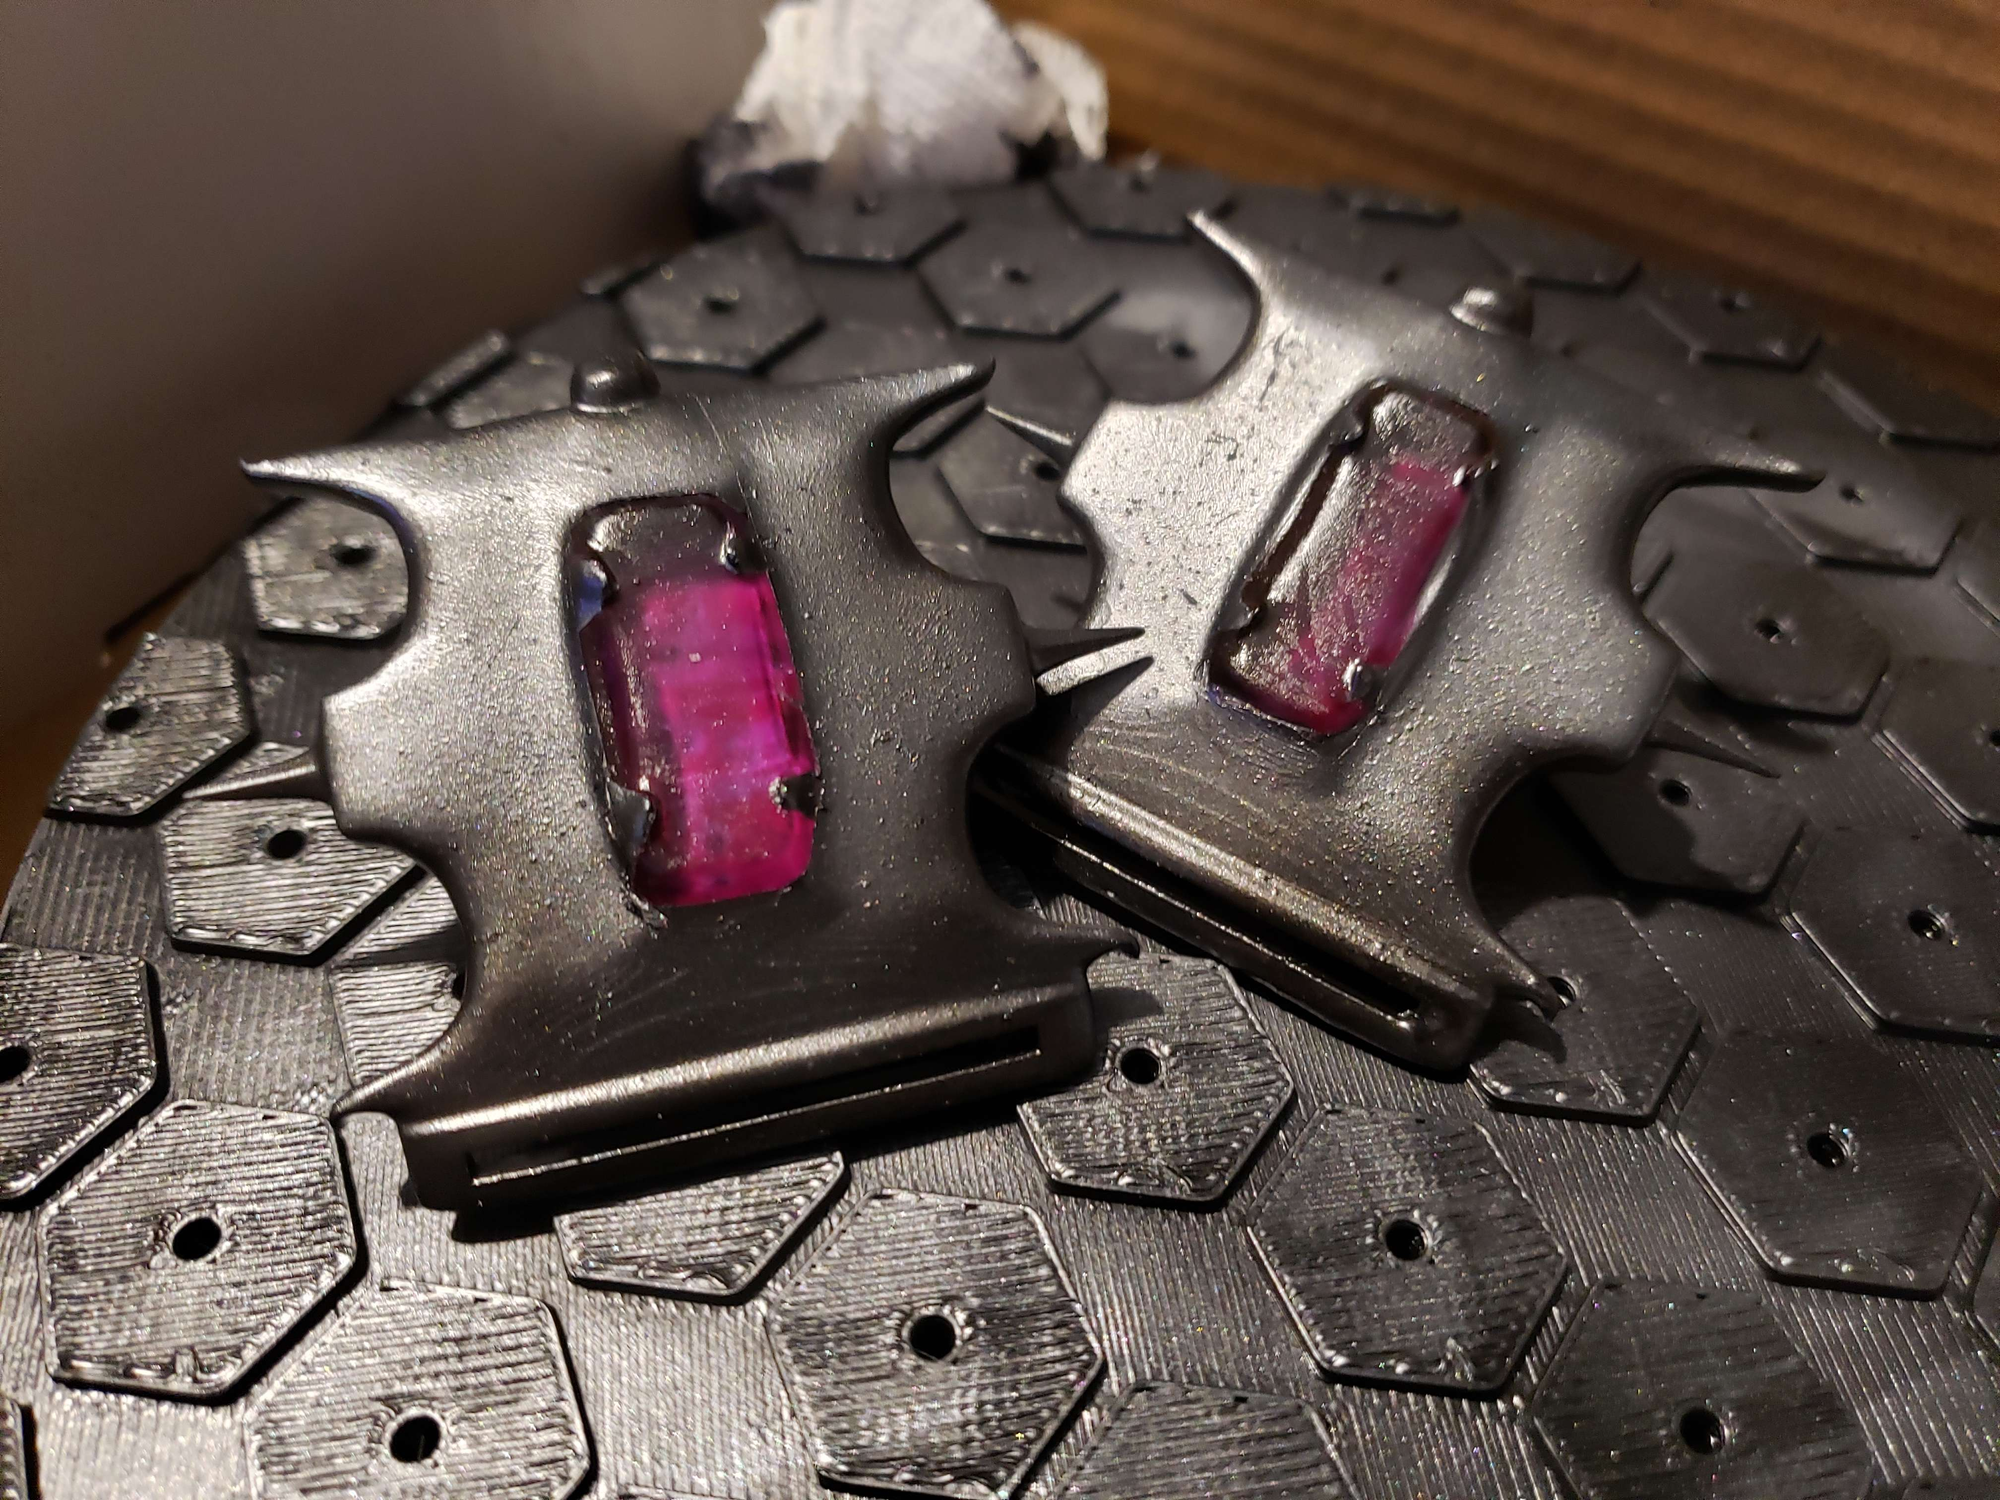
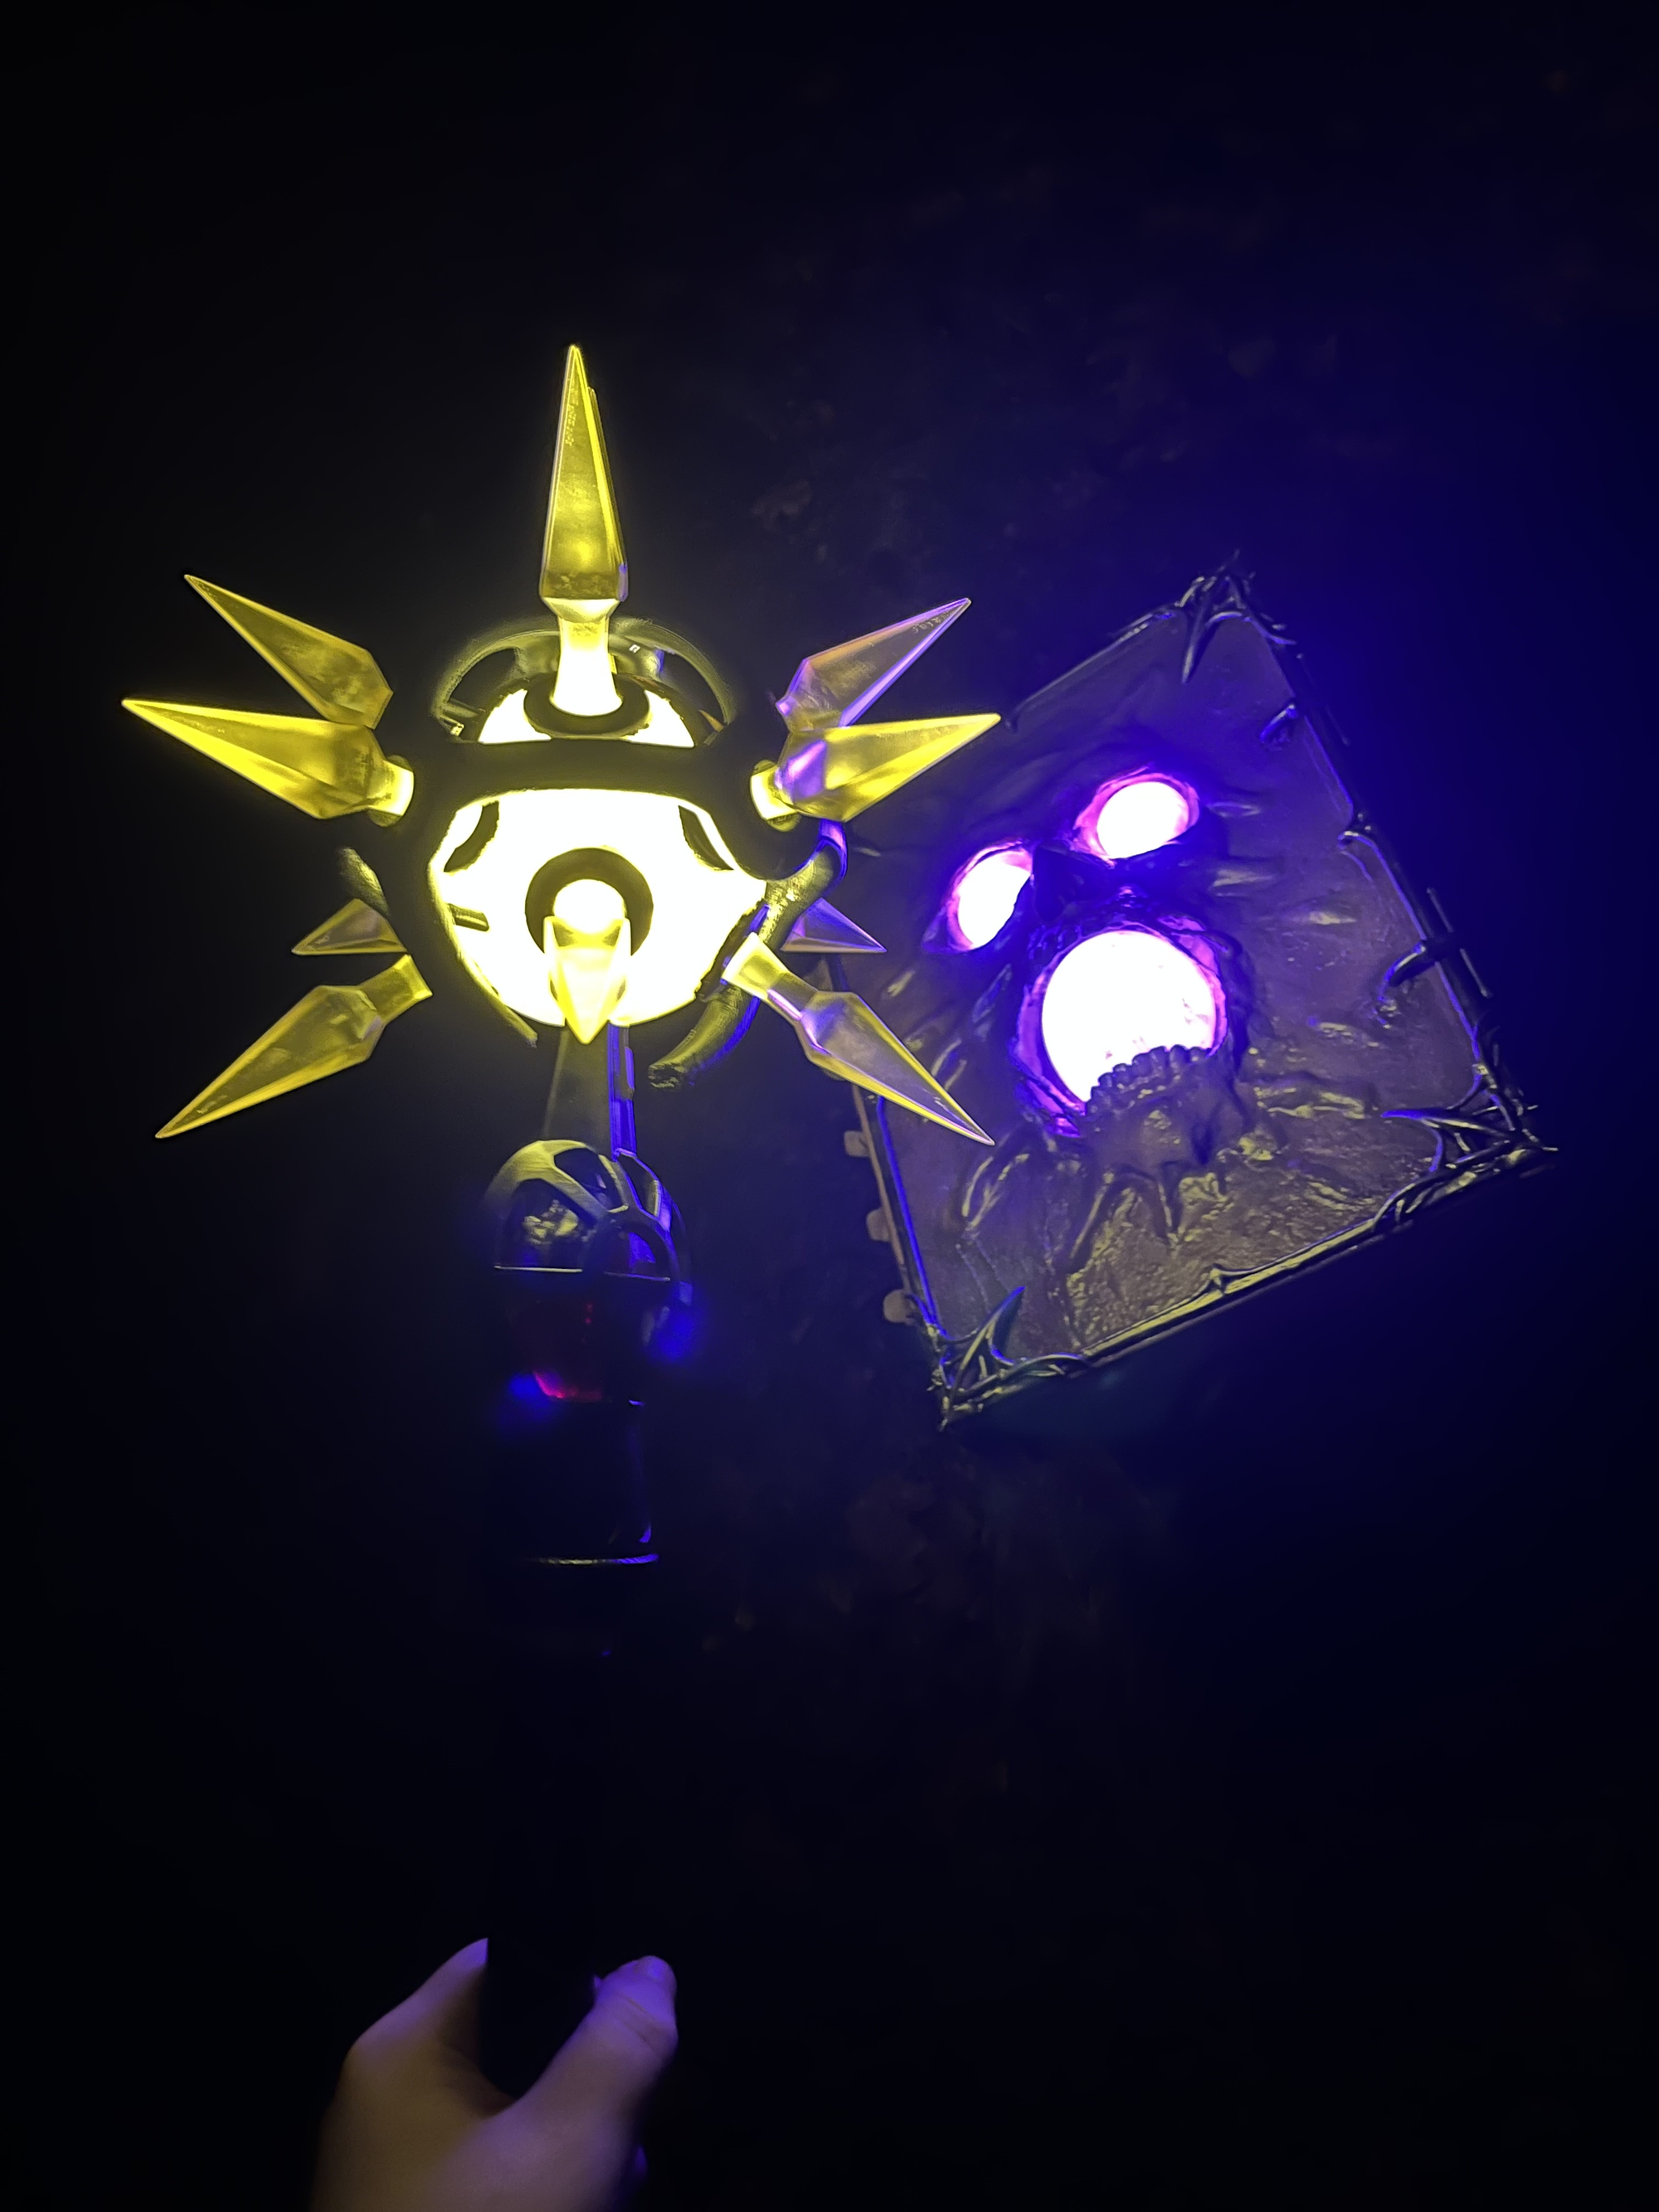
Lighting & Gems
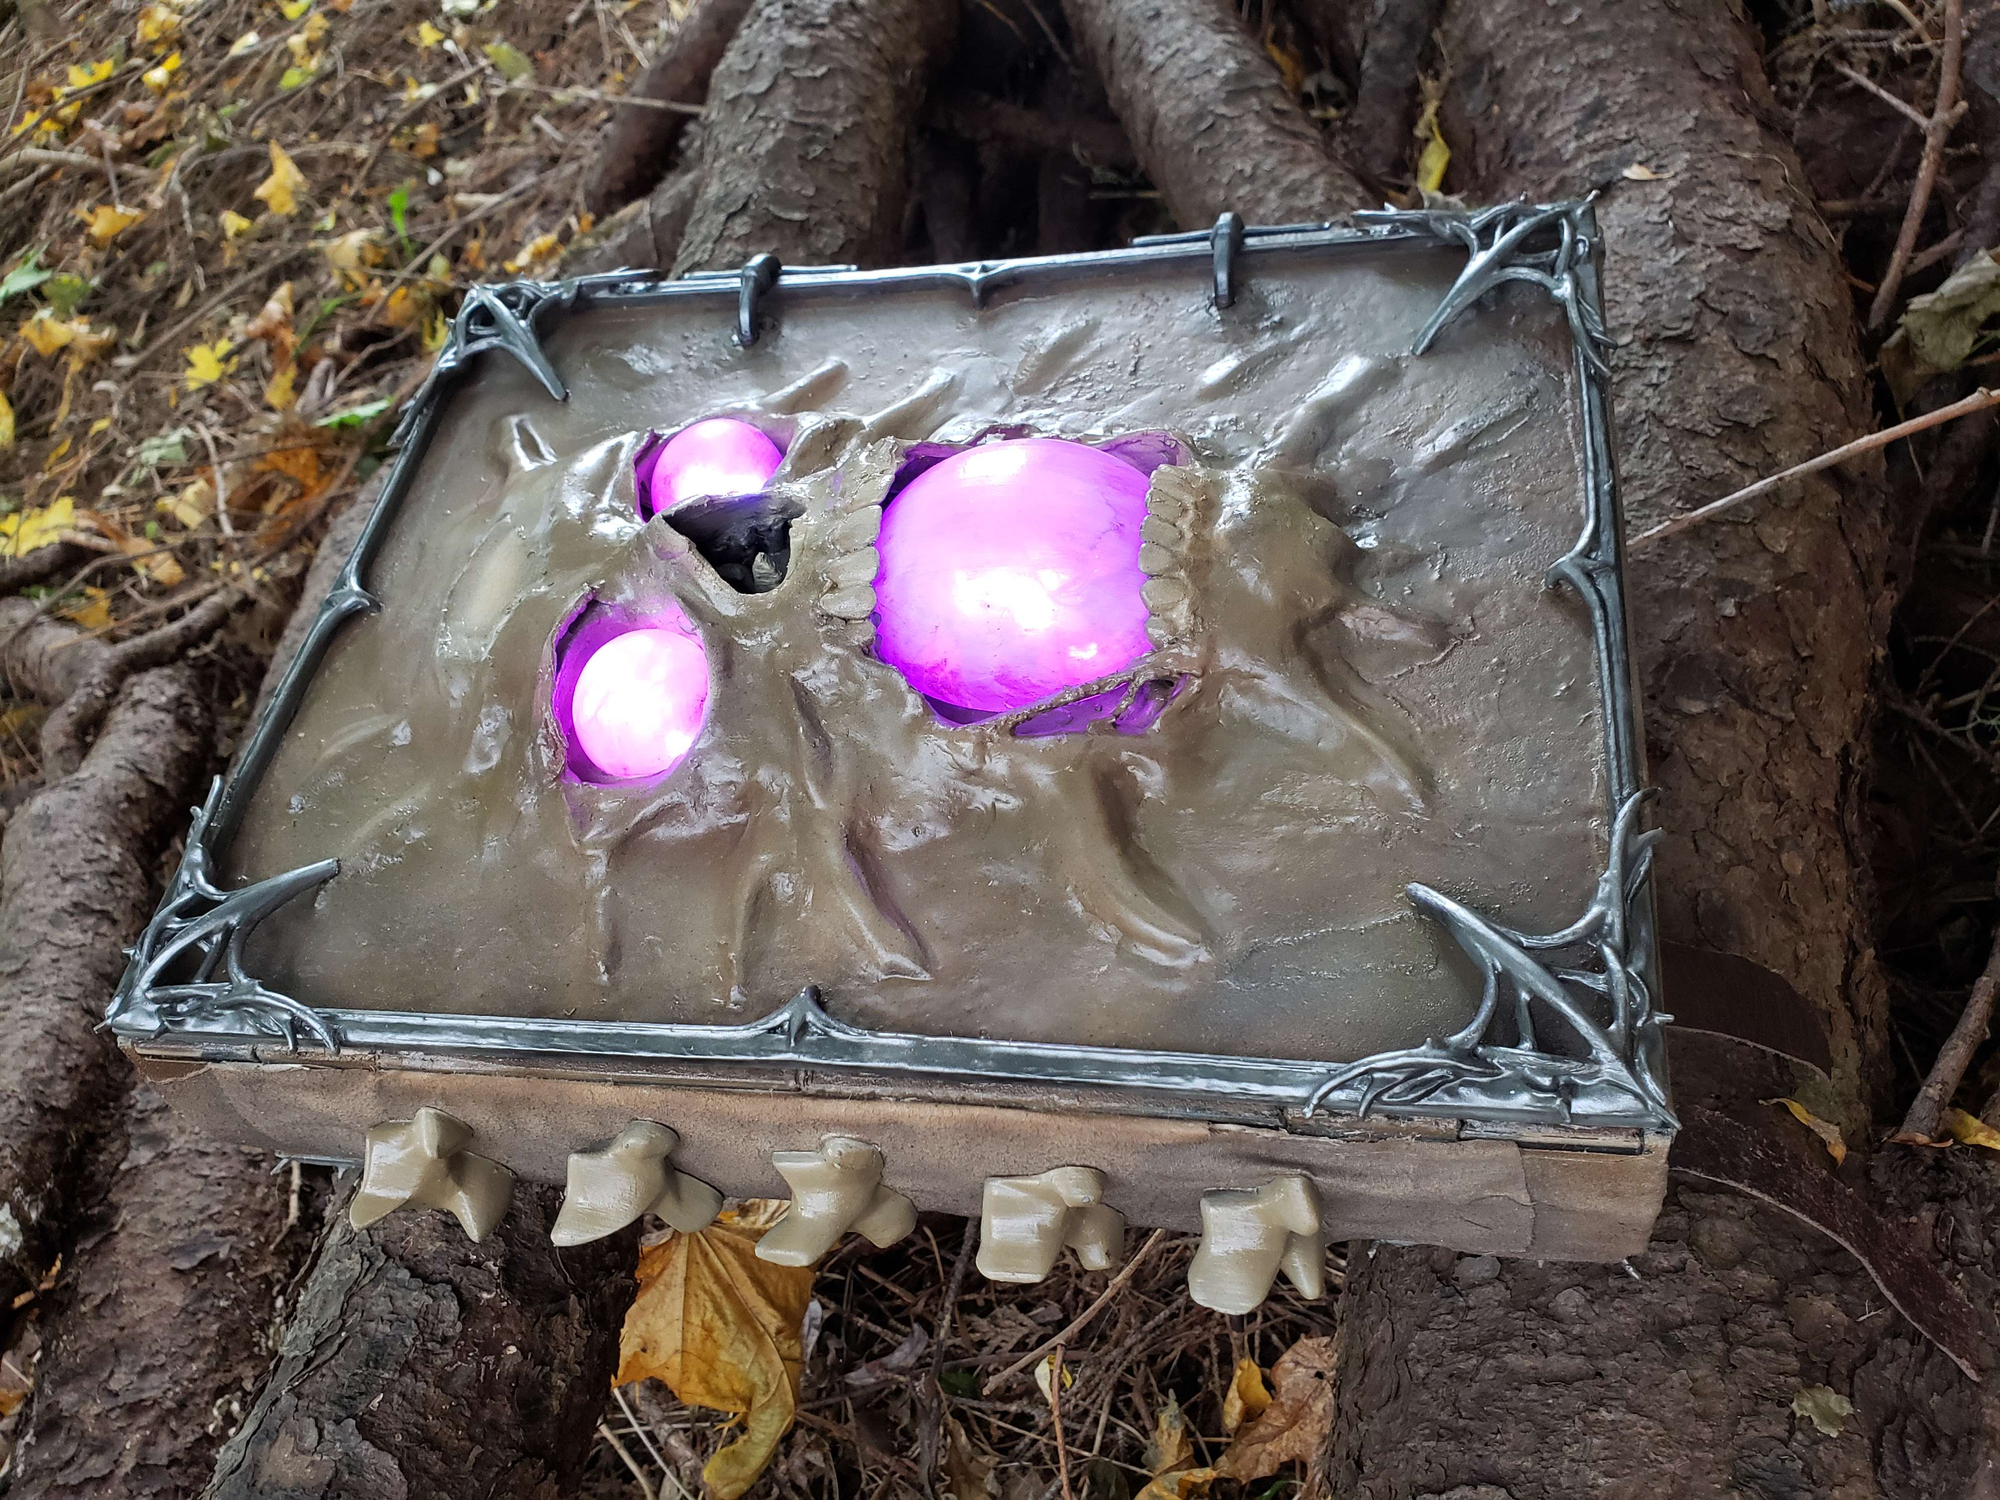
The wiring for the fairy lights were fished through the back of the front cover (empty space in the forehead) and through small holes from the right eye -> through the mouth -> and through the left eye, crumpled a bit into balls and to mix the two colours together.
After this, the gems for the eyes and mouth were inserted and glued into place. The mouth gem was a tight fit after squeezing it, and it is practically a friction fit.
They were masked off again because I then painted more and added more liquid latex. I got indecisive.
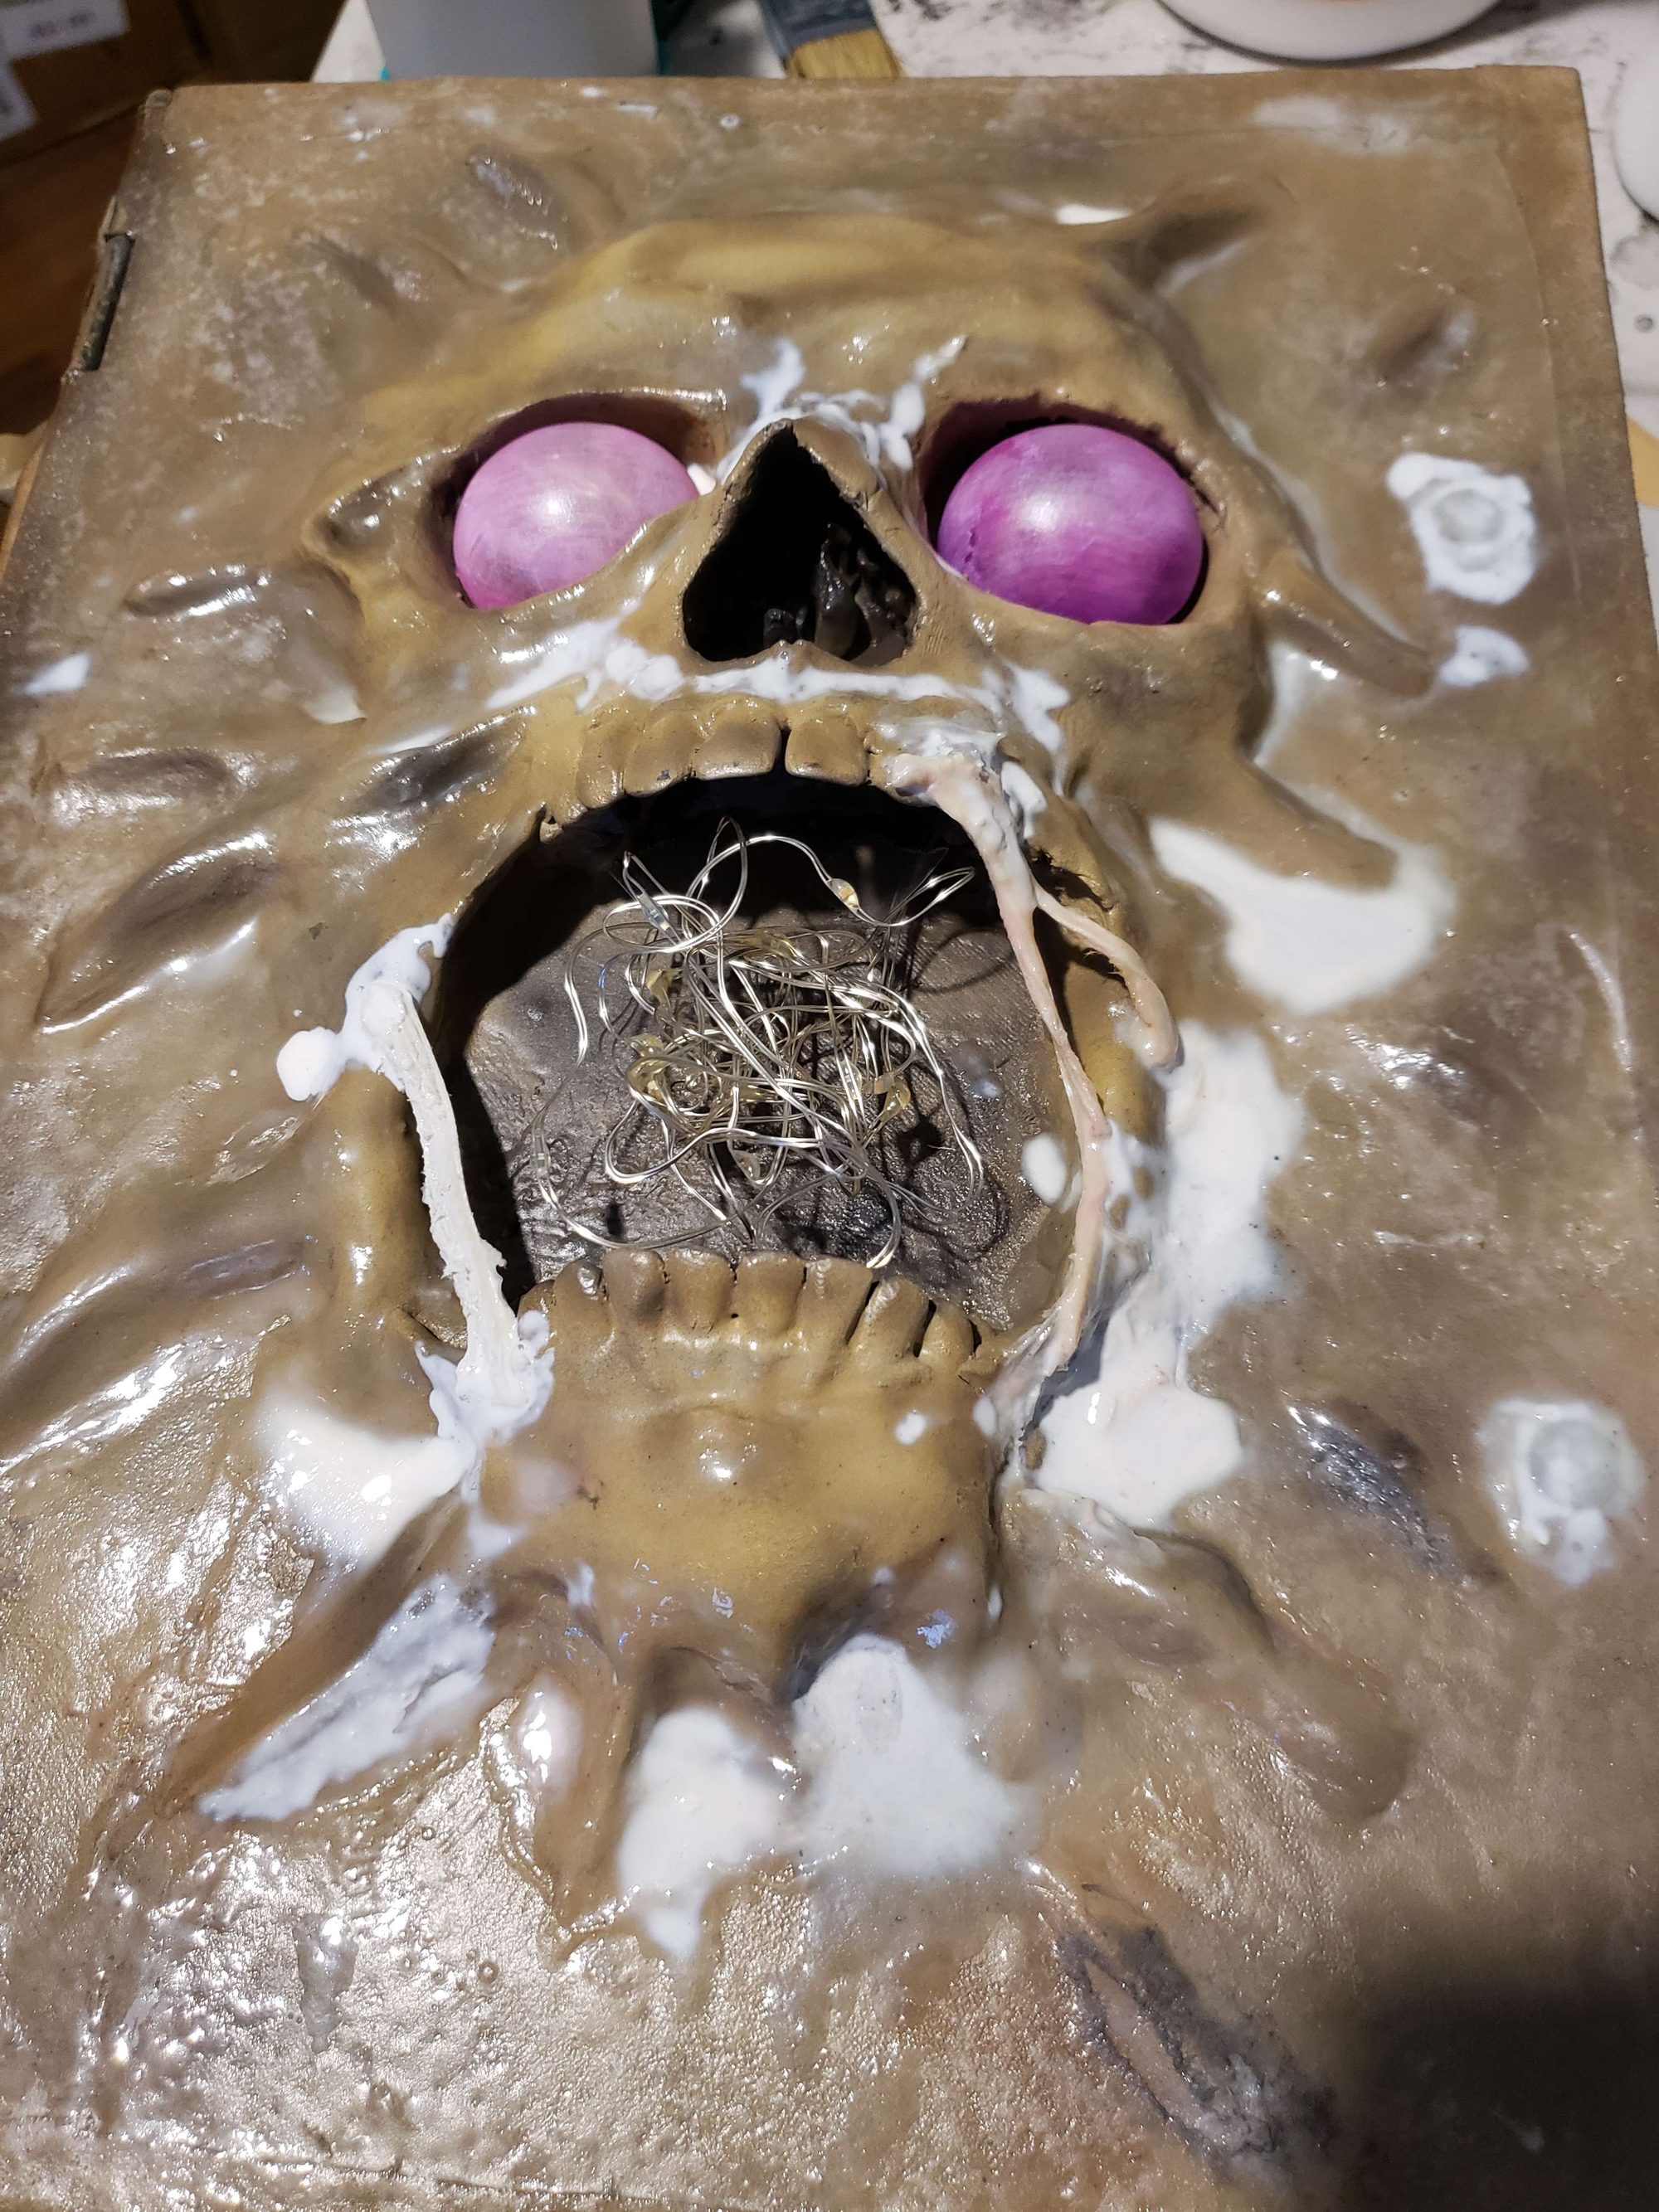
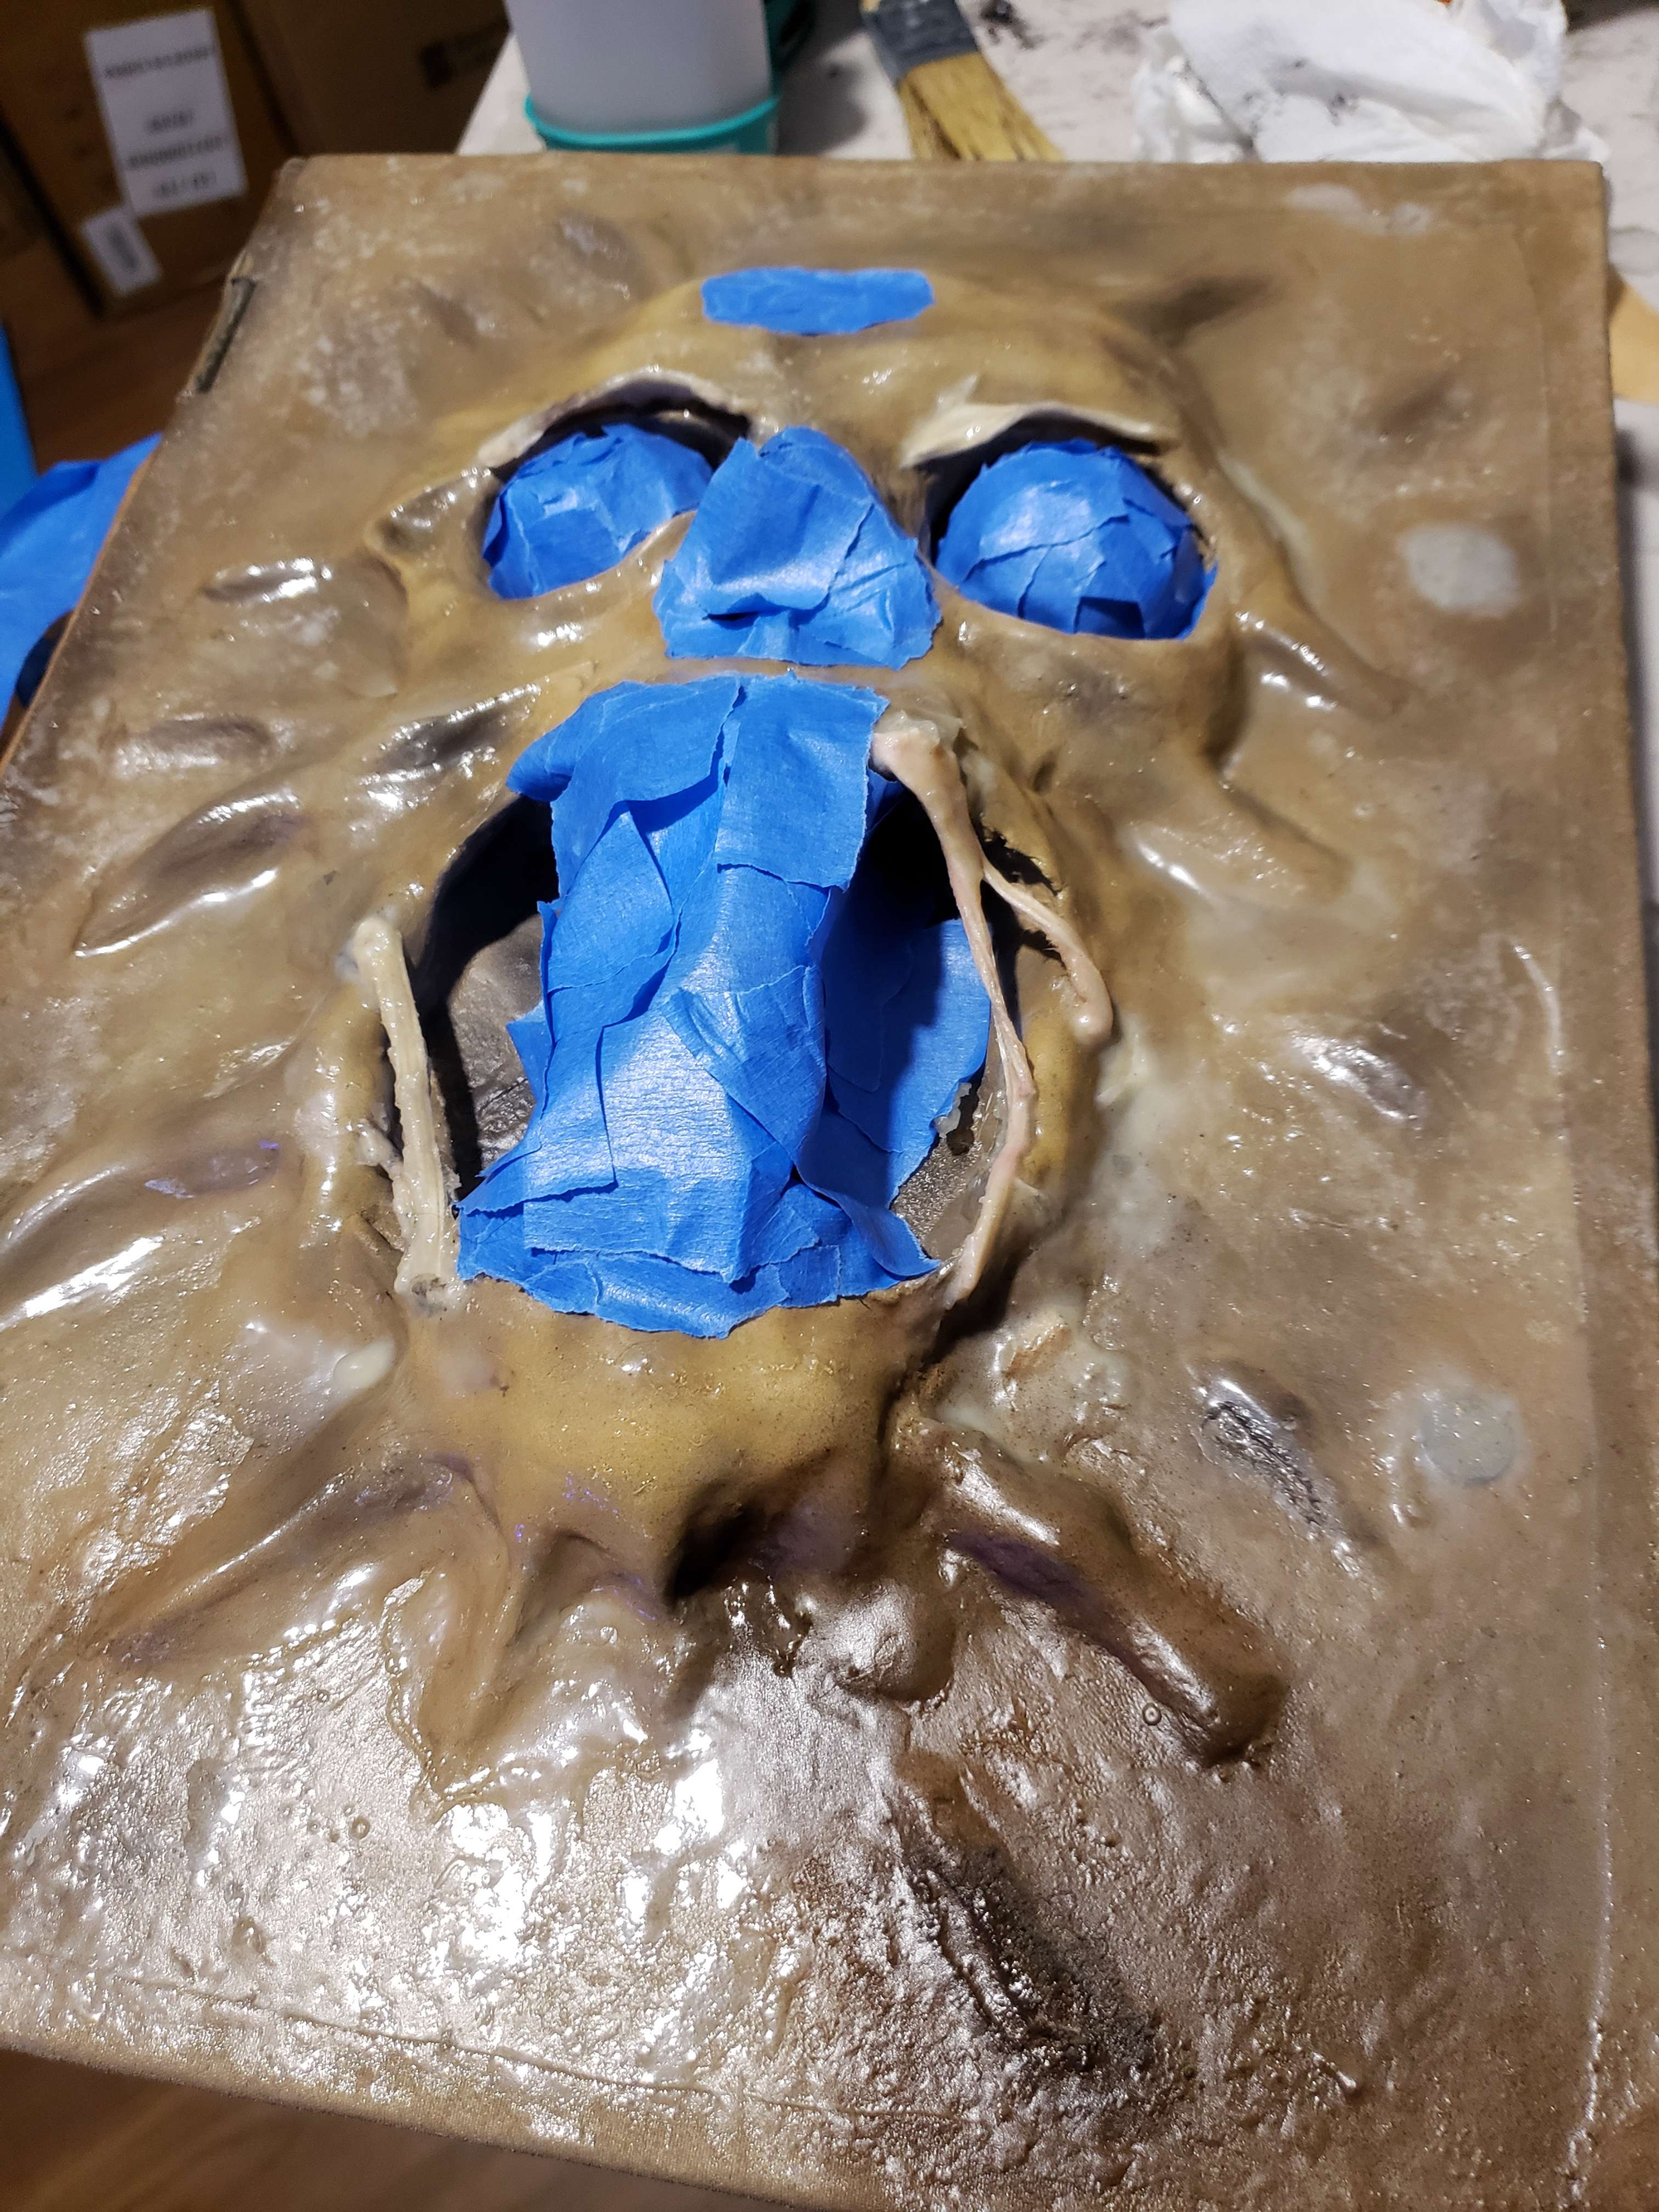
Showing how the lights were fished through. Get your mind out of the gutter the white is latex!
Pages & Book-Binding
The two stacks of pre-bound inserts were glued using book-binders glue together on just two pages, then a piece of cloth was glued around their spine/back for strength.
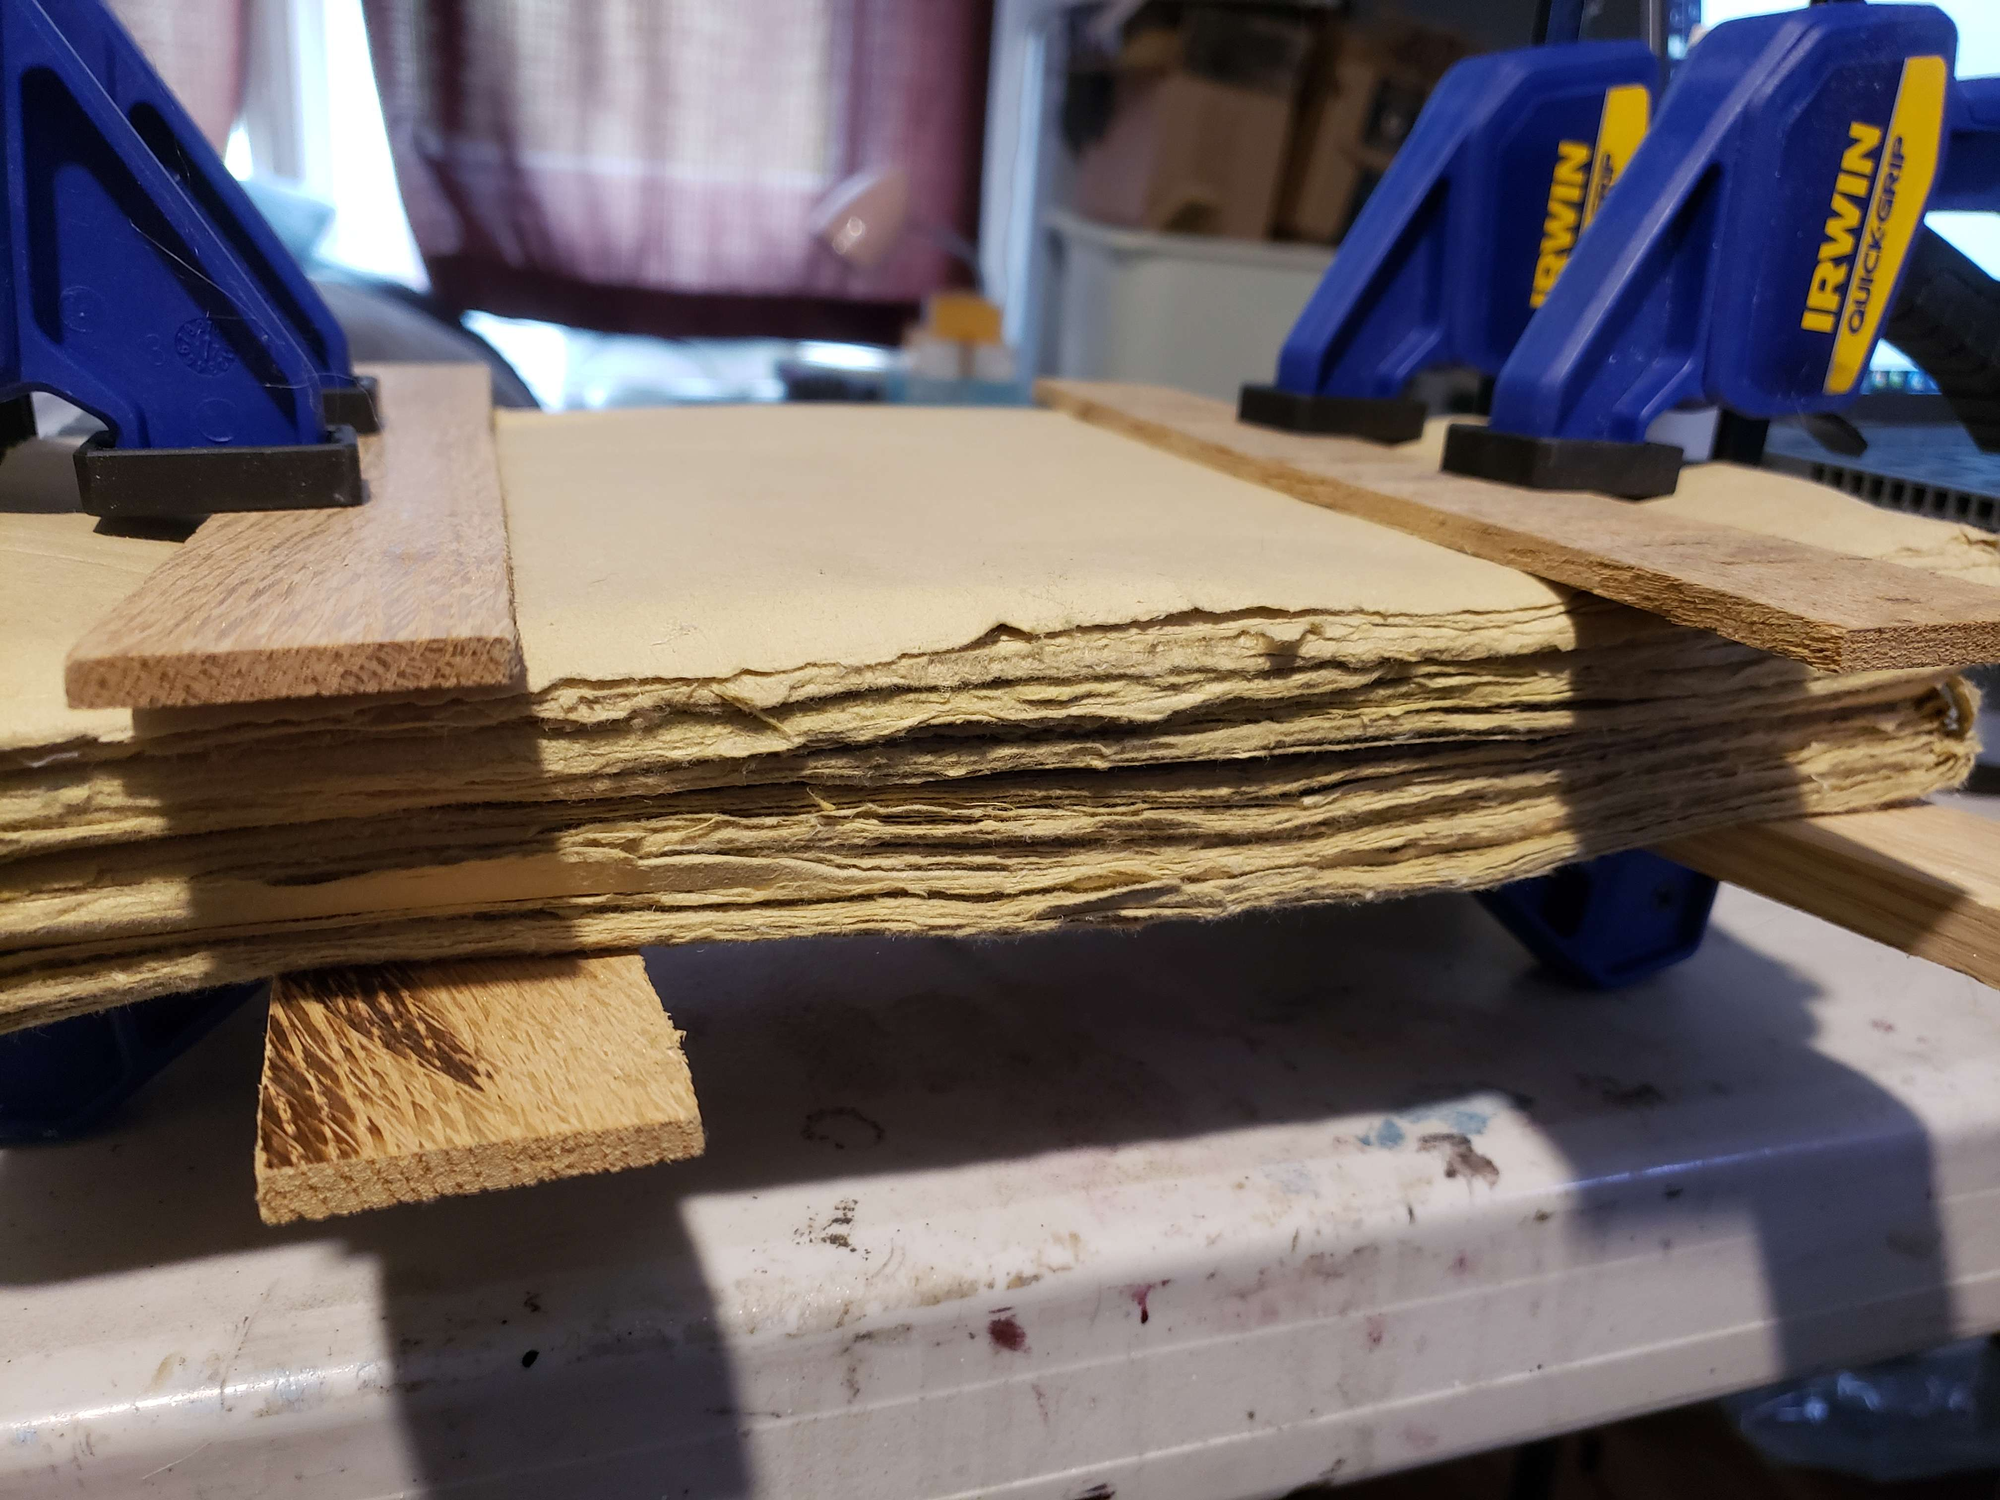
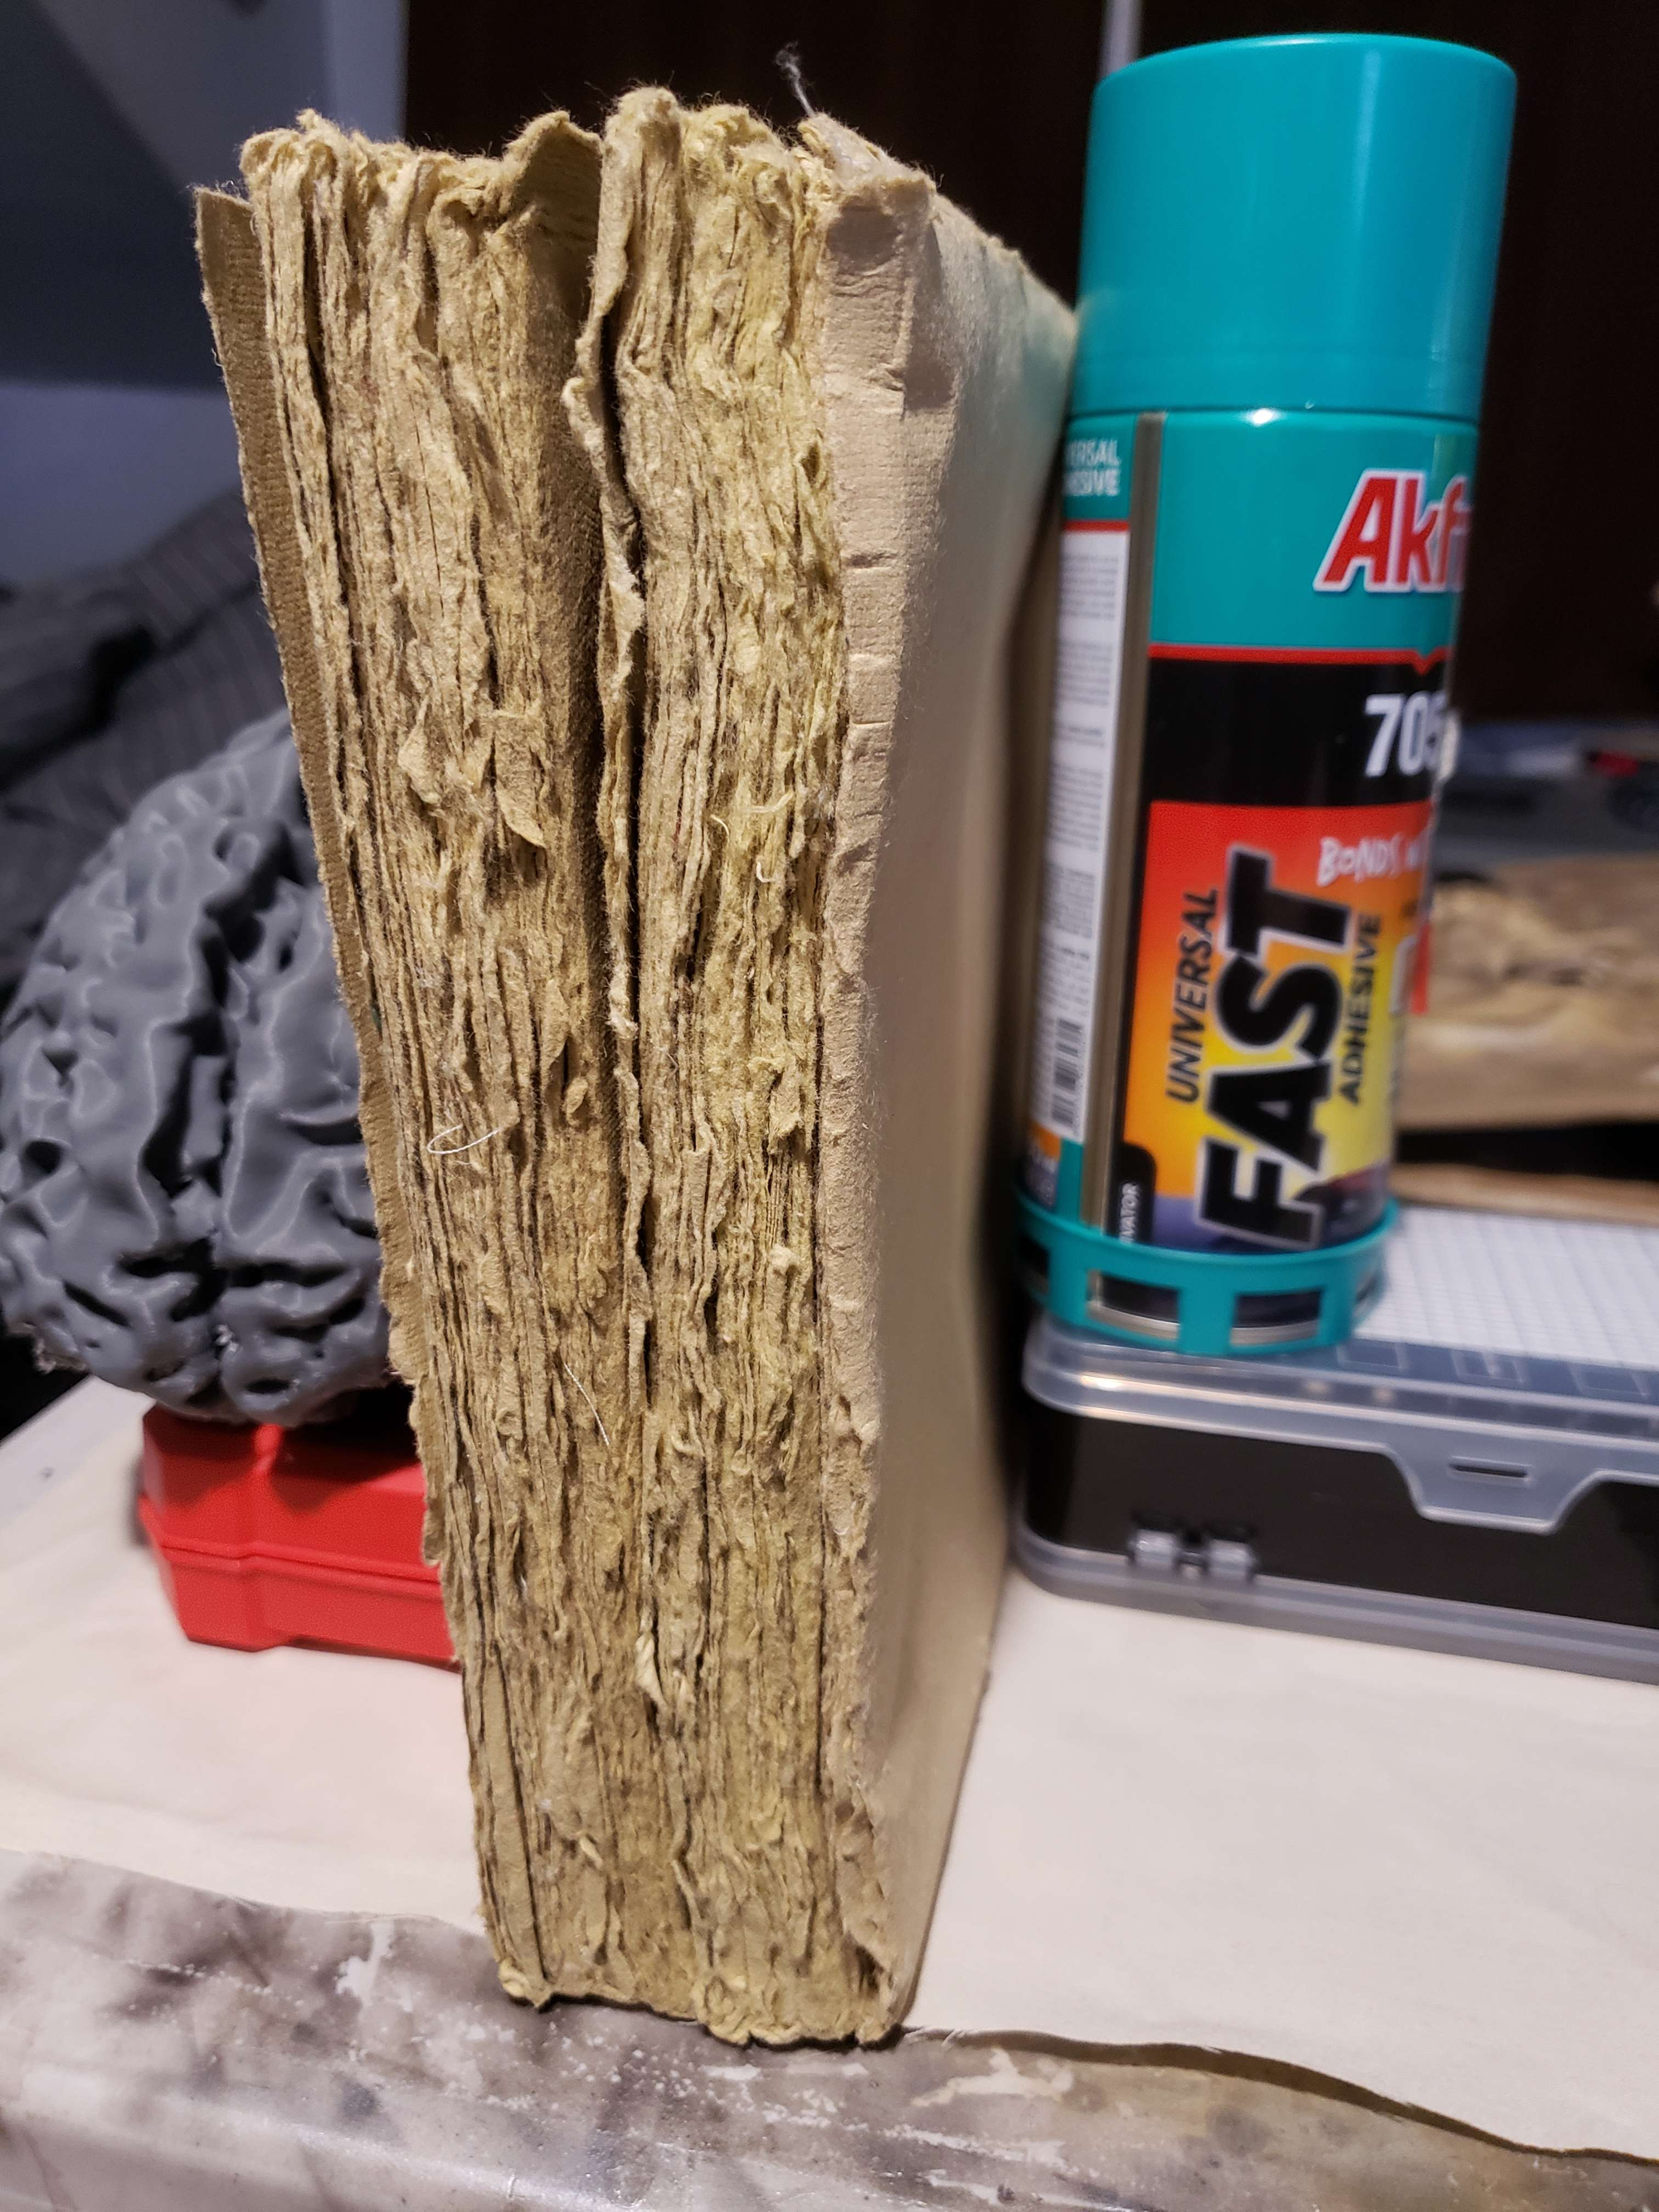
Combining the page inserts and adding the cloth helper to the spine of them only.
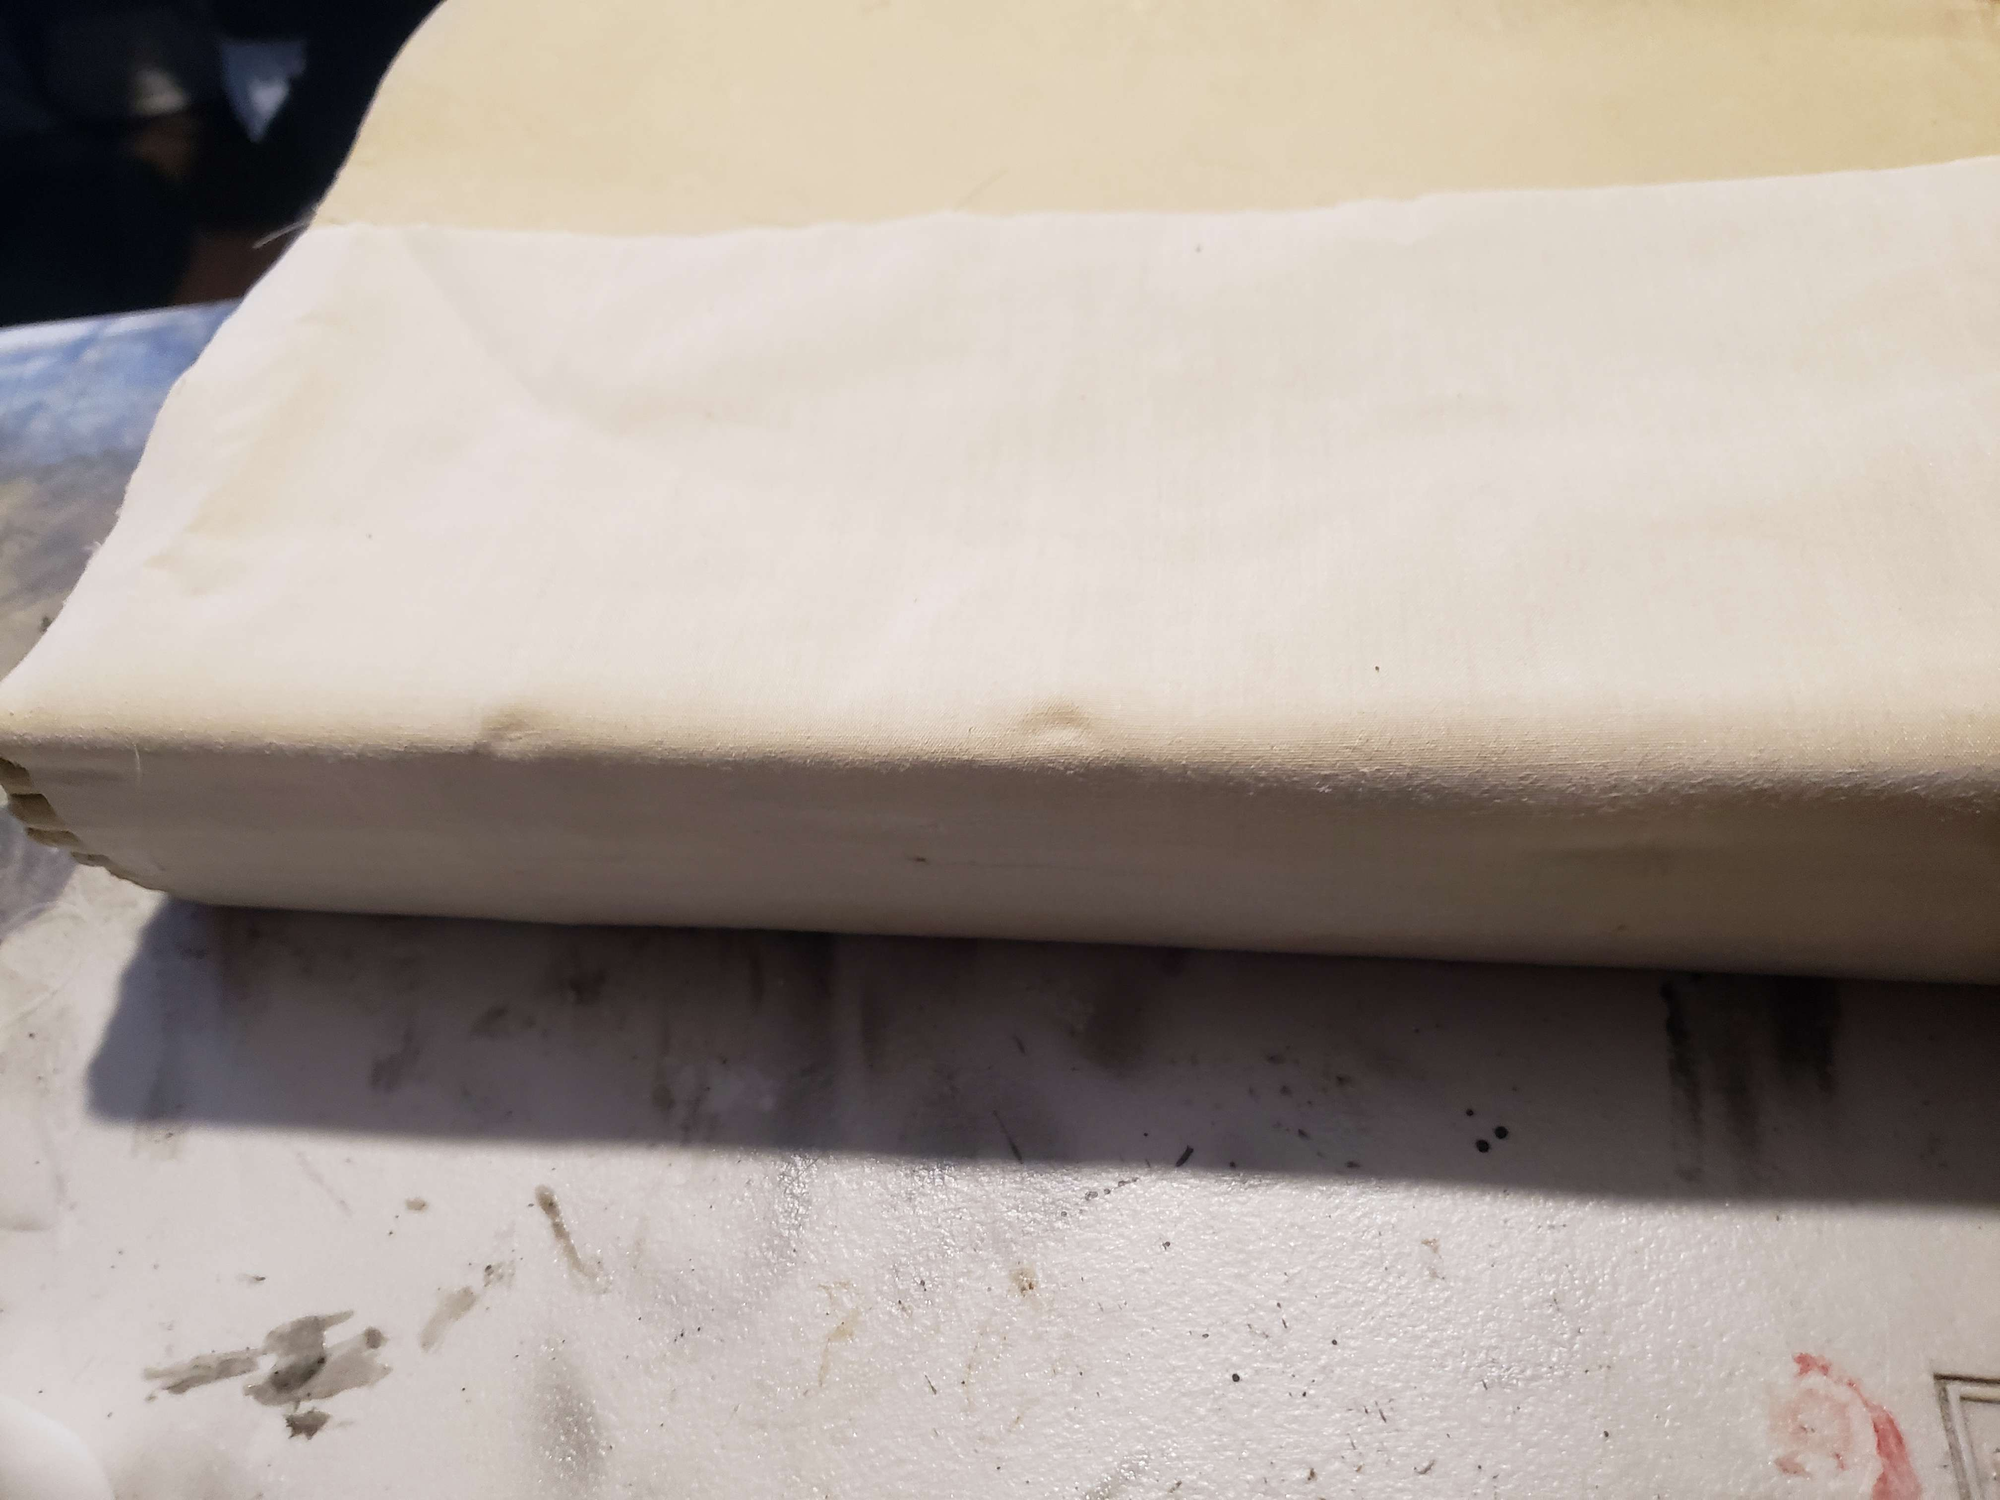
Following several guides on book-binding specifics about page inserts, I then added another piece of cloth to the back spine. It was glued to only the spine, not going up the pages at all. But the cloth extended to at least half-way (or more if you want) onto each side of the covers, and only those parts were glued to the covers. This way, the spine of the pages would "float" after the glue sets.
Once that glue set, I used brown packing-paper on the inside glued to the complete inner part of the front cover, all the way up to cover the whole first page of paper. I repeated this for the back cover. This would ensure strength in keeping the pages inside, while also hiding crimes of glue and make it look pretty. Apologies for lack of photos here.
I did cut a hole into the packing paper for where the lights and batteries would go into the forehead, and glued some paper overtop with metal and magnets such that I can access them whenever I want to turn them on/off.
For the text on the pages, I went to around the middle of the book and used transfer tape to transfer my vinyl cuts to each page.
Misc
For the bookmarks, I cut the leather into strips and bonded them to make them longer. I burnished them with a rounded piece of wood on the fluffy/fuzzy side to make it smooth, then glued them at the top hidden in the spine of the pages.
The spine-bones were glued onto the exterior piece of cloth on the back hinge. This way they could move around semi-freely even if the back hinge was bent.
The filagree was printed in 4 parts per side, and attached to each other using acetone to chemically bond them as they were all ABS. I then glued both pieces onto the covers, using clamps to make sure it was even pressure. For the front cover, some of the tips embedding into the face were clipped due to the clay features added.
The buckles needed to have a gem-like portion, so when it was still clear resin, they were airbrushed a purple-ish alcohol ink. The backside of where the transparent "gem" was would be air-brushed a bright silvery metallic paint. Then I masked off just the front part of the gem then primed & painted the rest of the buckle, removed the masking tap and clear-coated for the shine. The reason for the silvery metal paint backing was so it can catch light better through the transparent resin in the front. The eyes were normally brushed on with the inks, but with different mixes.
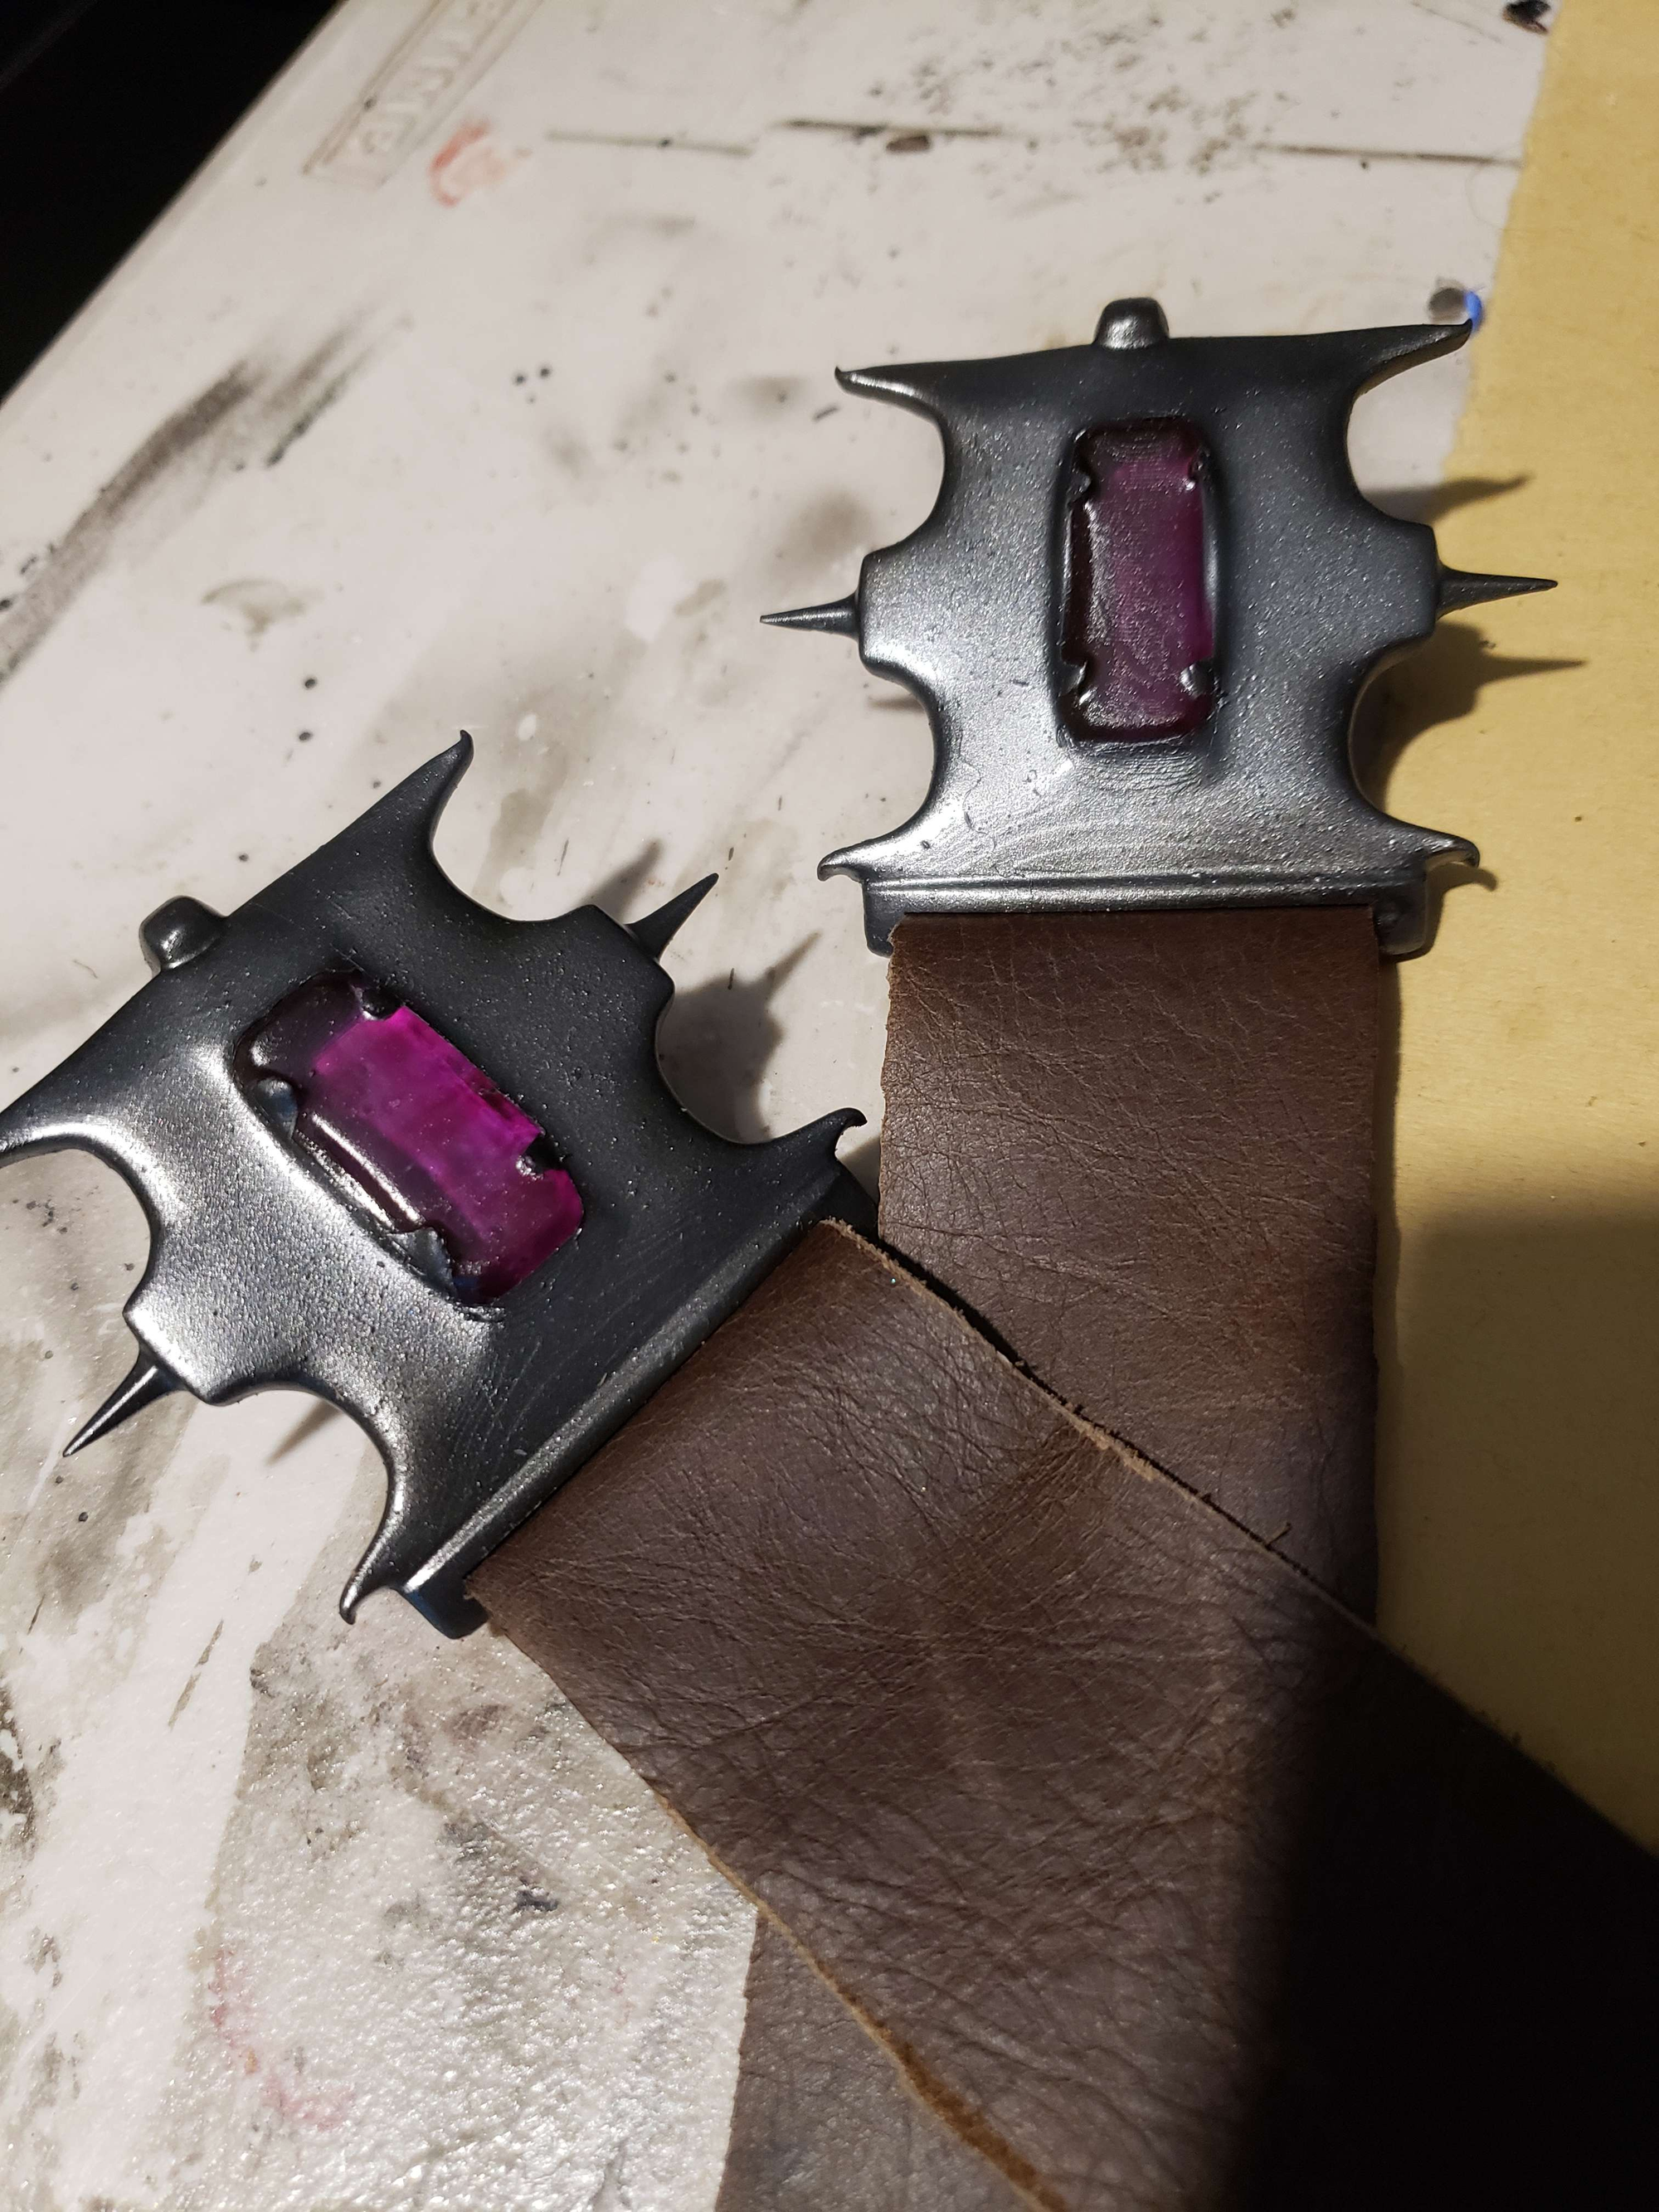
Leather was wrapped into the slot made in the two buckles, cut to length and glued shut, then glued onto the back cover of the book with such a length that they would be able to be pulled over the front cover still. Small magnets were glued onto the end of the hook on each buckle/latch so it would connect to the embedded metal.
Finale
My apologies of the verbose yet semi-rushed nature of this post. I had debated on releasing my "making of" the Necromancy of Thay book for several months as I did a poor job documenting my process of it. I decided to go through with it anyways just to get it done and over with, after I have had several people reach out to me about it.
The only things missing from this are the fancy emblem embossed on the back cover and the fancy designs on the spine of the book. I couldn't manage to get a good enough quality image to get the pattern nor emblem, so those will have to come later.
In the end, the whole book weighs about 5-6lbs, mostly due to the pages. It's crazy how big it is as the pages are actually slightly larger than A4 size when I received them.
If this guide in any way helped you, or you appreciated my free files or tips etc., I would love to see what you made with it! Feel free to share and tag me on Twitter, Instagram, or anywhere else where I have a social, or otherwise credit with a link to here or a social. I would love to see your cosplay or prop-make!
Additionally, if you would like to tip me for the files, you can do so at my Ko-Fi below.