Bambulab Advanced Setup with HomeAssistant, Grafana and Postgres
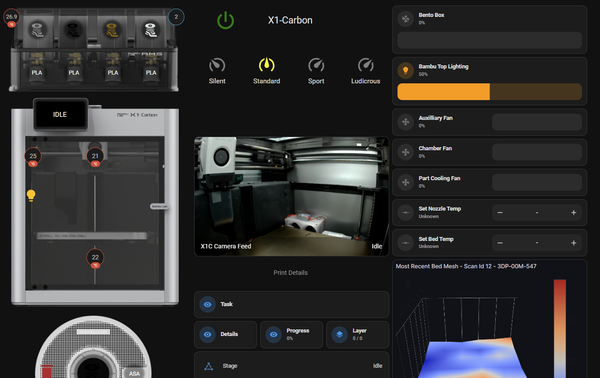
Grafana Dashboards Updated 2024-10-22
Works with X1Plus!
This setup is more complex than the previous two (Basic Implementation, Dashboards), as it requires multiple palettes in NodeRed to enable us to FTP fetch from the printer, a few new routines for you to do per print, and setup (optionally) some data monitoring in Grafana and a database. Additionally, this will require the use of a metering smart plug to calculate energy costs, and more.
This guide will help you go over all requirements separately to prepare you for the configurators and setup. However, as this is a more advanced setup, I will be leaving some technical details out for brevity.
In addition to the below requirements, this assumes you have completed the previous two guides linked above
Software Requirements
- Grafana setup and running (Recommend as a Docker Container for simple setup)
- Partially Optional: Postgres SQL Database (I'm using 13, can use higher versions. Recommend as a Docker Container for simple setup. If using HAOS with Addons and you cannot use a separate docker, some users had luck with this addon). If you don't want this setup, only about 15% of this is applicable to you.
- A HomeAssistant sensor that has your electric rate in terms of cents per KwH. Suggestions to set this up are discussed briefly.
Hardware Requirements
- Bambulabs X1 Series, P1 Series or A1 Series printer
- Energy Monitoring Smart Plug - I use the following (Aff Links)
- Tasmota (US, EU, UK, AUS)
- ESPHome (US, EU, UK, AUS)
Any energy monitoring smart plug should work as long as it tracks total kwh, or can be flashed with ESPHome or Tasmota to track it.
Amazon
NodeRed Setup
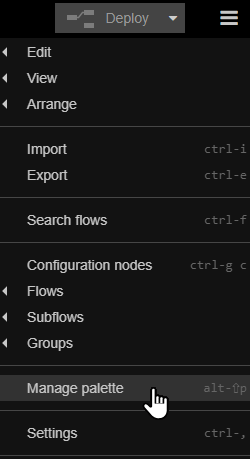
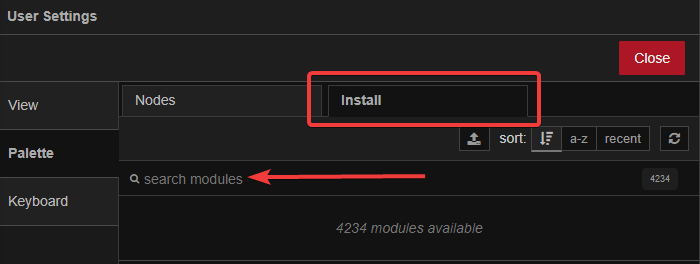
You will need to install the following palettes in NodeRed before continuing.
Palettes
- node-red-contrib-home-assistant-websocket >= 0.62.3
- node-red-contrib-postgrestor-next >= 0.0.9-c (only if using postgres)
Next, you will need to create the directory /data/fetched in your NodeRed installation (such as a Docker install or HA Addon). Additionally, ensure the permissions on this path are rather loose, as the NodeRed flow will create an additional folder inside, and add files to it.
If you only want the FTP image fetch, or just the database setup, I recommend continuing this guide to setup both (leave fields blank in configurator) then just delete the NodeRed "group" you don't need.
Complete the below form to download the advanced NodeRed Flow.
Printer Name is the name of your printer. Same as in the Basic Implementation. NOT the same as "HA Printer Device Name".
The postgres fields are optional. If you do not want to setup the database portion, leave it blank and then delete the "PostgresDB" and "PostgresDB Row Updater" groups in the flow after importing. The database will store information on every print your printer does, including electric usage and cost, as well as amount of filament used in grams, final status of print, and duration, for the unique printer and timestamp. It additionally will have a secondary table which stores a single row (non-historical) for your printer's electric usage.
HA Printer Device Name will be the device name of your printer as HomeAssistant sees it, as described in the Dashboards guide. Keep in mind, this is different from the "Printer Name" field. HA Printer Device Name is unique.
The HA Electric Rate Sensor Name will require you to have a sensor in HomeAssistant that provides your electric rate in terms of cents per KwH. You can check if your power supplier offers an API for their rates, or if HomeAssistant has an integration to fetch it. Ig not, you can setup a web-scraper automation to fill a template sensor with this information from their website, or just hard-code a value in a template sensor. Fill in the sensor name here without the prefix sensor.. If you are not using the Postgres DB portion, you can ignore this.
HA Plug KwH Sensor Name will be the sensor name of the TOTAL lifetime KwH of your metering smart plug. Again, without the sensor prefix. If you are not using the Postgres DB portion, you can ignore this.
If you wish to still use the DB for recording print information, but do not want to metre the electric costs or rates, I recommend setting up fake sensors in HA that always have the value 0, and using those in the configurator.
Import this into your NodeRed Flow and test to see that there are no errors.
If you are experienced with NodeRed with HA nodes and want a clean slate or replace the existing server id your own pre-configured HA server id, you can use this tool to modify the flow json before importing.
If you are importing more than one advanced flows for multiple printers, I highly suggest learning how to use the tool above to reduce the clutter of HA servers in NodeRed. Otherwise, you will end up with multiple duplicate HA server configurations.
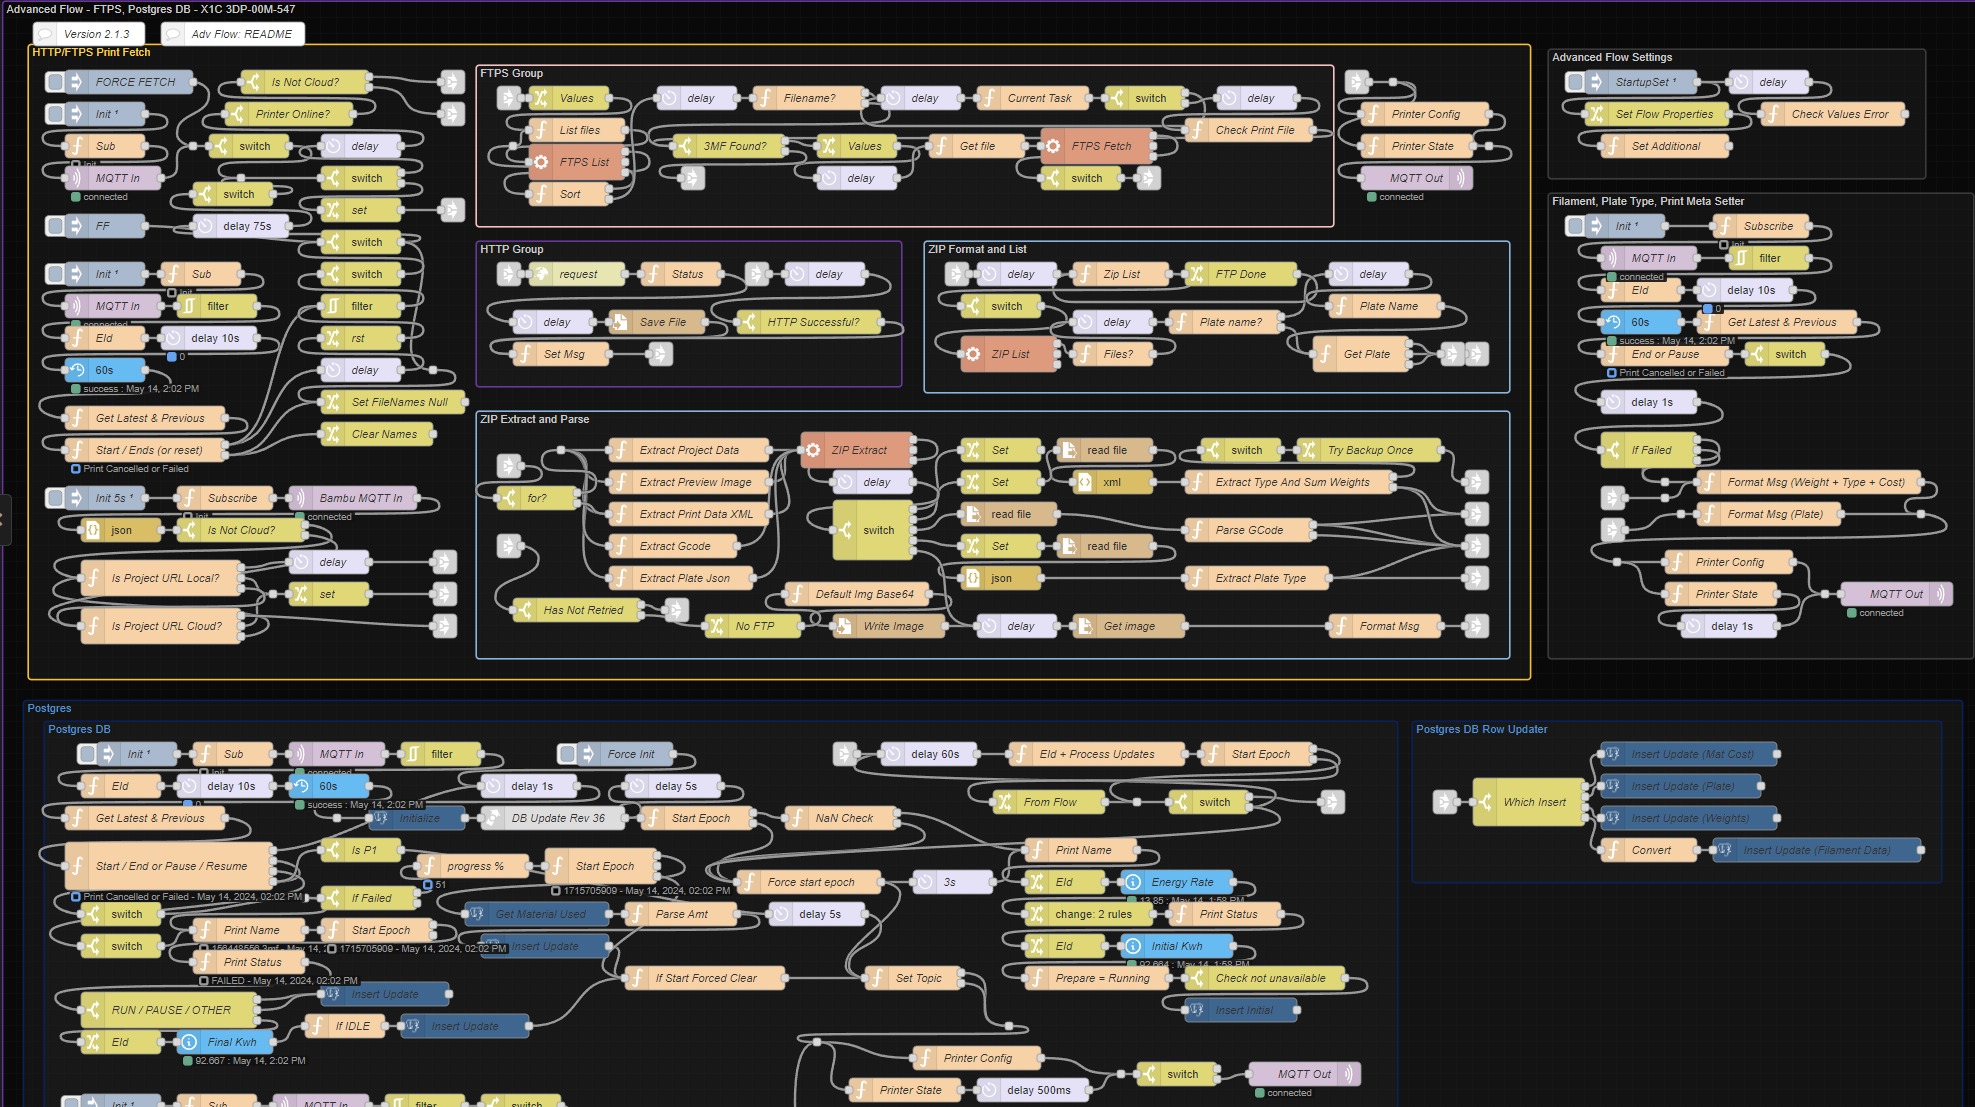
Anytime you start a print, two flows will launch. The first will FTP into the printer and download the 3mf file being printed, extract the preview png, weight and filament type from it. The second will fill in and start tracking the print into your postgres DB, and when it pauses, resumes, fails or finishes, it will be updated.
Should it fail to fetch anyways, there will be a default image created for the print, and the weight & print type will be 0/empty in the database.
With the 'P1P Cloud Mode' enabled, it will use HTTP GET instead from the cloud server.
Note: Selecting the menu option "Print Again" on your printer's screen after a print will not track your print's metadata!
One note regarding the grams / material used value in the DB - on a failed or cancelled print, this flow will adjust the material used by the percentage of print progress completed. This is not 100% accurate, but is the best estimation we can get without being extremely complex. It does not account for skipped objects.
New in 2.0.6/2023-09-19:
The same applies for material used cost, which is parsed from the gcode file. On a failed print it will modify based on the progress completed. Also note, the cost for a print is determined by the gcode file, based on parameters set in bambustudio/orcaslicer. For the most accurate results, please use filament profiles with correct cost/kg values.
If you are updating from before 2.0.6 and have used the db and want the material_used_cost to apply to previous prints, there is an explanation on how to retroactively apply a "good enough" estimate for each print. Please double click the "NOTES 1" node at the bottom of the postgres DB group and read it in there. This is only applicable if you use the postgres db component.

New in 2.0.7/2023-10-06:
Similar to the material used cost, 2.0.7 introduced multiple new features which may require a manual update. Please read the "NOTES 2" node here for more information. This is only applicable if you use the postgres db component.

Grafana Setup
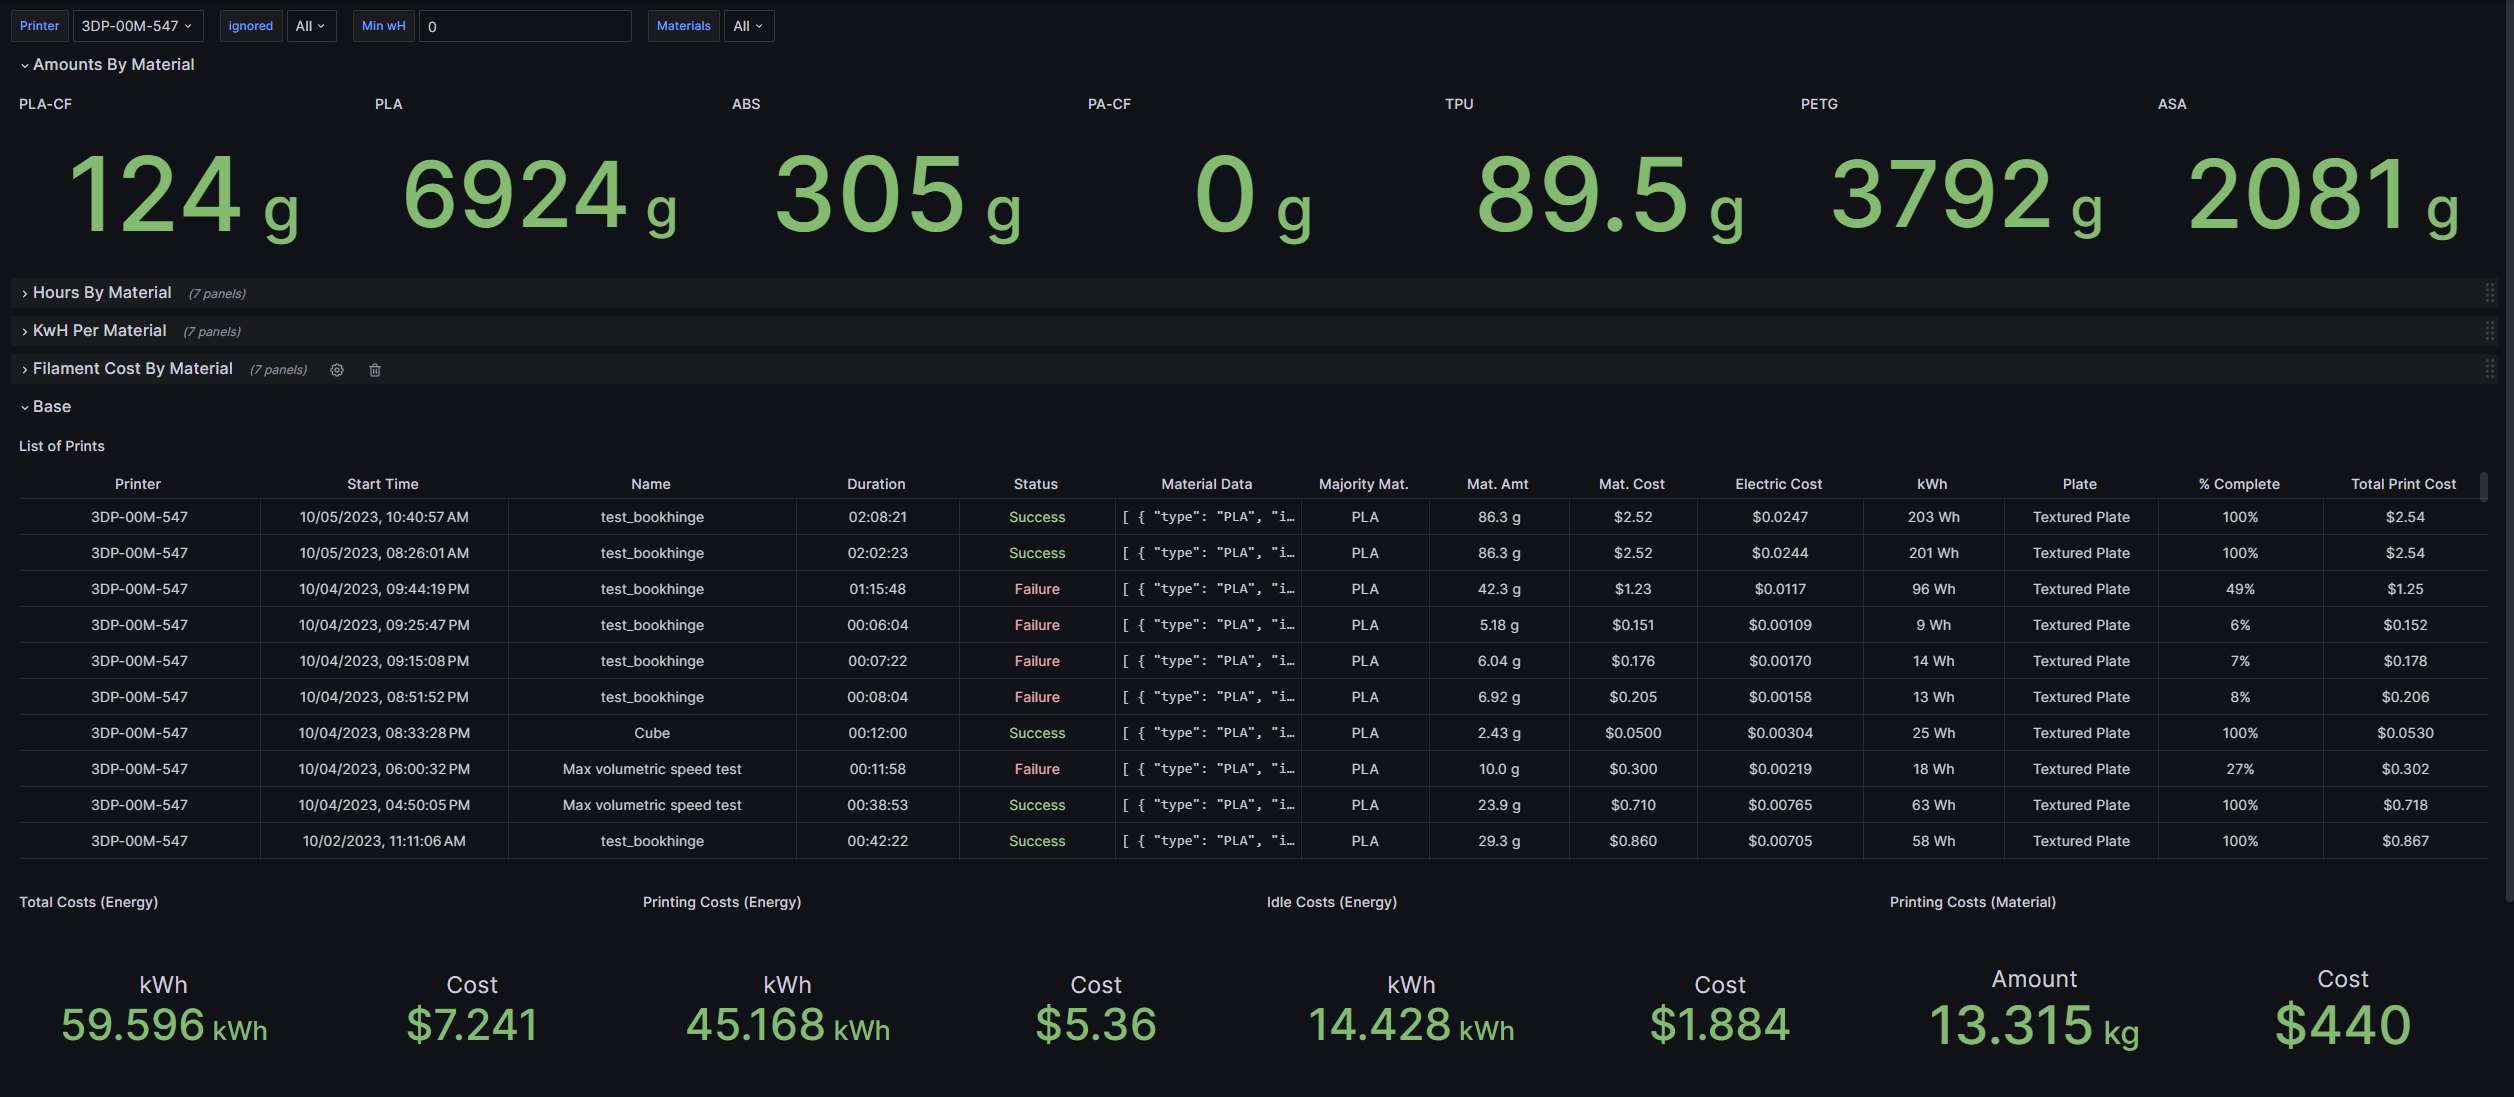
This Grafana setup is not meant to look amazing or be functional on its own, but more of a playground for creating some tables to then embed as webpages in Home Assistant. As such, it currently has one table, 3 stat panels and 2 messy charts, and pick what you like!
These tables (as well as the database setup) are already configured to work for both FDM and Resin prints and will automatically change the units for material used from grams to ml. It selects by printer name in the dropdown, extracted from the electric usage table. It also by default filters out prints with at least X amount of wH used, so you can filter out immediate canceled prints for example.
Requirements
- Grafana instance up and running
- A Datasource for Postgres has been set up for the same DB you intend to use. For a seamless import, name it
3D Prints - PG13. Otherwise you will need to change the datasource on all panels and variables in Grafana. This is really easy to do as it asks you on import to select a datasource to use for it, so don't worry about the name.
Note: Due to how I have the DB table for electric tracking per printer as updating a single row each instead of creating historical amounts, you should not rely on the "Idle Costs" and "Total Costs" stat panels for a given time period other than "All time". "Print Electric Costs" will always be accurate for a given time.
Simply import the attached dashboard and configure any panels that may be broken.
Thanks to @Tangado_Haid, we now have a v2 of the Printer Stats dashboard which reworks the print history table, giving it a fresh new look with colours and splits for up to 4 filaments used in a print!

To get a single panel from Grafana in Home Assistant, click the share/export of the panel in question (such as the table) and find the embed preset. Copy the URL from inside the embed html and remove the "to" and "from" variables (or set to what you want, such as "to=now", "from=now-90d" for example). Then enter this URL into a webpage card in HomeAssistant. The server of Grafana will be much like the requirements for the NodeRed server - either domain it up to the internet with some form of Auth for protection, localhost if it's an addon or container name if docker compose.
A second dashboard which shows print stats by material for a selected printer is available here:
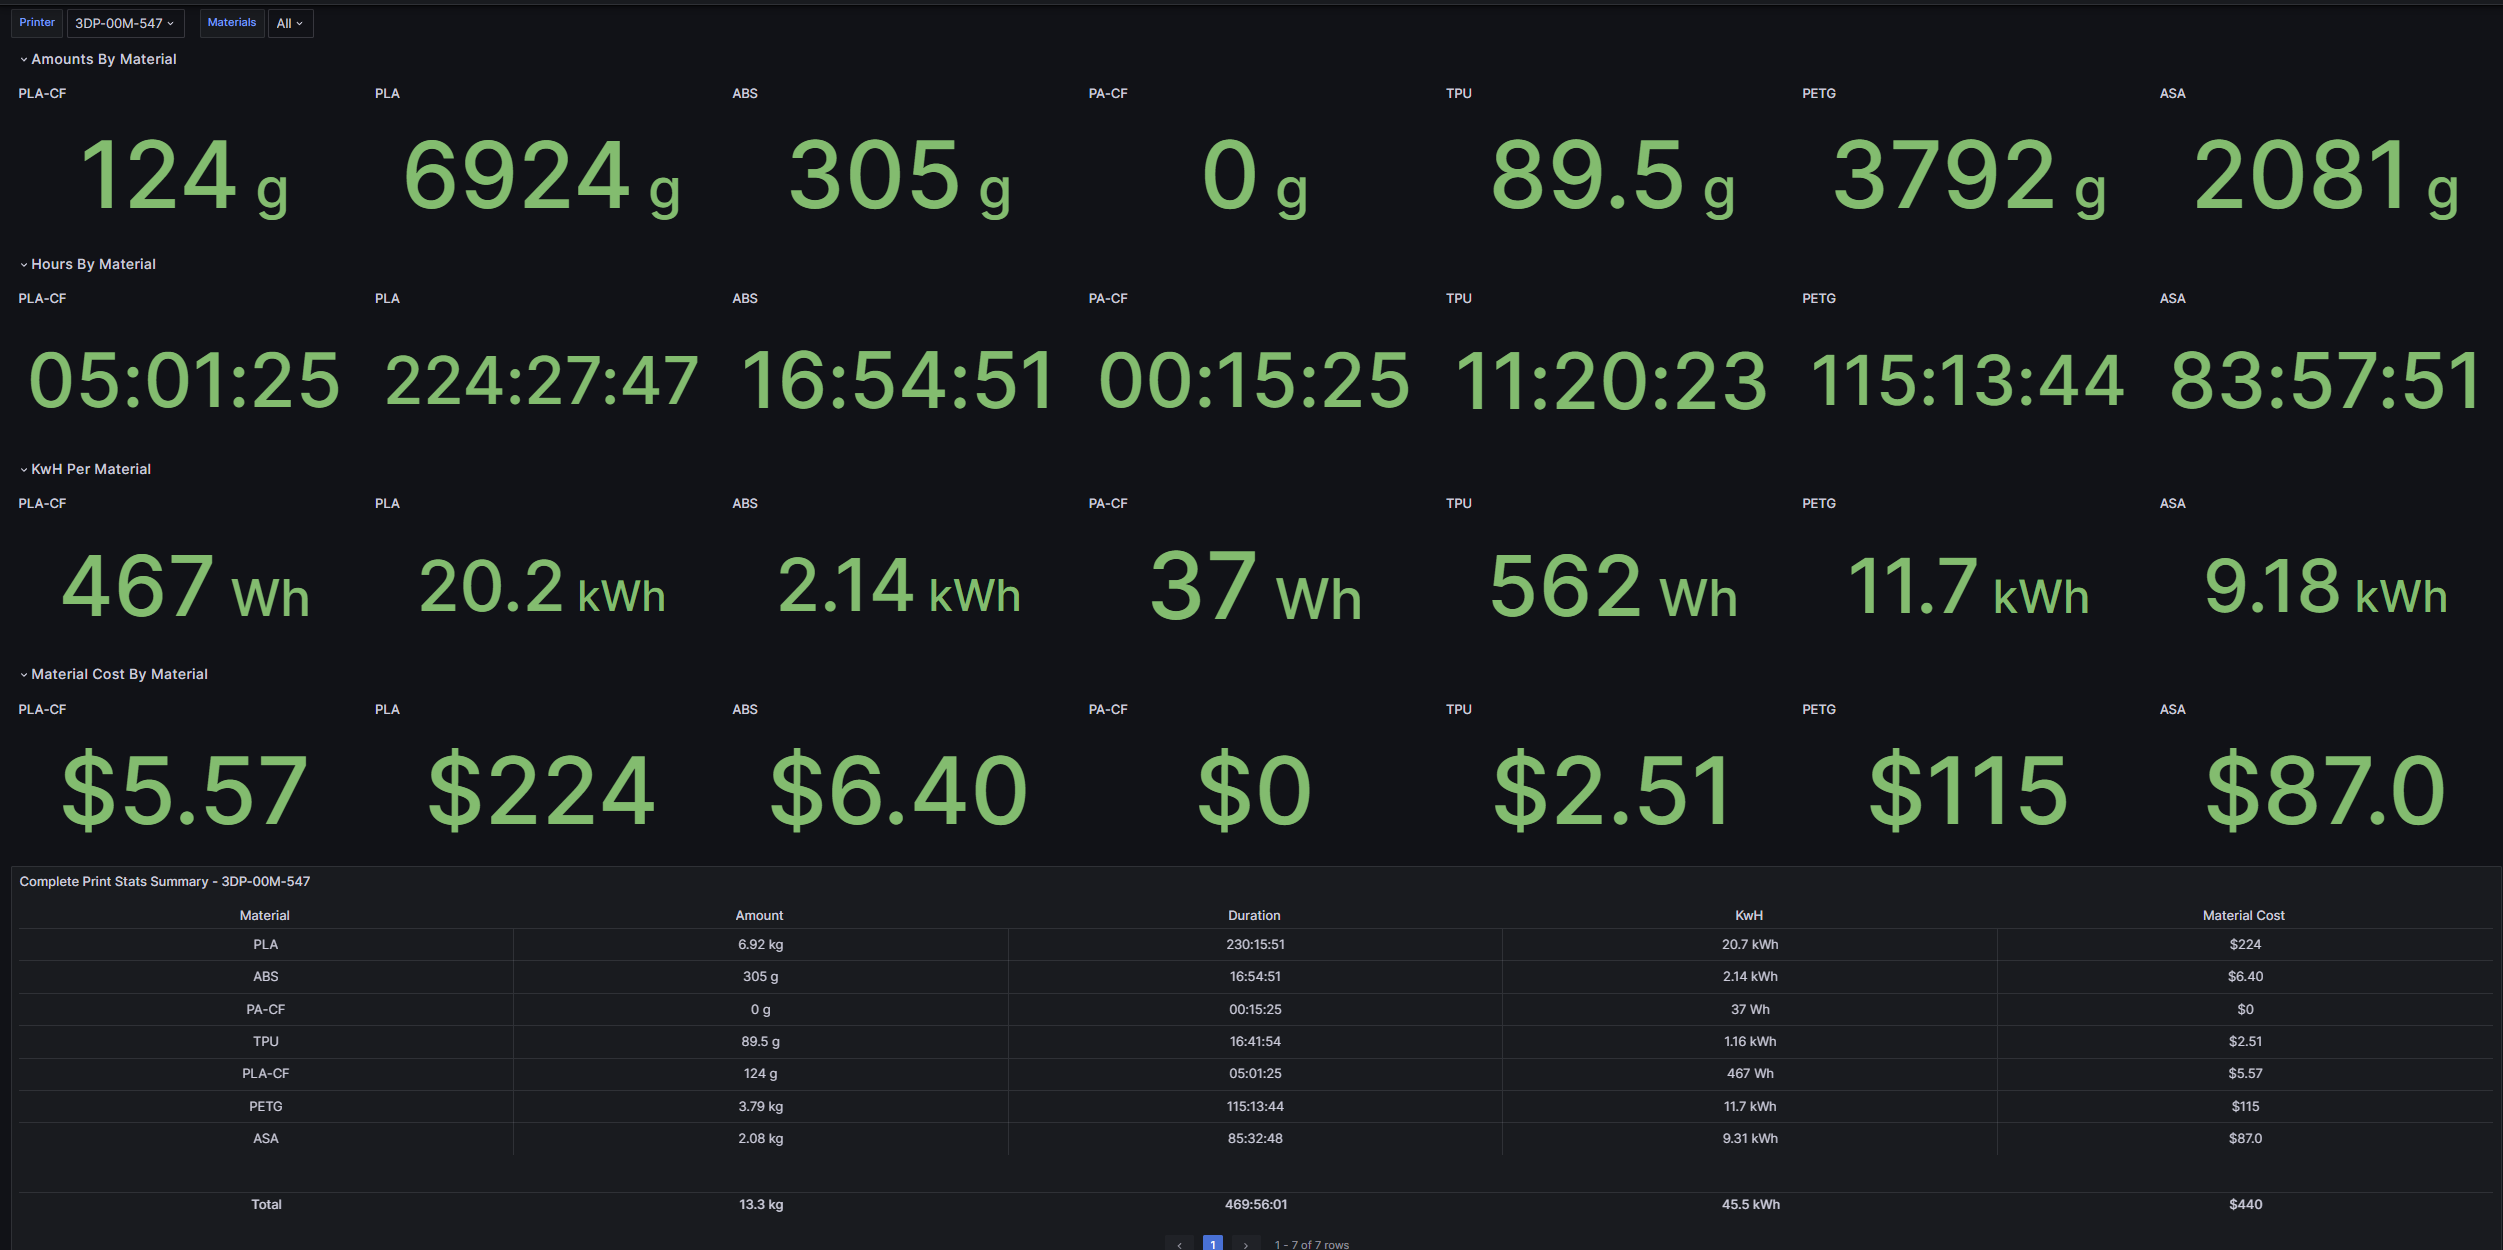
Note: The costs and material usage of prints in these dashboards already take into account the progress done (if pulled from the filament_data column) without modifying the column. Otherwise, the column for overall material cost / used is always reflected by progress done % in the DB.
That's it! It's far more complex than the previous two setups, hence the many warnings that this is for more technical users. However, if you have any questions, feel free to leave a comment below, contact me over Discord (@wolfwithsword), on the HA Forum, or anywhere here.
You can also leave an issue at the (new and WIP) github repo for these flows here:
 WolfwithSword