Custom RGB Hex Lights (DIY)
Whoa, whoa, whoa! Watch the magic!
You made a what now?
Skyrim everywhere, RGB everywhere, what next?
In this project, I made something truly customizable for once, and documented a lot of it! Came to a shocker to me as well when I looked back at my camera roll...
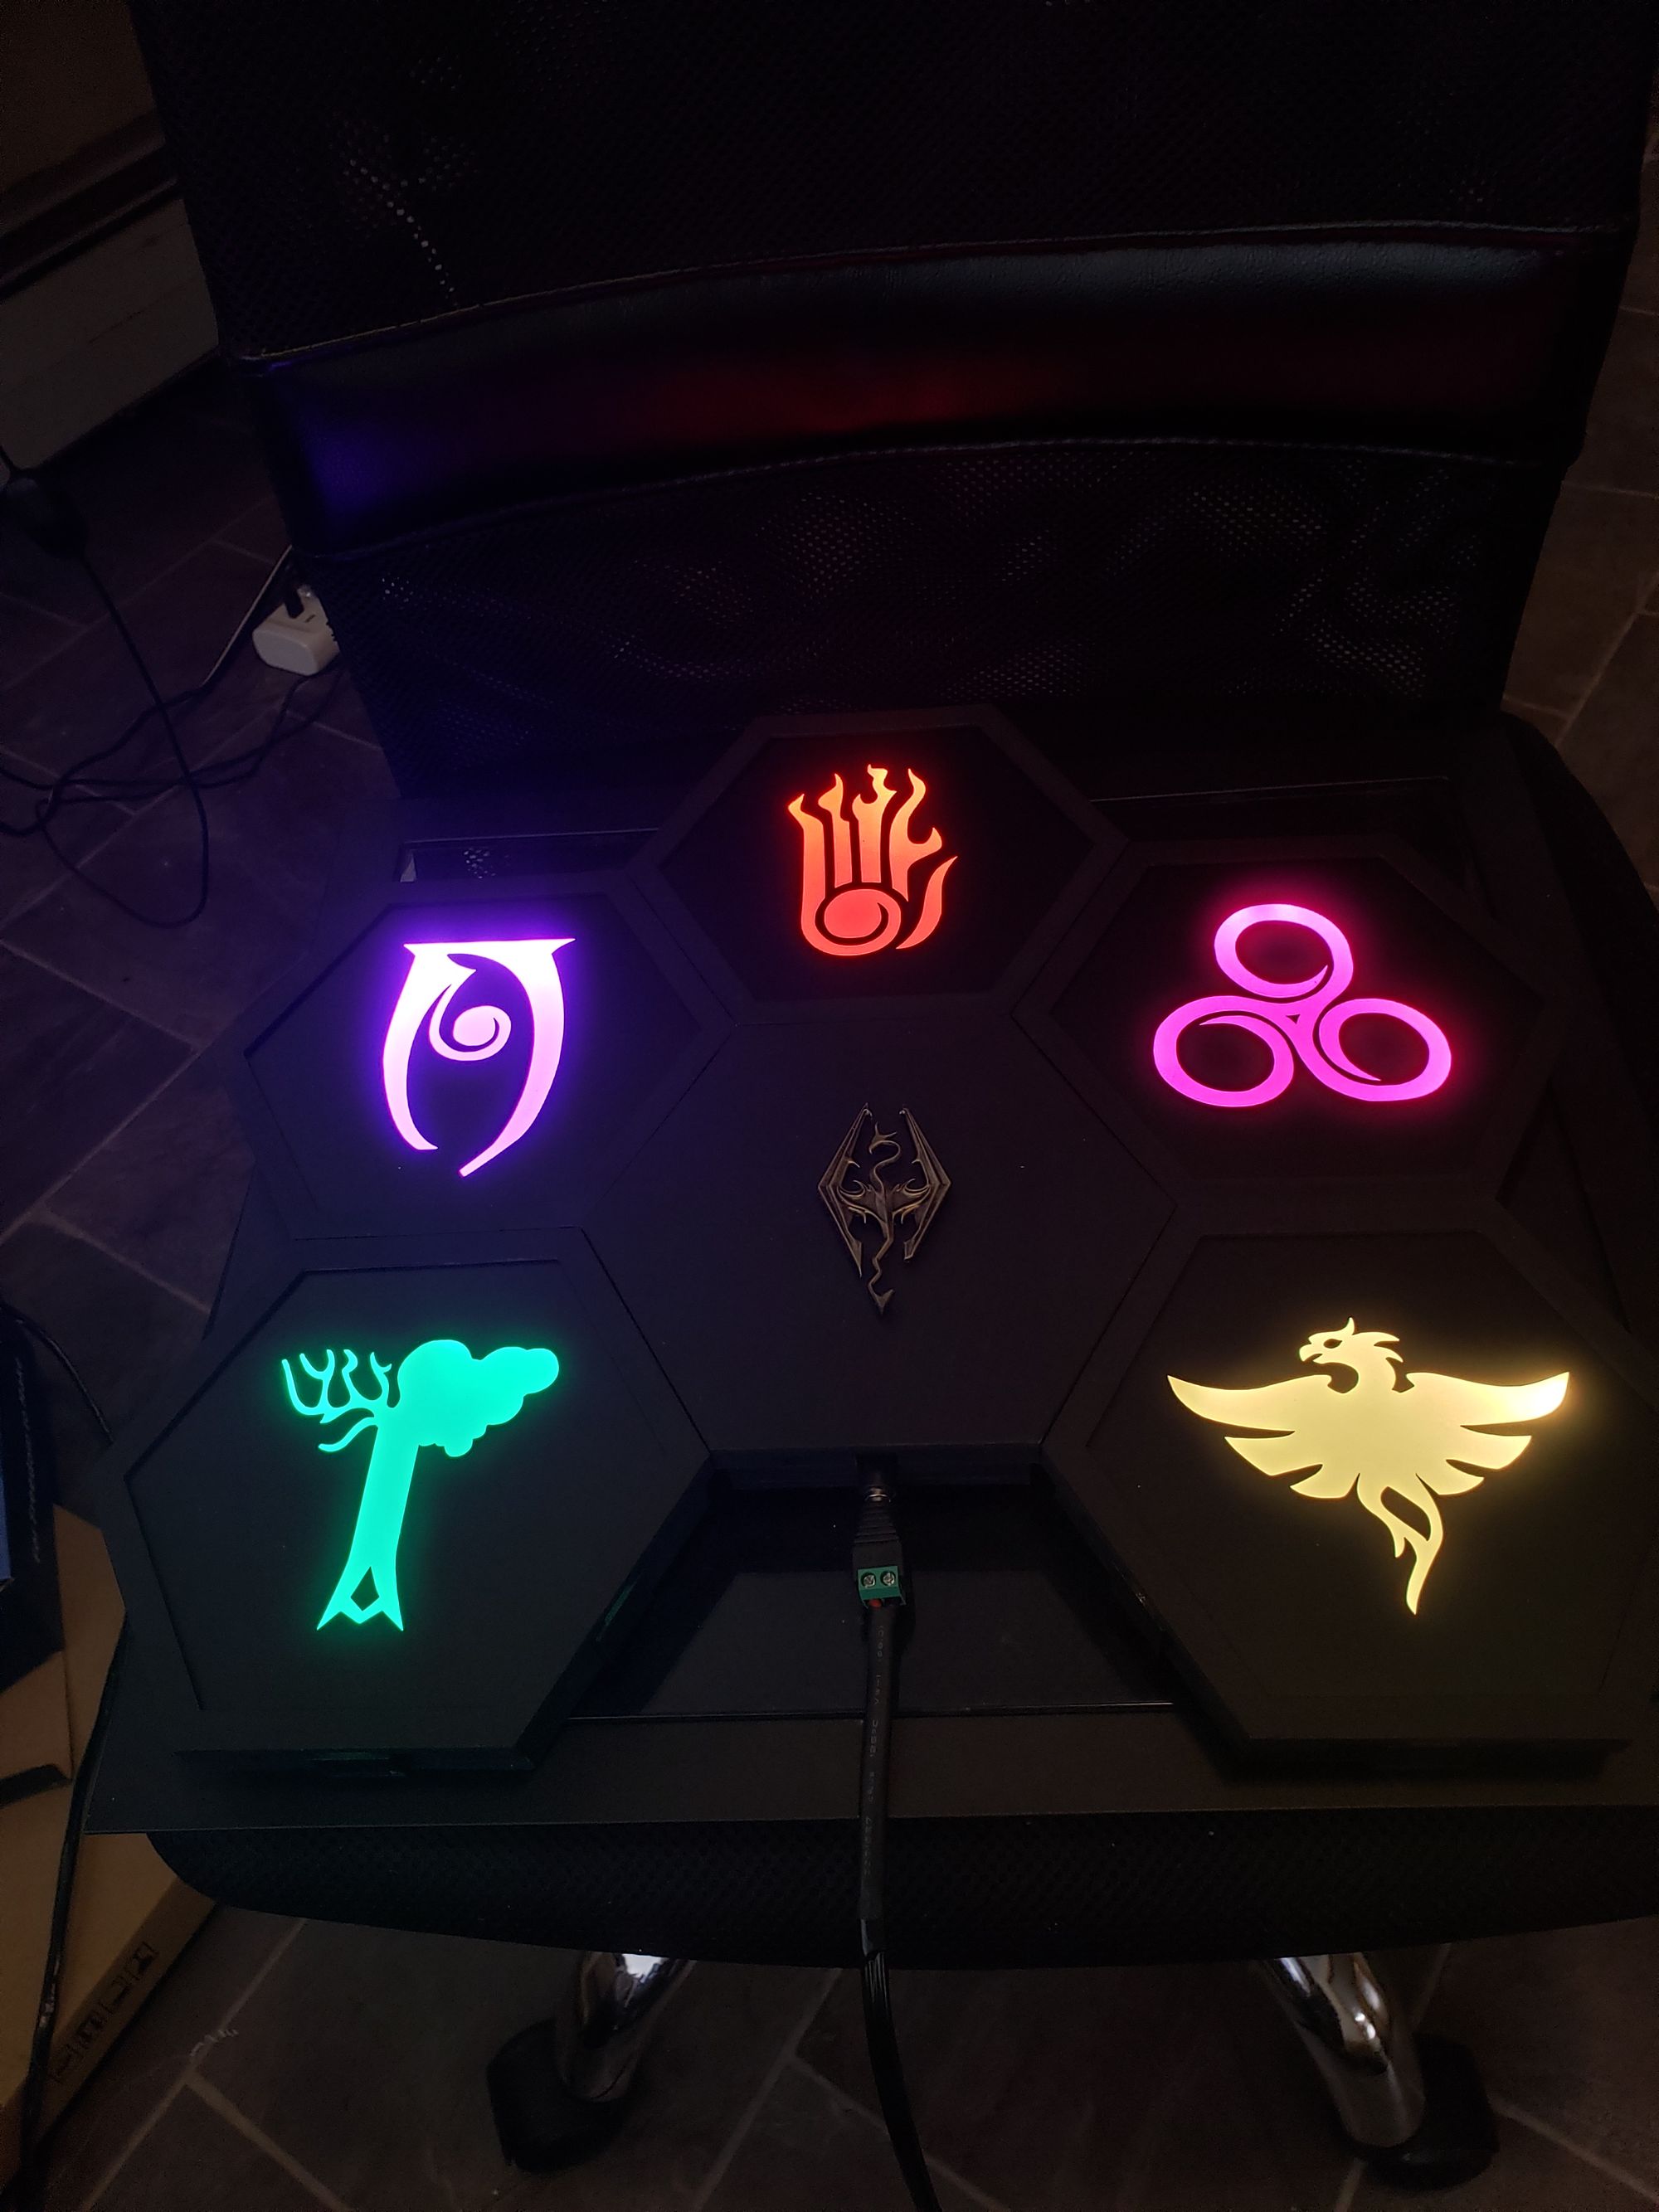
So what did I make this time? Nowadays, RGB is everywhere, you can't escape it, and Hexagons are the best shape, without a doubt. Plenty have made RGB hexagons before, even commercially, so what about what I made? Well, for one, it's customizable, and second, I first made it Skyrim themed and probably never going to actually change it because that's one of my three addictions (the others being collecting hobbies, and dates - as in the fruit!)
How are they customizable? Not only are the RGB effects fully configurable through WLED, and not only are the hexagons able to be moved around in any order, but each hexagon panel has a diffused acrylic glass in front of it, and a removable cover. This allows me to place stencil cutouts in front of each panel for a custom shape!
Below you will find details on how I made it and the resources I used, but first, take a look at the finished product.
3D Modelling
The torture I put my old printer through on these...
As per my continuing attempt at learning Blender, I used it for making and tweaking the models for the hexagon lights. There are many excellent models already out there RGB hexagon light housings, but they were either too small for what I wanted, or were impractical to make configurable.
The full blend file can be found here:
In the end I took a few pieces of other models as inspiration and tweaked them for what I had in mind. The plan was to fit acrylic hexagons on the top that were 6" in diameter from point to point, leave enough space so the lights don't have hot spots, wall mount it, route cables nicely, and finally hold the LED strips inside without relying on their horrible adhesive backing.
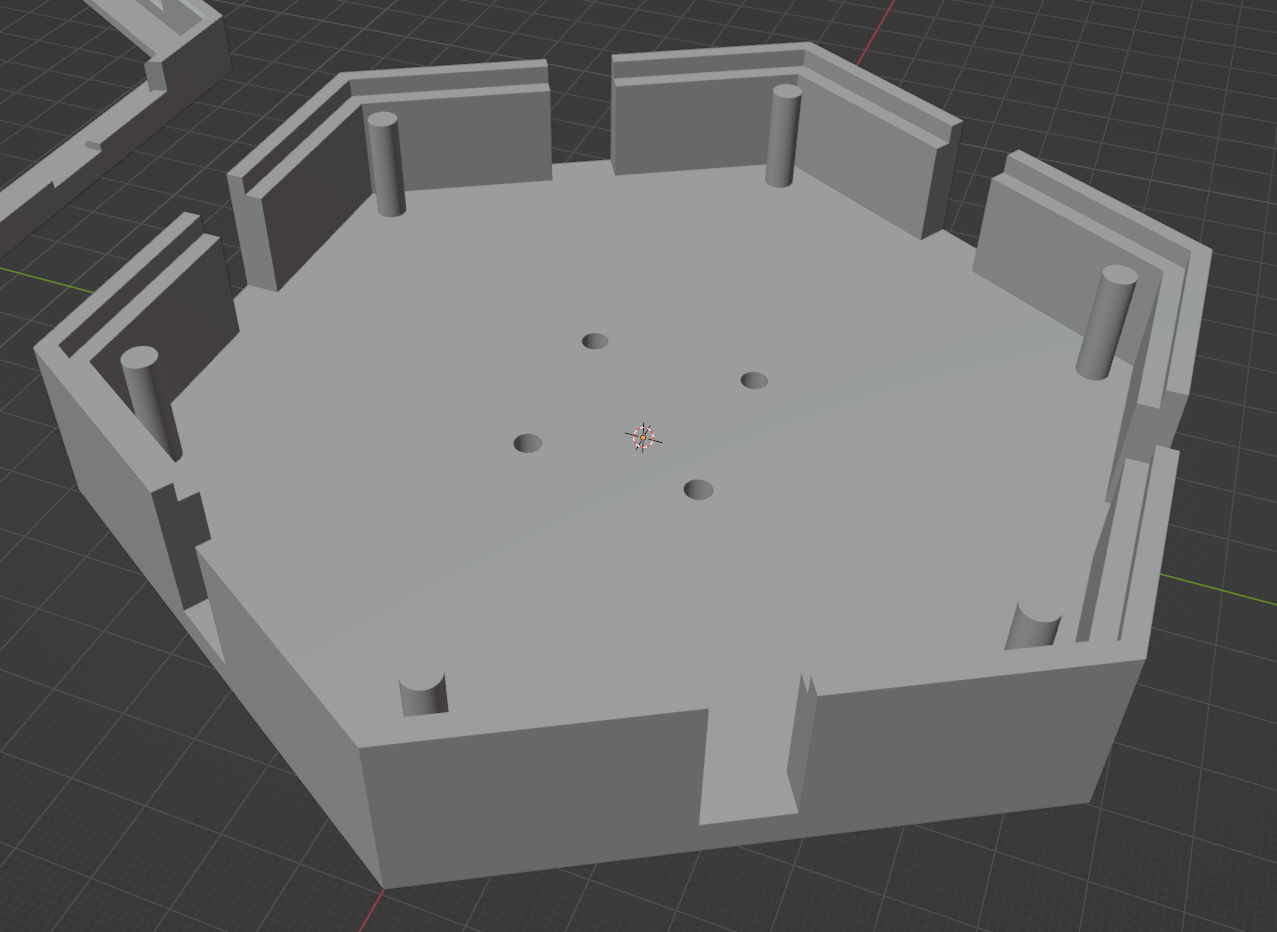
I knew I would have one panel that had no lights but was instead the control box. However, each panel should still be identical, should I need to mount more to a wall for extra strength and support.
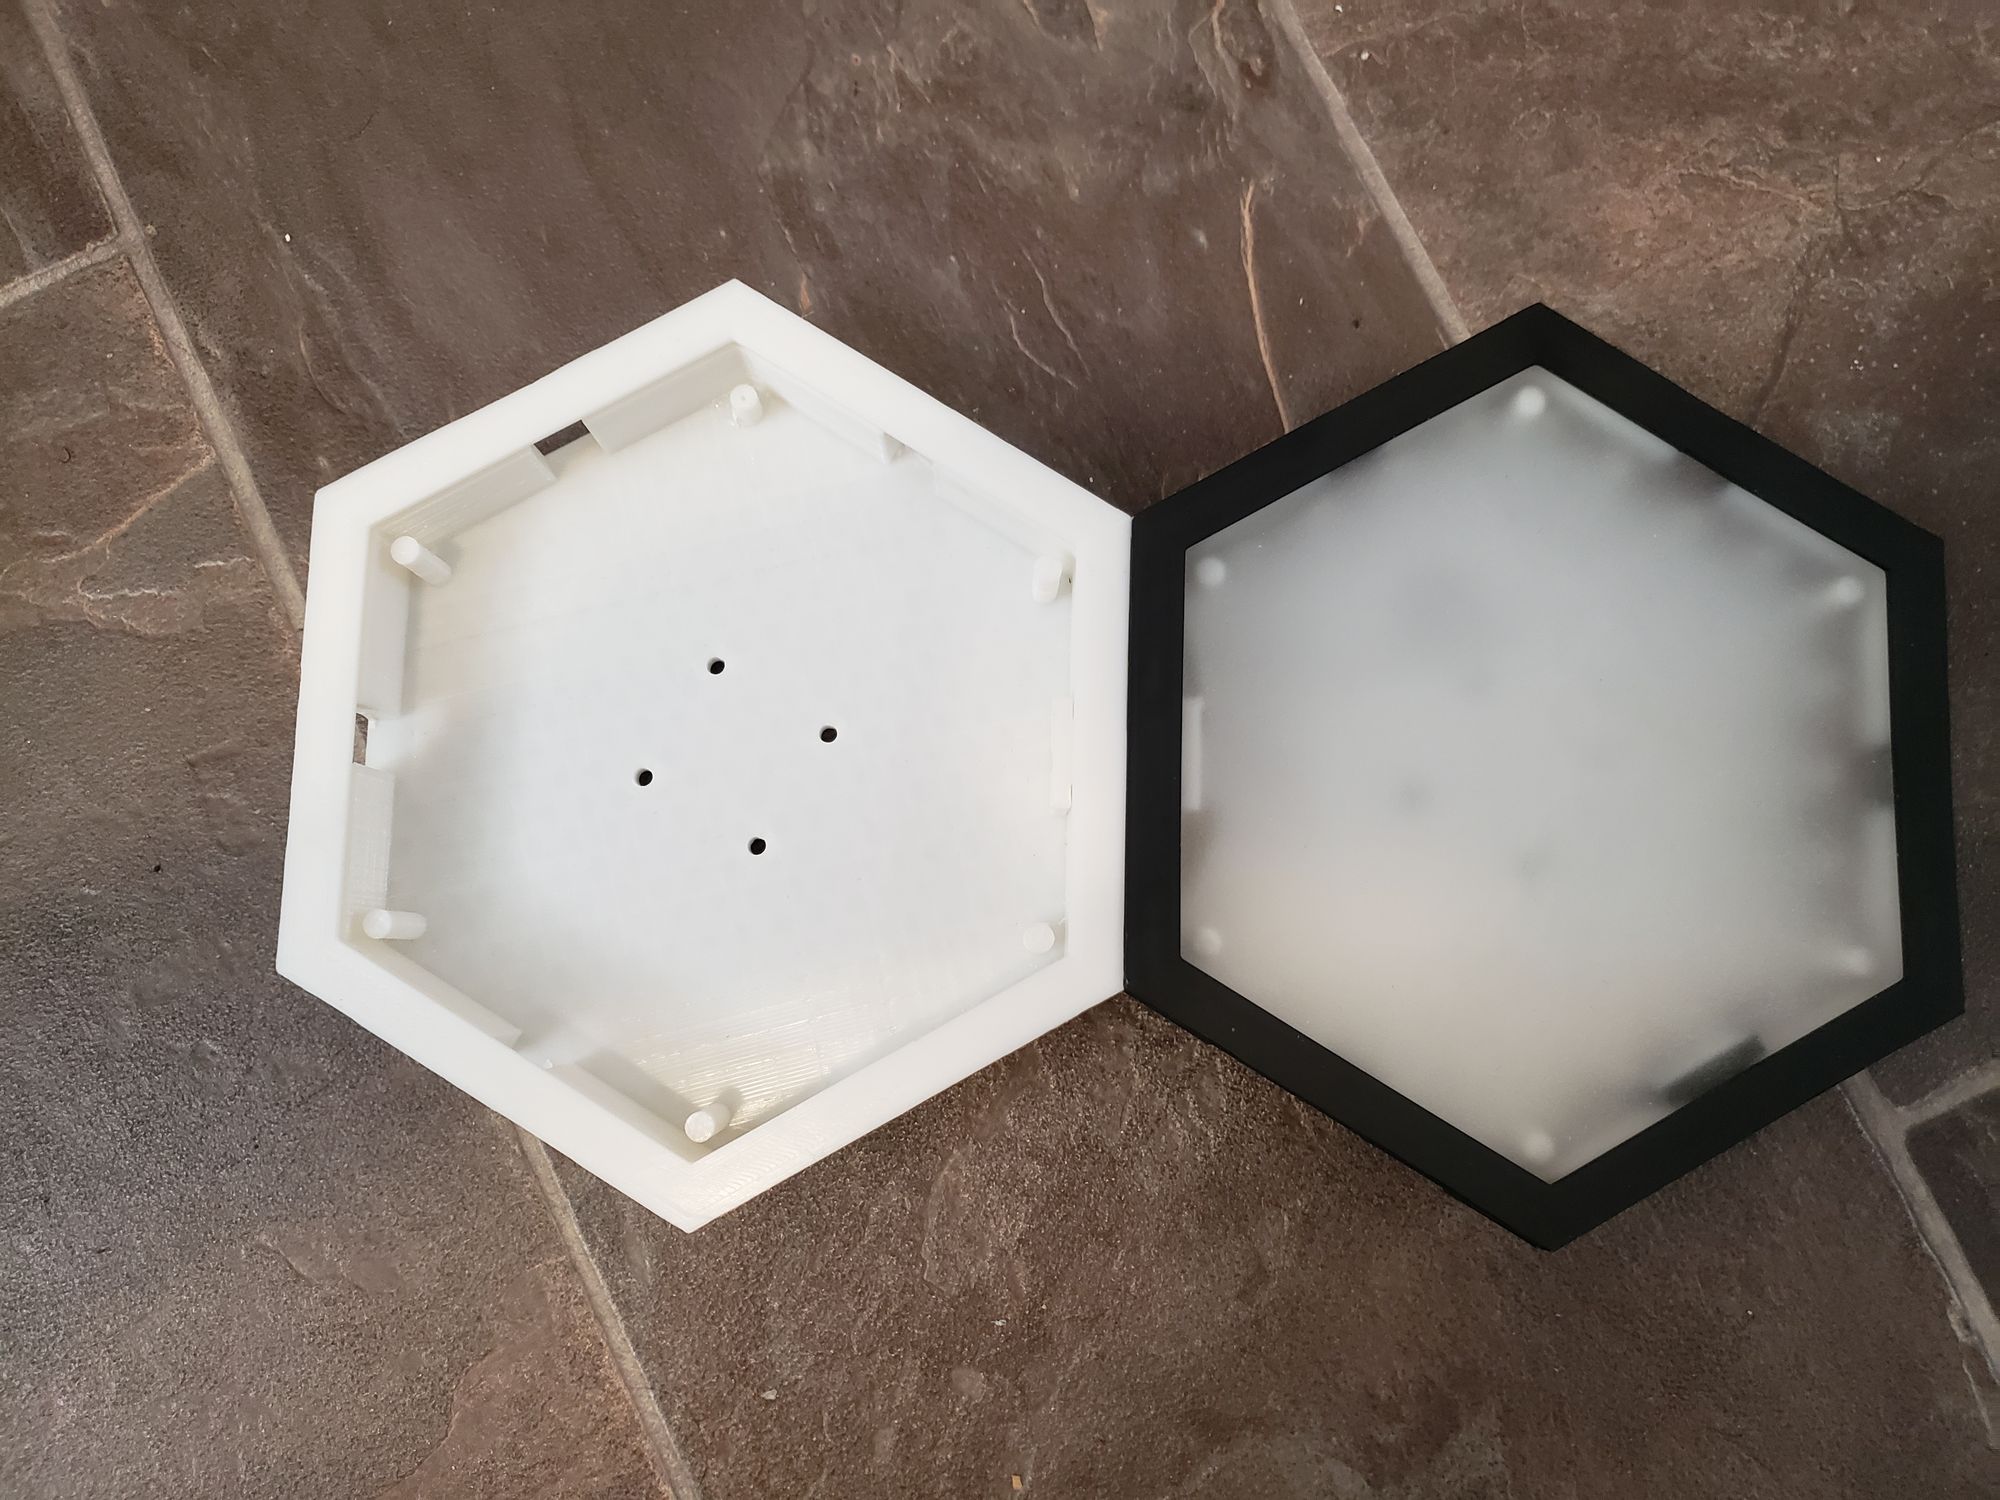
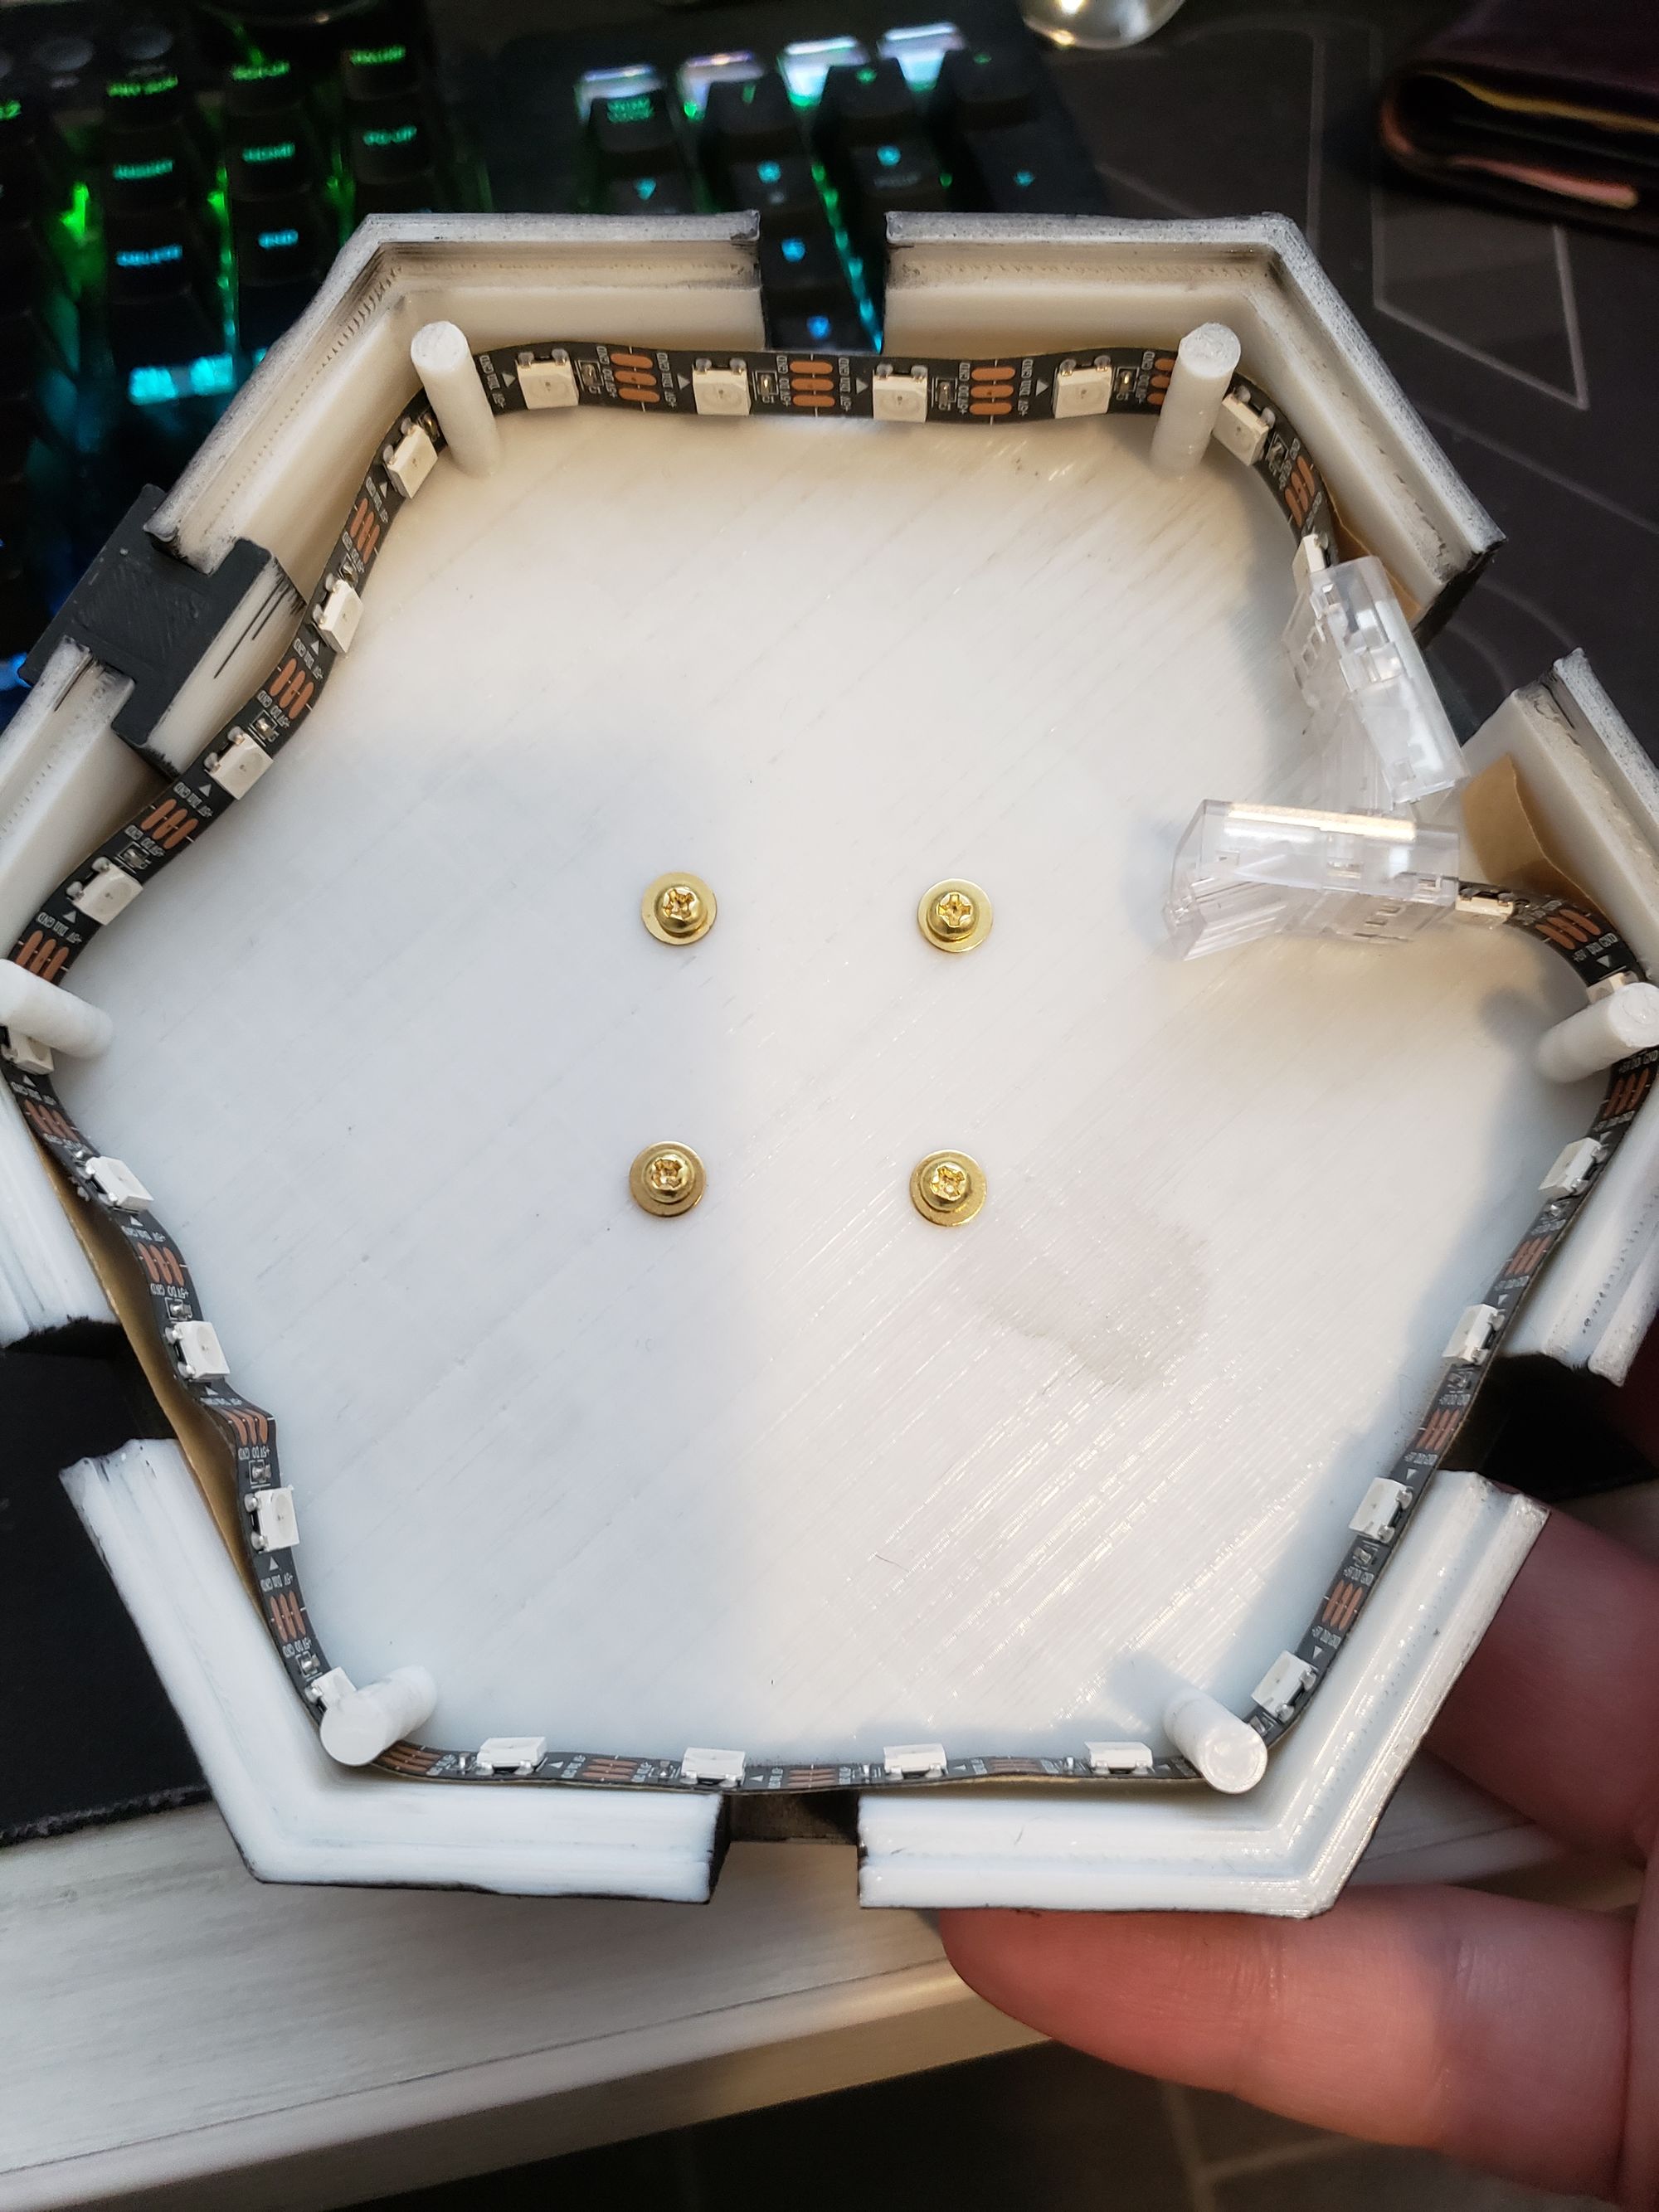
Each one has four holes in the centre which will go out to screw into a special wall mounting block I made. Small pillars in each corner to hold the LED strip which shouldn't put too much strain on them, and finally, the small dip in the top to fit the acrylic panel.
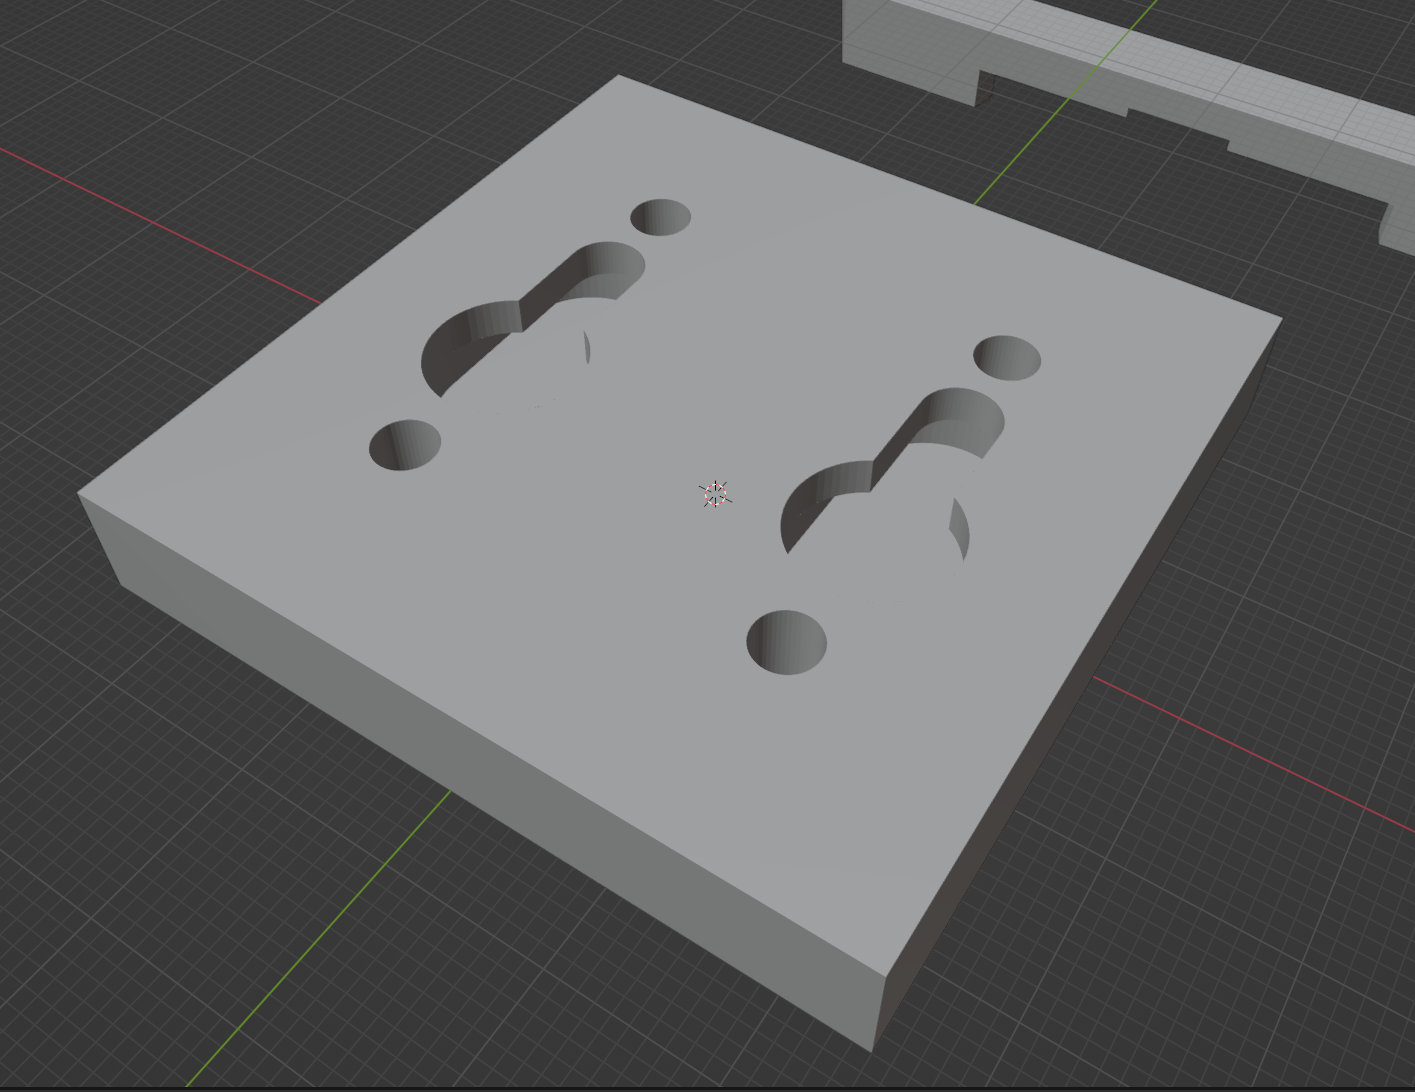
The special wall mounting block I mentioned is pretty simple, just a block with holes which will later have threaded inserts, and then two keyhole cavities for mounting on two screw heads in a wall.
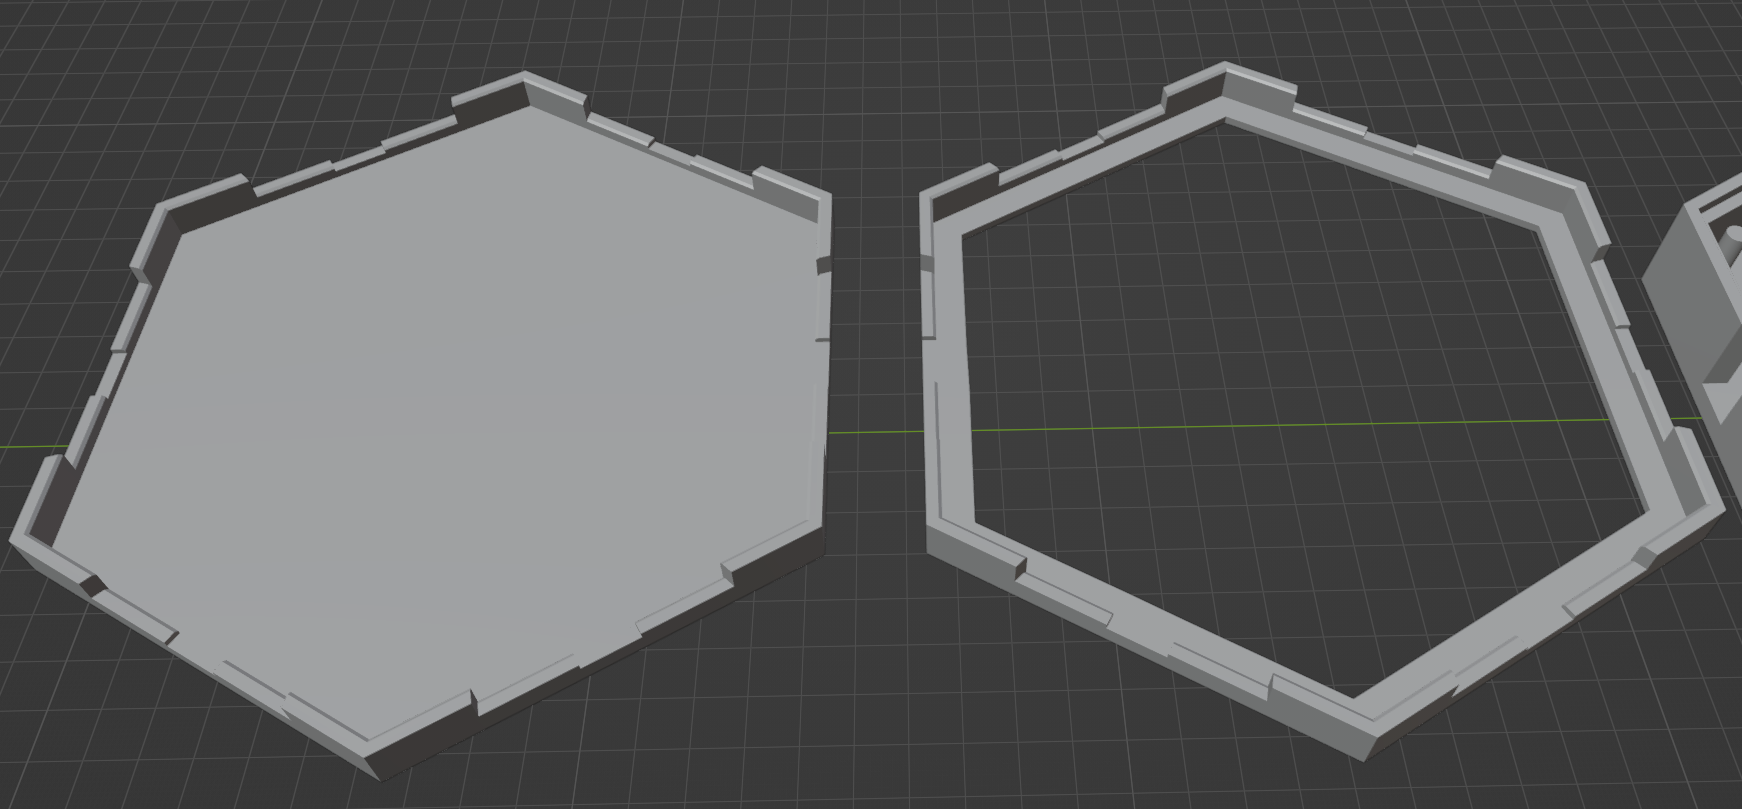
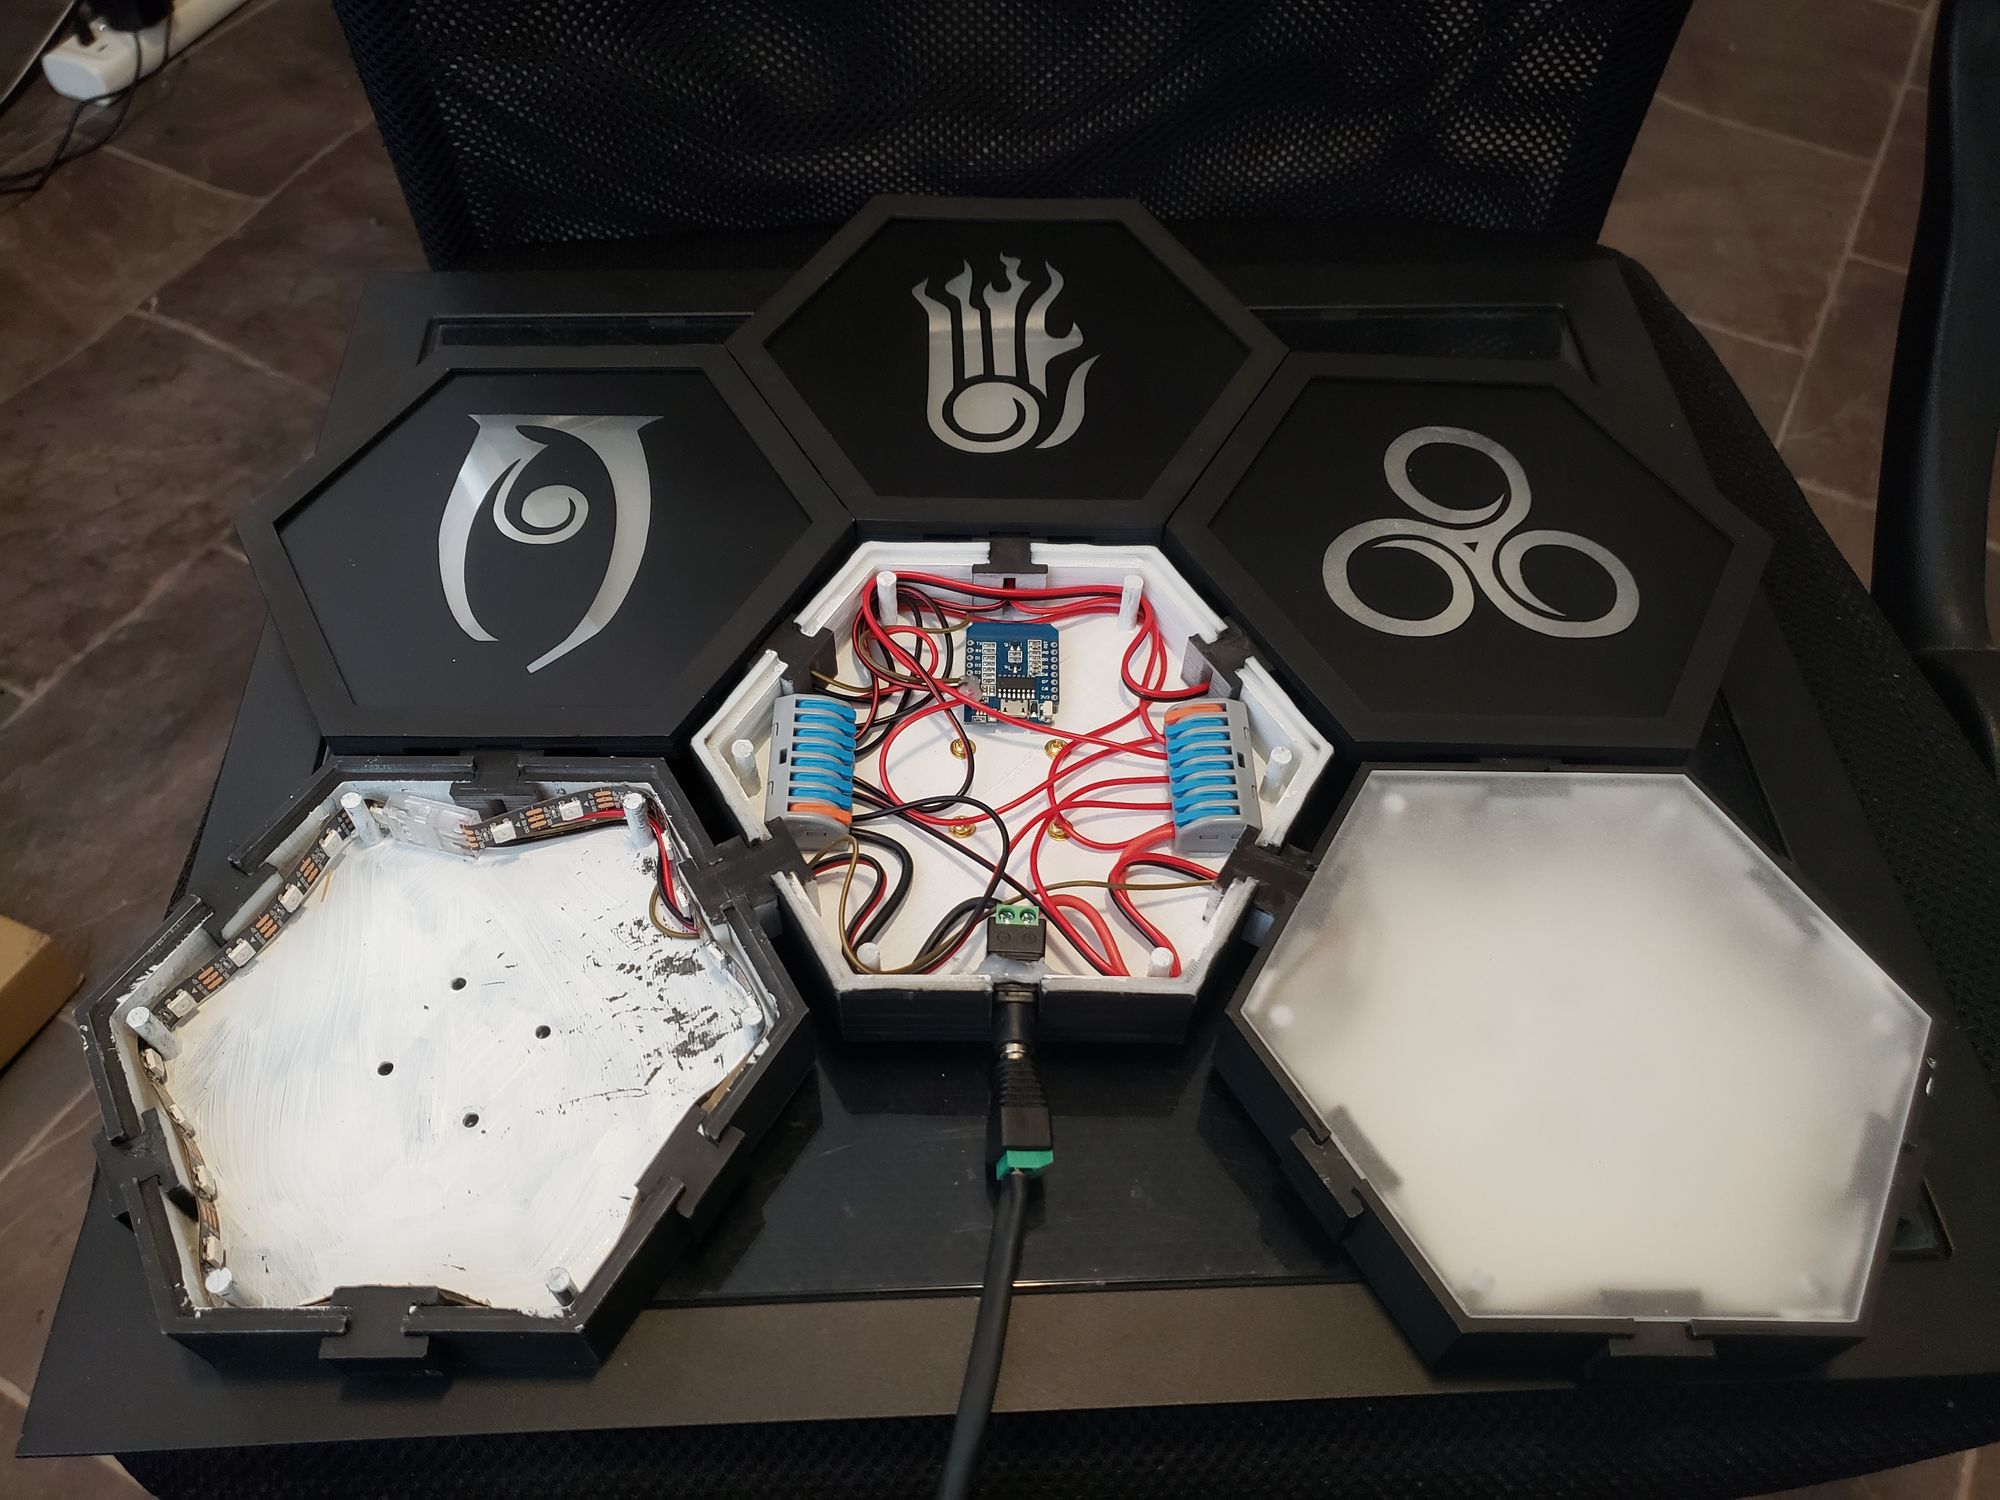
There are two cover designs - one for the control box, and one with a hole so you can see the acrylic panel underneath.
And finally, how to connect the panels together. There are two blocks I used for this - one allows for connecting two panels together and routing wires through, the other is just to close off unused holes in each panel.
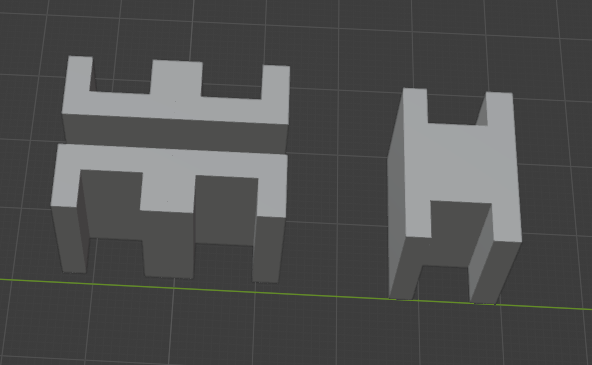
The connector block is actually longer than you would expect, causing the panels to not line up next to each other. This is because the covers that go on the panels are wider, so the blocks are longer to account for this space. When the covers are on, everything is lined up!
For the basic setup I wanted to make, I printed 6 panels - 5 were for lights, and one control box. The configuration I had planned needed 9 connector blocks, 17 gap plugs, 2 mounting blocks, 5 hole covers and 1 full cover.
Each of these pieces were 3d printed in white PLA, which was important for bouncing the light around inside each panel. The external facing sides of everything however, were painted black to both prevent light leakage, and to look cool.
Electronics & Software
What is it anyways if not magic to the unaware?
I would be using WLED for this project as it's easy to setup and use, and offers a lot of customization. It could be controlled through a webpage, app, or even connected services such as HomeAssistant.
The controller board I chose to use would be the popular D1 Mini, and ESP8266 board that sports WiFi and enough pins to make my life easy, while being well, mini so it could fit inside the control box.
For LED strips, I went with an individually addressable RGB strip - WS2812B. To not go overboard but reduce the chances of the lighting looking terrible, I went with a 5m strip with a density of 60 LEDs per metre. The strip itself was black, but white would have reflected better. Though with the amount of white inside each panel and the diffusion, this wouldn't matter too much. Each strip was then terminated with a quick wire connector to make life easier down the line.

I went with a 5v LED strip because I had it laying around. In hindsight, a 12v strip would not only have been easier, but also safer if I wanted to expand it more. The reason is due to the power draw.
The max the lights could draw would be 60 milliamperes per LED (R + G + B all on at once). I calculated that each of my panels would perfectly fit strips of 25 LEDs. With 5 strips, this meant I had 125 LEDs, which at max brightness with all LEDs on, it would draw roughly 6-7.5A @ 5v. Now it will never draw this much at once realistically, and WLED does offer ways to limit its power draw with brightness adjustments, but it was my worst-case scenario I need to account for.
The reason is that essentially, amps make wires hot, and hot wires can cause fires. Wires can tolerate this better the thicker they are, the better insulated they are, and the shorter they are. I used 16AWG wire to be absolutely safe, and pure copper wire (not copper clad aluminum!) as aluminum in wires tends to make them less stable long term.
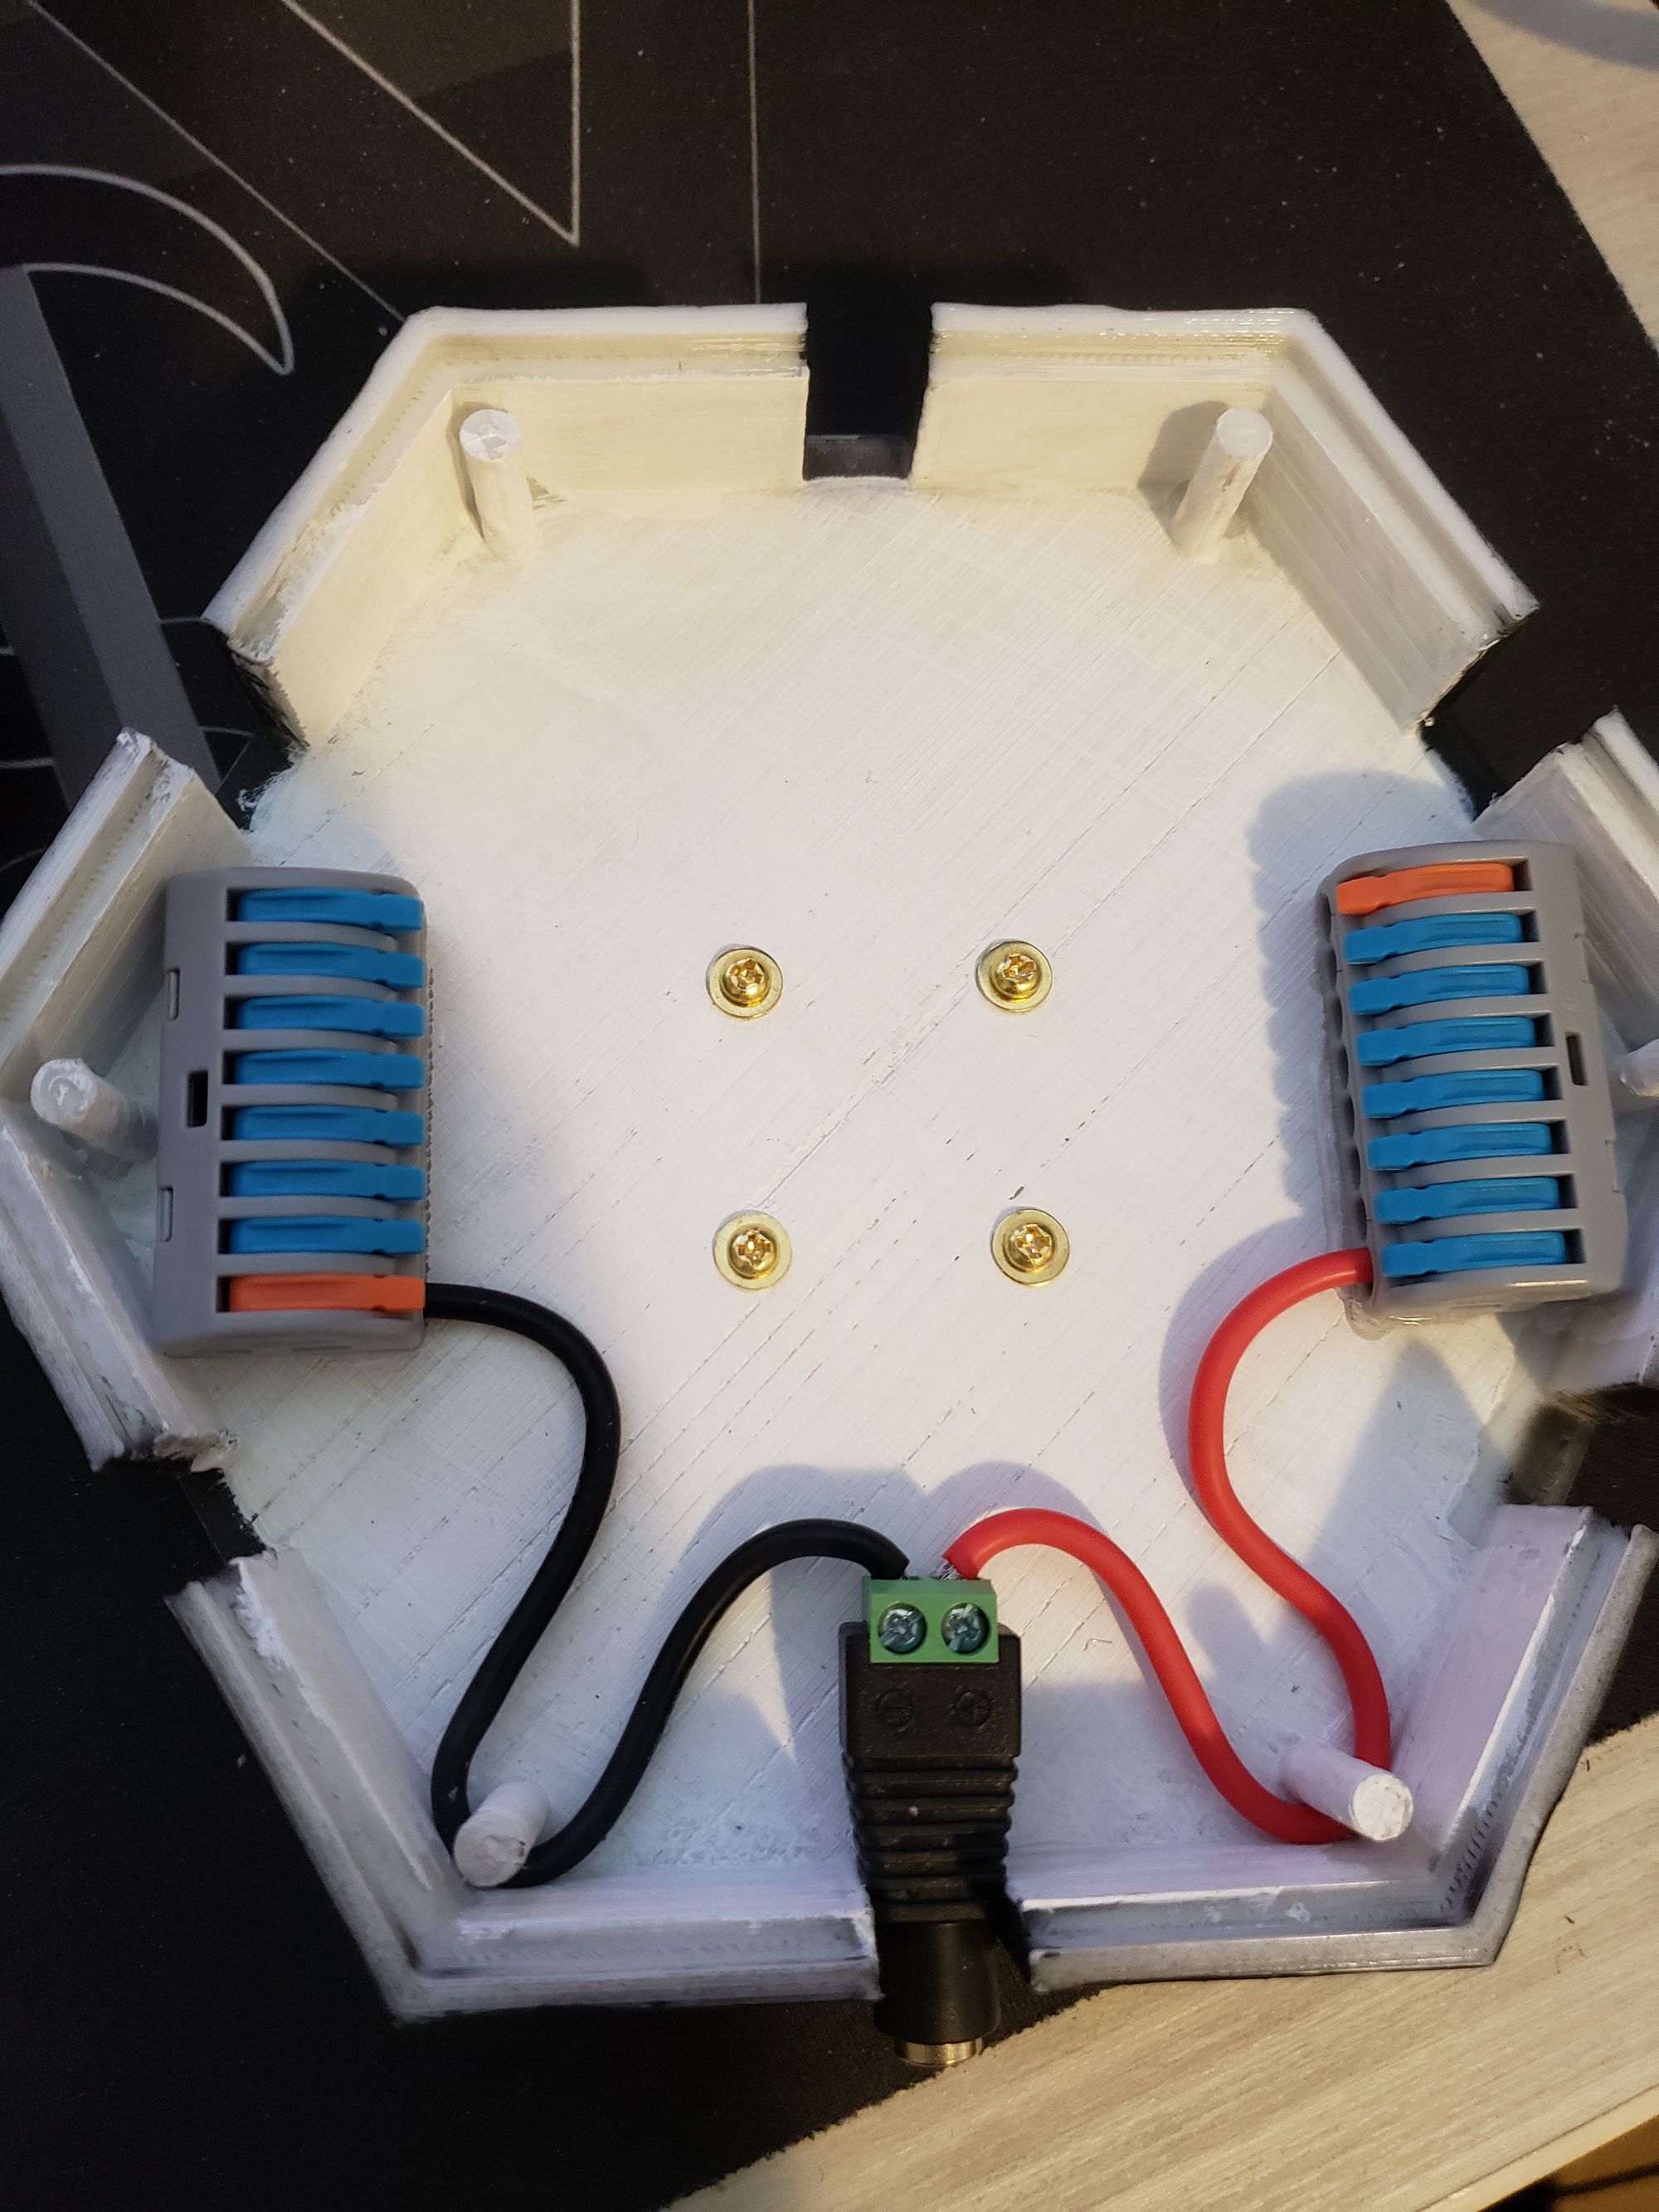
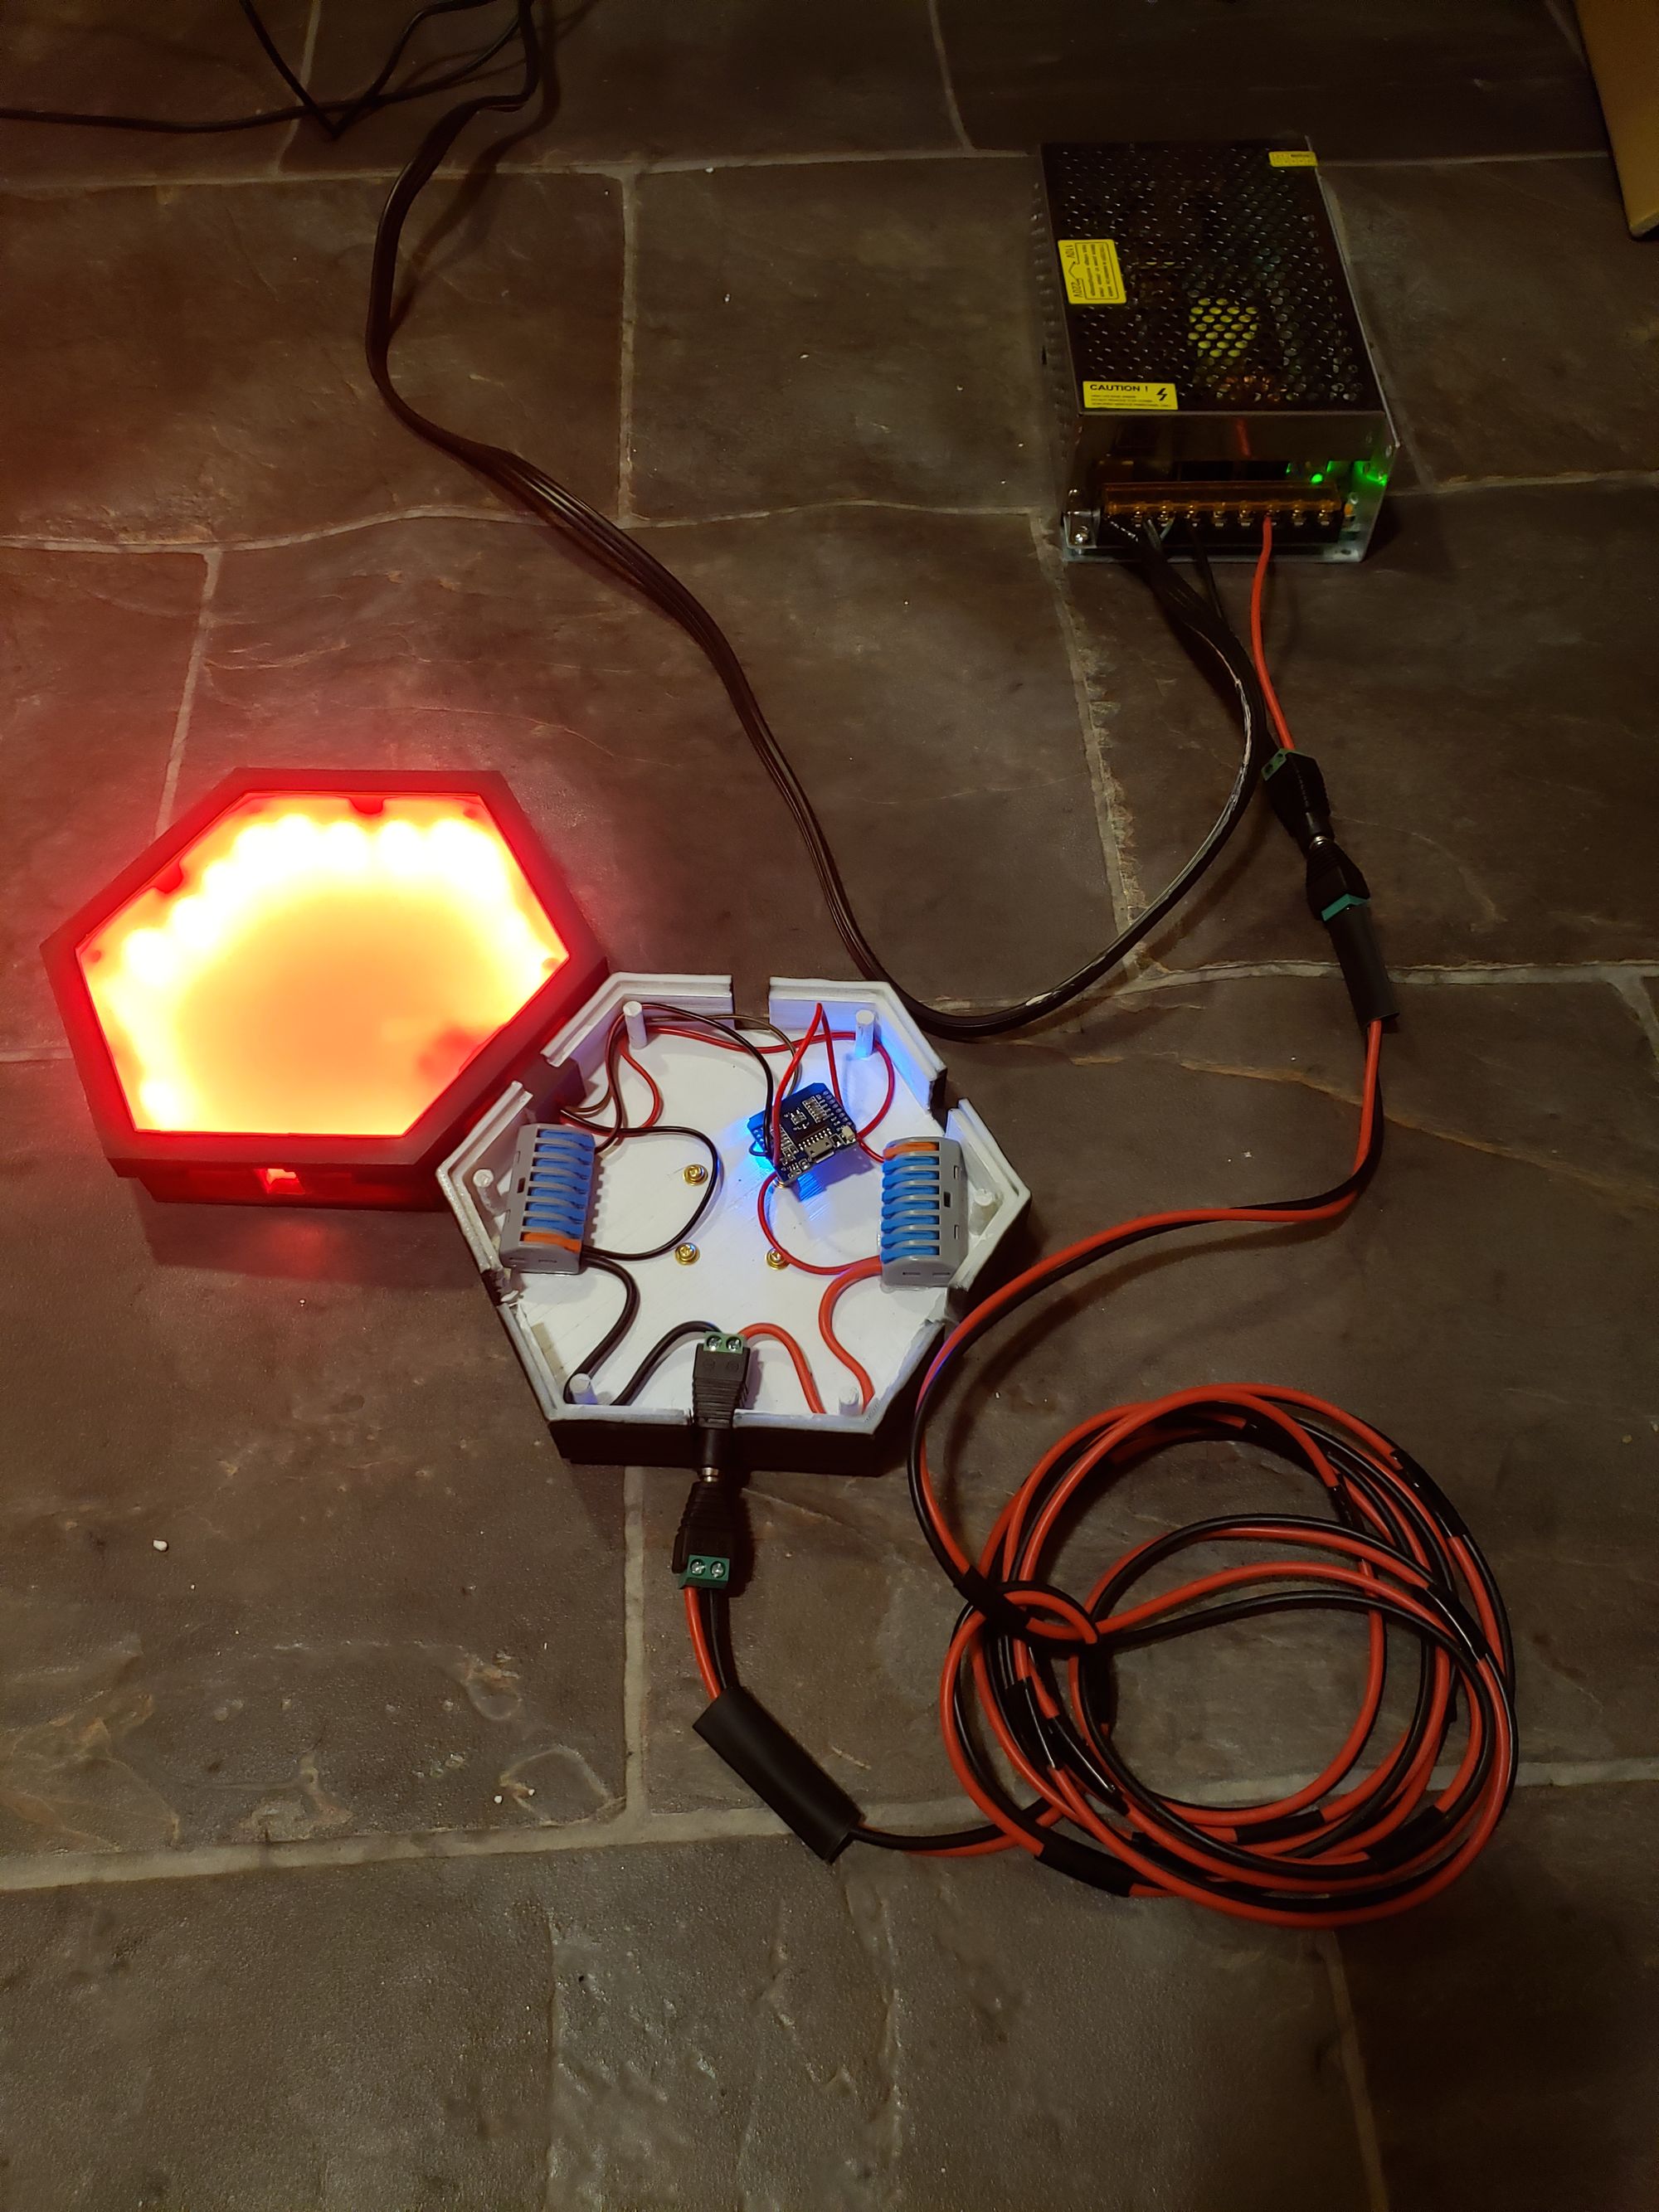
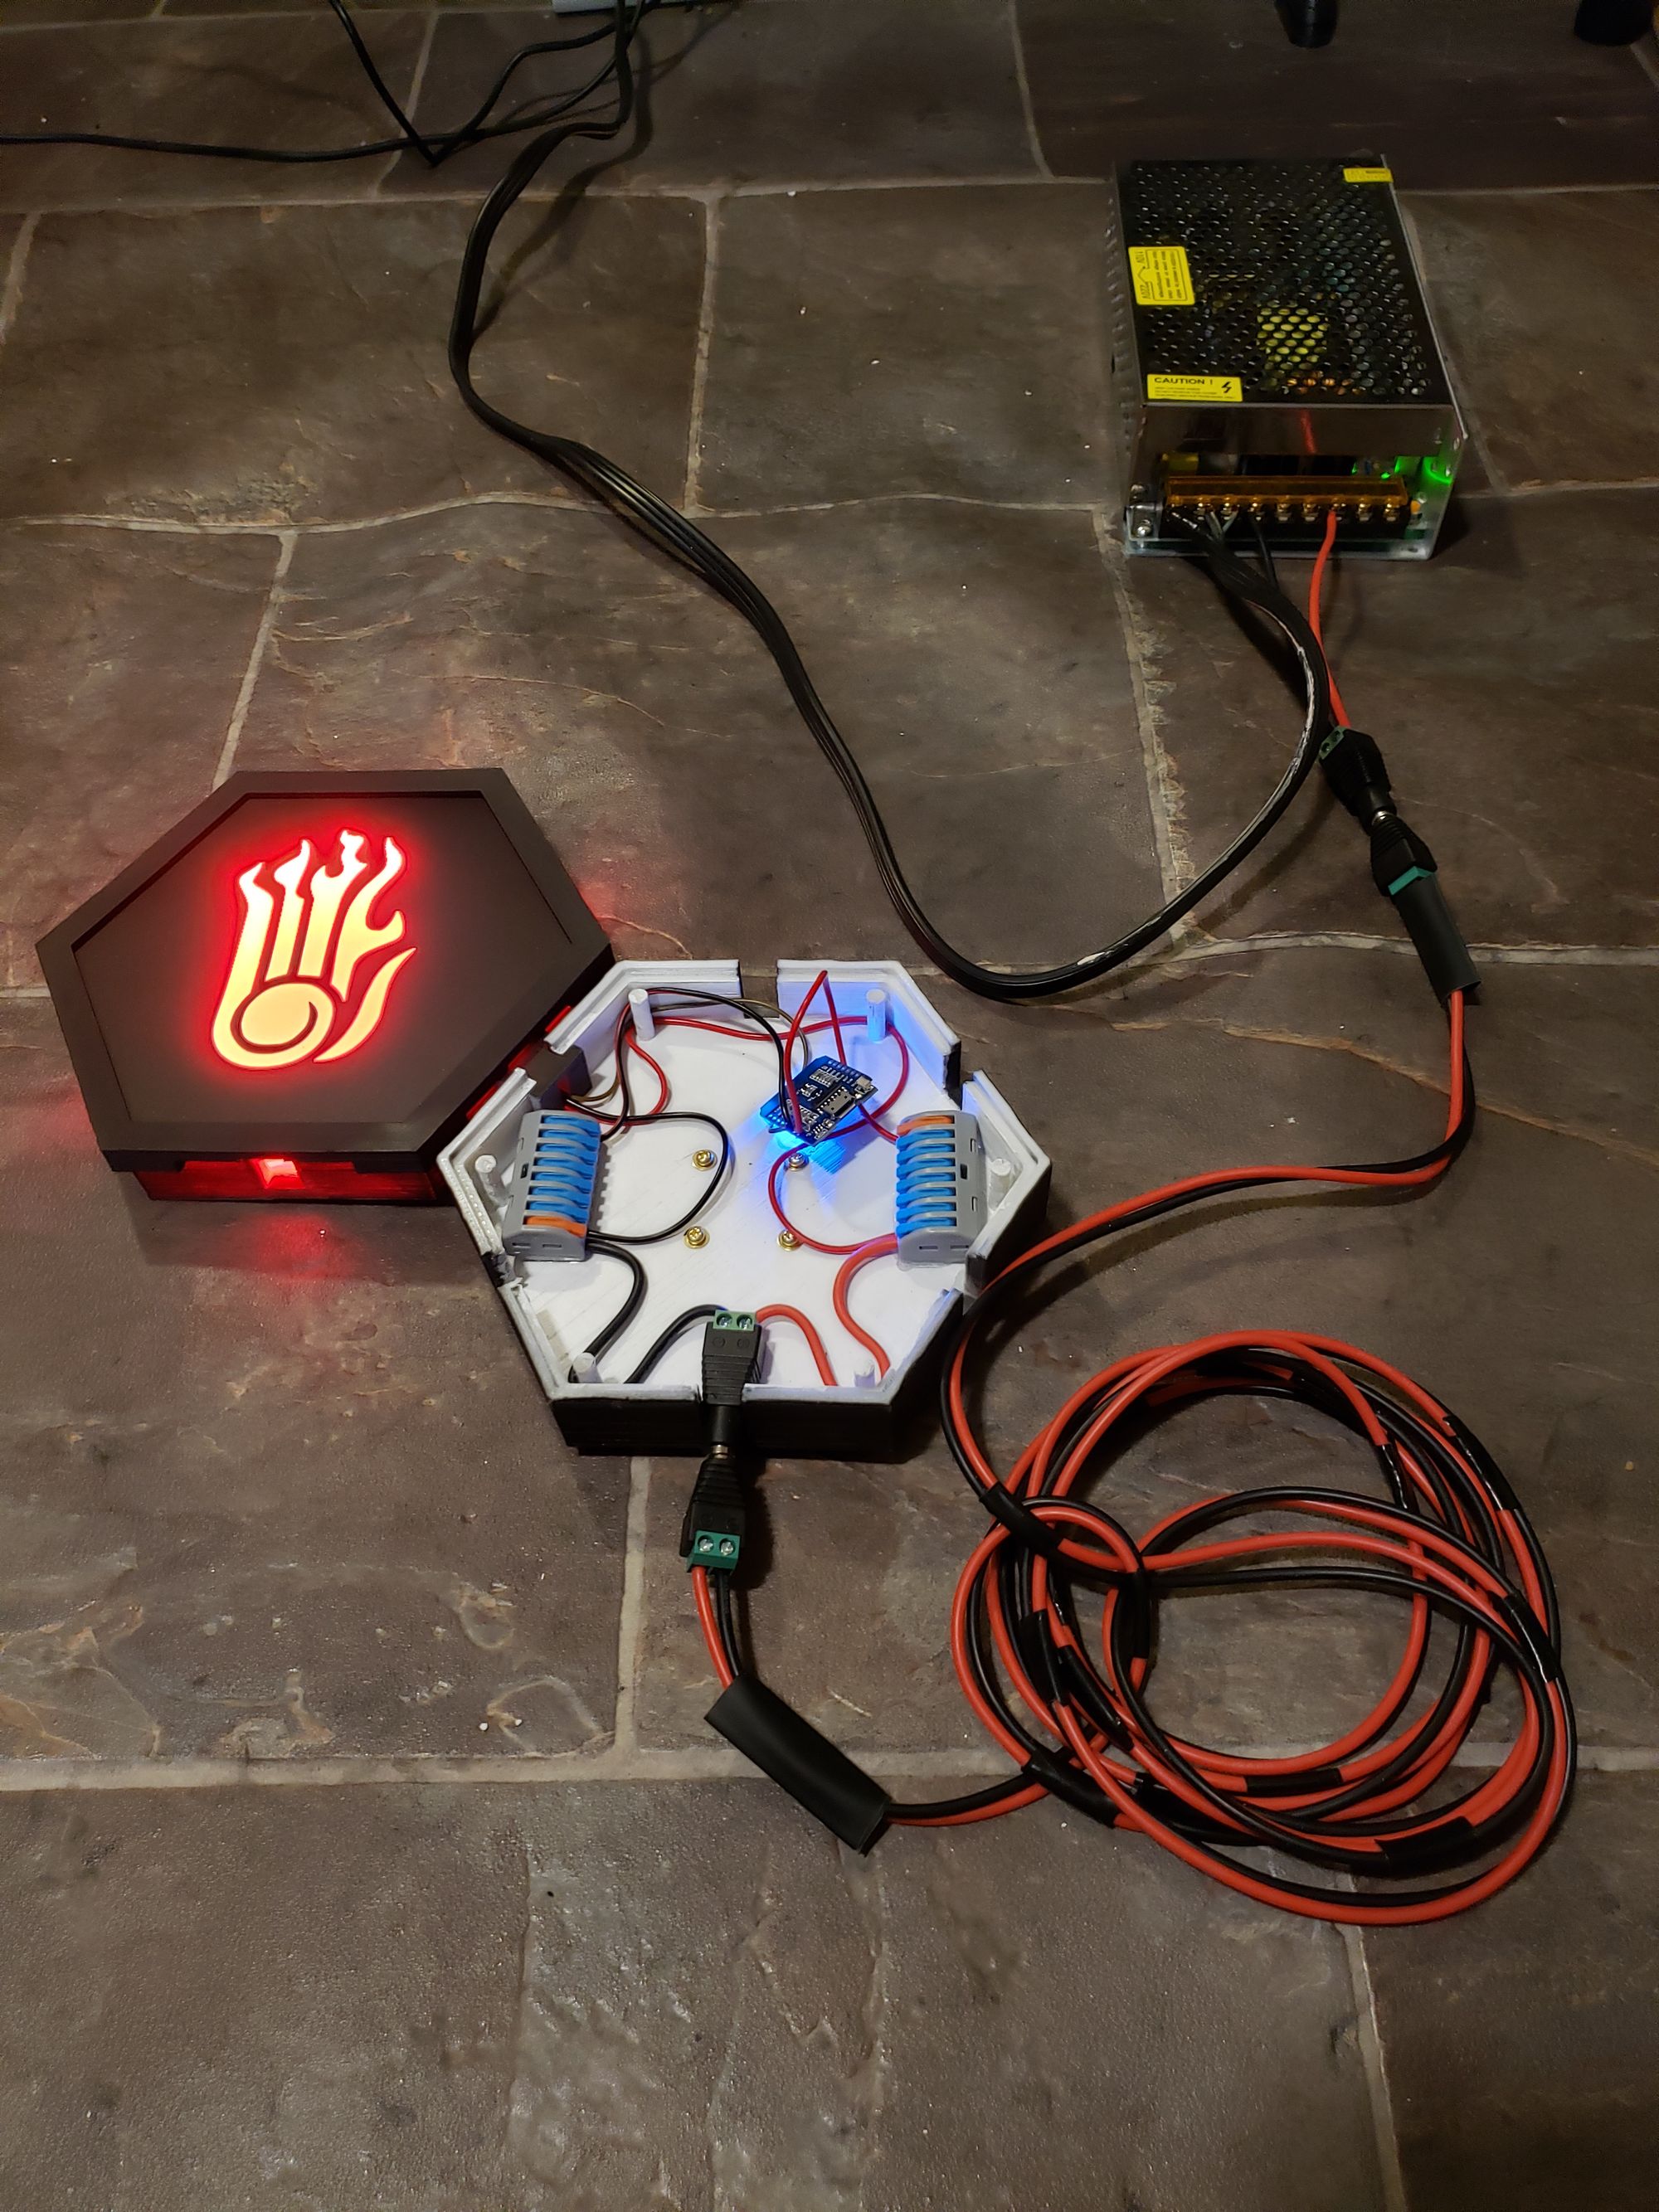
There's also the notion of power injection, which both makes it safer and more feasible. Power injection means that instead of each LED strip panel being connected in essentially one long line of power wires, you have multiple "source" wires to draw power from. Ideally, this would be going straight back to the power supply. In my case however, I made it the control box. This let me save my expensive thicker gauge wire for just the PSU to control box connection, and smaller wire for inside the LED panels. This minimizes the risk of a fire and voltage drop, so the LEDs will look brighter too!
To be even more cautious, I could have used some fuses in here, and I totally recommend you should. I was even prepared to use some inline fuses in the wiring for this project... but every time I ordered fuses it got cancelled so I accepted the minimal risk with my low amount of power draw, since I took other precautions.
For the long power supply cable run, I insulated the wires further by wrapping them in electrical tape meant for high heat, connected them to barrel plug ends and called it a day. Internally, I used some snap connectors to layout my wiring in the control box. As mentioned, each panel is separated here power-wise, however the data cable between LED strips could not be if I wanted each panel to have separate effects, so this was chained between strips.
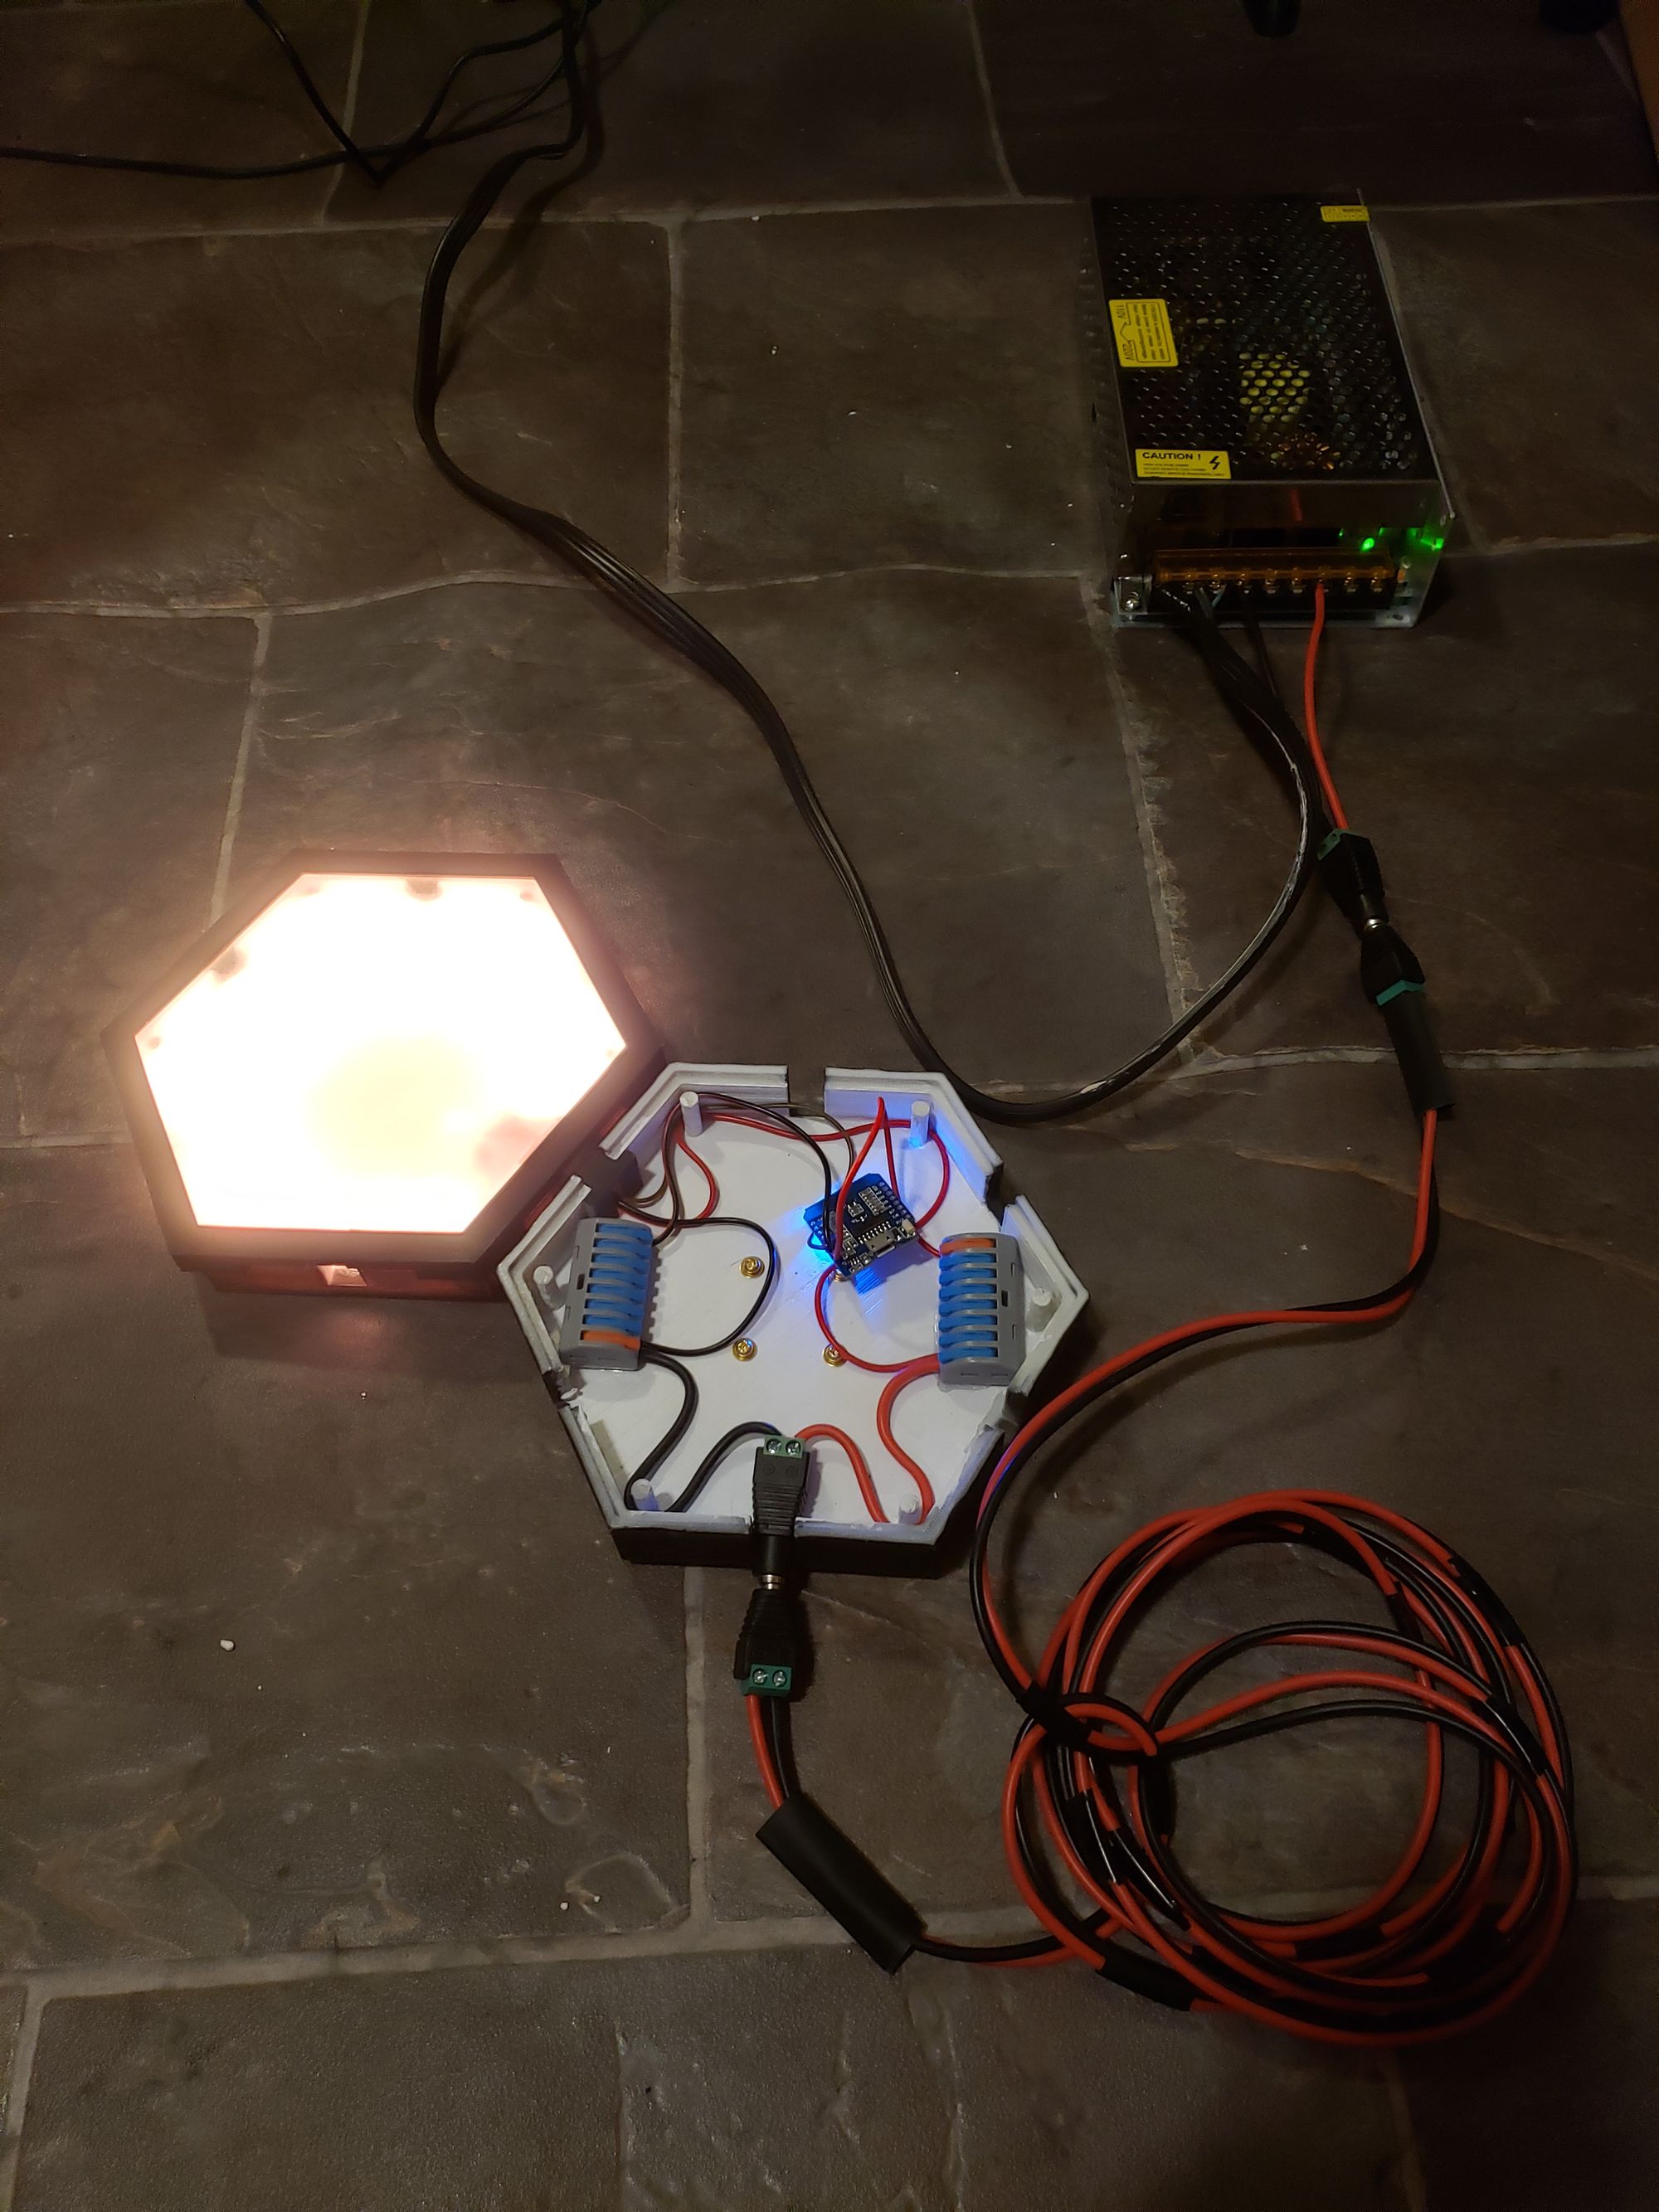
The power supply I went with was also due to me using 5v. I wanted to ensure I had room to expand down the line if I wanted to add more and have the spare wattage to do so. So here's a 5v 40A 200W power supply eh? Overkill, but I like overkill - it only ever spits out whatever the electronics request, that's how electronics work.
Stencils
I did mention this was customizable, right?
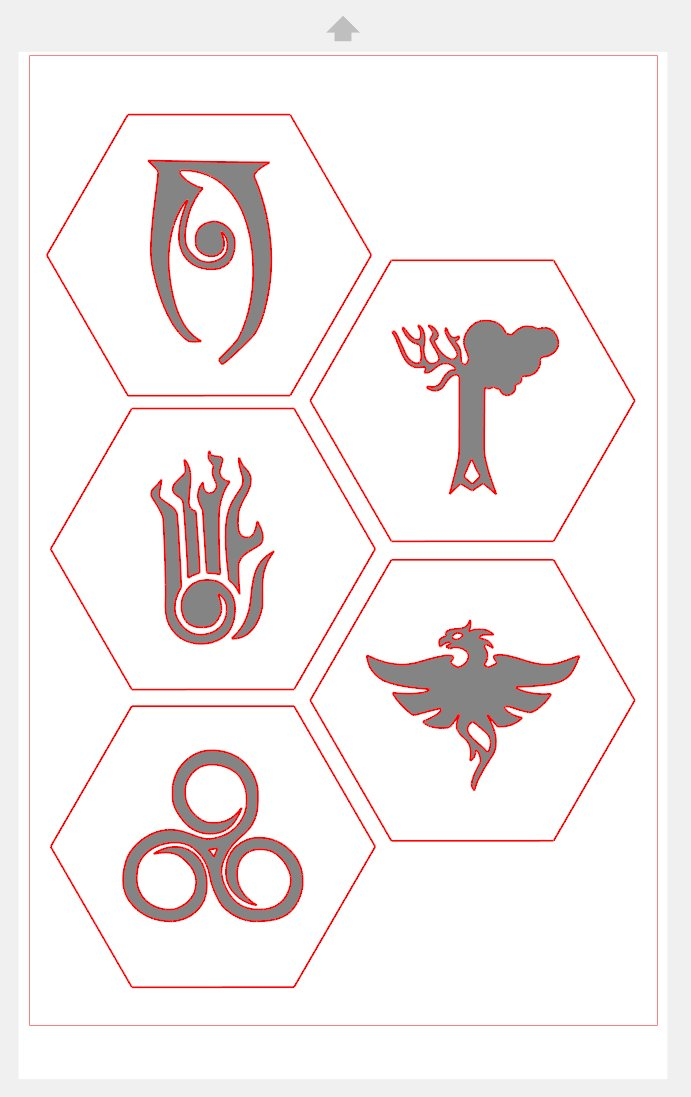
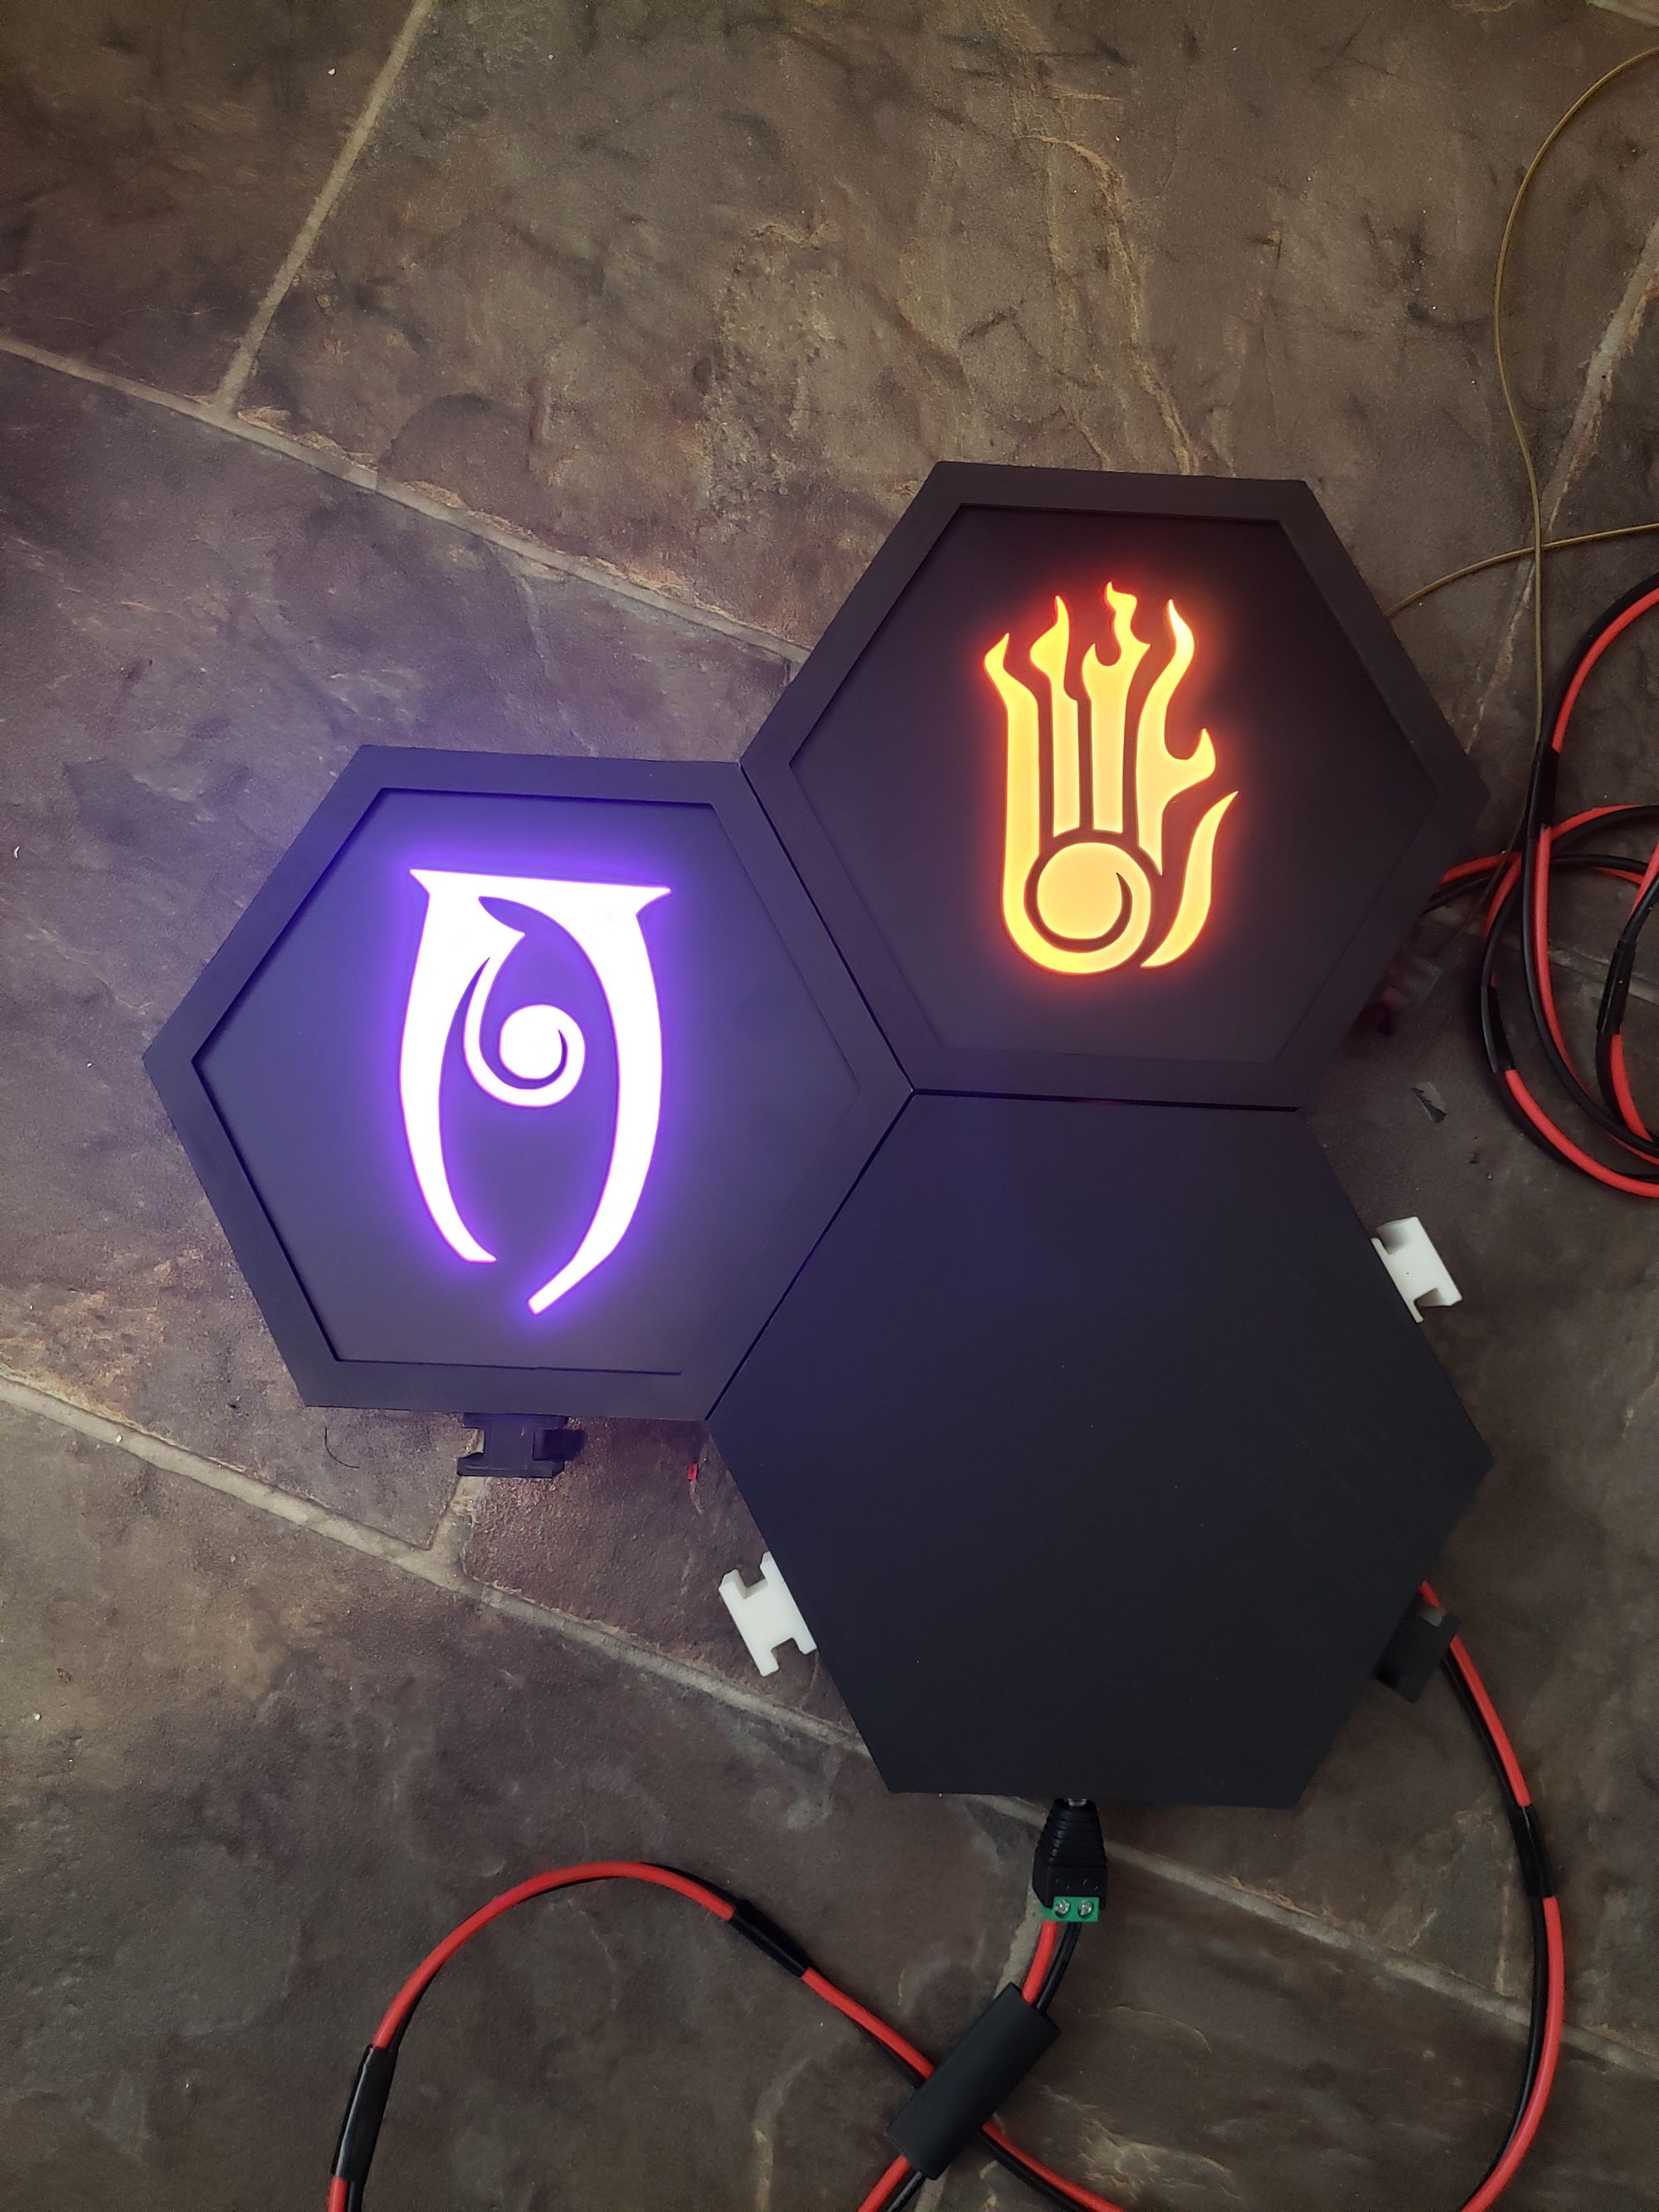
I wanted to theme mine around the Magic Schools as found in TES: Skyrim, but felt like if I made it permanent, I would regret it. That's where the idea came from to make them stencil silhouettes I could change at will per panel.
This step was pretty straight forward, but required some new tech I only recently acquired.
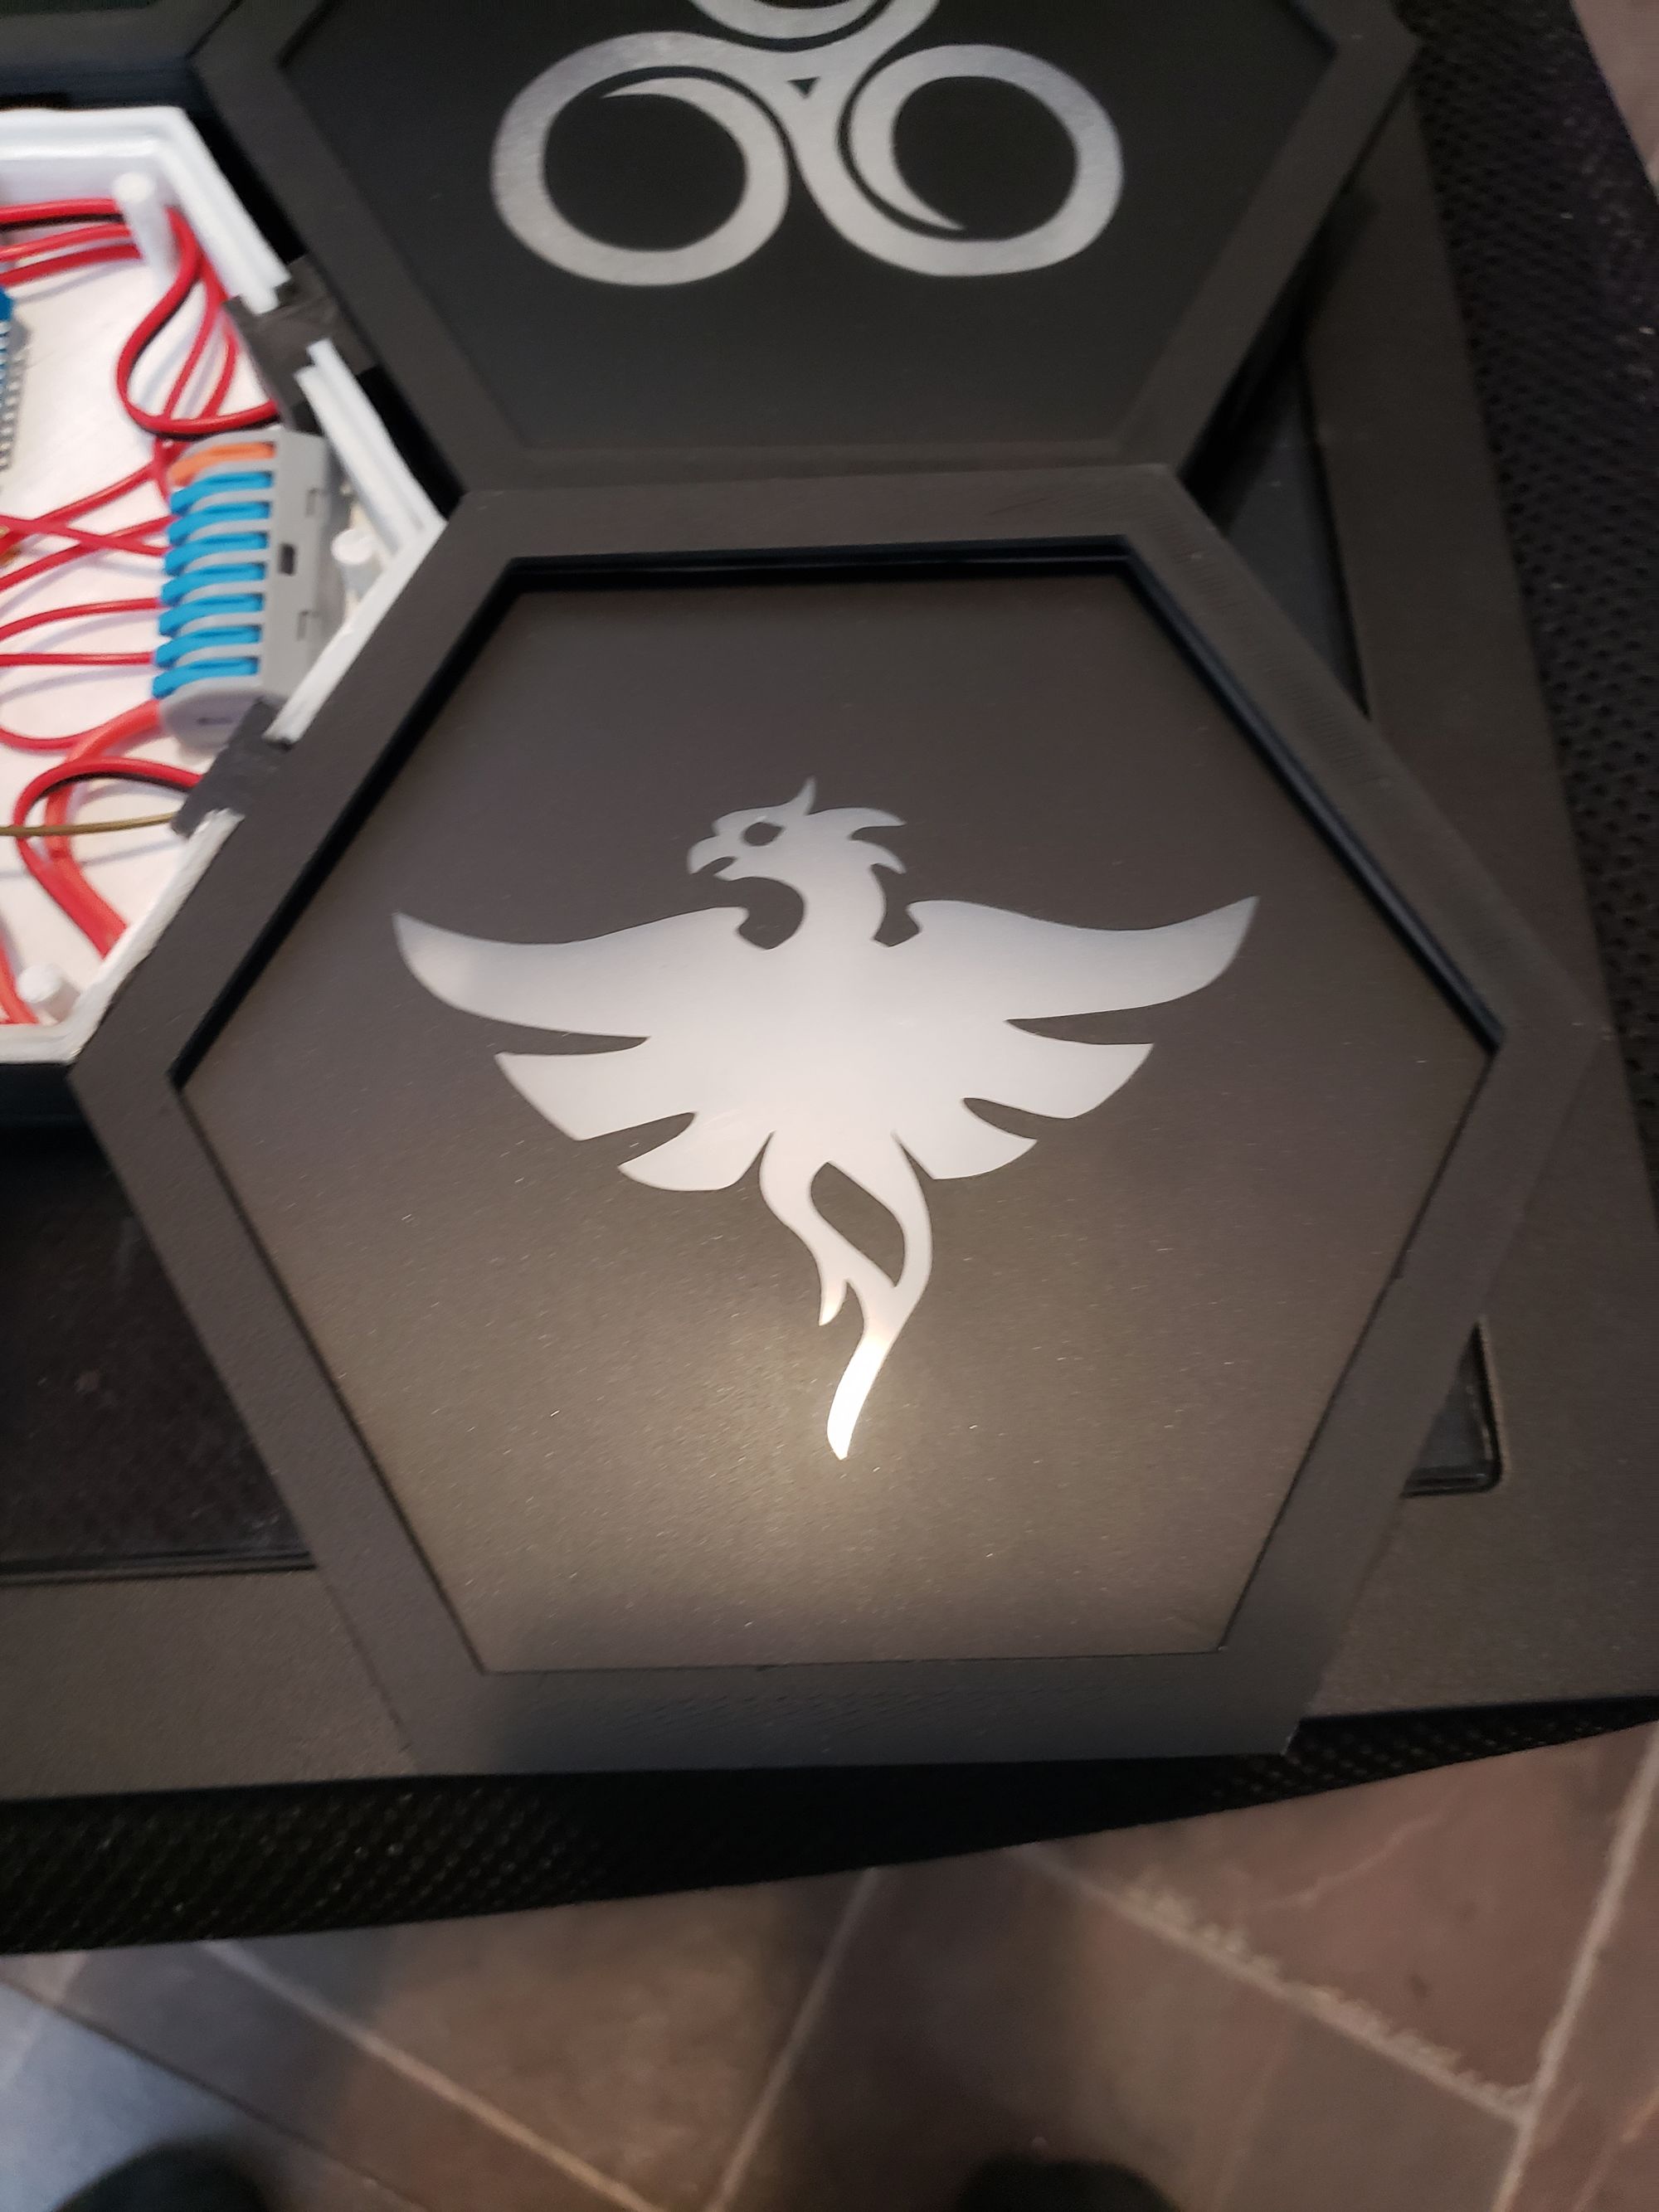
For each of the 5 magic schools in Skyrim, I had to find their iconic graphics and create an SVG out of them. Some were easier than others but it really was just a matter of finding a clean image of each, editing it to be cleaner, then converting it to black and white. Once B&W, I then tried a few programs to extract an SVG out of it, then manually edited the paths of each where it was broken until I had what I wanted.
Then came the new stuff. I had recently acquired a programmable vinyl cutter - A silhouette cameo. After spending a day figuring out their weird software, eventually it was as easy as plopping in the images I made above, setting my cut settings right, and hitting print - well, not exactly.
I had to adjust the images and create the actual hexagon shapes around them, try 5 times because the cut settings were off, and the machine sounded like it was ripping itself apart when printing. Yet, it all worked?
I don't have any pictures of the next steps, but it involved what vinyl appliers often call "weeding". Carefully picking out the parts of the vinyl cut you don't want, then applying transfer tape to the front of the vinyl. From this point, you peel the back of the vinyl off, and apply it to whatever you want it applied to.
For me, I had these clear plastic sheets I wanted to apply it to, so it would be see-through but semi-rigid. This was so I could just swap each "sheet", instead of the whole acrylic panel if I had applied it directly to it.
I first spritzed the sheet with a bit of soapy water then applied my transfer-taped vinyl to it, squeegeeing out any soapy water until it was smooth, and at that point it was ready to take off the transfer tape very slowly and tada! All done.
The stencils as PNGs, SVGs, Modified PNGs, and even studio3 files can be found here:
Assembly
Thankfully not the language...
The assembly can be split into multiple parts - Physical parts, Electronics, then the software setup. Let's start with the printed parts.
Physical Parts Prep
The printed parts were quite simple and would snap together, but were loose fits until the covers where in place. Due to my tolerances, the covers were also loose until the acrylic panels were in place too.
The covers were just there for test fitting at first, as I'd need to take things apart for the wiring.
The only other printed part needed for assembly was the mounting block on the back. Each one had four holes for heat-set inserts, which I applied using a soldering iron. This would let me screw them in freely to the panels and move them around without damaging the plastic as needed.
Putting in heat-set inserts
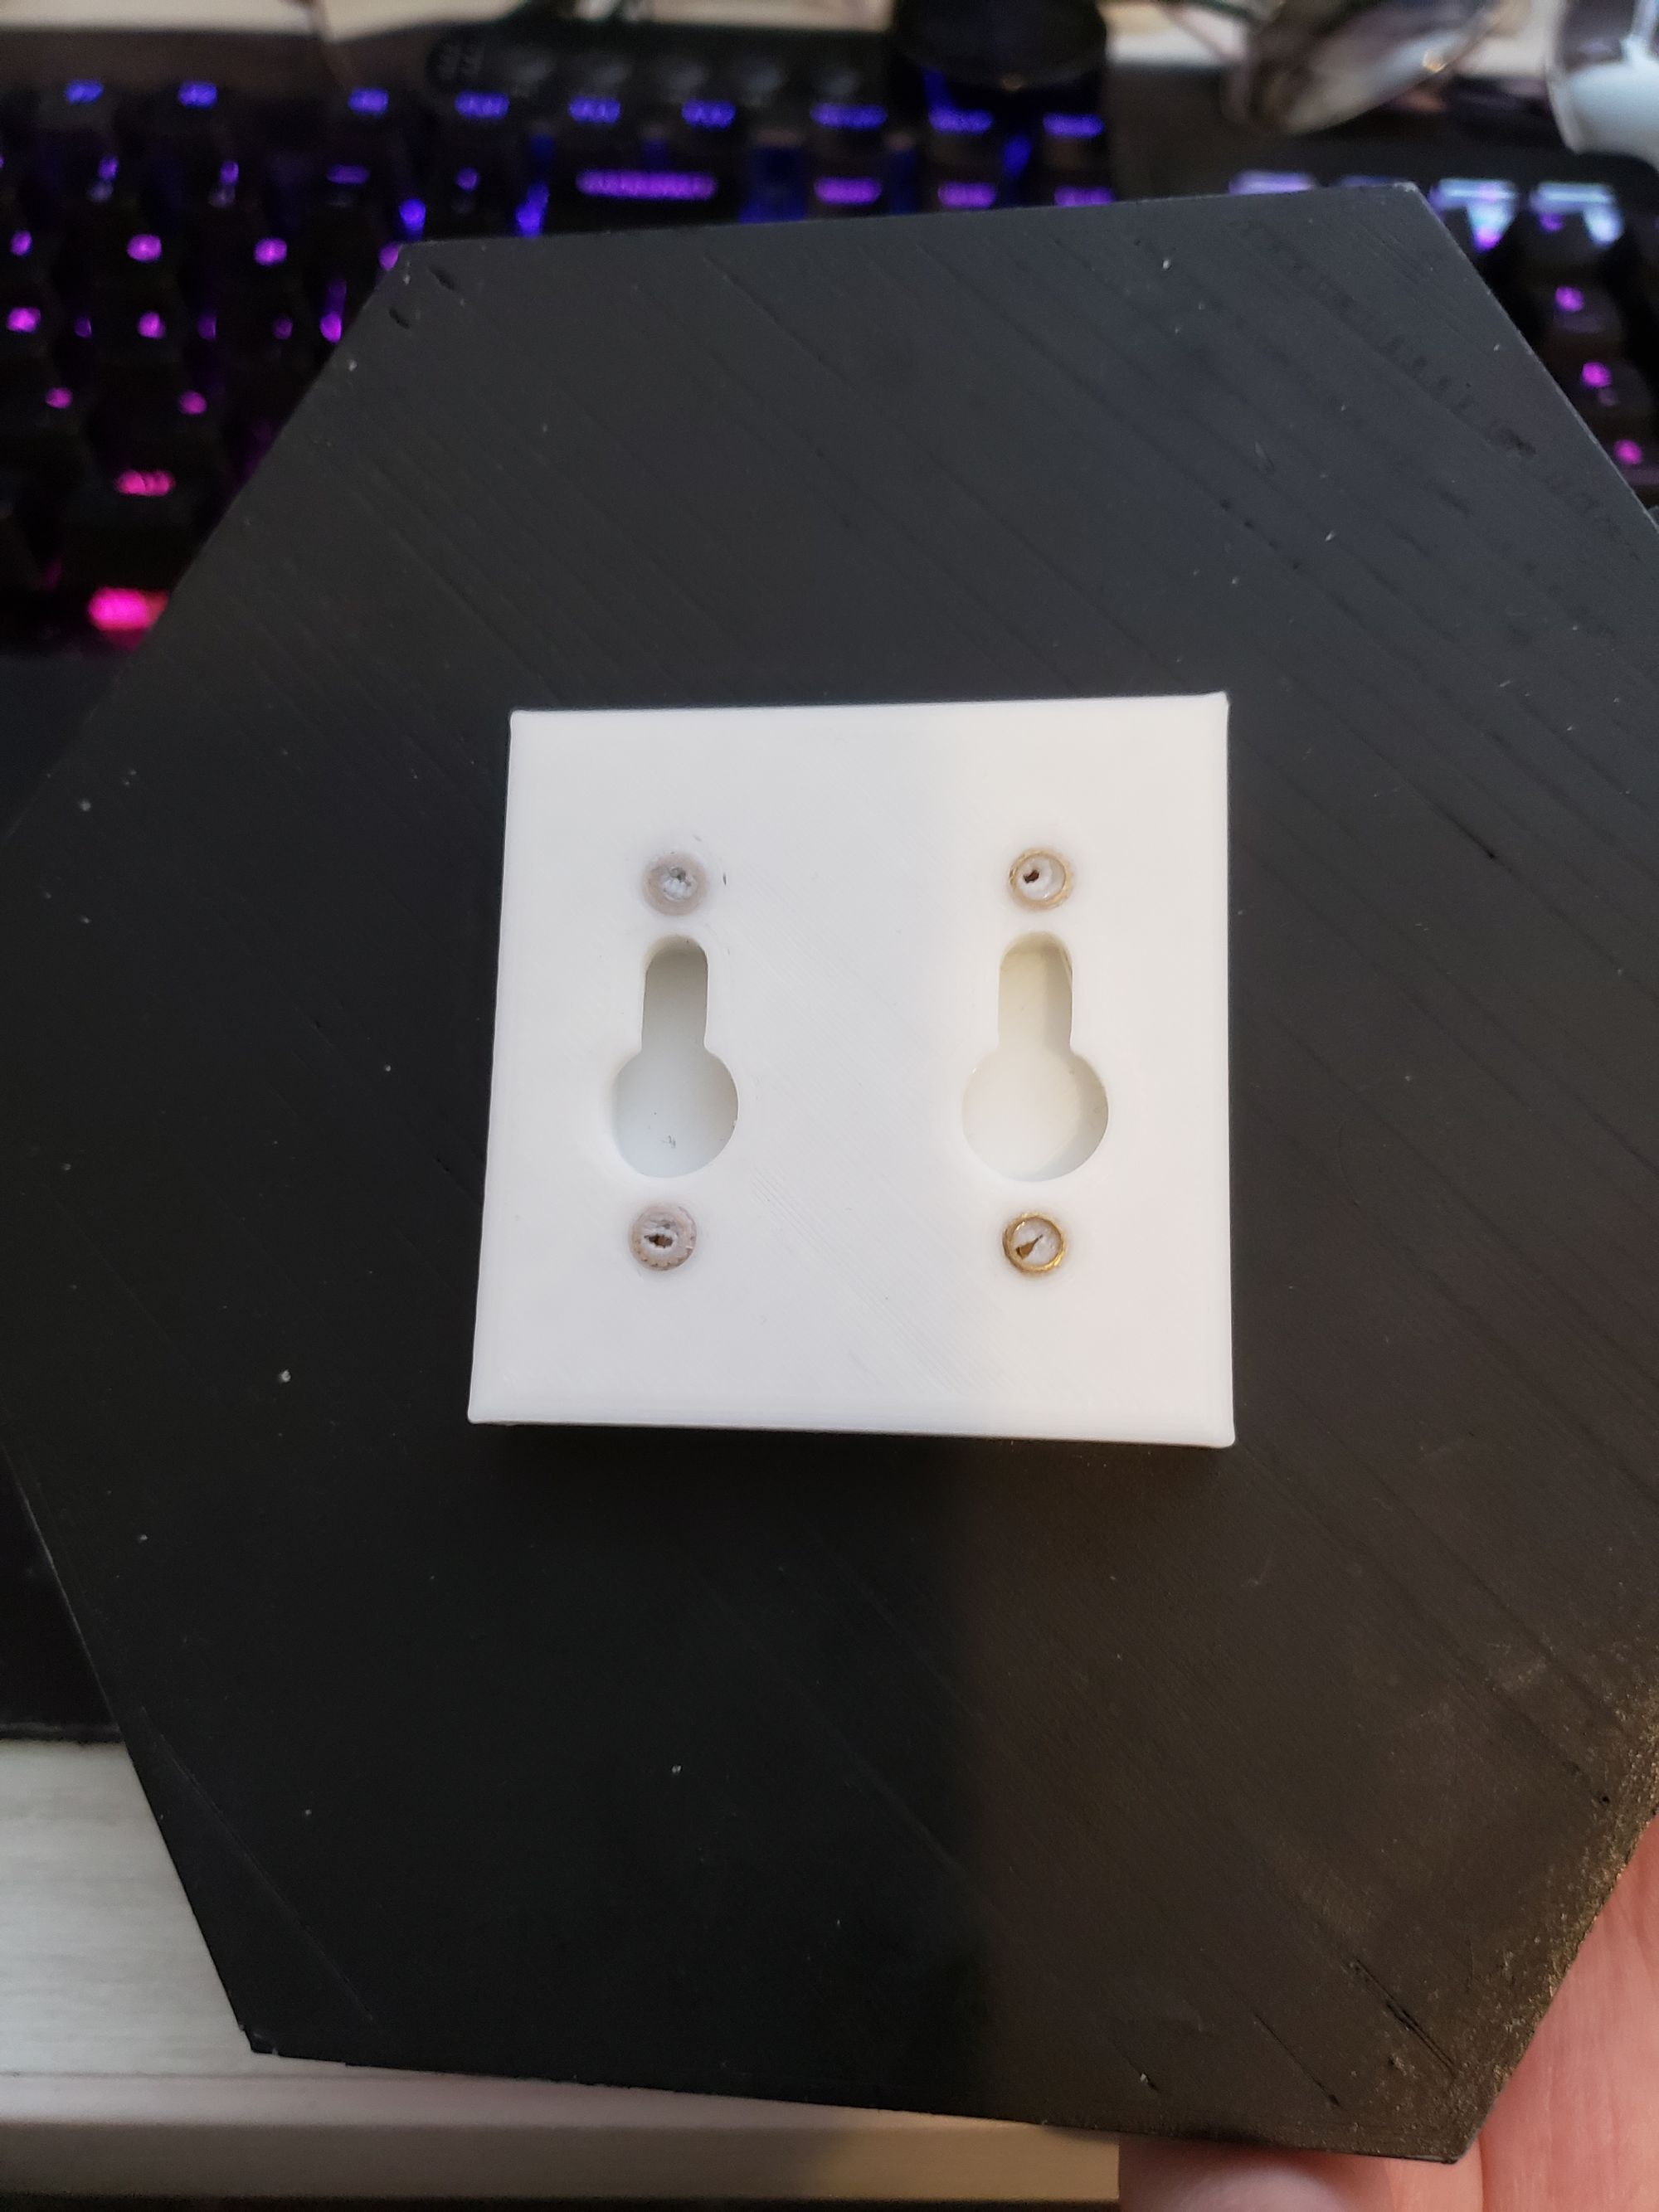
How the heat-set inserts look when in the mounting block and attached to a panel
Before assembling the final piece with the electronics, there's first a test fit of everything in one panel.
Single panel assembly without wiring
Finally for the acrylic hexagon, it was not forgotten! I had them custom ordered on Etsy because me and cutting acrylic/plexiglass have a bad history of never working well. Unfortunately, they were perfectly clear. Do note if you order some yourself, always make sure all sides are even length. You wouldn't believe how many people sell them with two odd length sides because they expect it's for wedding table panels or something, and don't tell you this upfront...
I could have sanded each side for diffusion, but it may be uneven so I opted instead to use a frosted glass spray paint on them. This gave a nice diffusion to them when properly distanced. Then it was just a matter of plopping it into each panel.

Assembly with testing electronics
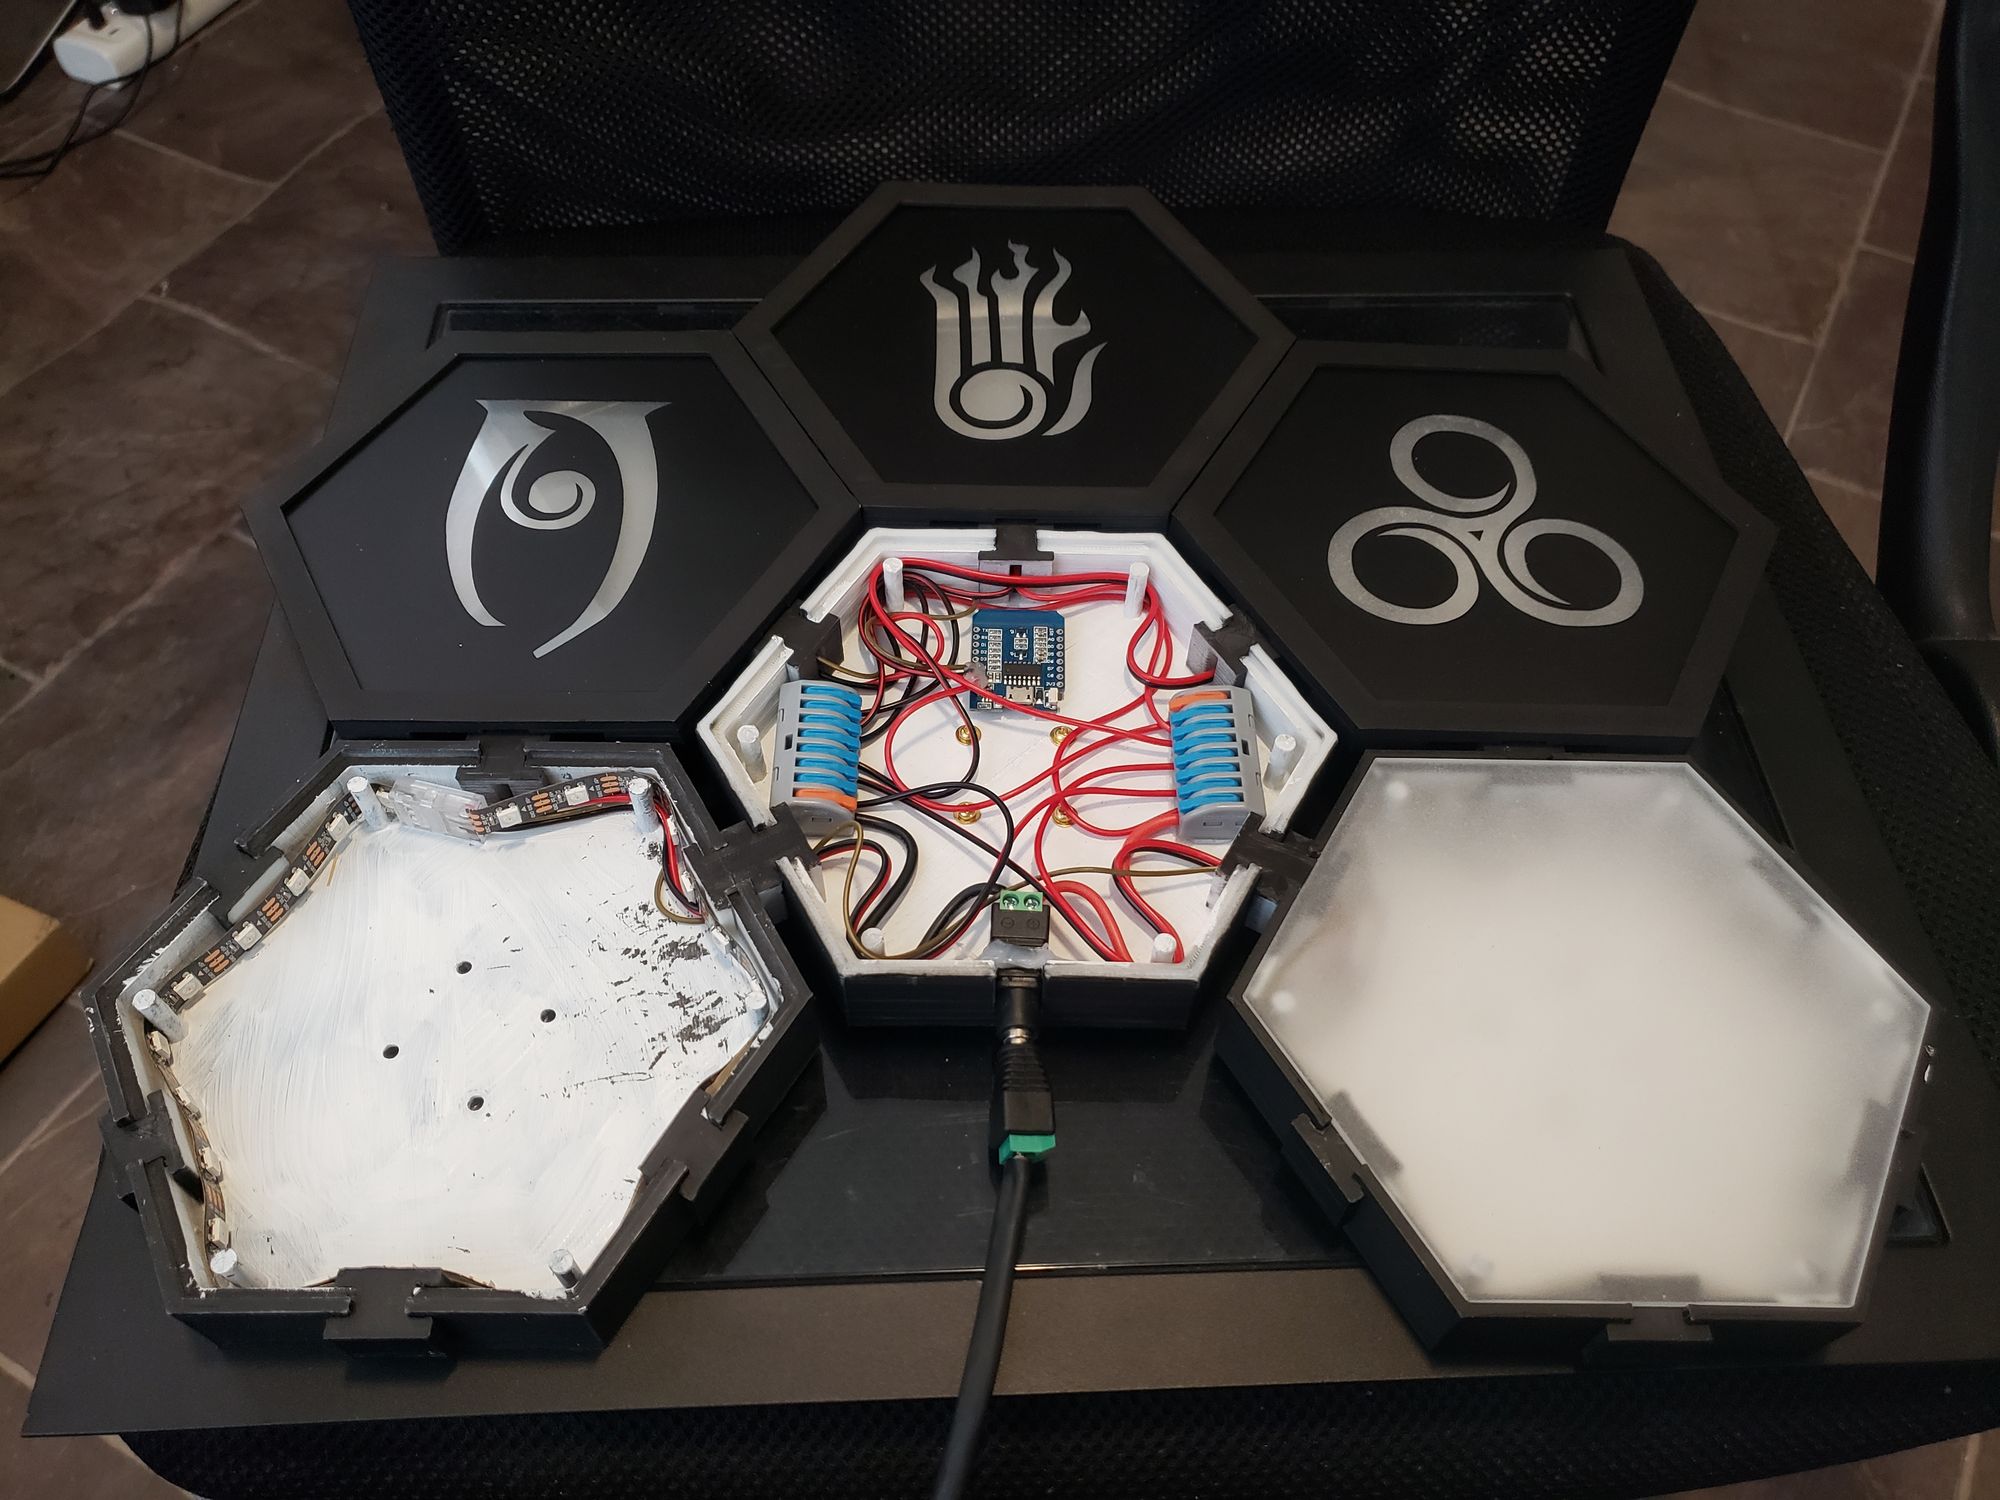
Electronics Setup
Now time to hook everything up together. It may look complex but it's rather simple. Each panel's red and black wires (positive & negative/ground) for power are connected to the hubs in the control panel, in order to split the load as if it's an injection point.
Then the single wire data cable is fed through each panel in series. Once done, each pane then gets combined together in the end.


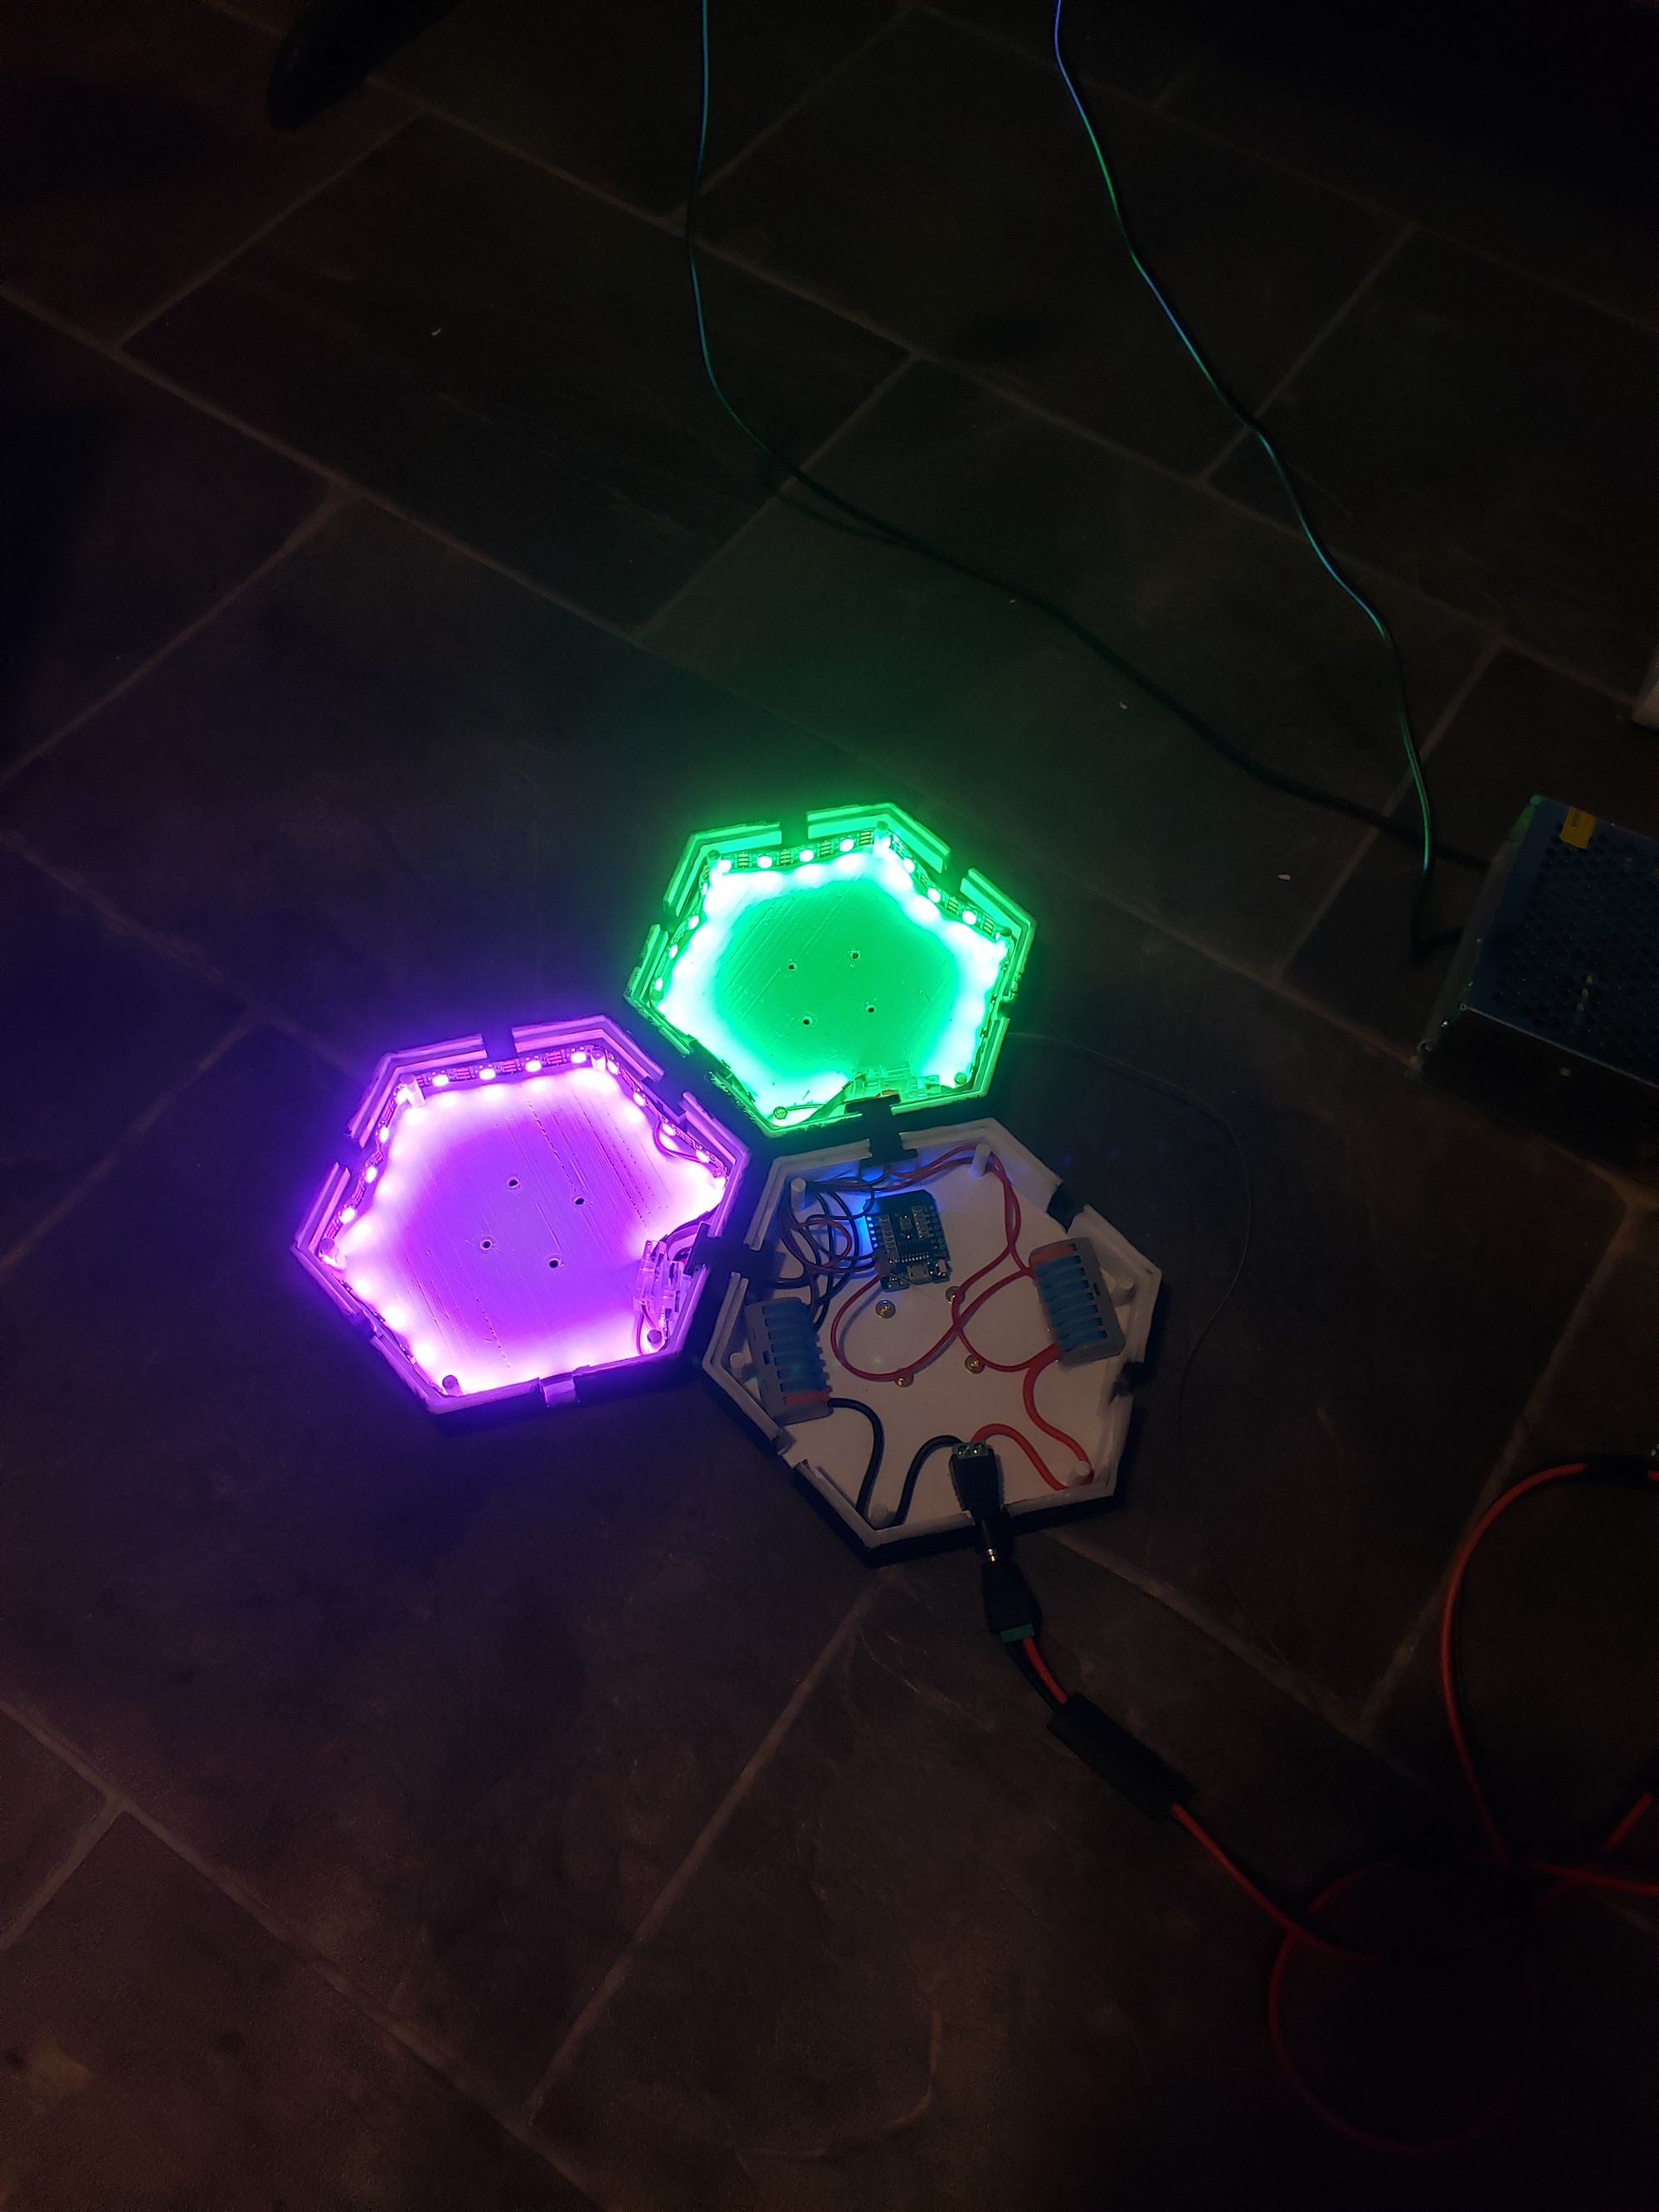
Electronics final assembly
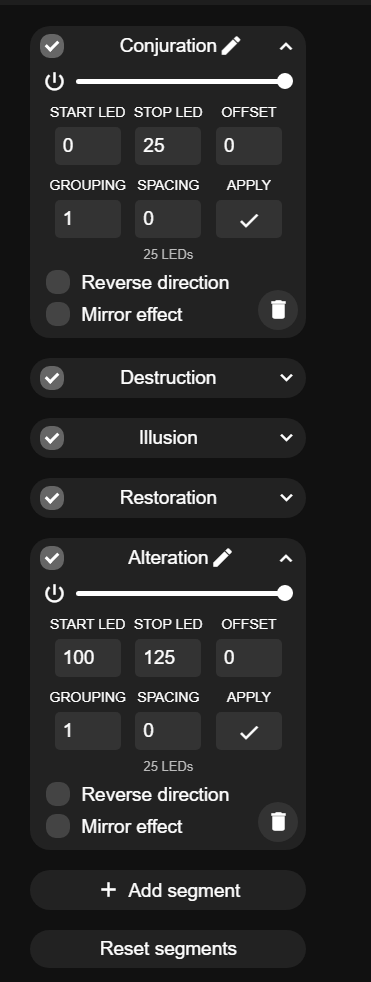
WLED Software Setup
I won't go deep into the WLED configuration or setup as the internet is full of instructions on it. Instead, I'll just show how to setup segments like mine.
Once you have it all setup, you can go to the settings and create segments. Here you can specify the span of LEDs in said segment, give it a name, etc. When you have a segment selected, you can actually also define the lighting effects and presets for it individually, or multiple at once when selected.
Final Assembly
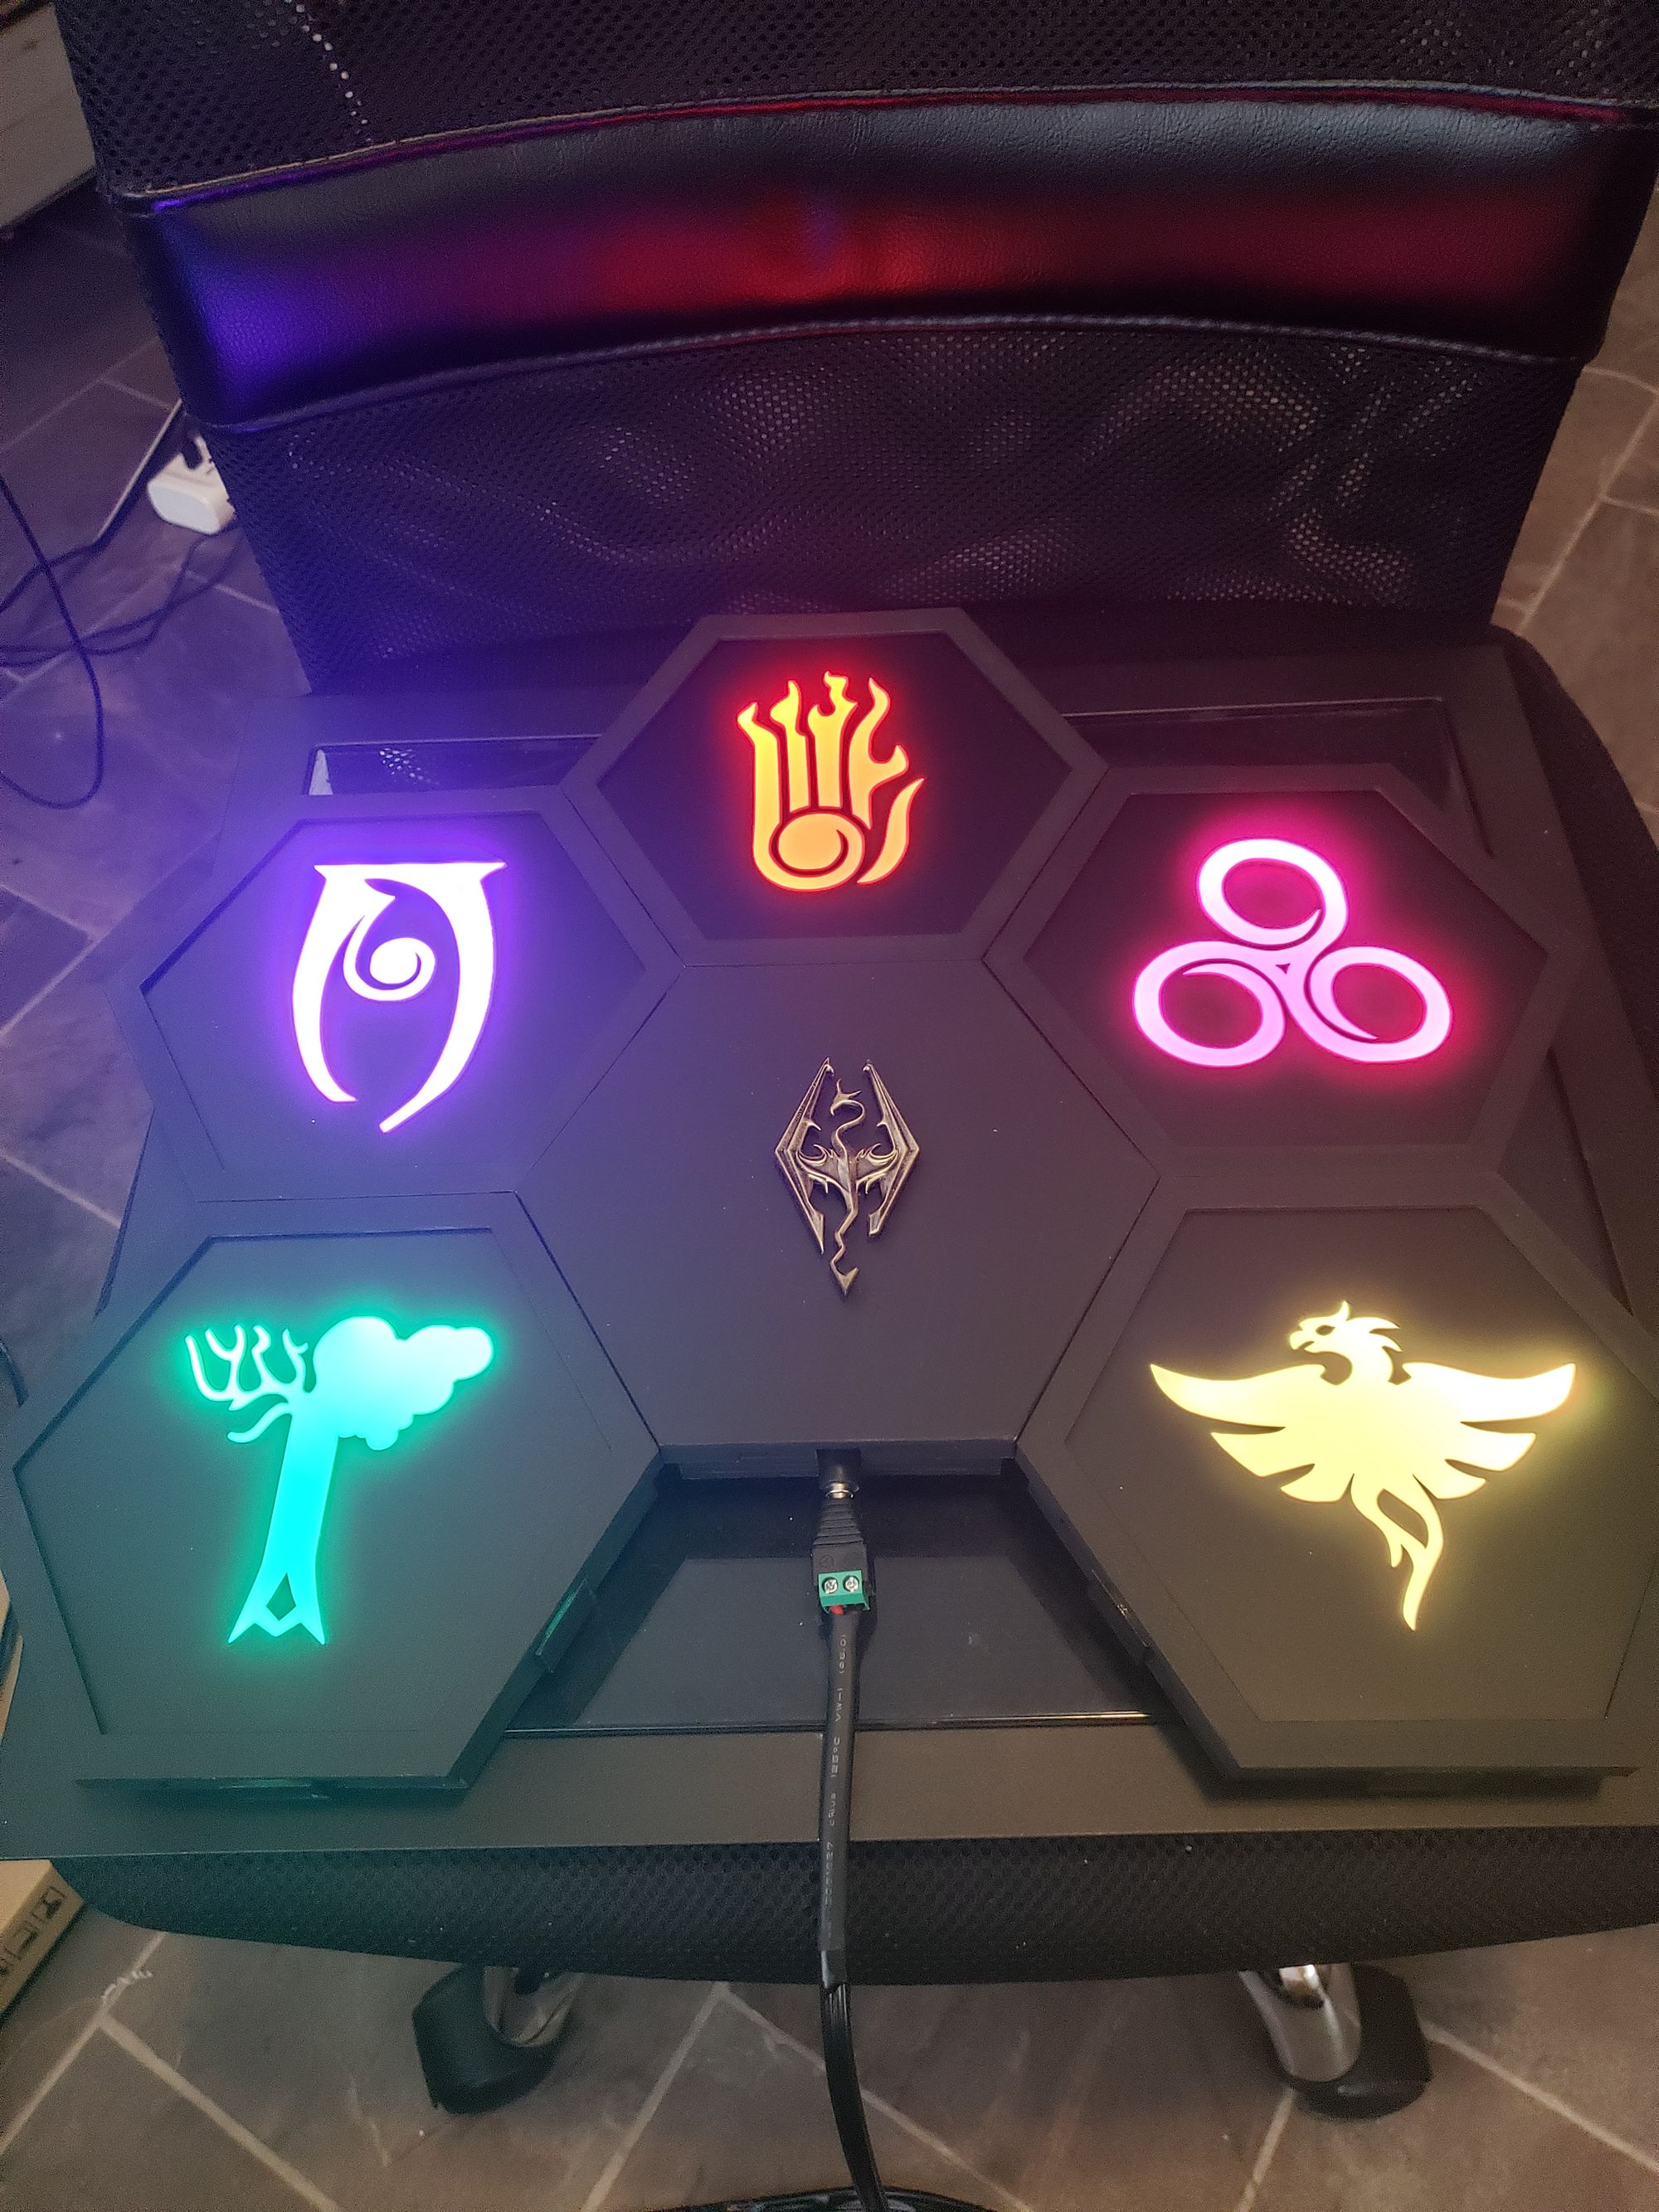
When it's all together, it just looks pretty dandy!

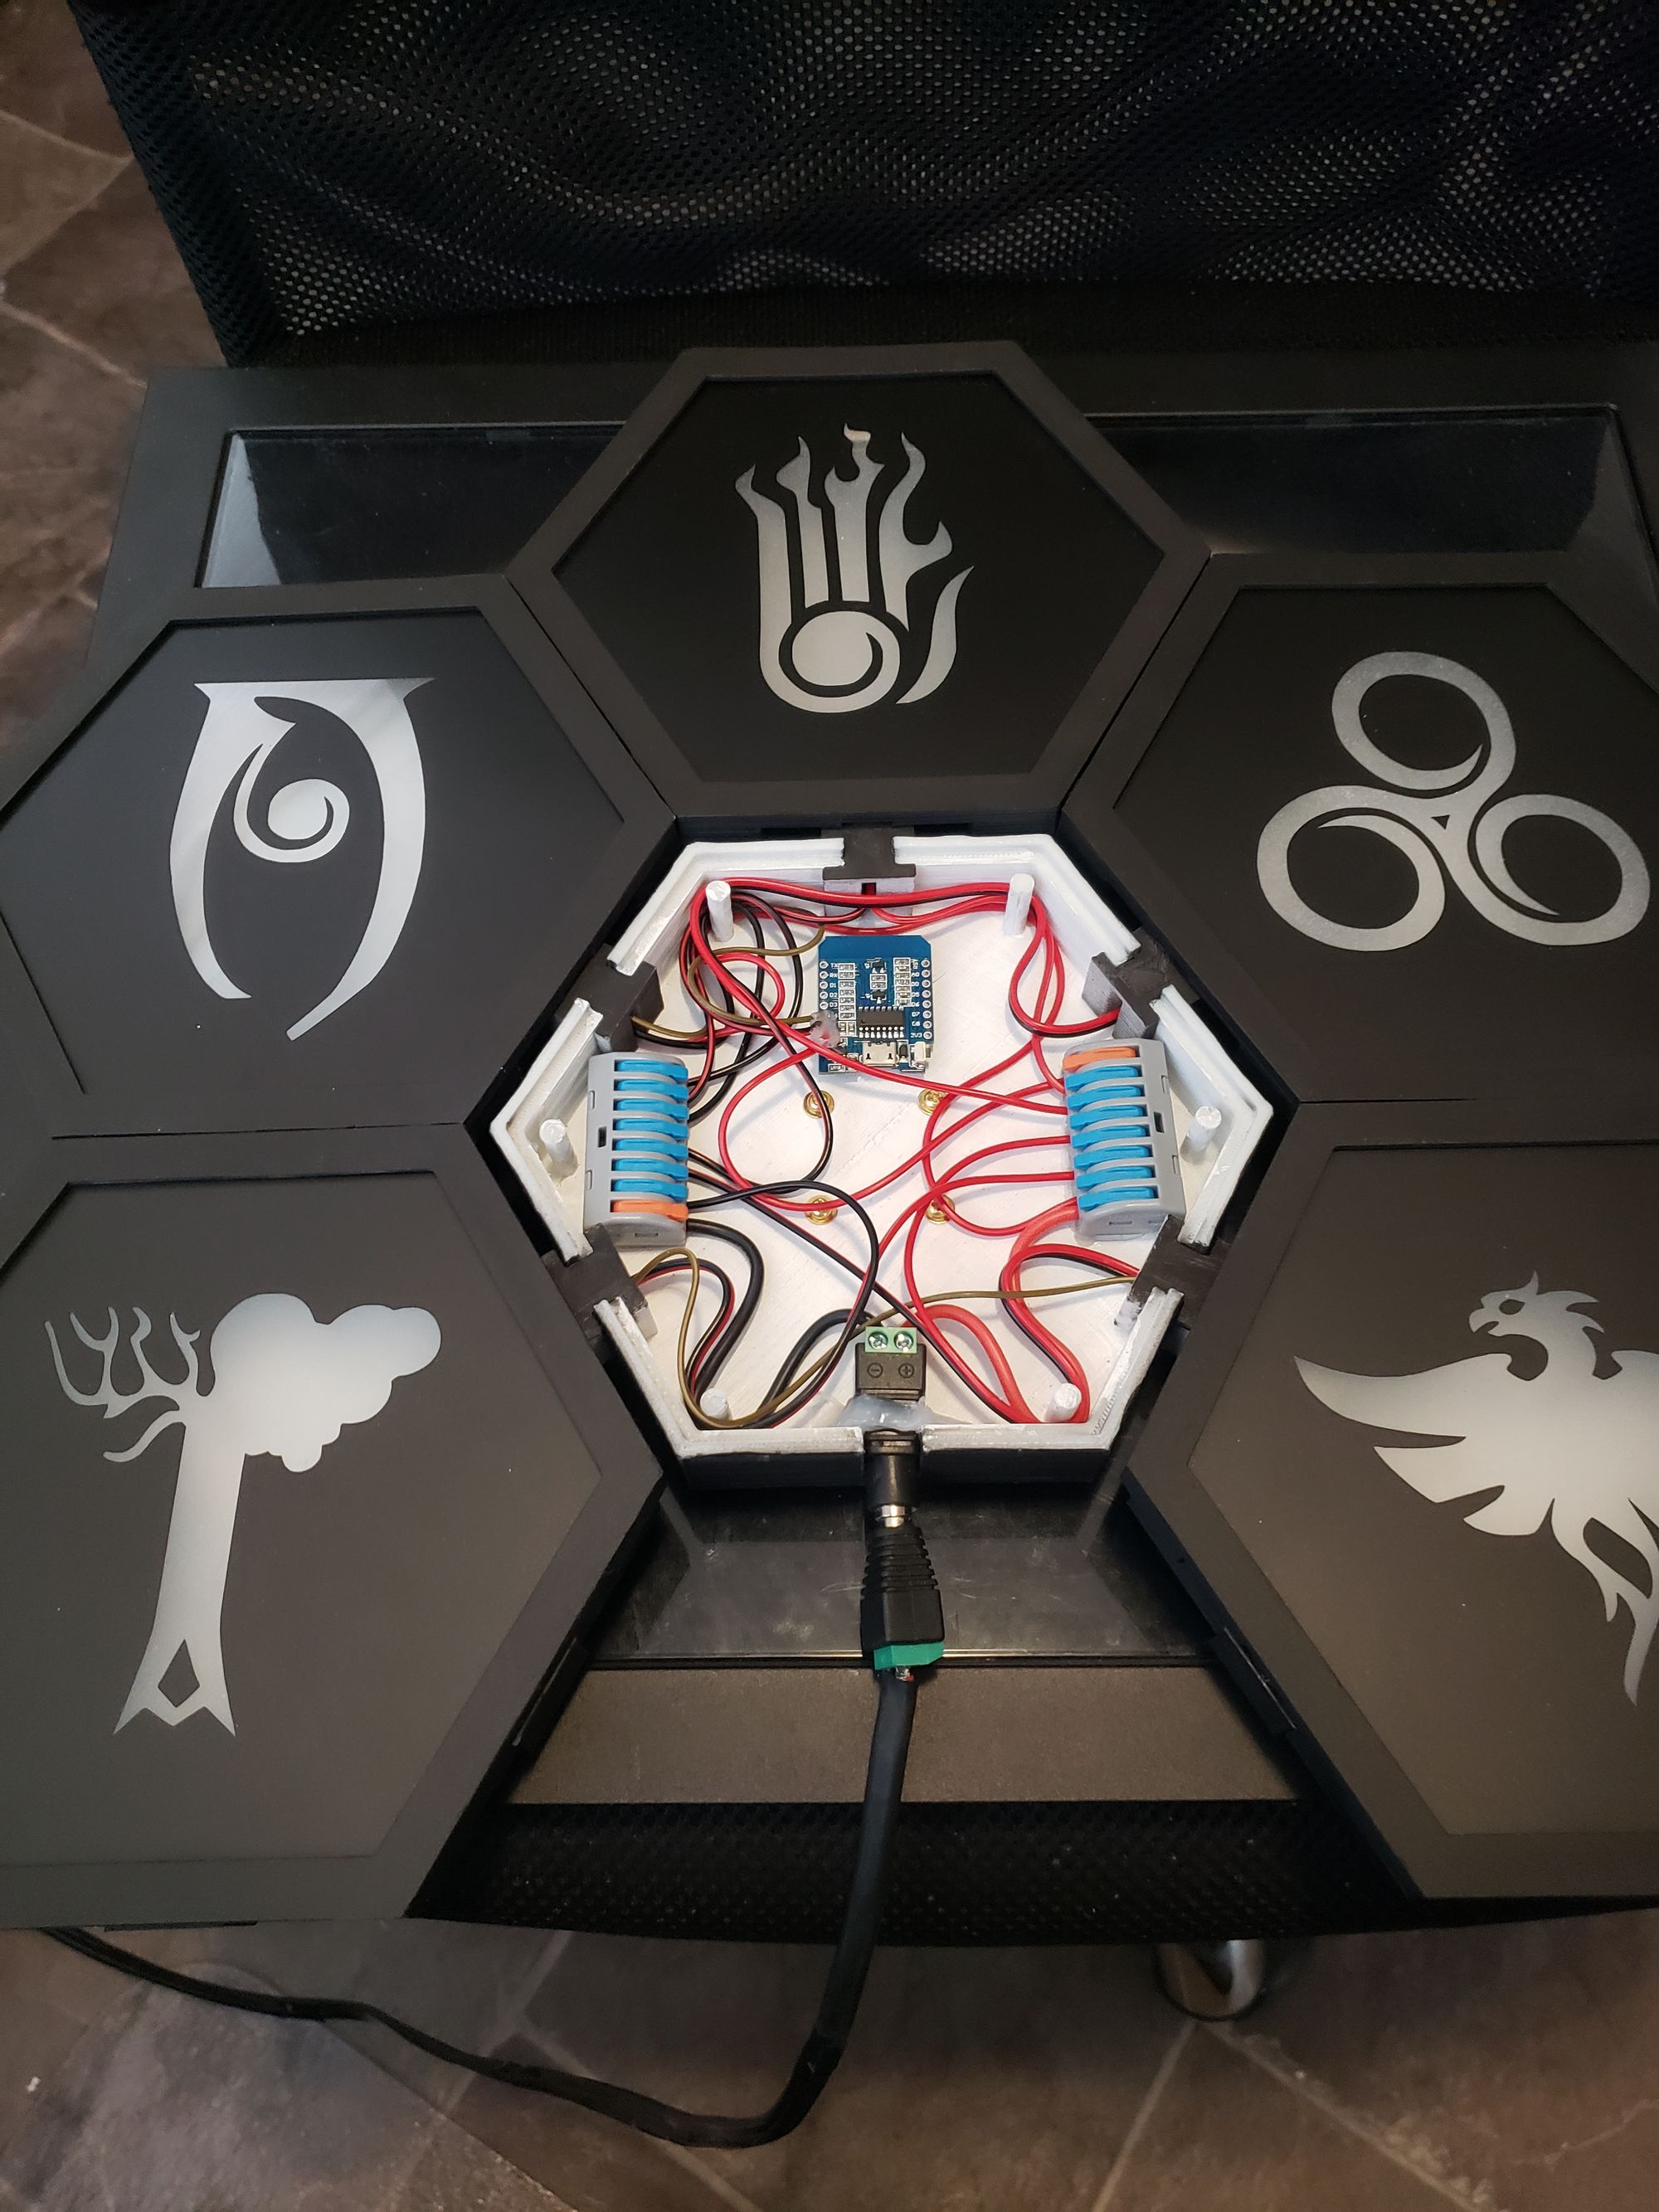
Final assembly
I almost forgot the last detail! For the centre cover, I thought it felt bland and empty. So I glued a small piece of steel from a can to the back of the cover, then resin-printed the Imperial Dragon emblem. Painted it gold, glued magnets to the back, and now I can have anything I want in the middle there using the magic of magnets! How do they work!?

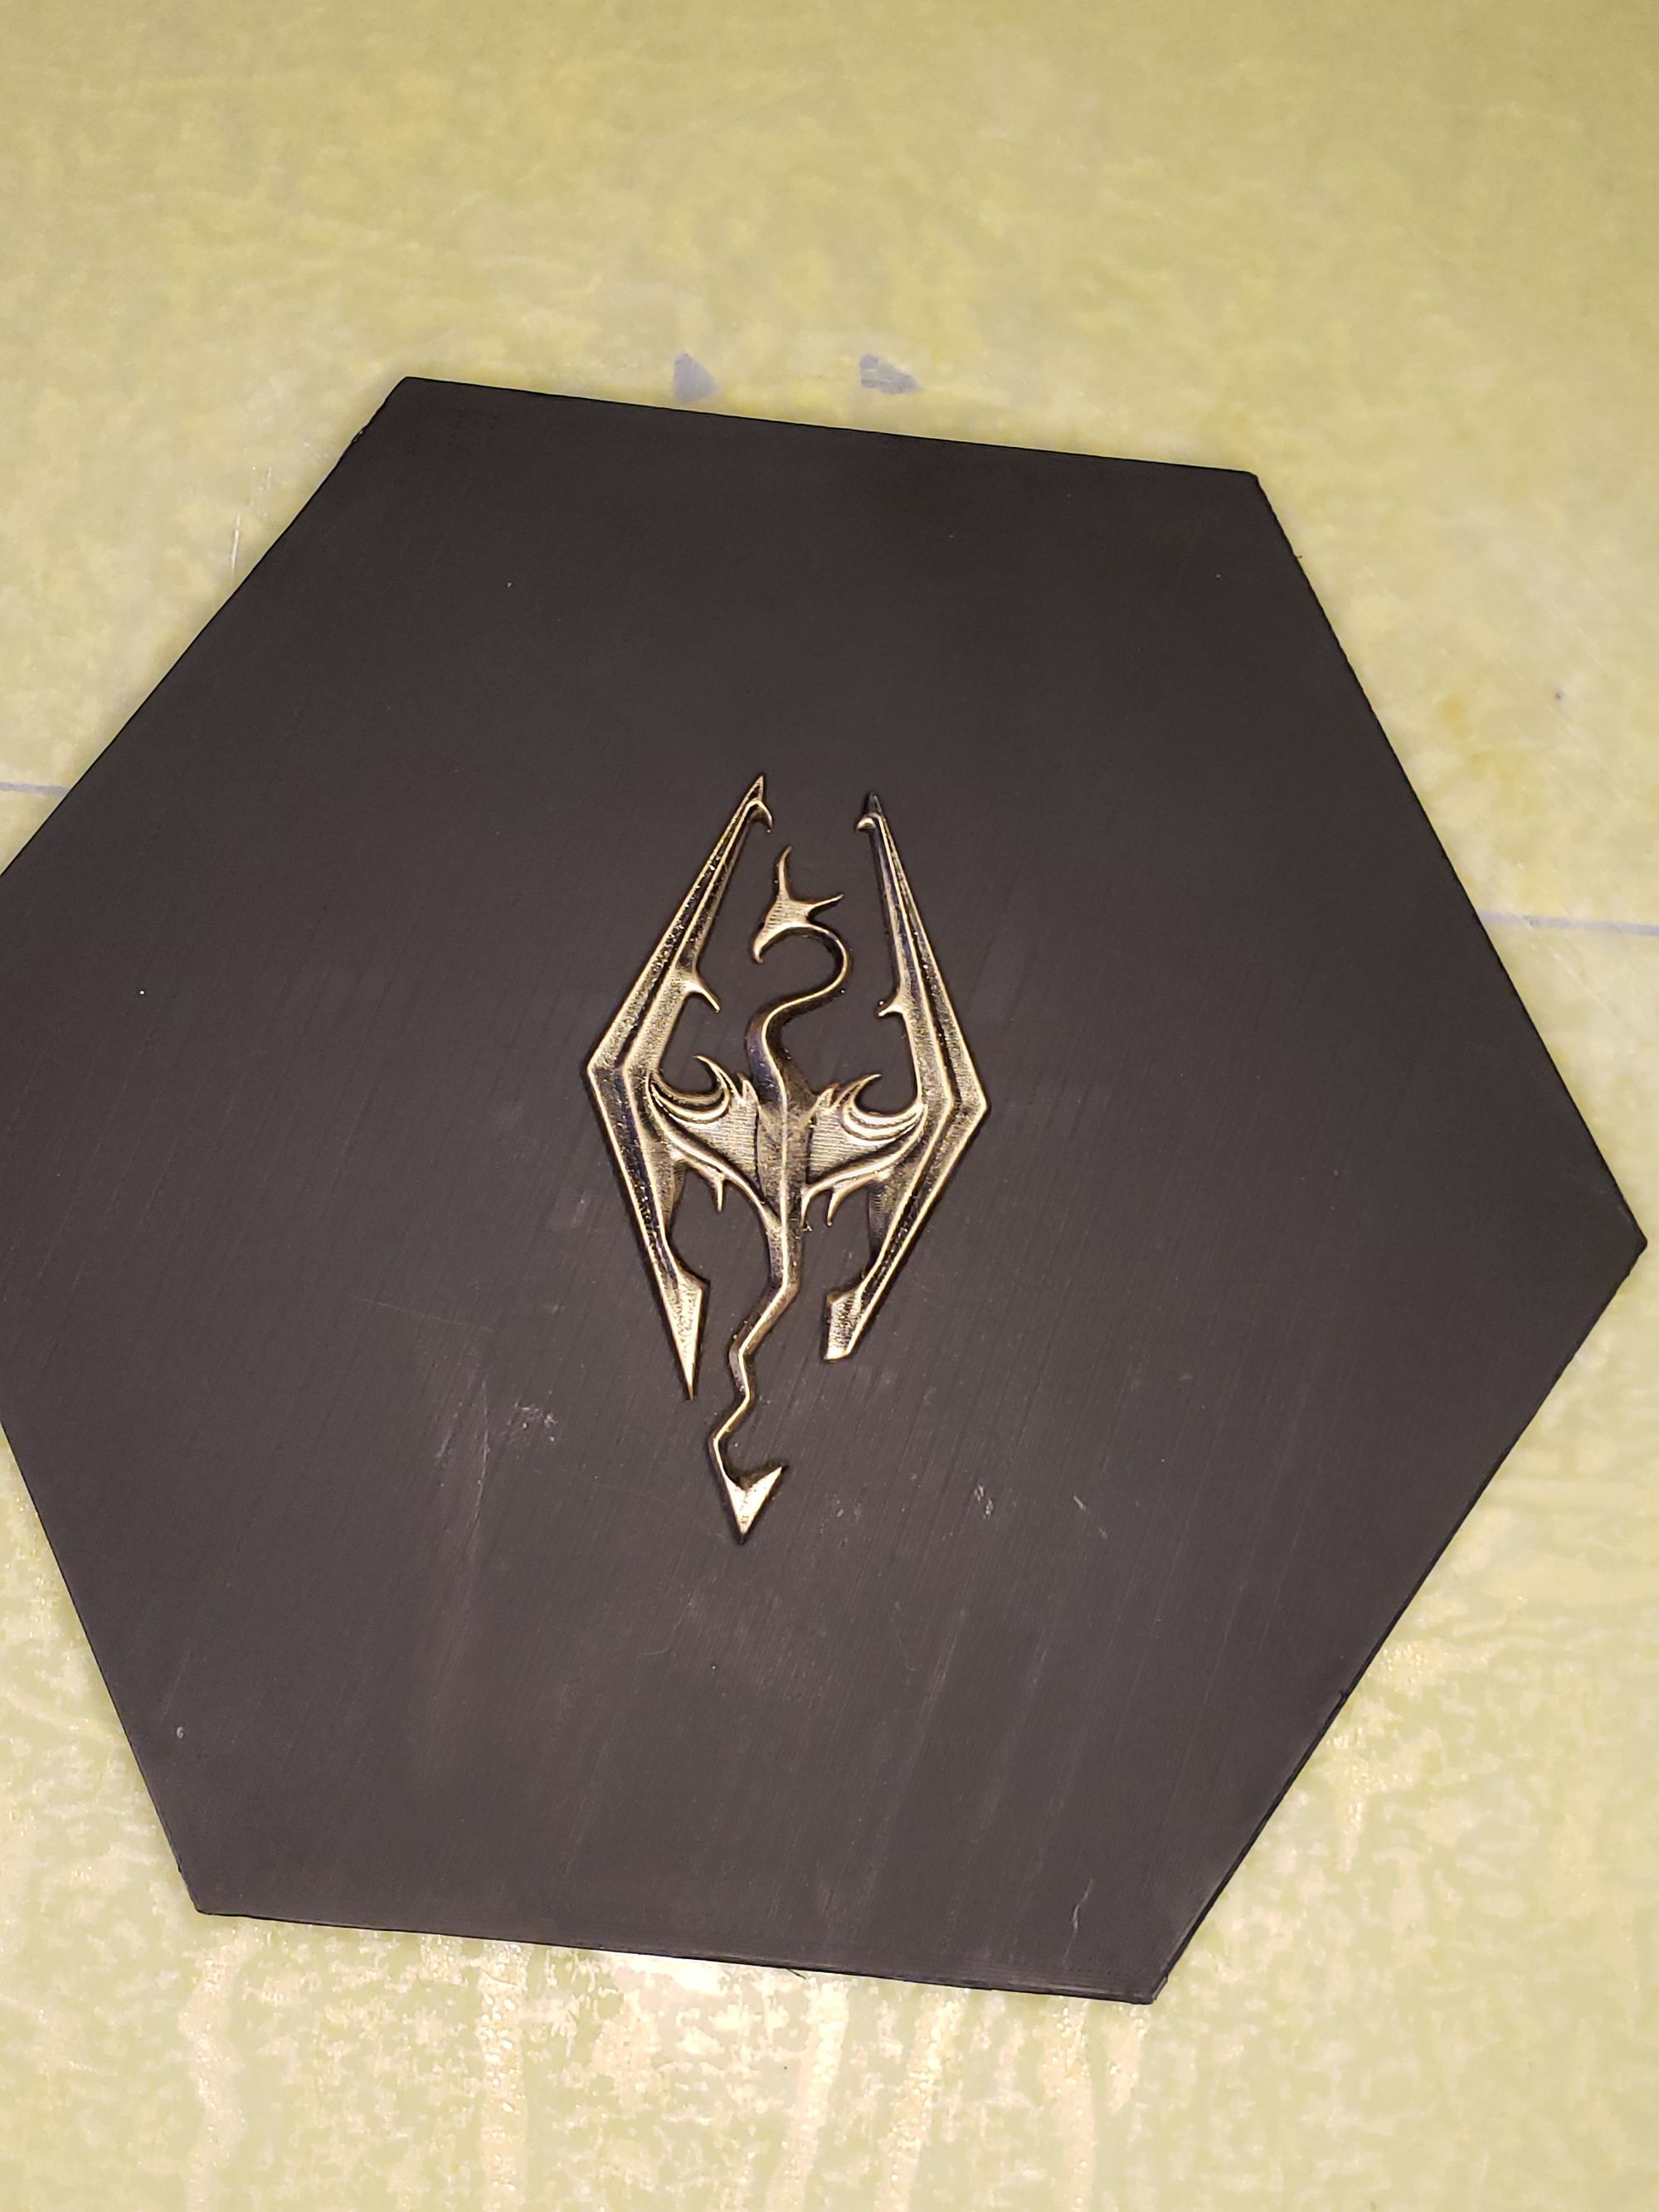
Centre piece
The Finale
Wall mounted, looks even nicer!
It took me months since I finished it before I could wall mount it, mostly because I was in an apartment that didn't allow wall mounting anything unless there was already a nail there. But I have since moved out and finally could mount this!
Here's a quick YT Short for some of the various effects I've setup for it, as well as how it looks in the dark vs light.
Resources
Everything I used and file resources for you
Files
Software
- Blender
- WLED (For RGB Effects)
- Cura (3D Printing Slicer)
- Chitubox (Resin 3D Printing Slicer)
Materials
- D1 Mini (x1)
- WS2812B 5v RGB Strip (60 LED/M)
- 16AWG Copper Wire
- Quick Connect Multi Wire Connectors
- Quick Connect 3 pin LED Strip Connectors
- 5v 40A (200W) Power Supply
- Small Flat Neodymium Magnets (Optional)
- Clear Plastic Sheets
- Black Vinyl & Transfer Tap
- Heat Set Inserts for Plastic & Screws + Washers (M3)
- 3D Printer Resin
- 3D Printer Filament
- Paints (Black & White)
- Frosted Glass Spray Paint
- 6" Point-To-Point Hexagon Acrylic Panels (x5)
Tools & Equipment
- Vinyl Cutter (Silhouette Cameo)
- Vinyl Weeding Tools
- FDM 3D Printer (Modified CR-10 v1)
- Resin 3D Printer (AnyCubic Photon Mono X)
- Resin Print Washing Setup (Isopropyl Alcohol)
- Resin Curing Station (UV Lights, or the Sun should suffice)
- Paint Brushes (some really raggedy old ones preferred for dry brushing bits)
- Various Sandpaper Grits
- Soldering Iron & Solder