Making a Floating Dwemer Lexicon
So, you want to learn the secrets of the Dwemer?
A little bit of Tech
To make some Magic
This project is a great example of several of the reasons I make the things I do. Not only did it involve new techniques and materials that I've never used before being brought together, but it also was something that on the surface, felt impossible.
After all, a floating cube that is lit up without any batteries or physically connected power source? That's like, magic, or something, right? Well, it's pretty weird how I came around to this project.
This page will discuss and show the most recent iteration and process for how I've made it, but right now I will briefly discuss how it all started with the first version, flaws and all.
The Inspiration & History
It started sometime around 2017-2018, and I had just started in the 3D printing space. I've had a thing for Skyrim if that was not at all obvious by now, and I wanted to make things from it for the longest time. A Dwemer lexicon seemed natural to me, not that I had a preference for Dwemer things, but simply because it represented knowledge and craft to me.
This was also the first "long" FDM print I've ever done at about 24 hours. Yes, it was a slow printer, and the final model had a ton of flaws. For example, the bottom was atrocious, top had some gaps, and there were some holes on some corners. The main cube was in PLA, and for some reason I used a very brittle, bad spool for it.
As for the small medallions on each side (which I'm still proud of), those were printed in ABS and smoothed with acetone vapour. The whole thing was spray painted gold because I had it on hand, and called it a day for year or so.
It took a while for me to learn about wireless charging and wireless powered technologies. I started with making my own coil for wireless power transfer and while it worked, my own version was very weak and bulky, and it was cheaper to buy a retail transmitter and receiver coil. Replaced the LEDs with some blue ones, threw on a resistor and yep, it lit up.
But I was also just barely learning about electro magnets and levitation stuff at the time, so around 2019 I had tinkered with a kit for it, which worked a bit but again was bulky, so buying a pre-assembled one was also surprisingly the same price or cheaper in most cases, so I went with that.
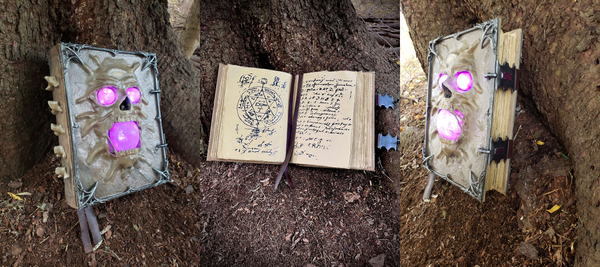
And the project sat there for months until the Covid-19 pandemic hit in early 2020. I had a lot of free time since some of my classes got easier or cancelled outright, so I dedicated a couple of days to finishing the first version of the floating lexicon. Once assembled, it looked rough as the holes were there, layer lines were rough, paint was gold instead of well, anything else. The bottom of the cube was atrocious, as it was too thick to have the coil inside, it had to go on the outside and was hot-glued there on two sticks with the magnet. But it floated, and lit up.
And of course it was a really rough video of the really rough version of it that TES and Bethesda noticed on Twitter
So I finally finished a project for once... Proper photos and videos soonTM. Not perfect, but eh, what can you do#Dwemer #TheElderScrolls #TES #Lexicon #3DPrint pic.twitter.com/uggyxve4aH
— WolfwithSword (@_WolfwithSword) March 21, 2020
But being noticed by so many people, especially TES and Bethesda, made me want to improve on it. That is where this page comes into play. I remodeled the cube to have less errors, I remodeled the base. Learned new techniques for painting, got better electronic components and mechanical components and in the end, yes, I made it better. And then I got a resin printer and made it better yet!
I still keep around the original, as a reminder of progress. Also because somehow I aligned it perfectly with the interior magnet weight-wise so it spins forever. All the new ones I make have such minor weight differences, causing a corner to be slightly tilted down and thus the spin eventually stops, but it can take hours.
Modeling
I did not model this cube completely from scratch, but by the end I doubt there were many vertices I did not remake or modify on the original model.
The original can be found here, and my modified version along with all the other parts can be found in the Resources section. The original is covered by this license, and thus the modified version by me is available here in a blender file.
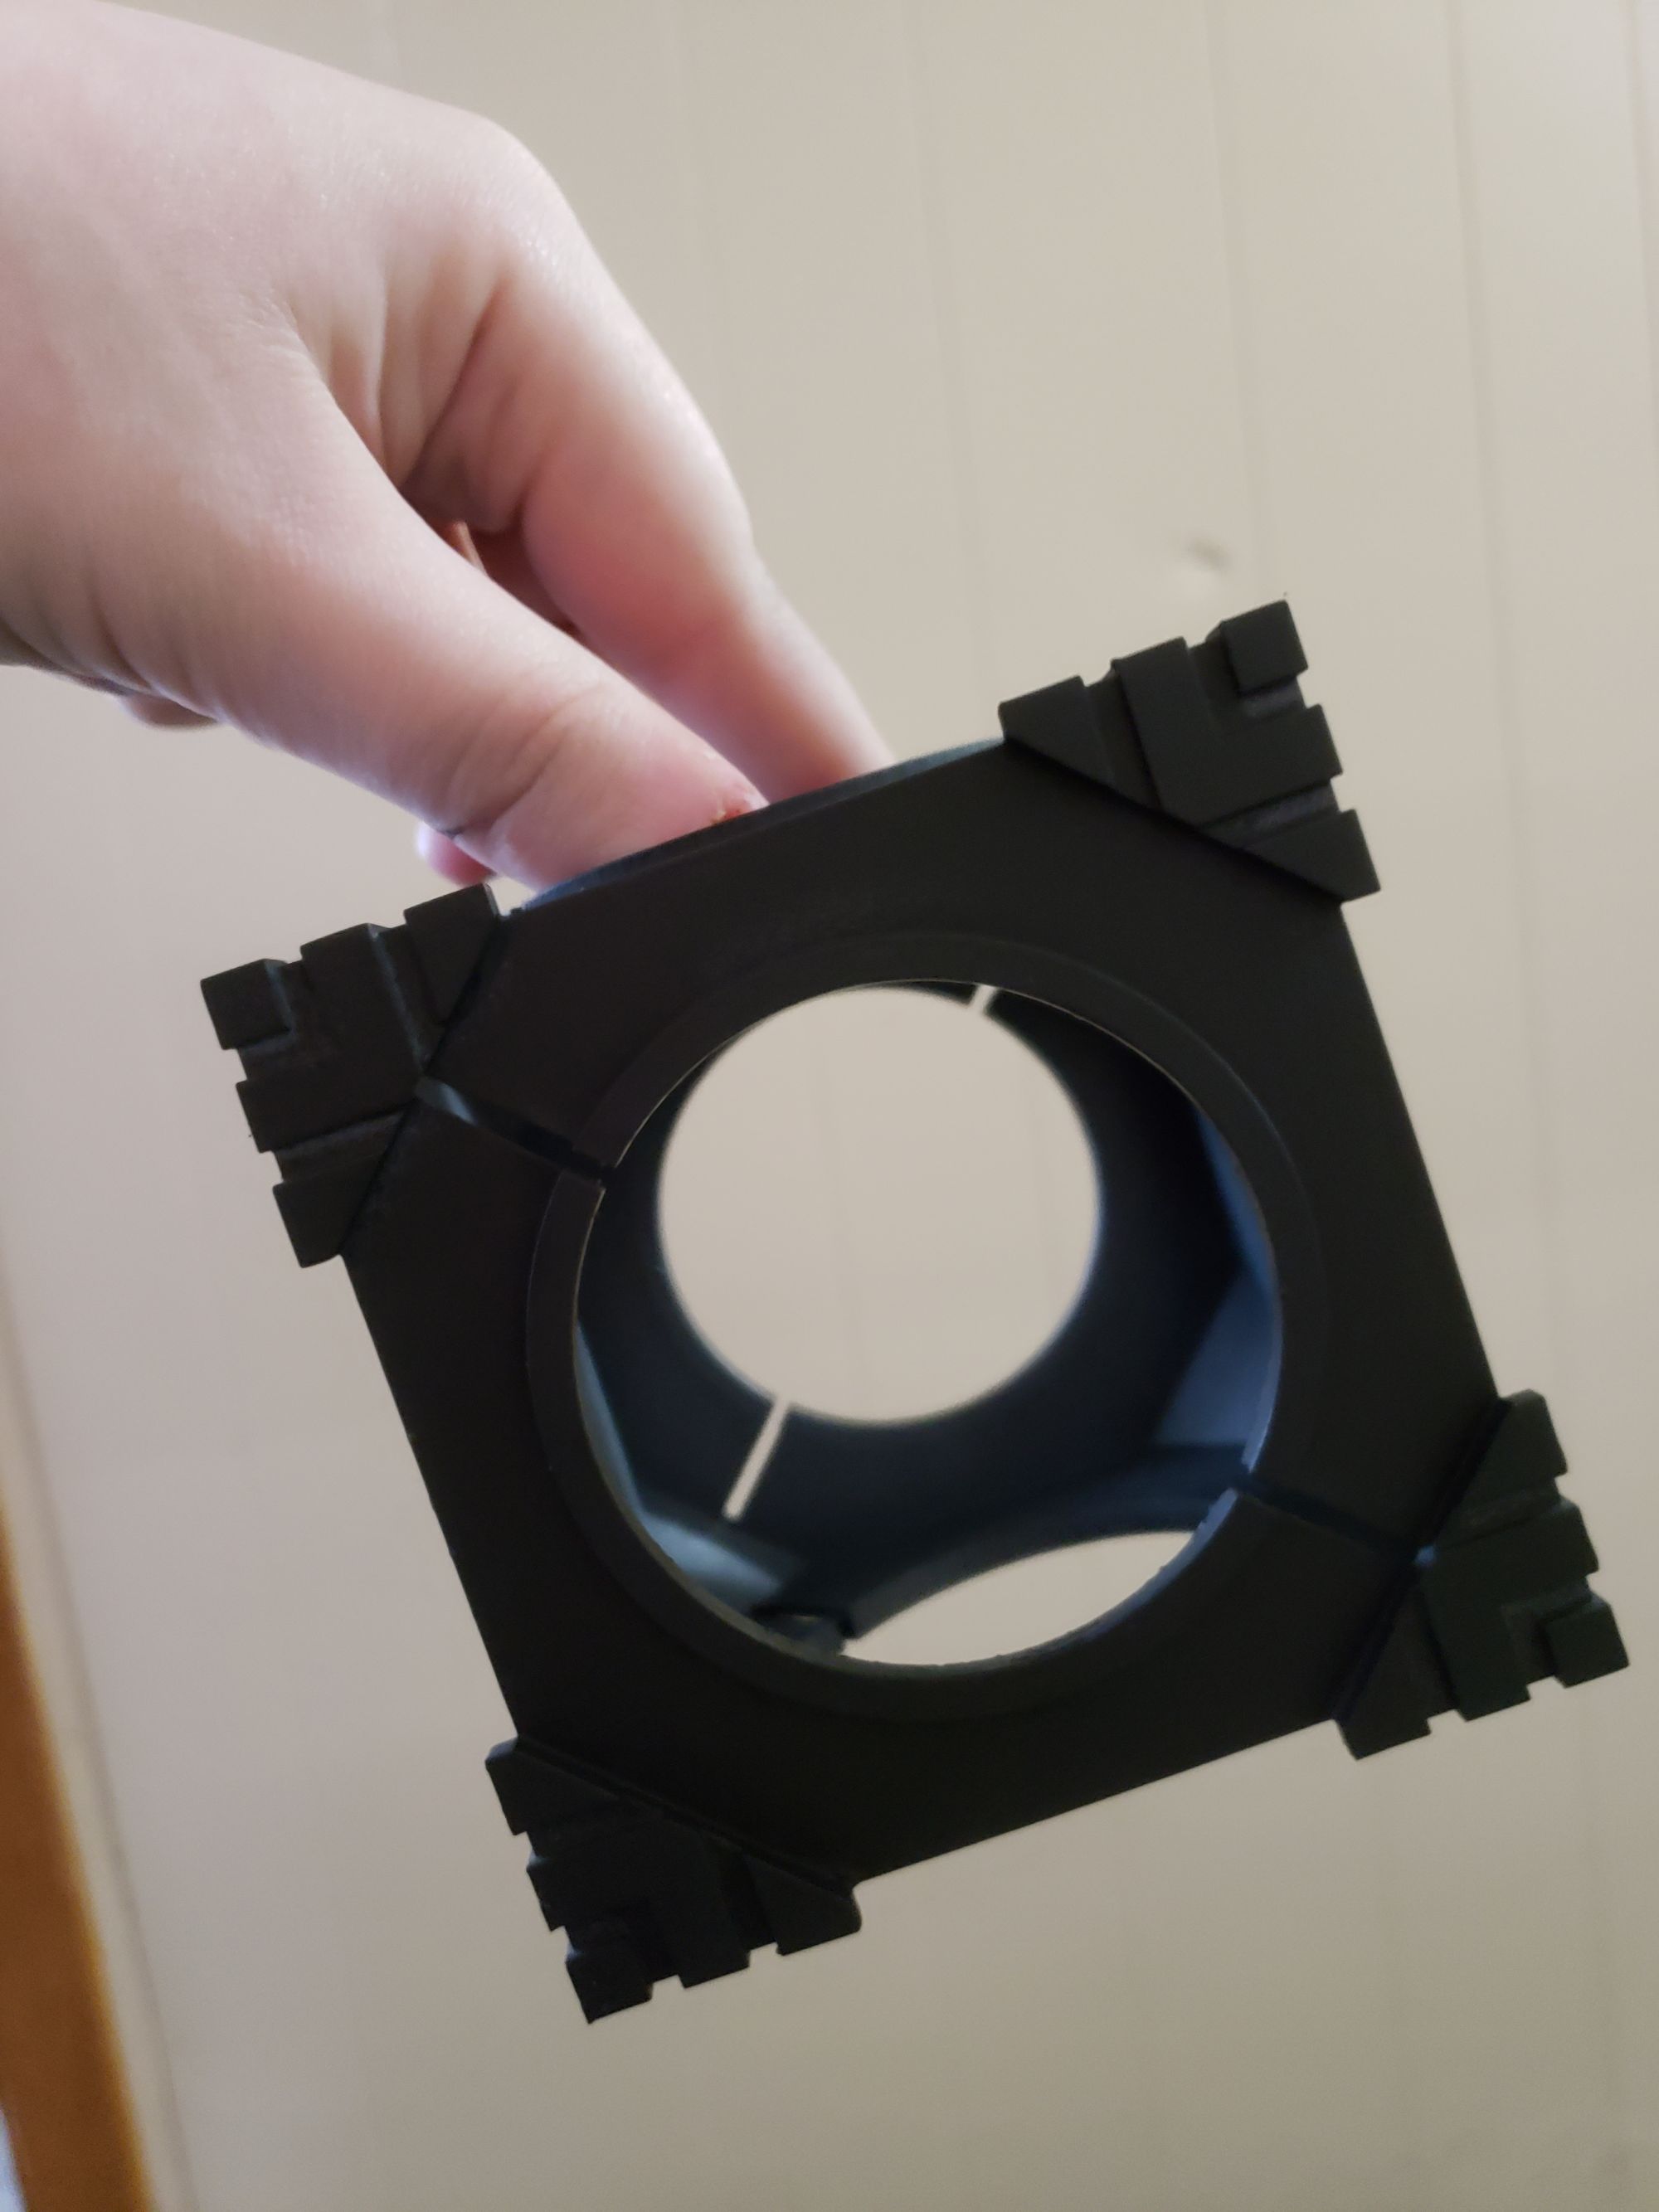
There were quite a few things I had to modify for my needs. Specifically, I had to hollow it out, separate the "medallions" and make sure everything was thick enough to be strong, and thin enough to be light and let the magnets and wireless power transmission work.
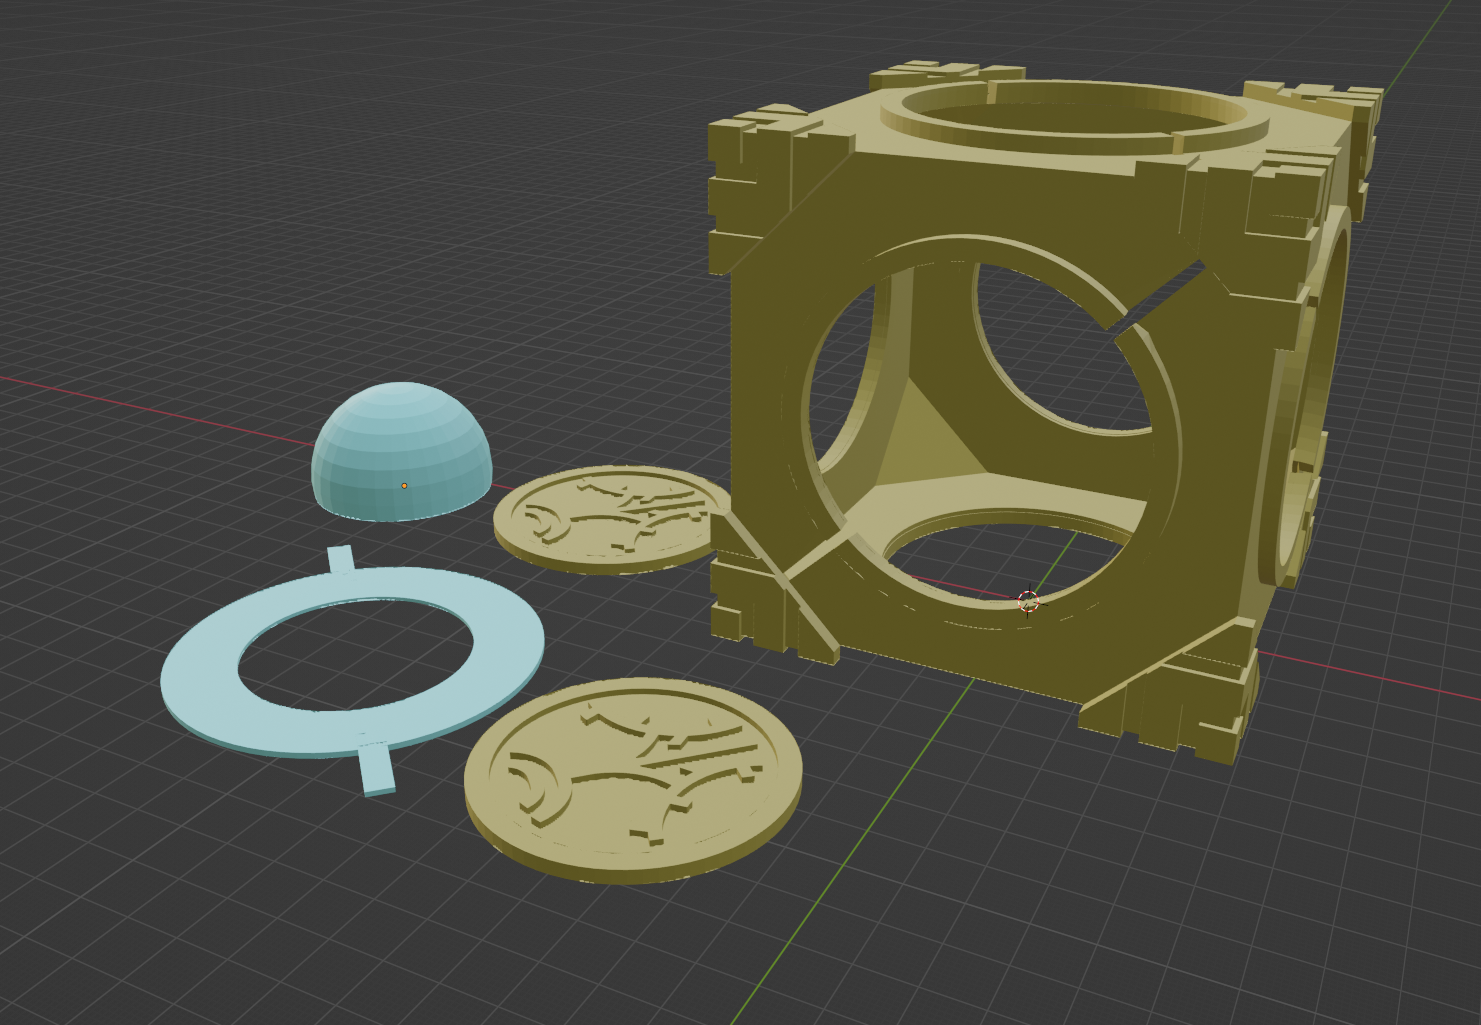
I also rescaled everything at the model level such that the cube was 10x10x10cm, and everything matched accordingly. I prefer scaling to realistic dimensions at the model level rather than in a 3d printing slicer as some models can create errors if scaled without checking first. So it's just easier to model it in the real size you plan to make it at. The blender file attached has this already setup.
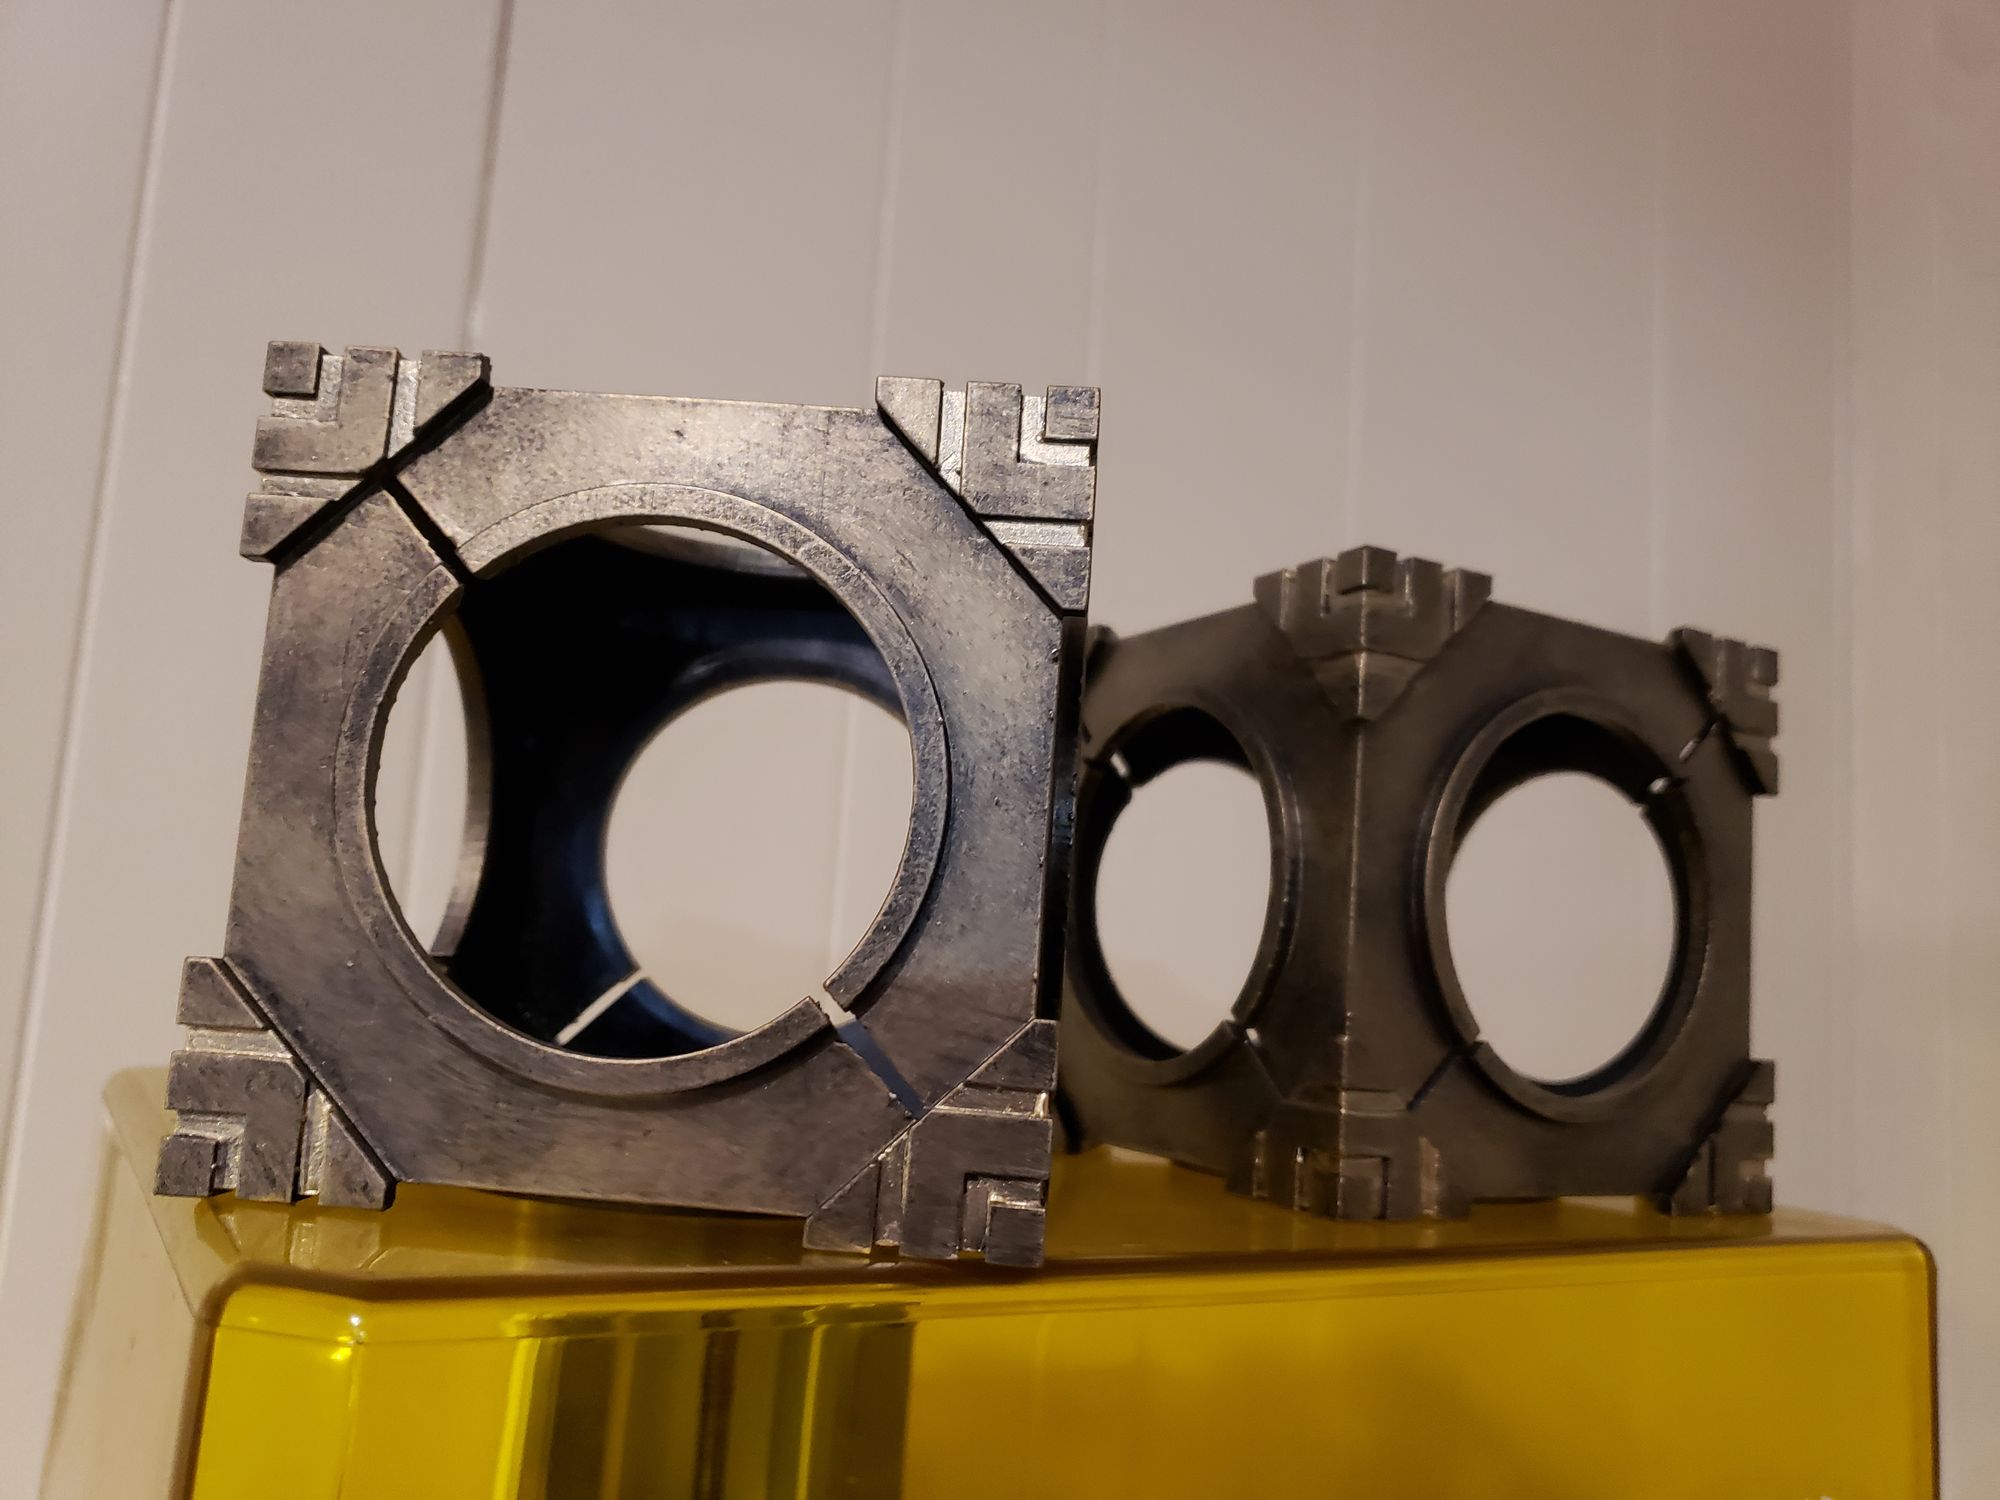
Once that was all scaled and separated, there were a few weird quirks with the model, causing me to need to split the cube into four corners, choose the best one, copy it four times then merge together for consistency. It took way longer than it should have, but it worked. Keep in mind, I am a noob at blender still.
Lastly came the base. Personally, I preferred my base model from the first iteration, but not only had I lost my model for it, but I designed it for a much taller and not as wide magnetic levitation base. So the new one had to be different.
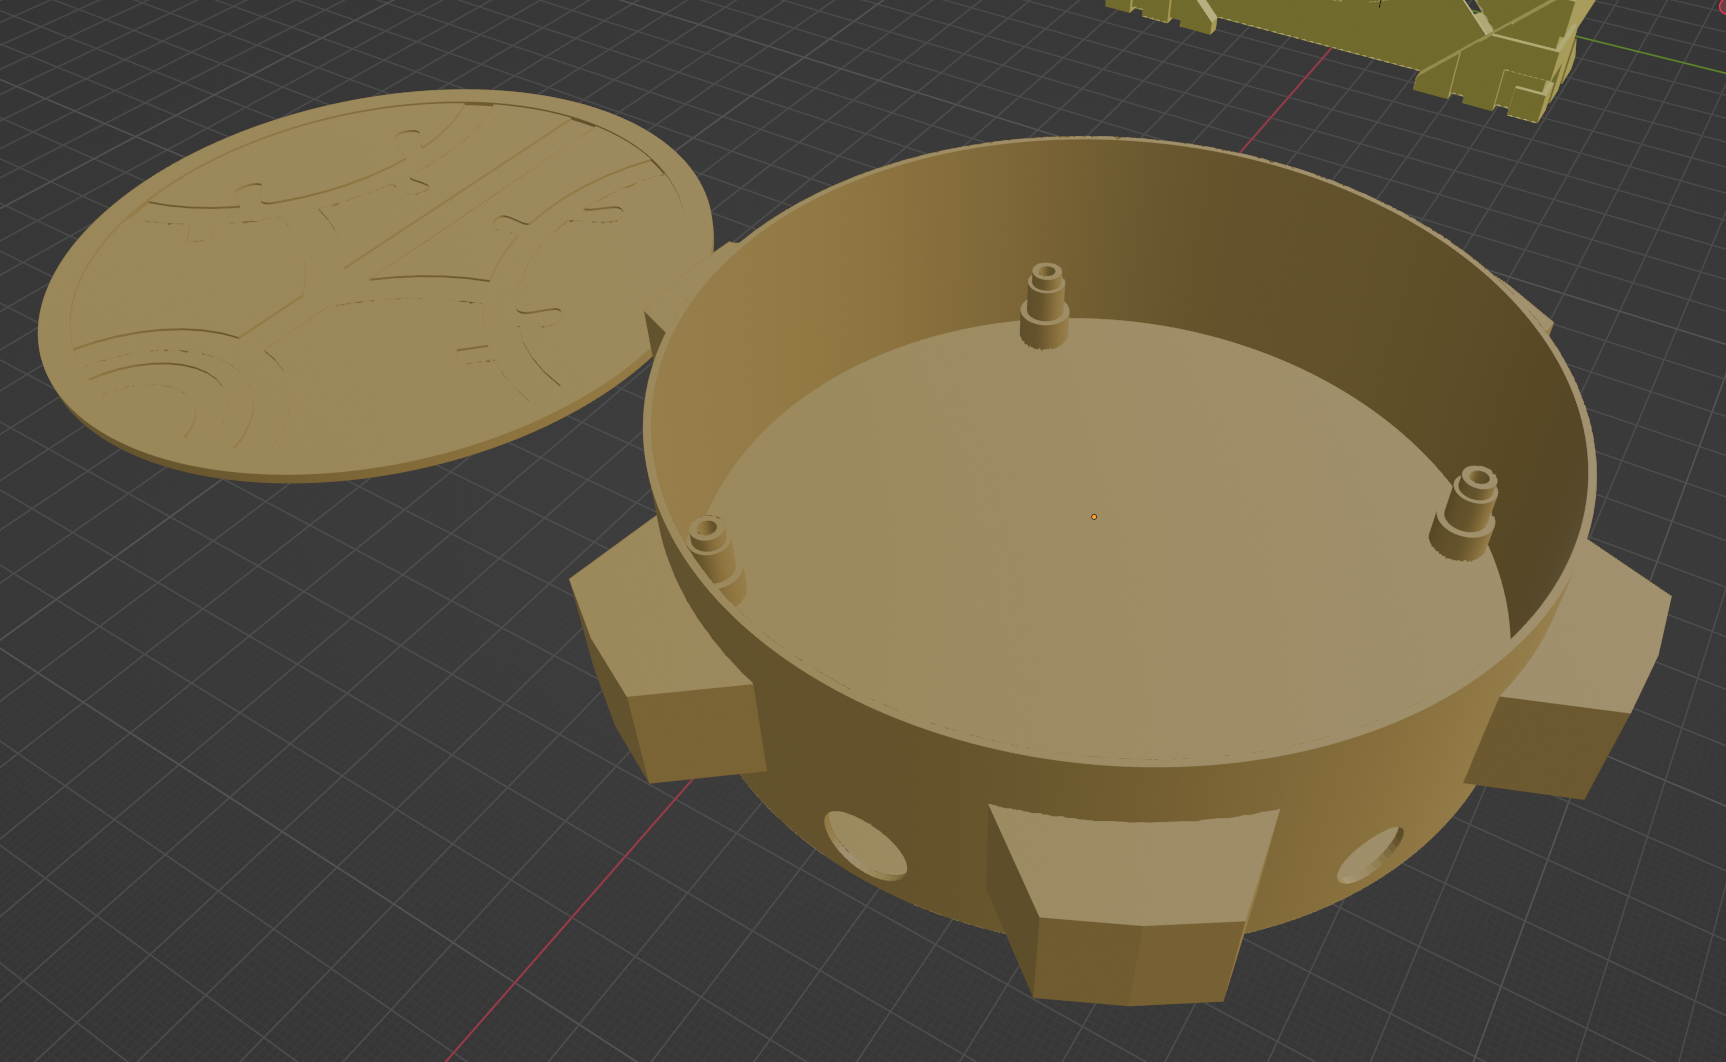
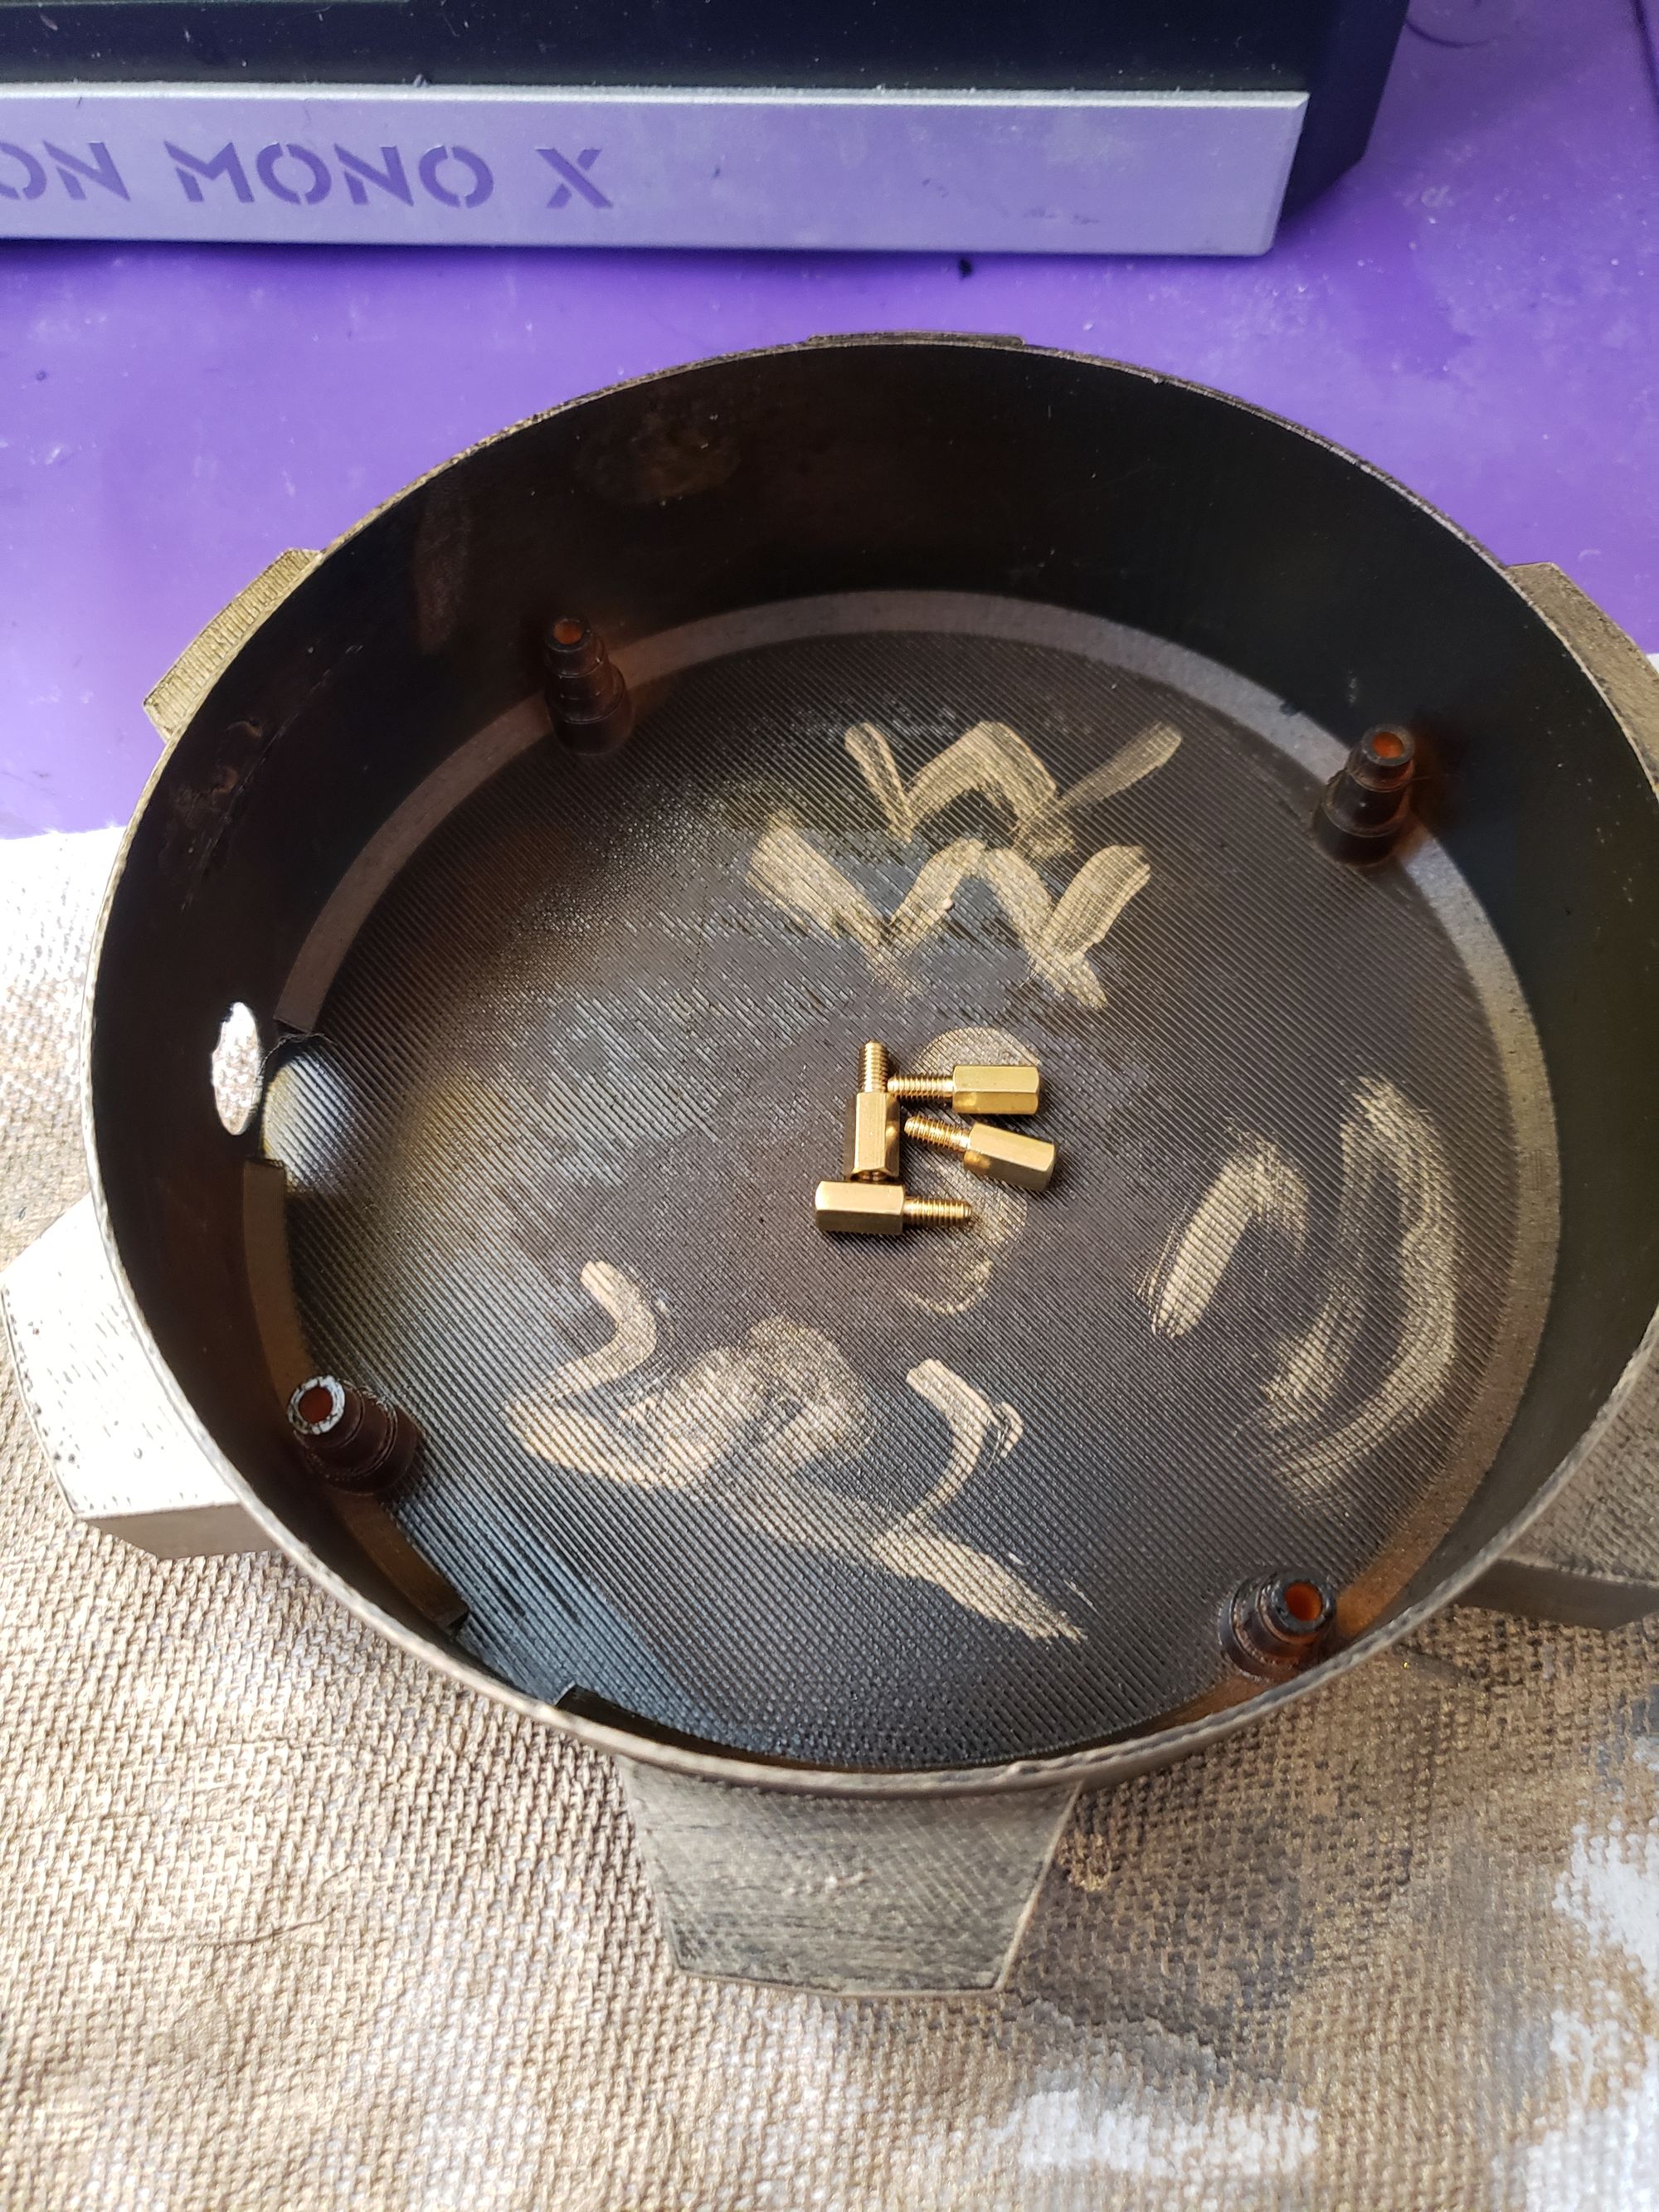
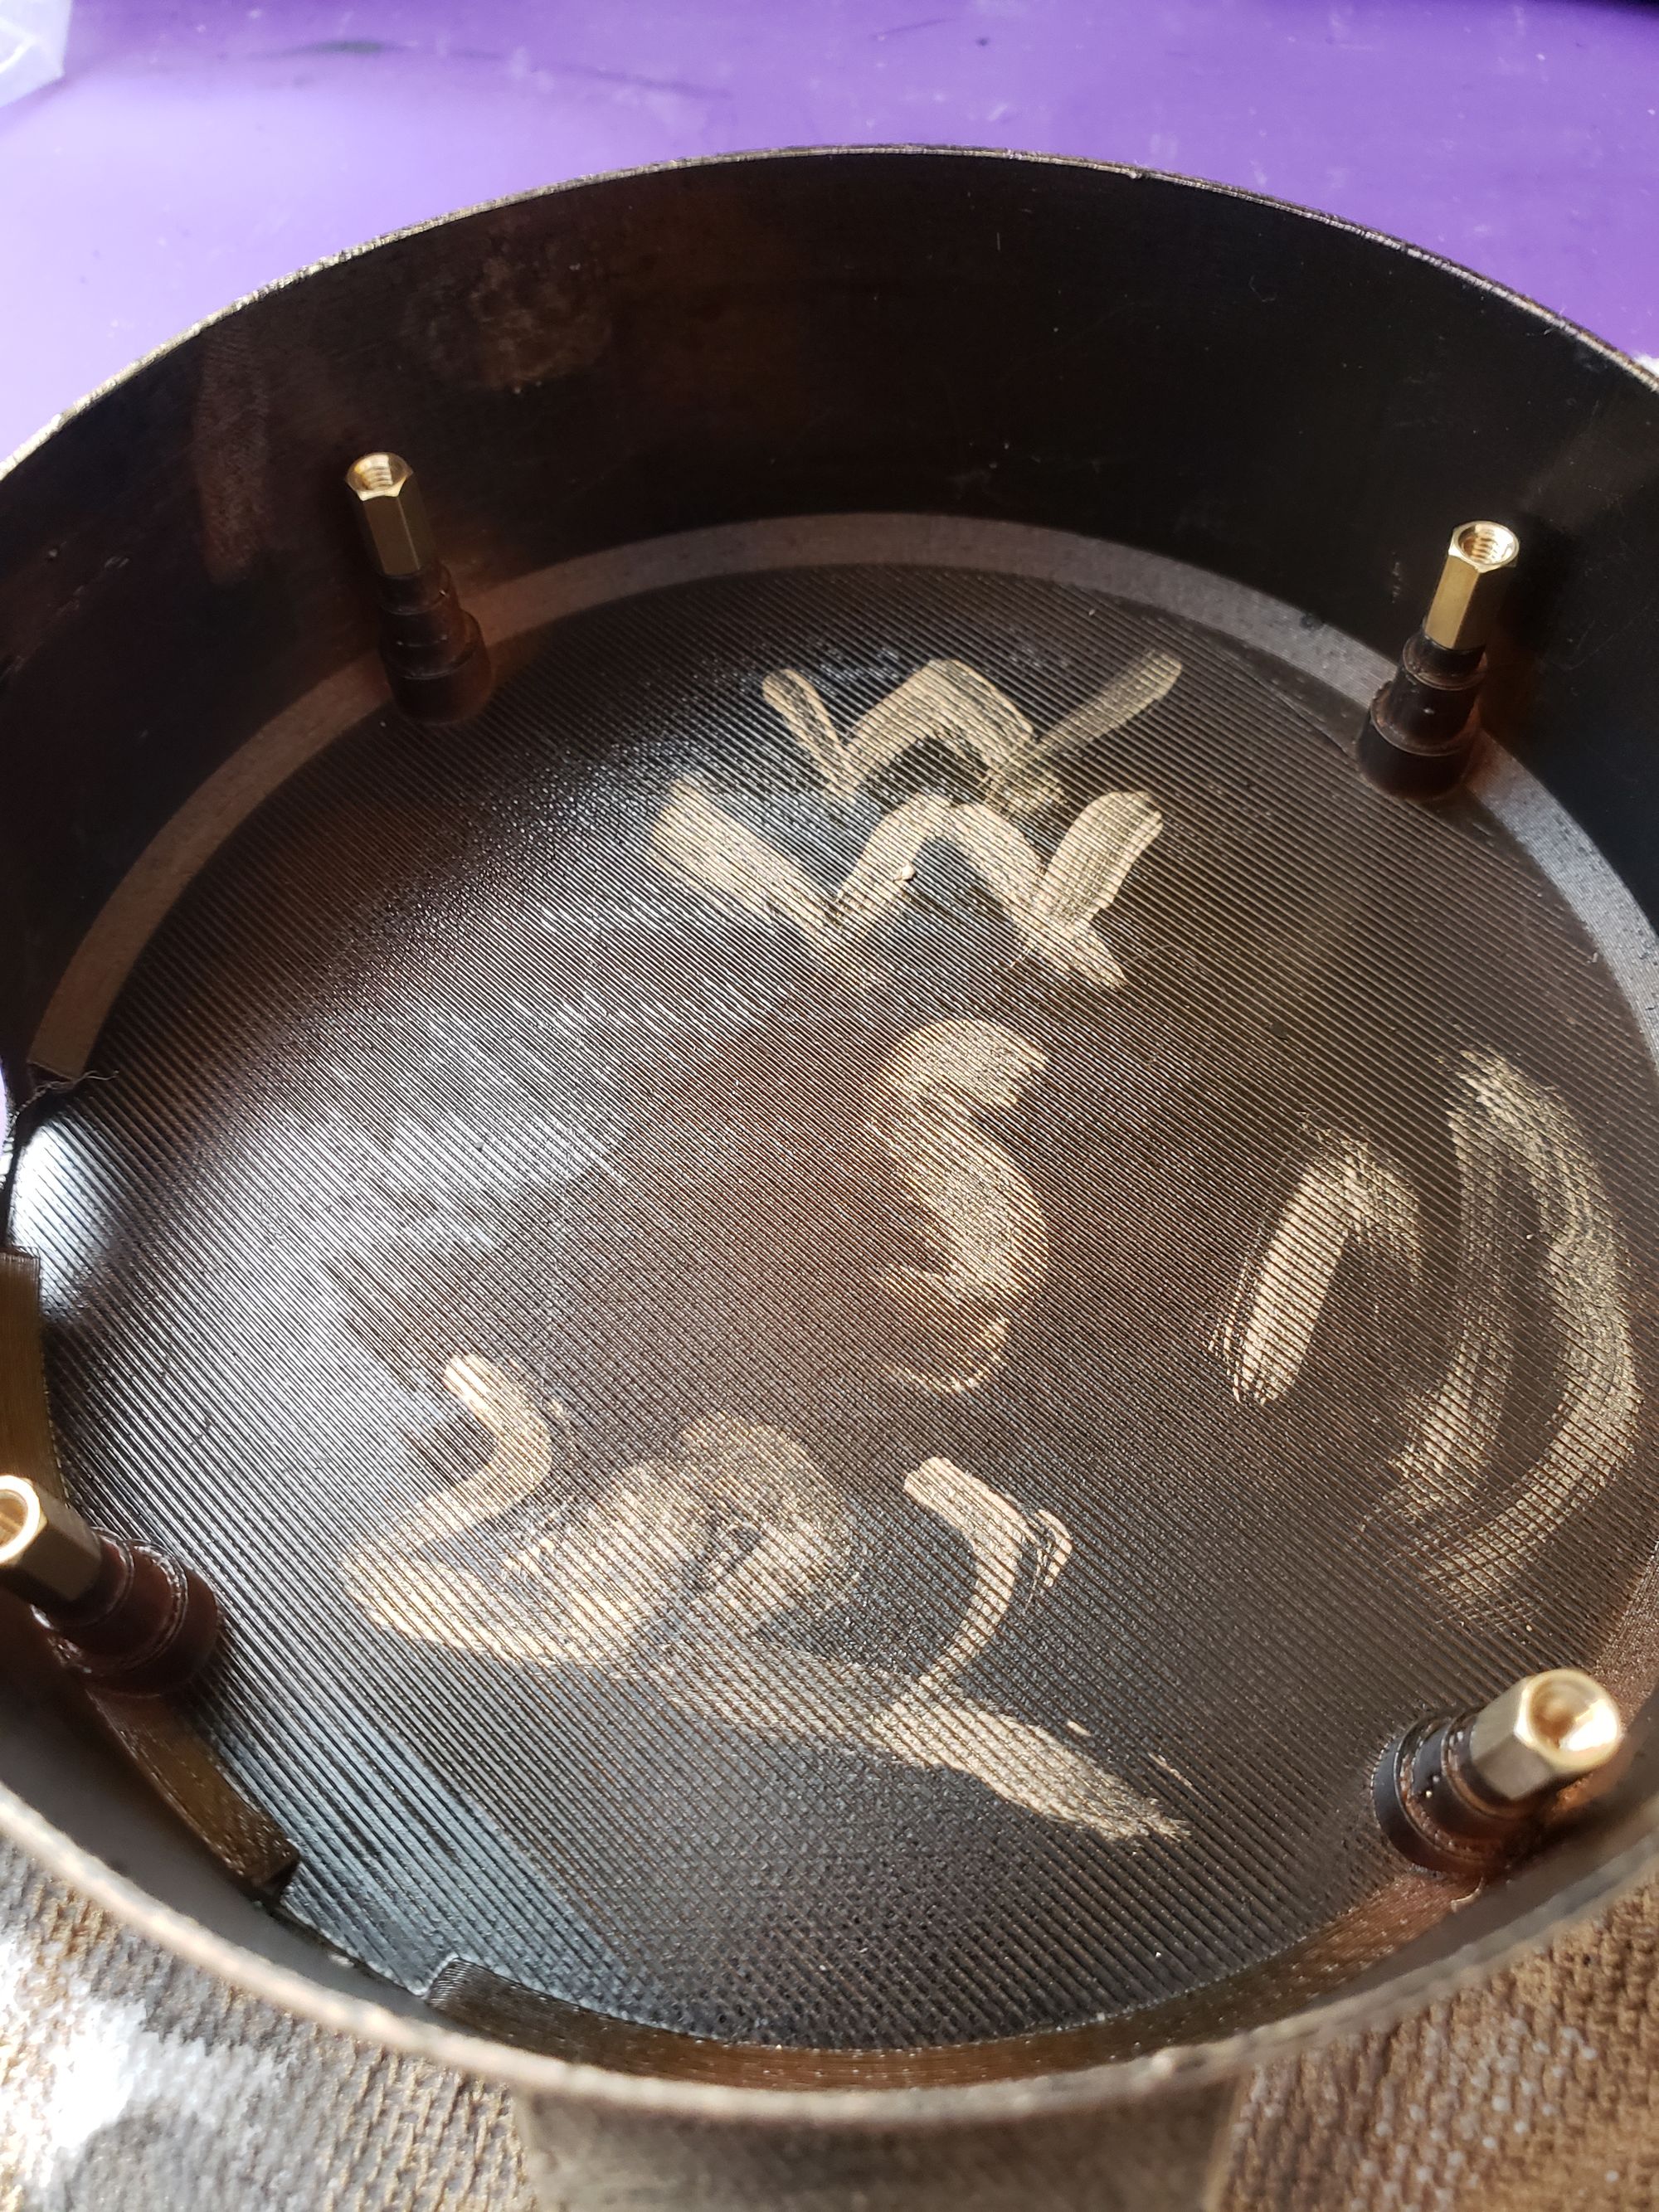
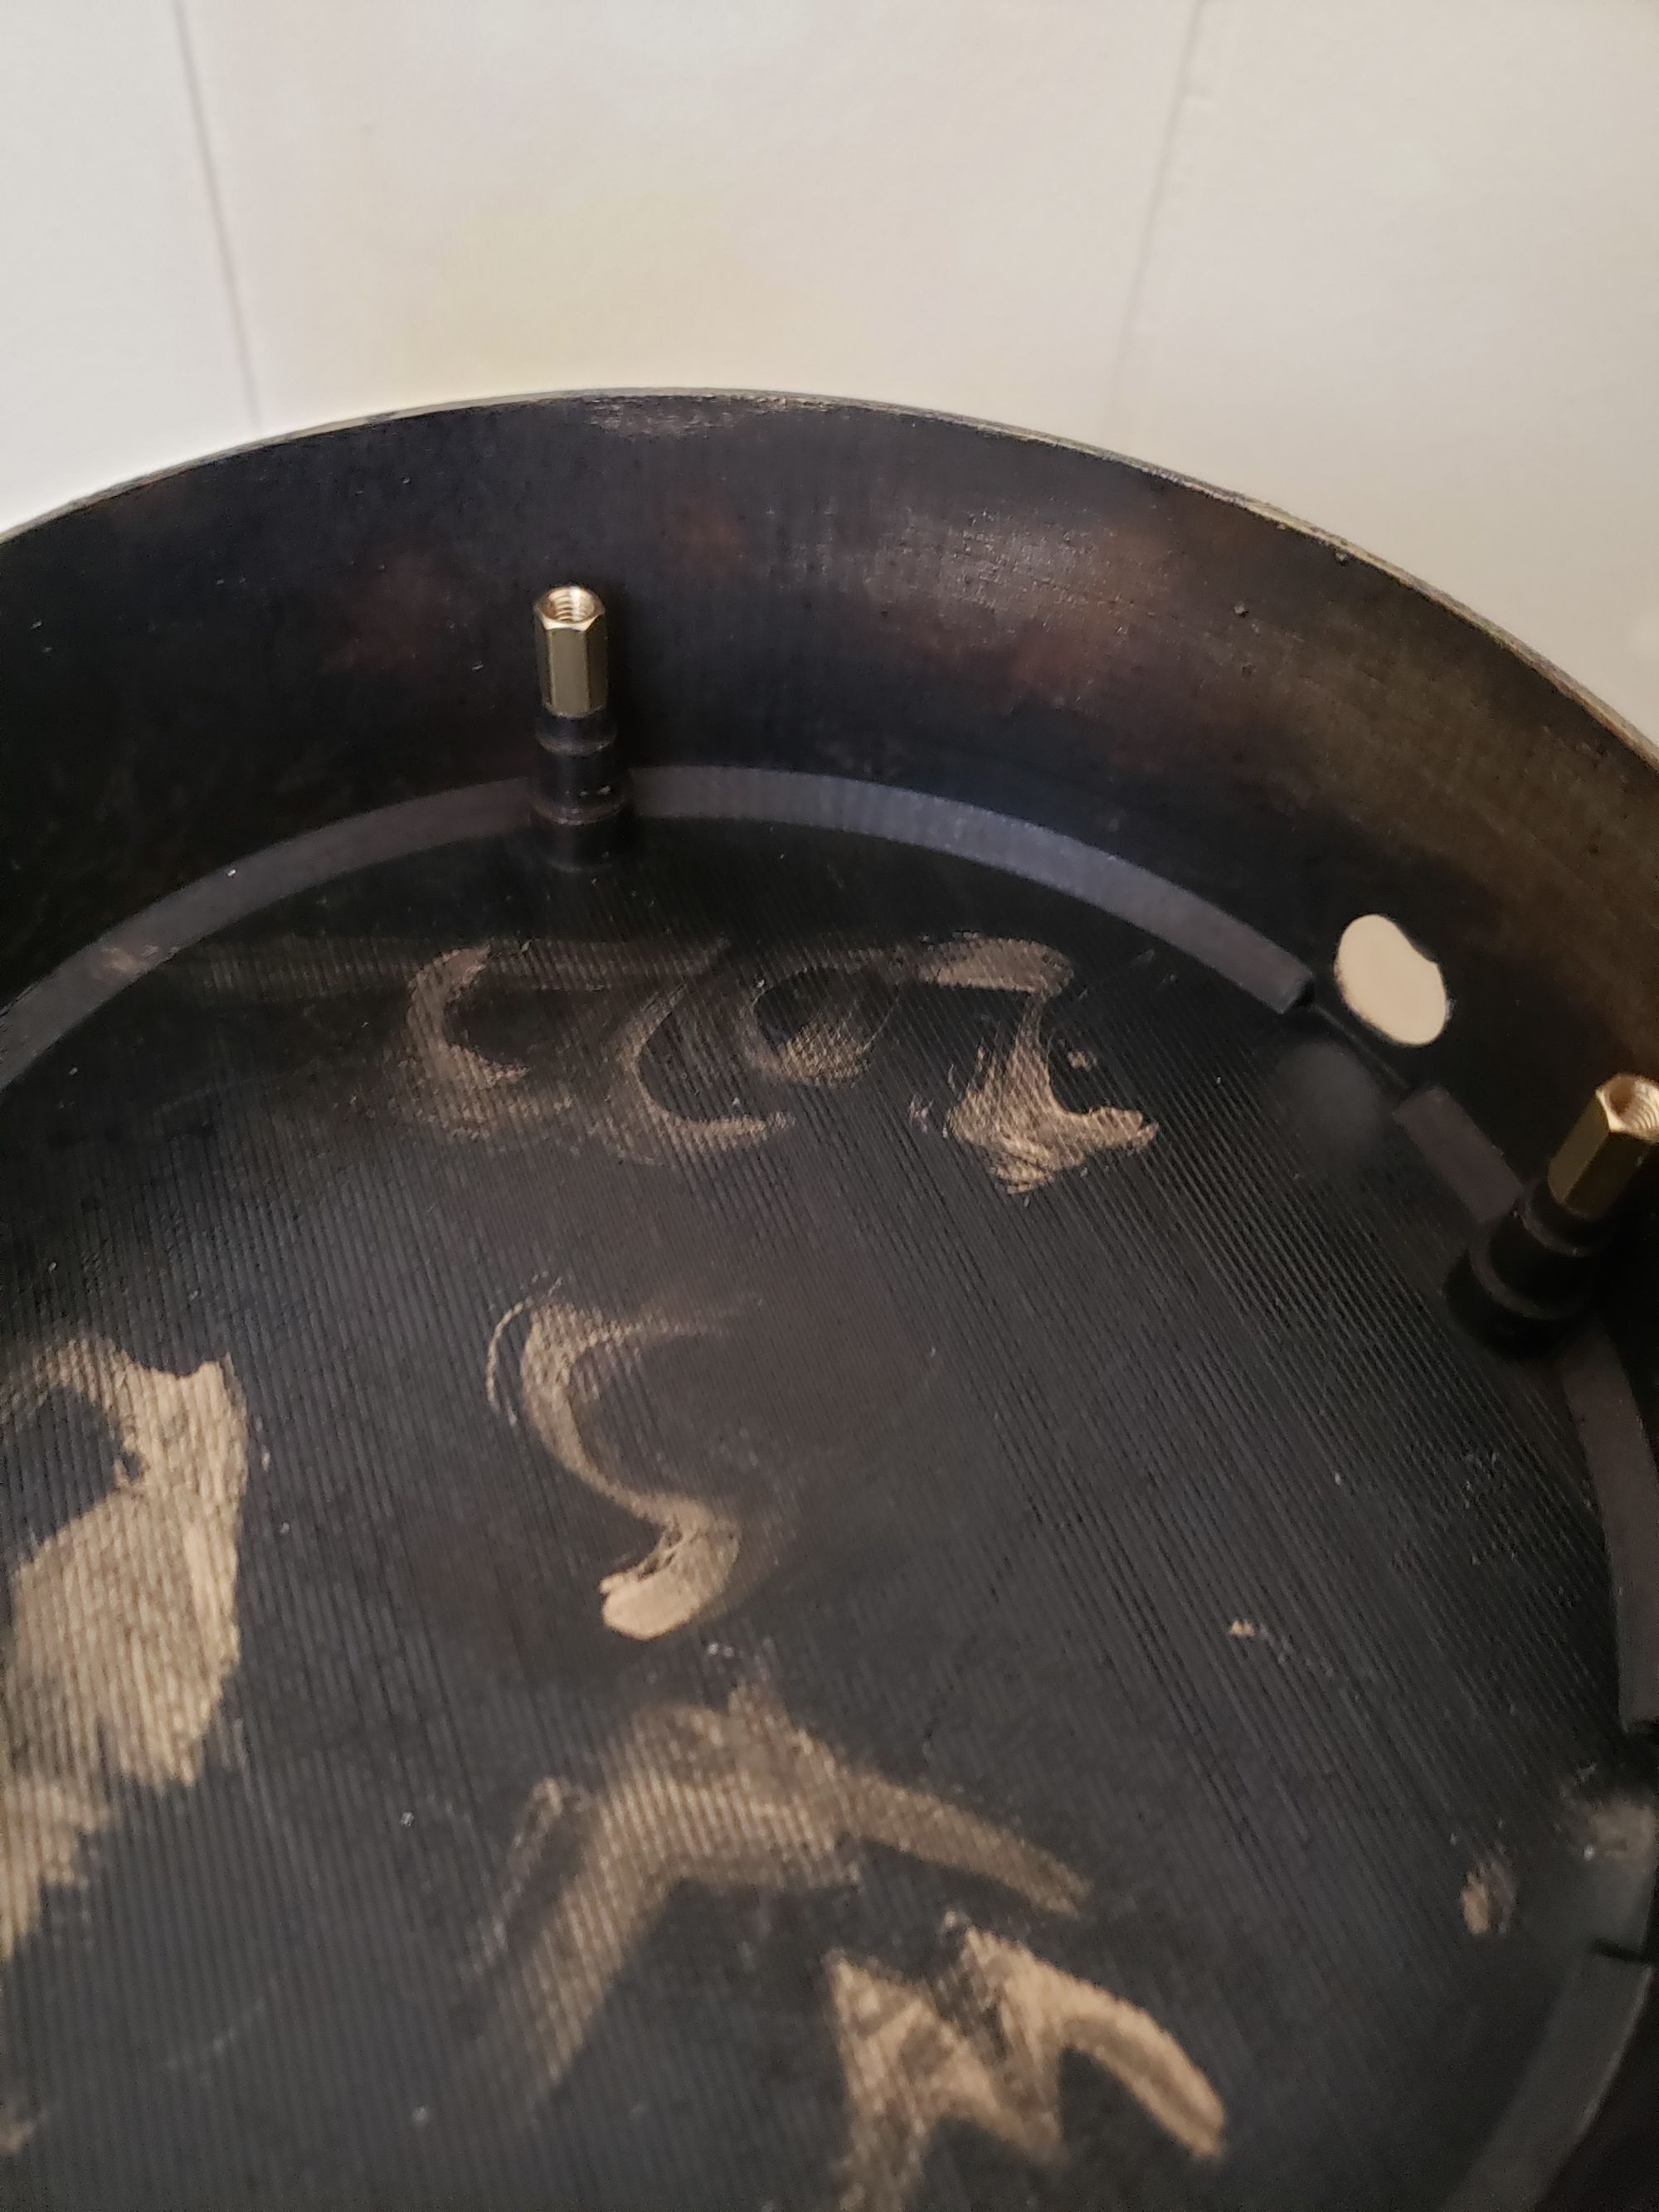
I decided to pretend to be professional when I did this, and actually put in standoffs for screwing in the magnetic base, as well as holes for the power plug and the button for turning on and off the wireless LEDs. I also at the time was not a professional, so my measurements were off.
For the standoffs, they were good enough, but could have been 1mm lower, so the base cover wouldn't bulge as I forgot to accommodate for the thickness of the wireless transmitter coil. In the final model/blender file attached, I have reduced the height by 1mm and it should work.
As for the holes for the power plug and button, the power plug fit but was a little loose, so a bit of CA glue on that and it was fine. But the hole for the button was too small, which was actually pretty perfect as it meant all I needed to do was file it down. This way, I can get a perfect tight fit by screwing it in. Could I have saved 20 minutes of my life for each one? Maybe. Did I? No. This is not fixed in the models provided, as they should be find with a variety of round plugs/buttons, but if they are too small, you can also file them to be bigger.
If I had to go back, I would make it so the base cover was not just a slot in to the base, requiring glue to keep it there. A snap-in system would be much better, but this was easier at the time for me.
Mixed Media Materials Manufacturing
MMMM that's some tasty knowledge right there
So, how did I actually end up printing it?
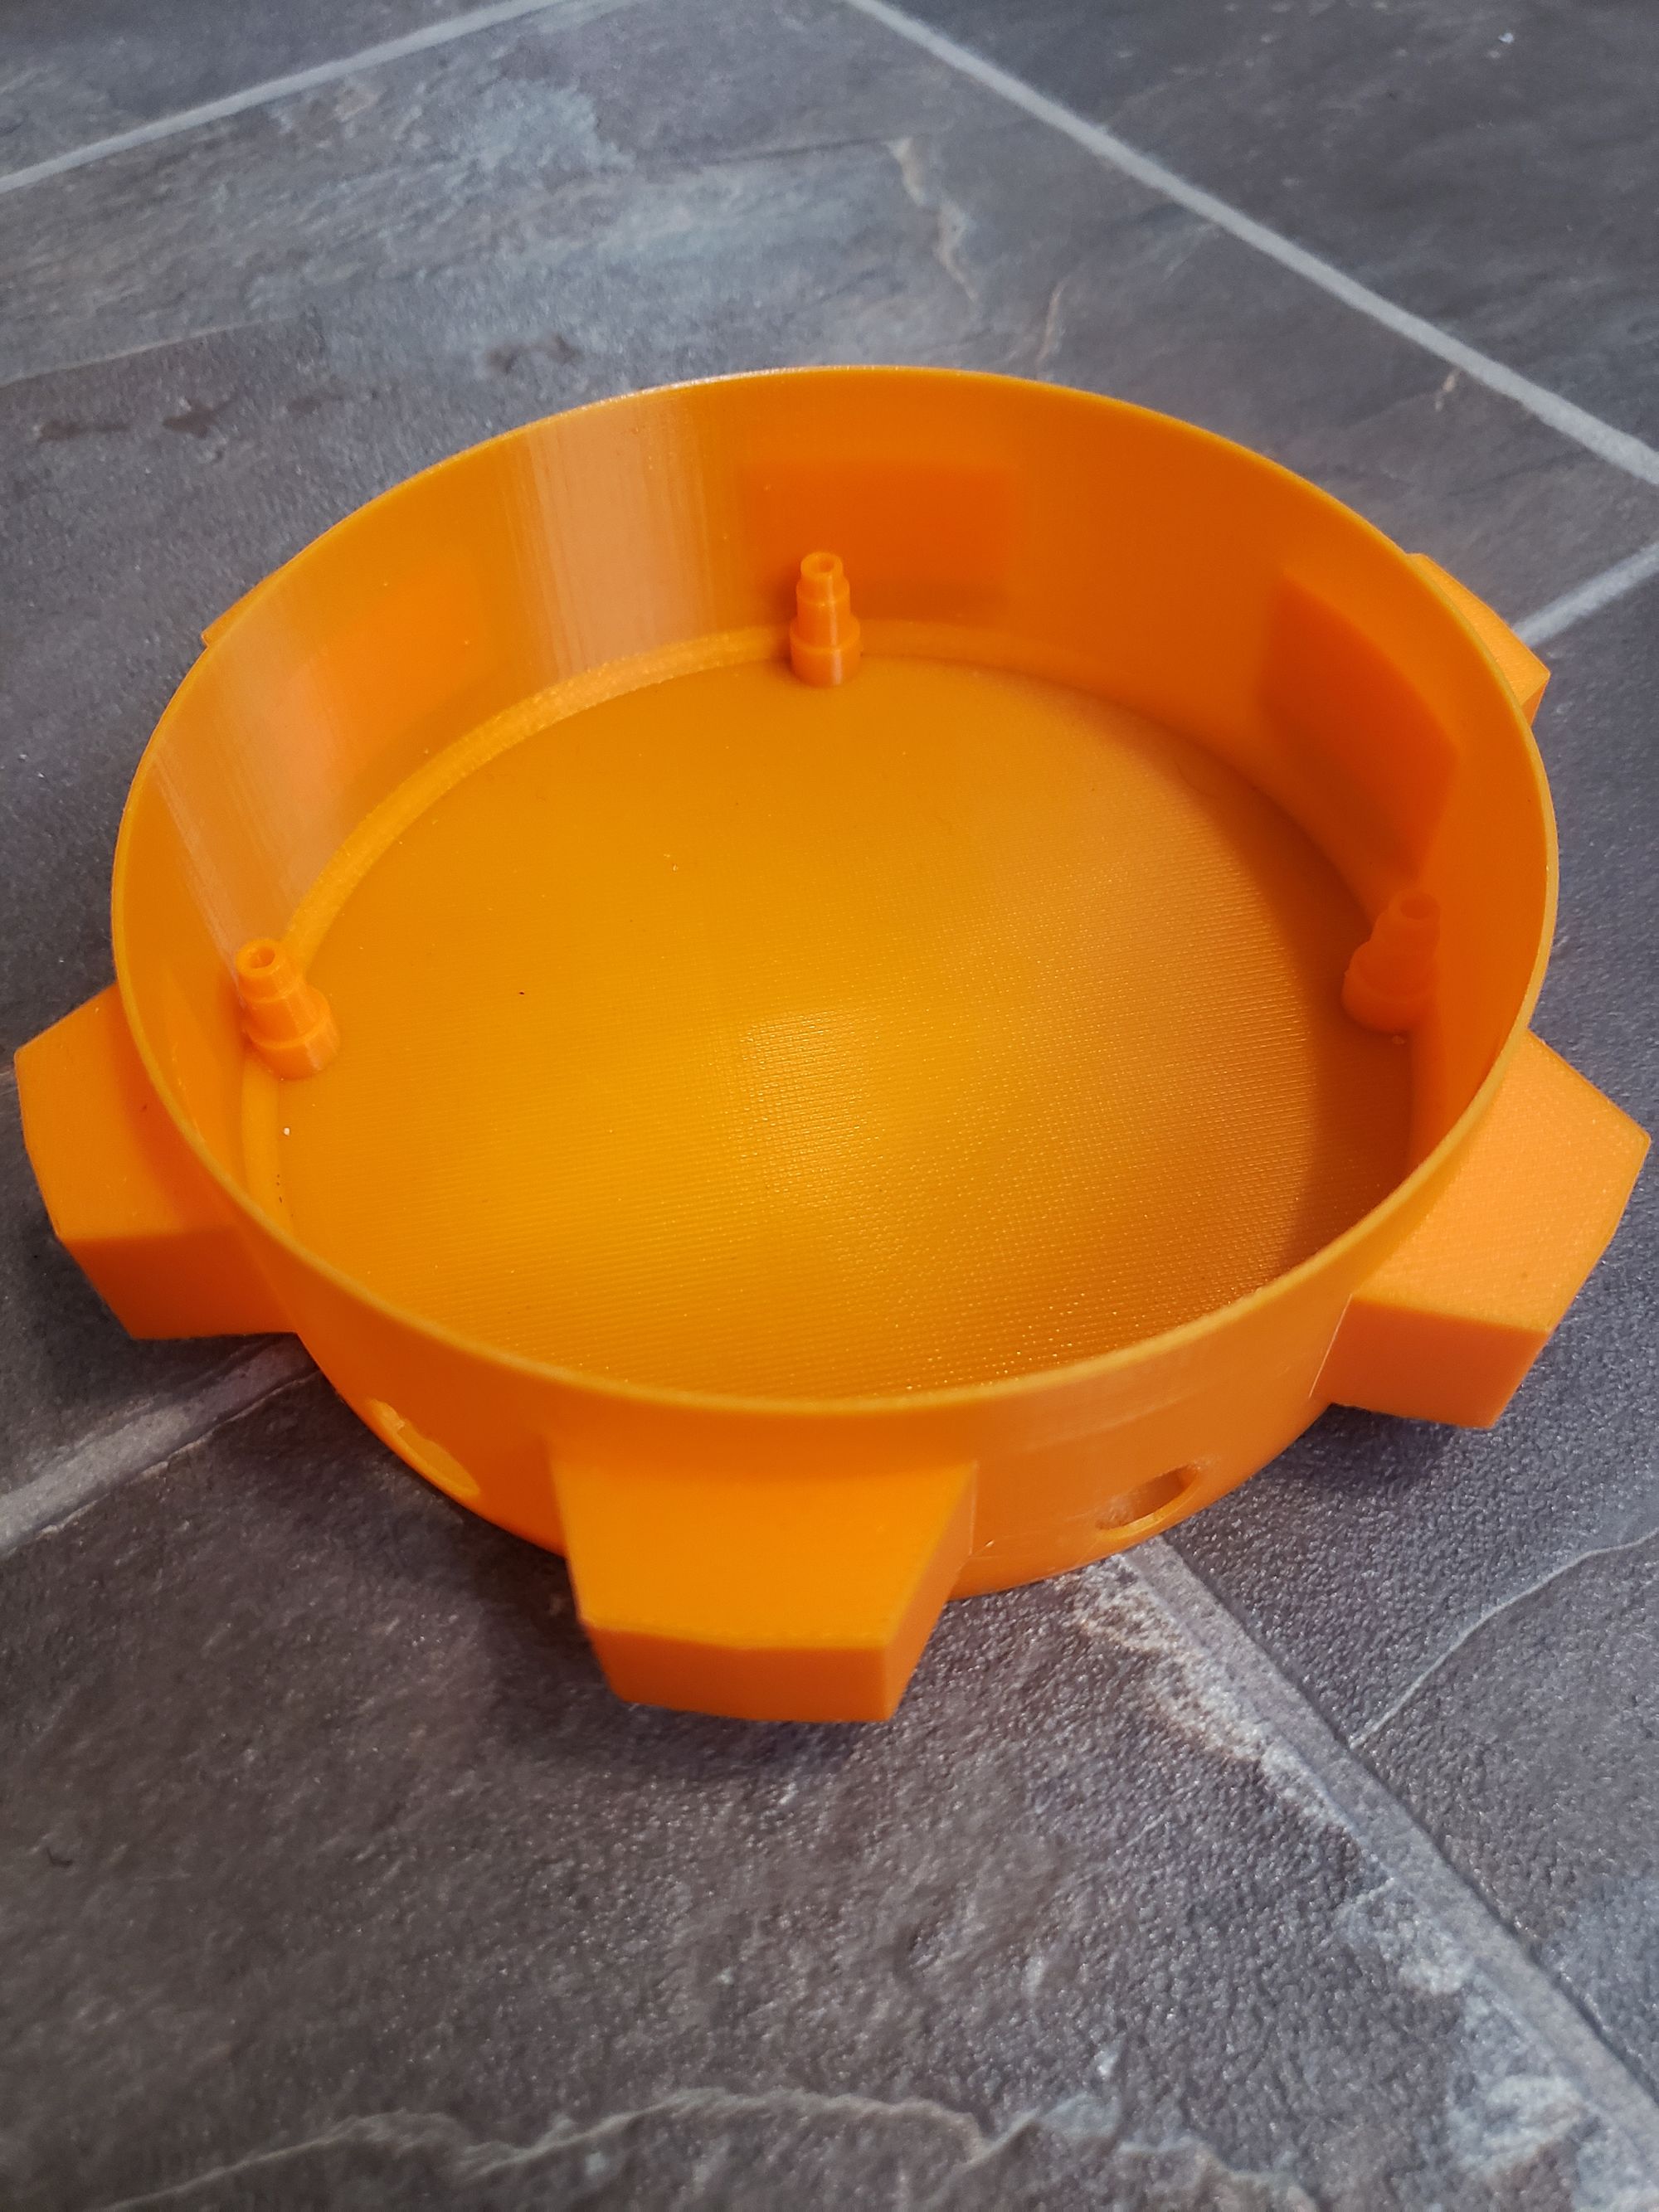
At first, it was all FDM printed. I experimented with separating the cube into multiple parts and combining it later, or a single long print, but I wasn't fully satisfied. In the end though I knew that I had to print the base container in FDM, and the rest in resin, as it was simple and not highly detailed. I printed this in both PLA and PETG, depending on what I had loaded up at the time.

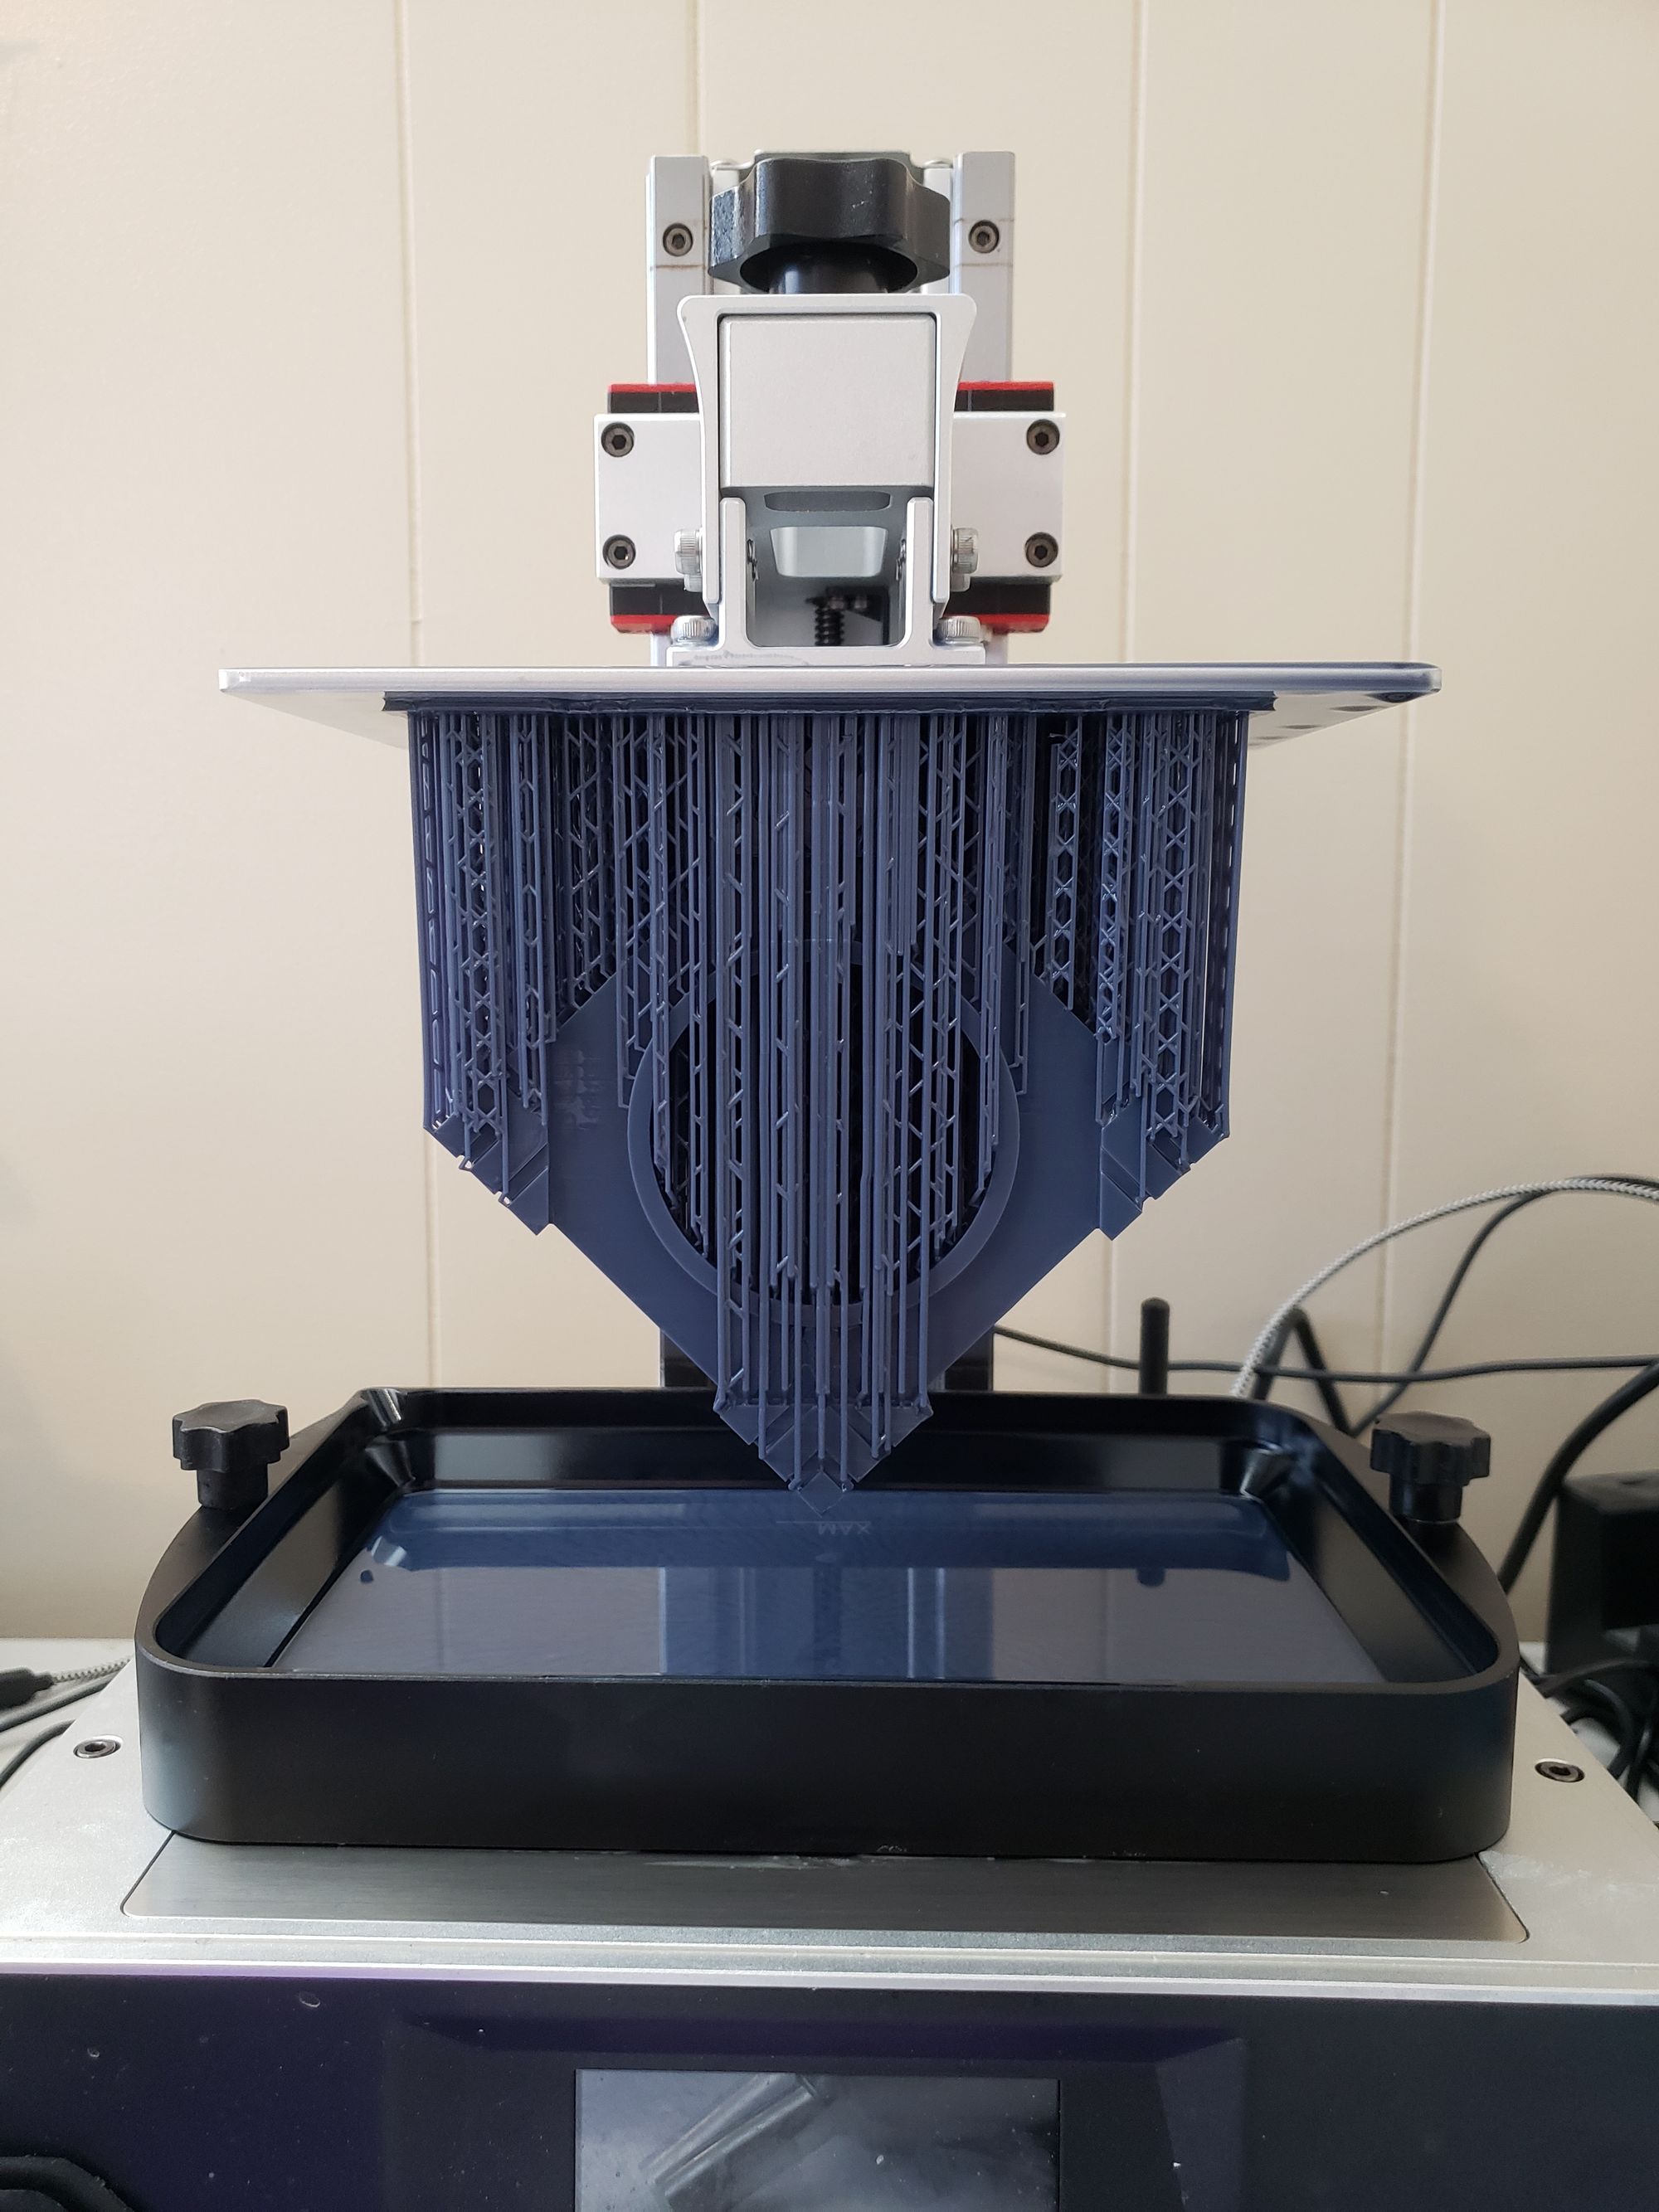
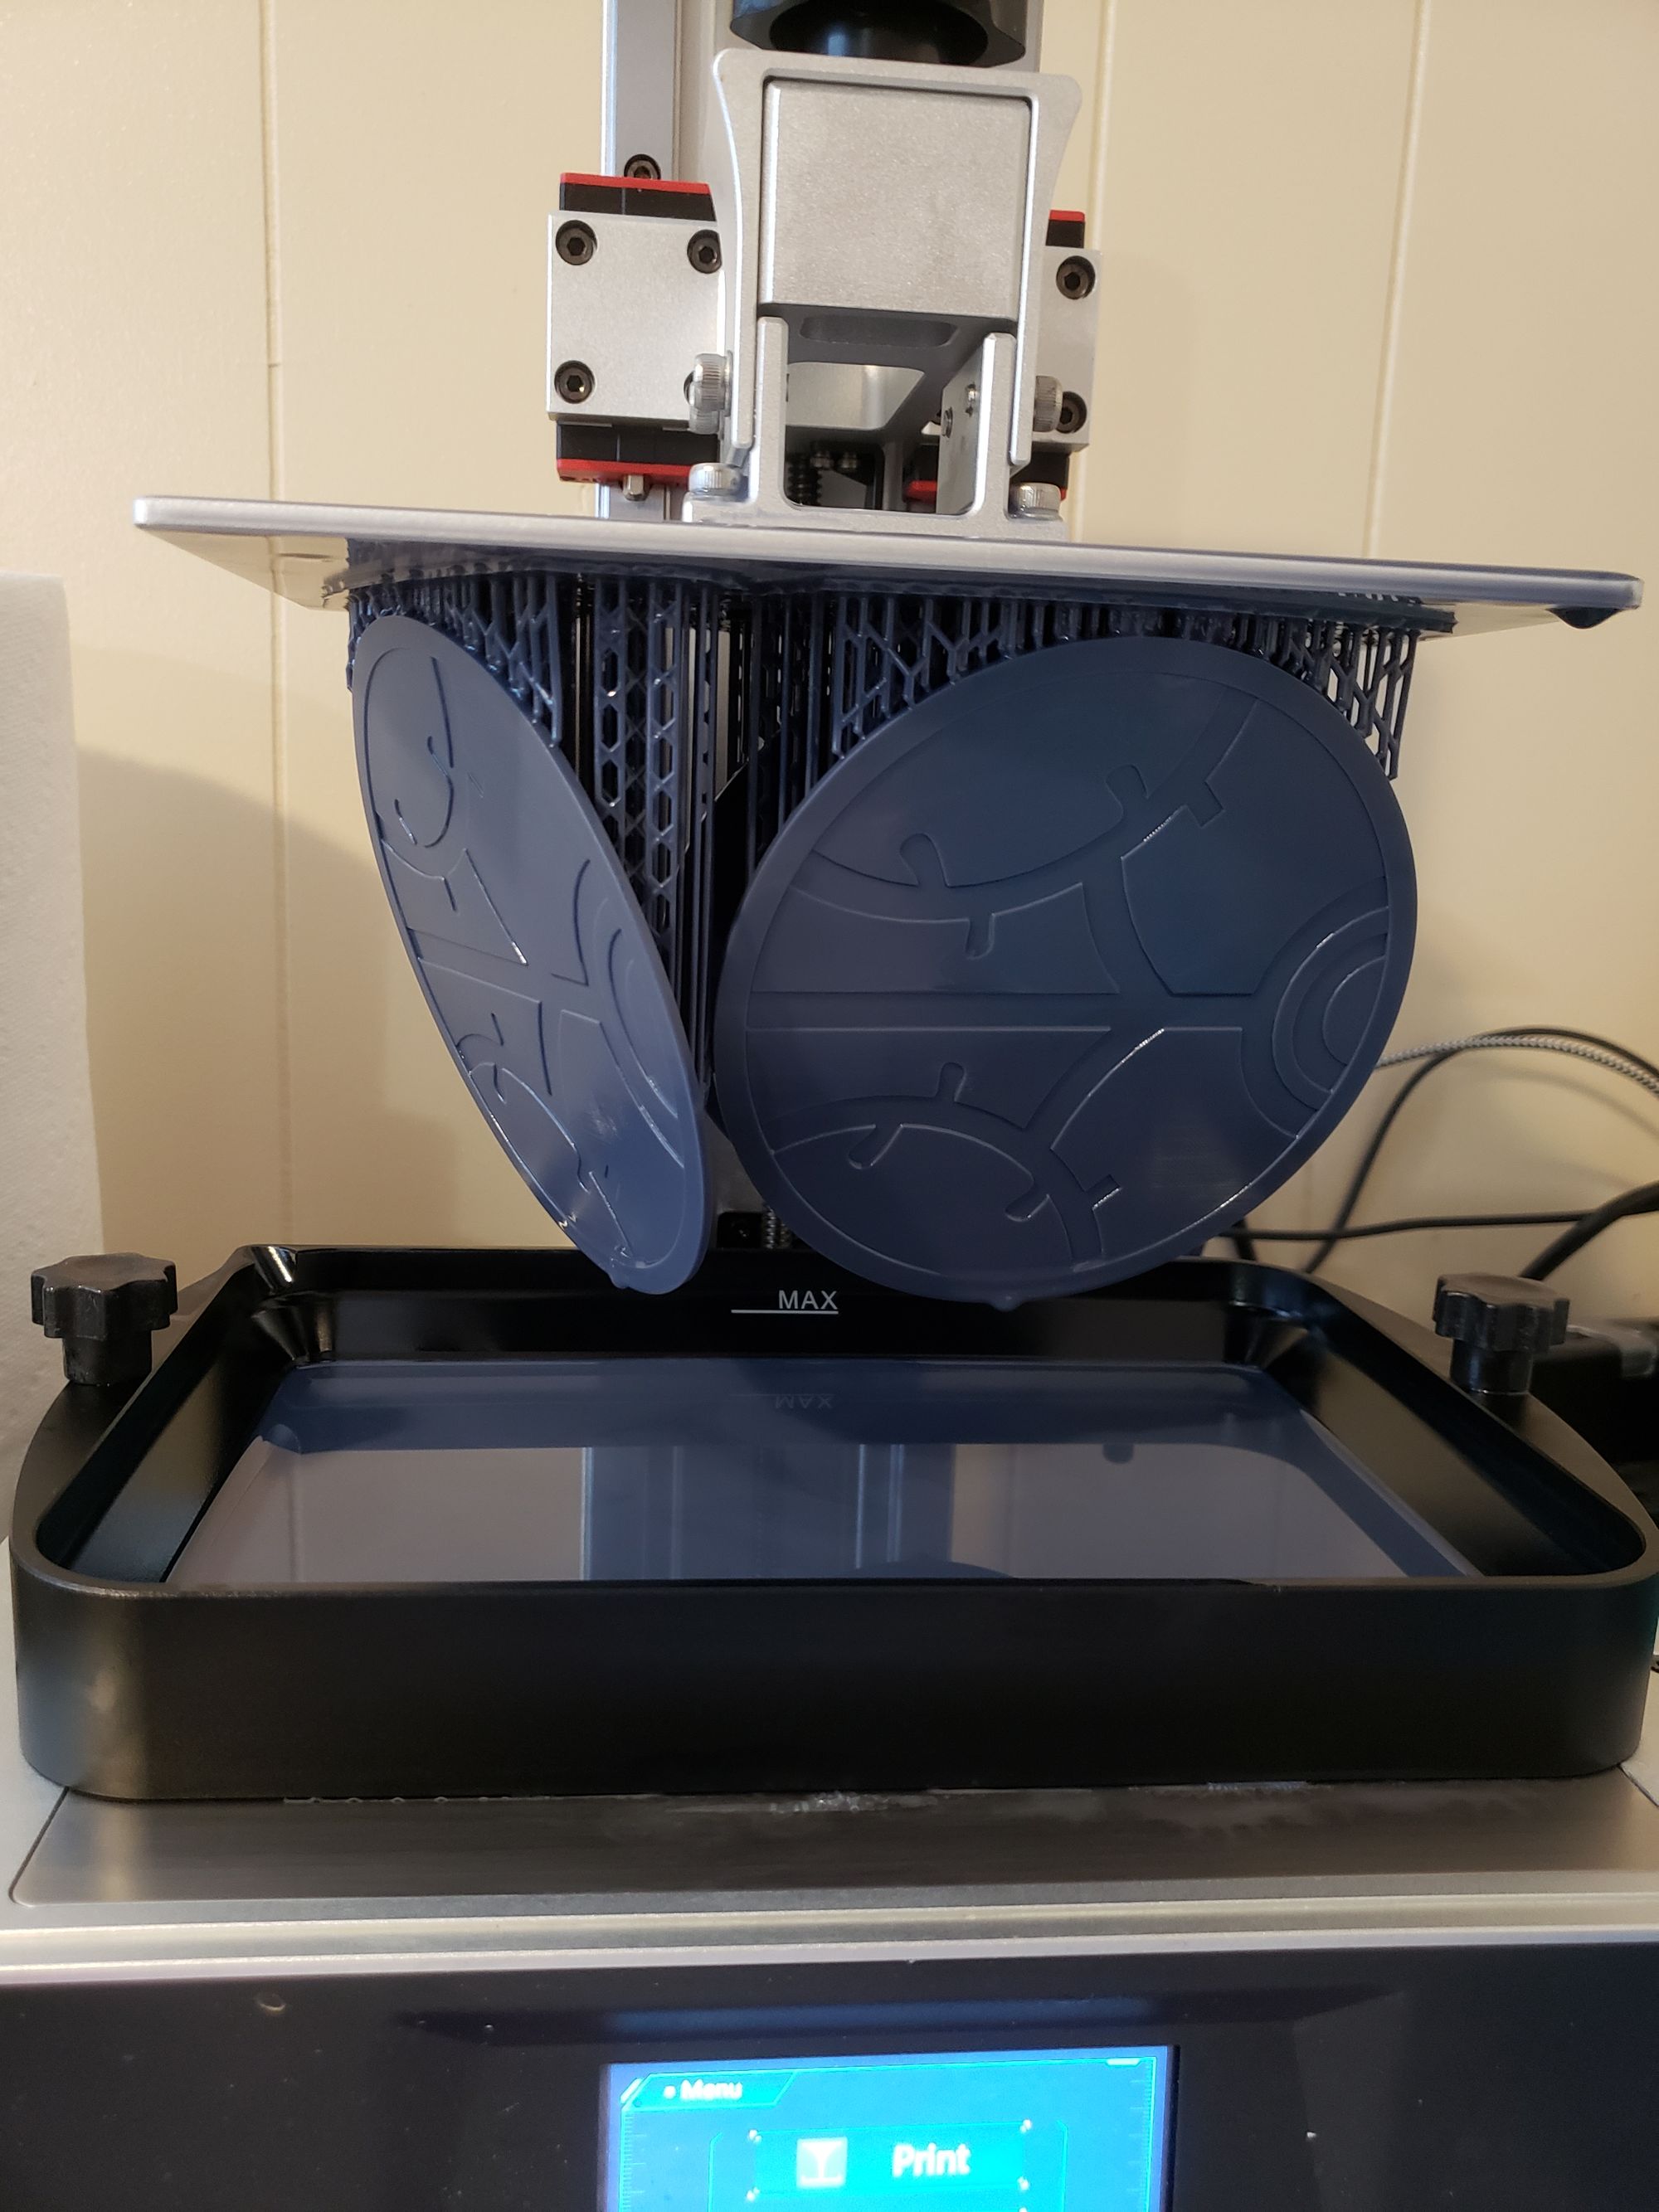
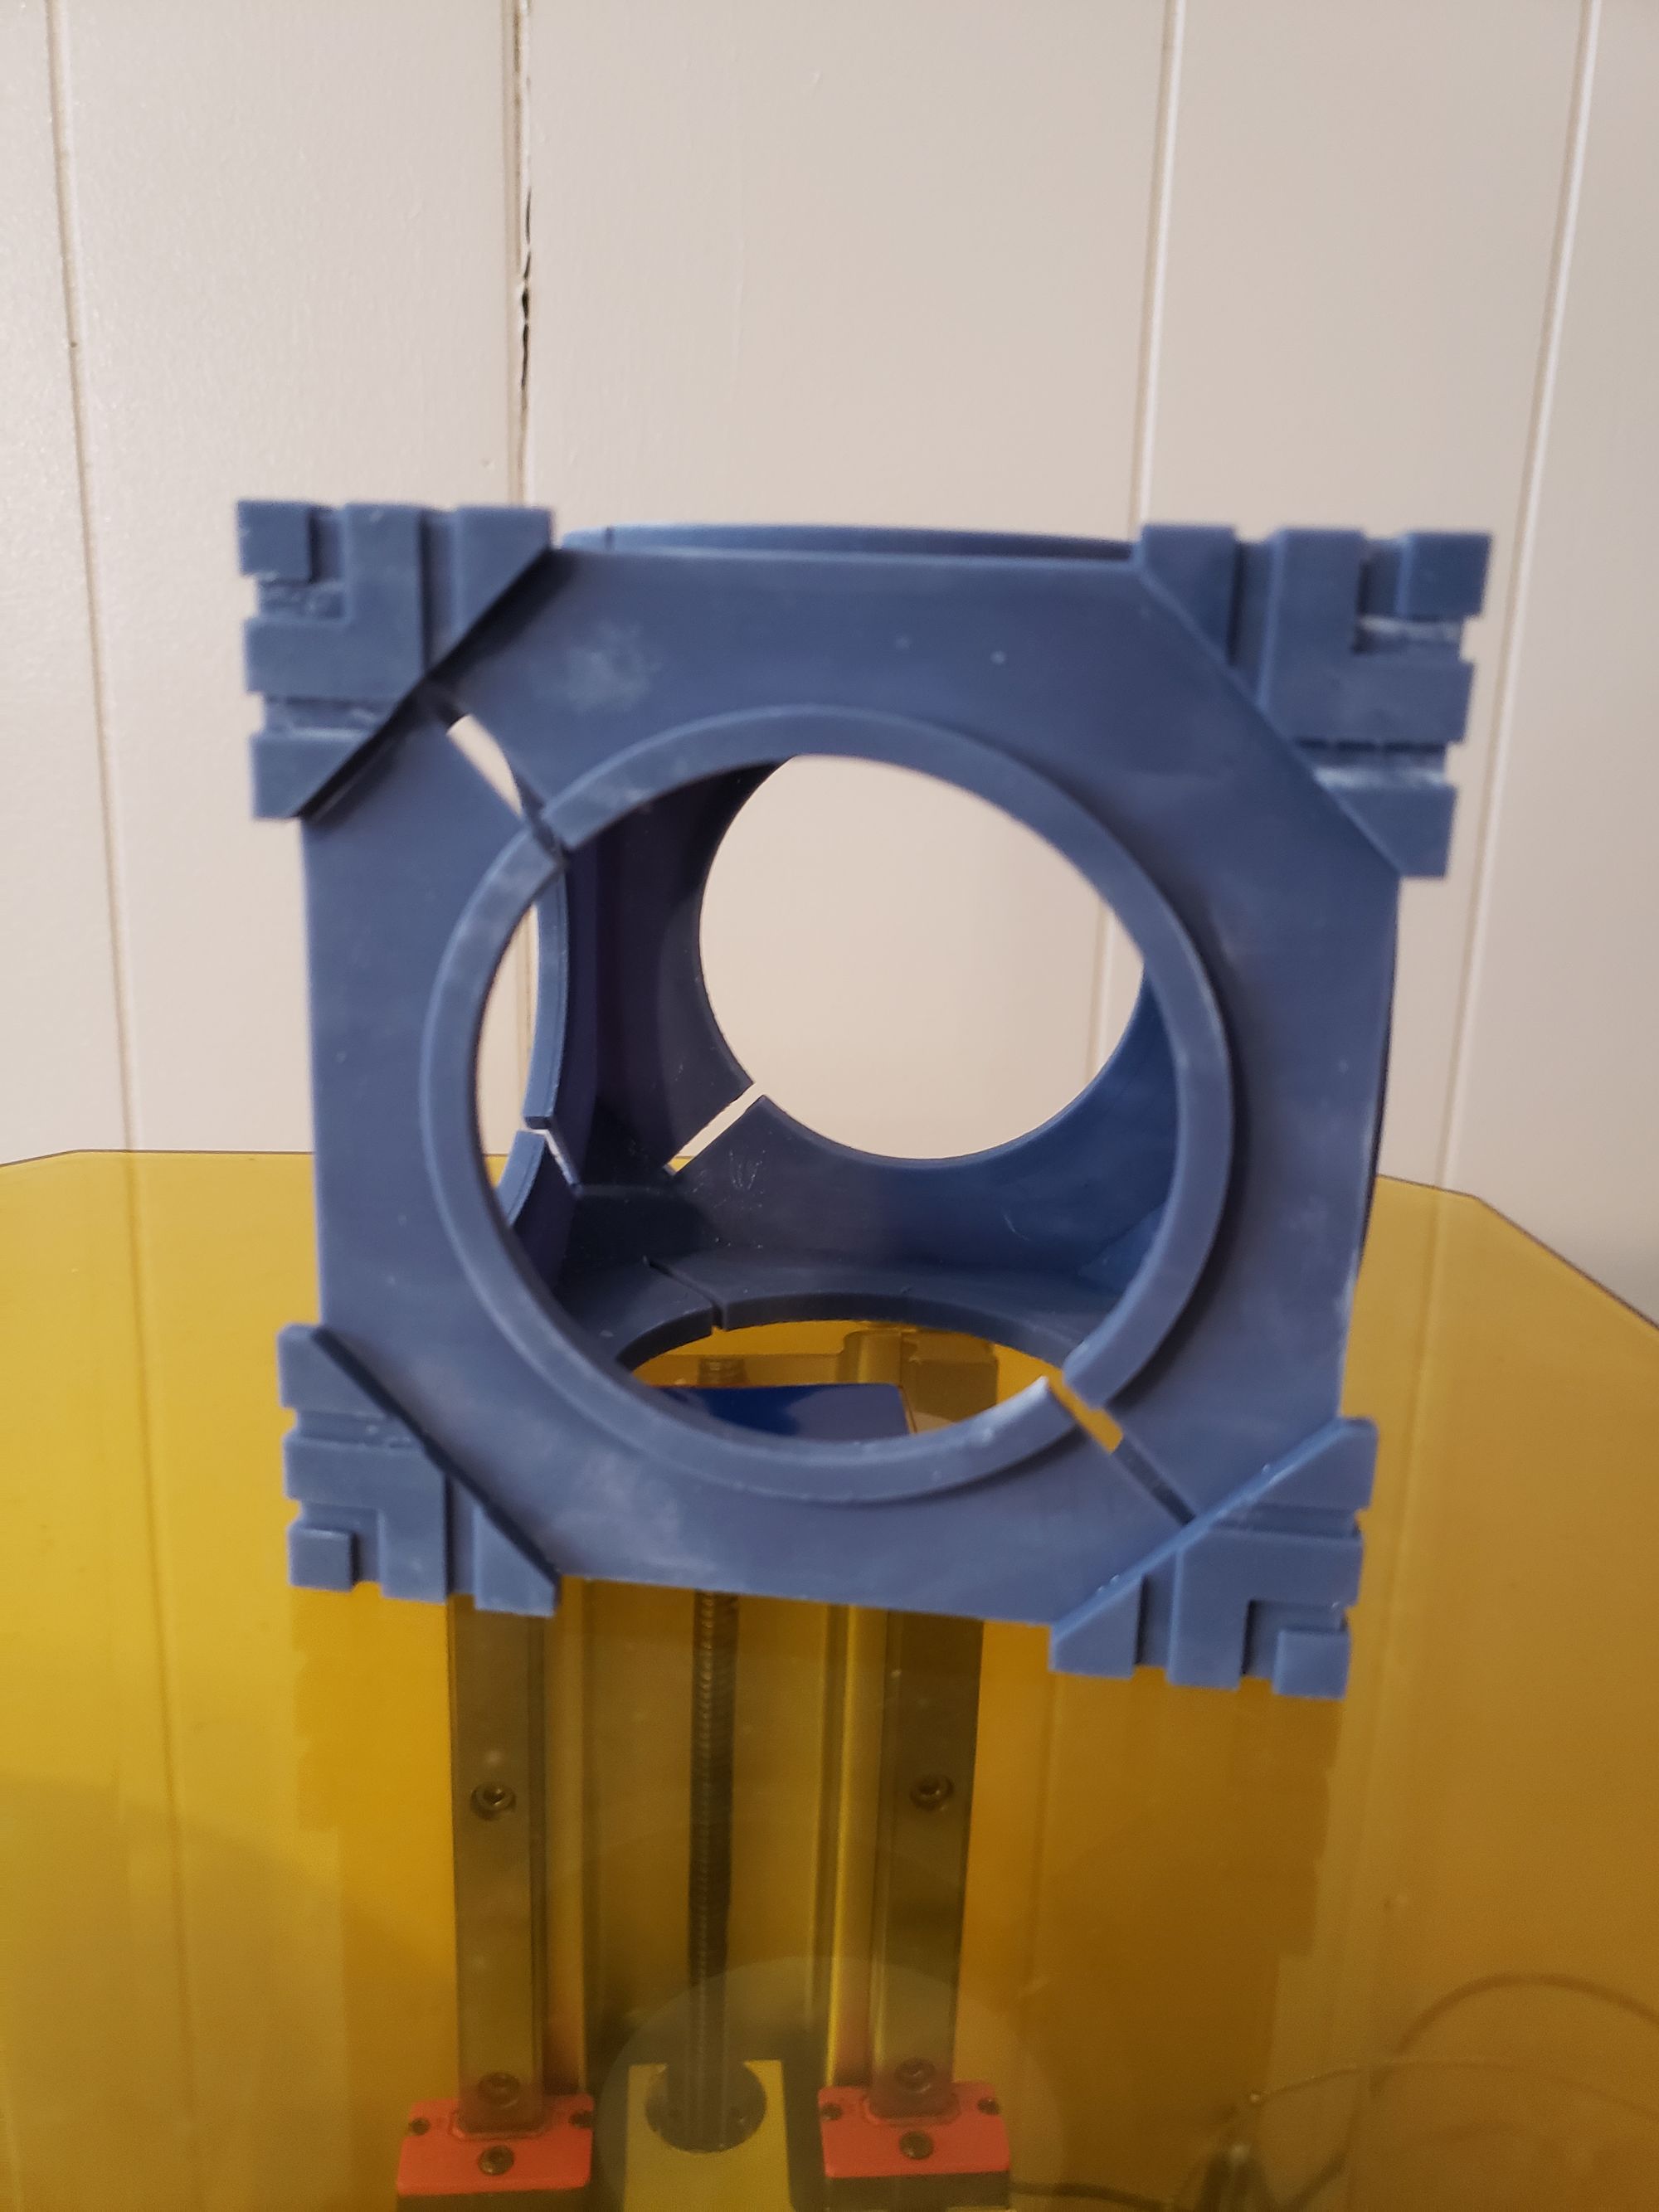
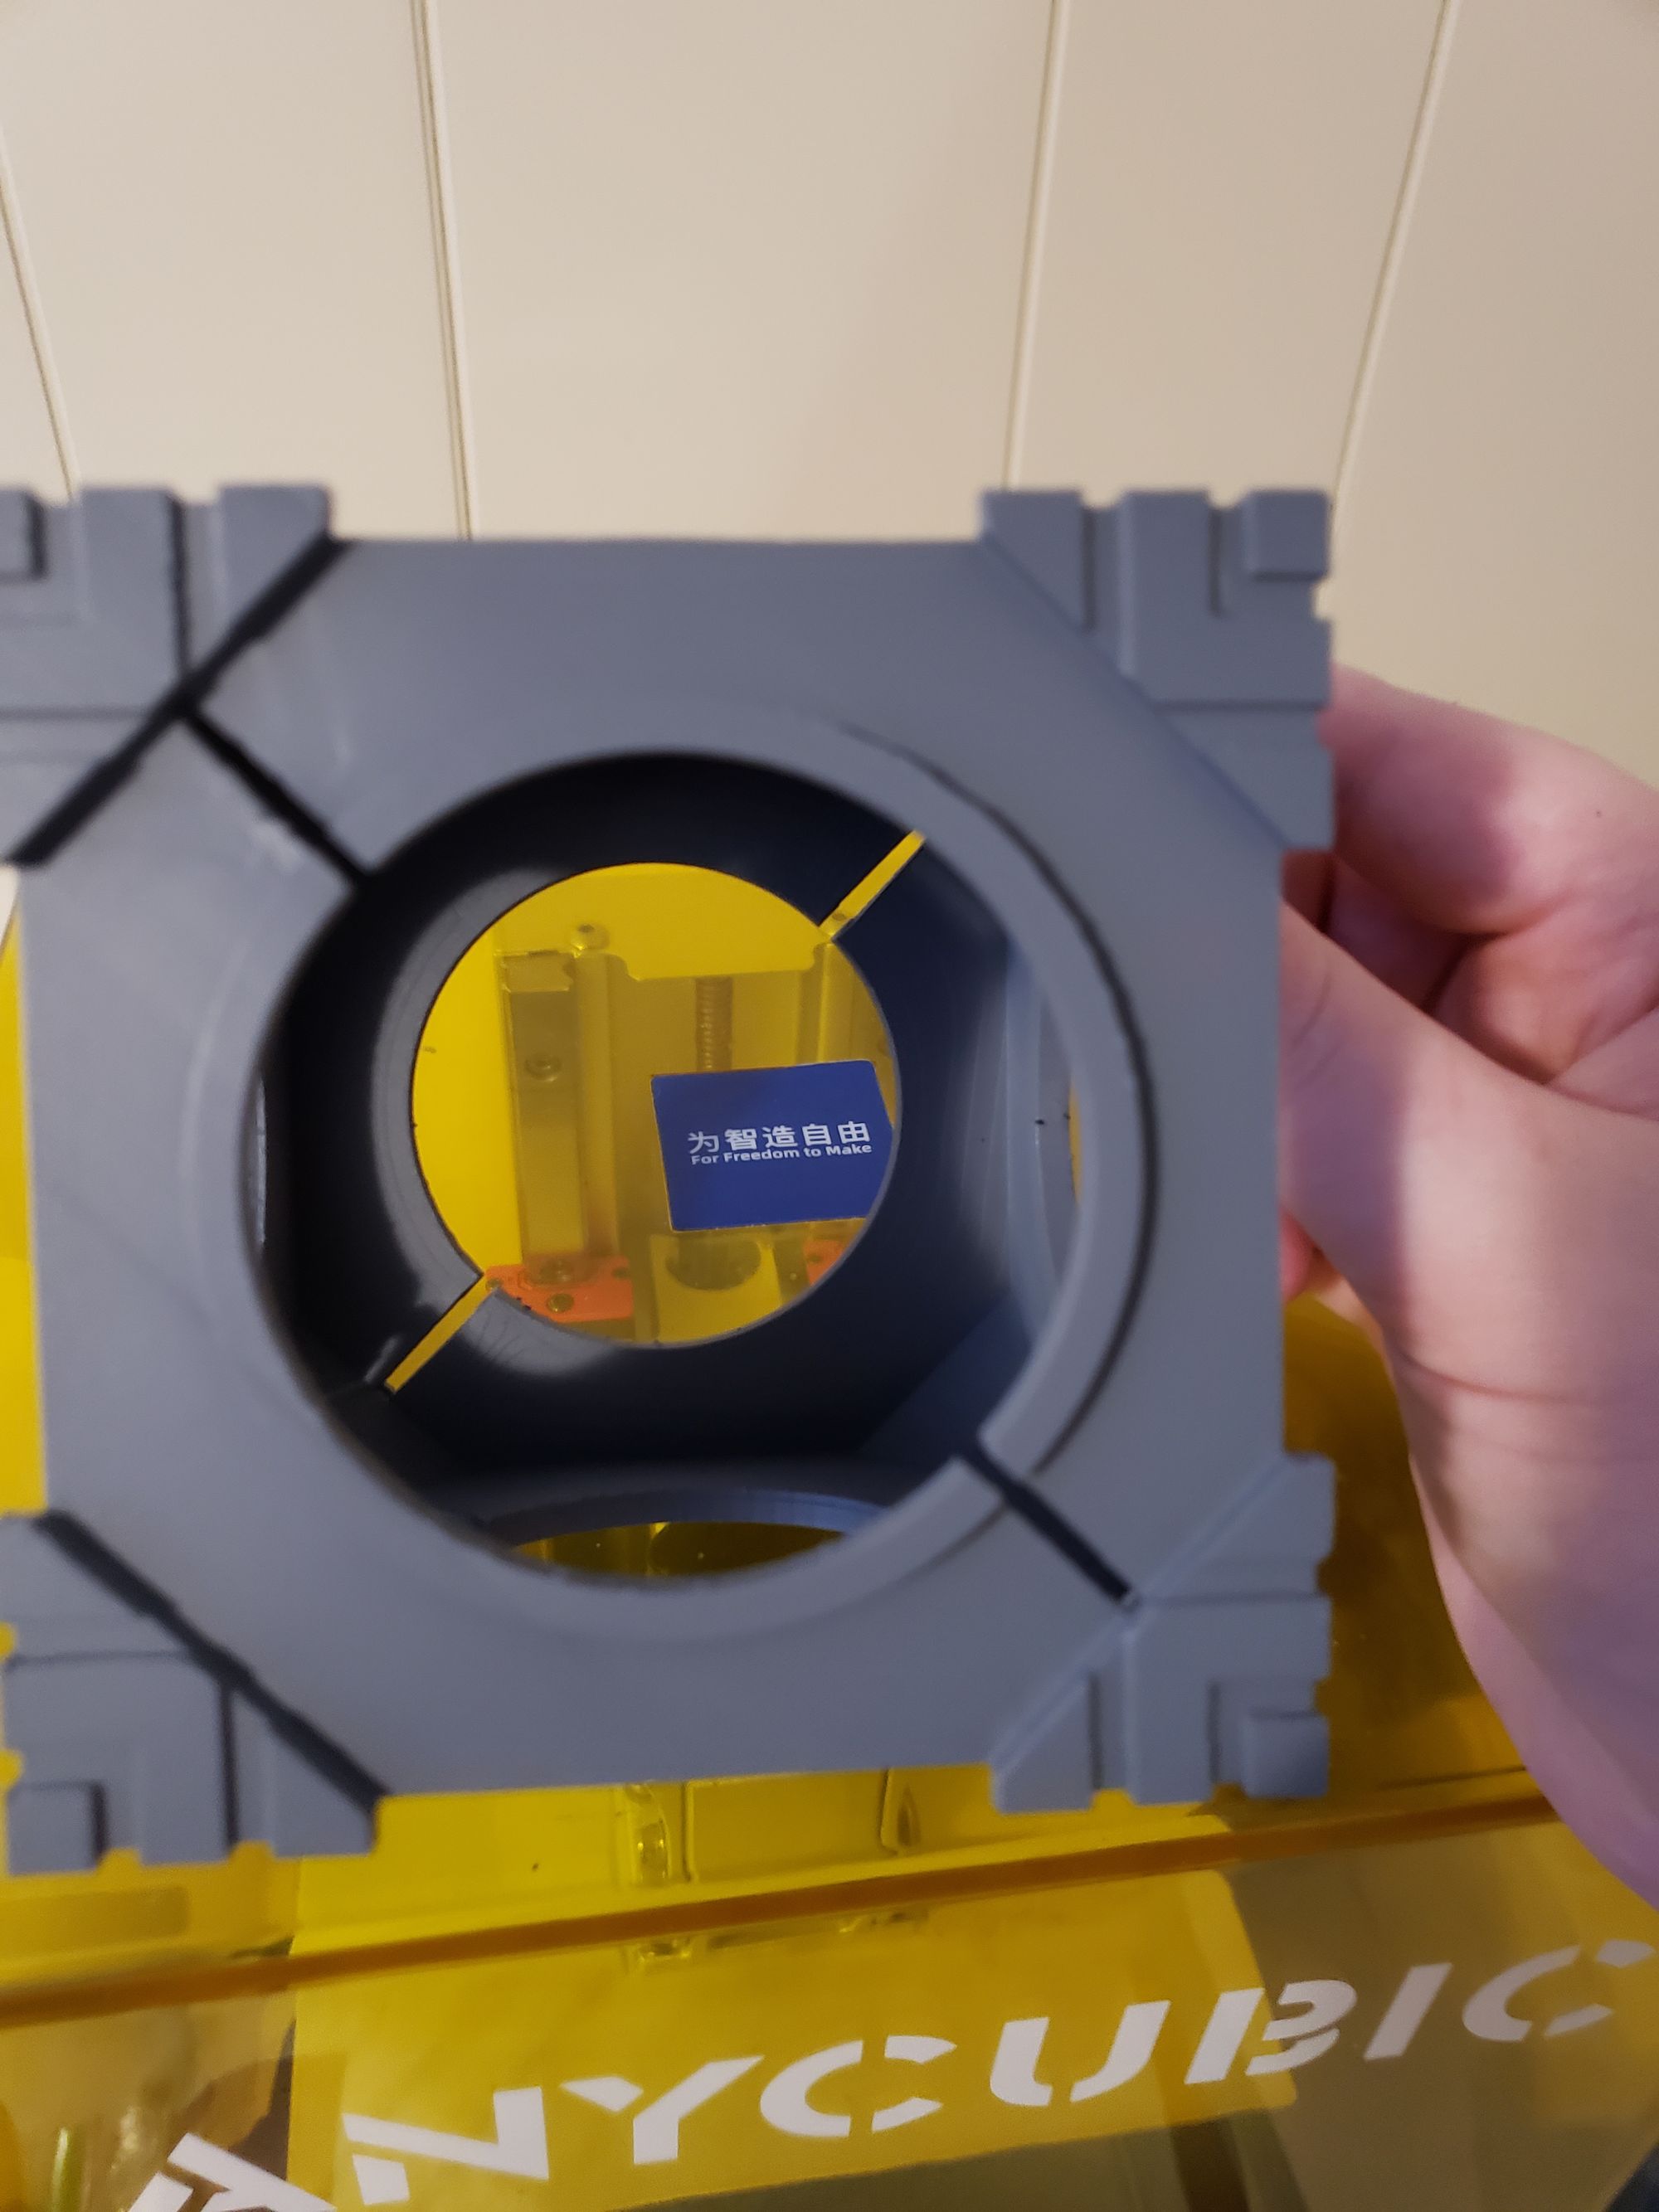
For the cube, medallions and base cover, I printed them all on my fancy new resin printer. The cube just barely fit on the build plate, it was perfect. I used mainly an ABS-Like strong resin for these pieces, often mixing a few from leftover resin bottles.
As for the transparent pieces that hold the medallions in place, or the diffuser dome for the LED lights, I had a mix. Initially, I printed them in a clear PETG and lightly sanded them to diffuse them all. Then I experimented with a batch in a clear resin that I diffused with a frosting spray paint. For the domes, either worked, and it was easier to make the resin ones in large quantities, but the diffusion wasn't as good but still adequate. For the other transparent pieces, it was slower but better to print in clear PETG. I still used the ones from the resin tests, as their diffusion was better, but many were brittle and the ends broke off, or they warped during curing slightly.
Unfortunately, I forgot to take photos of the medallions, diffuser domes and transparent holder pieces being printed.
So in the end, the parts were made up of plastic FDM printed PLA and PETG, and then the rest was resin printed in ABS-Like resin, some clear, some not.
Electronics & Magic
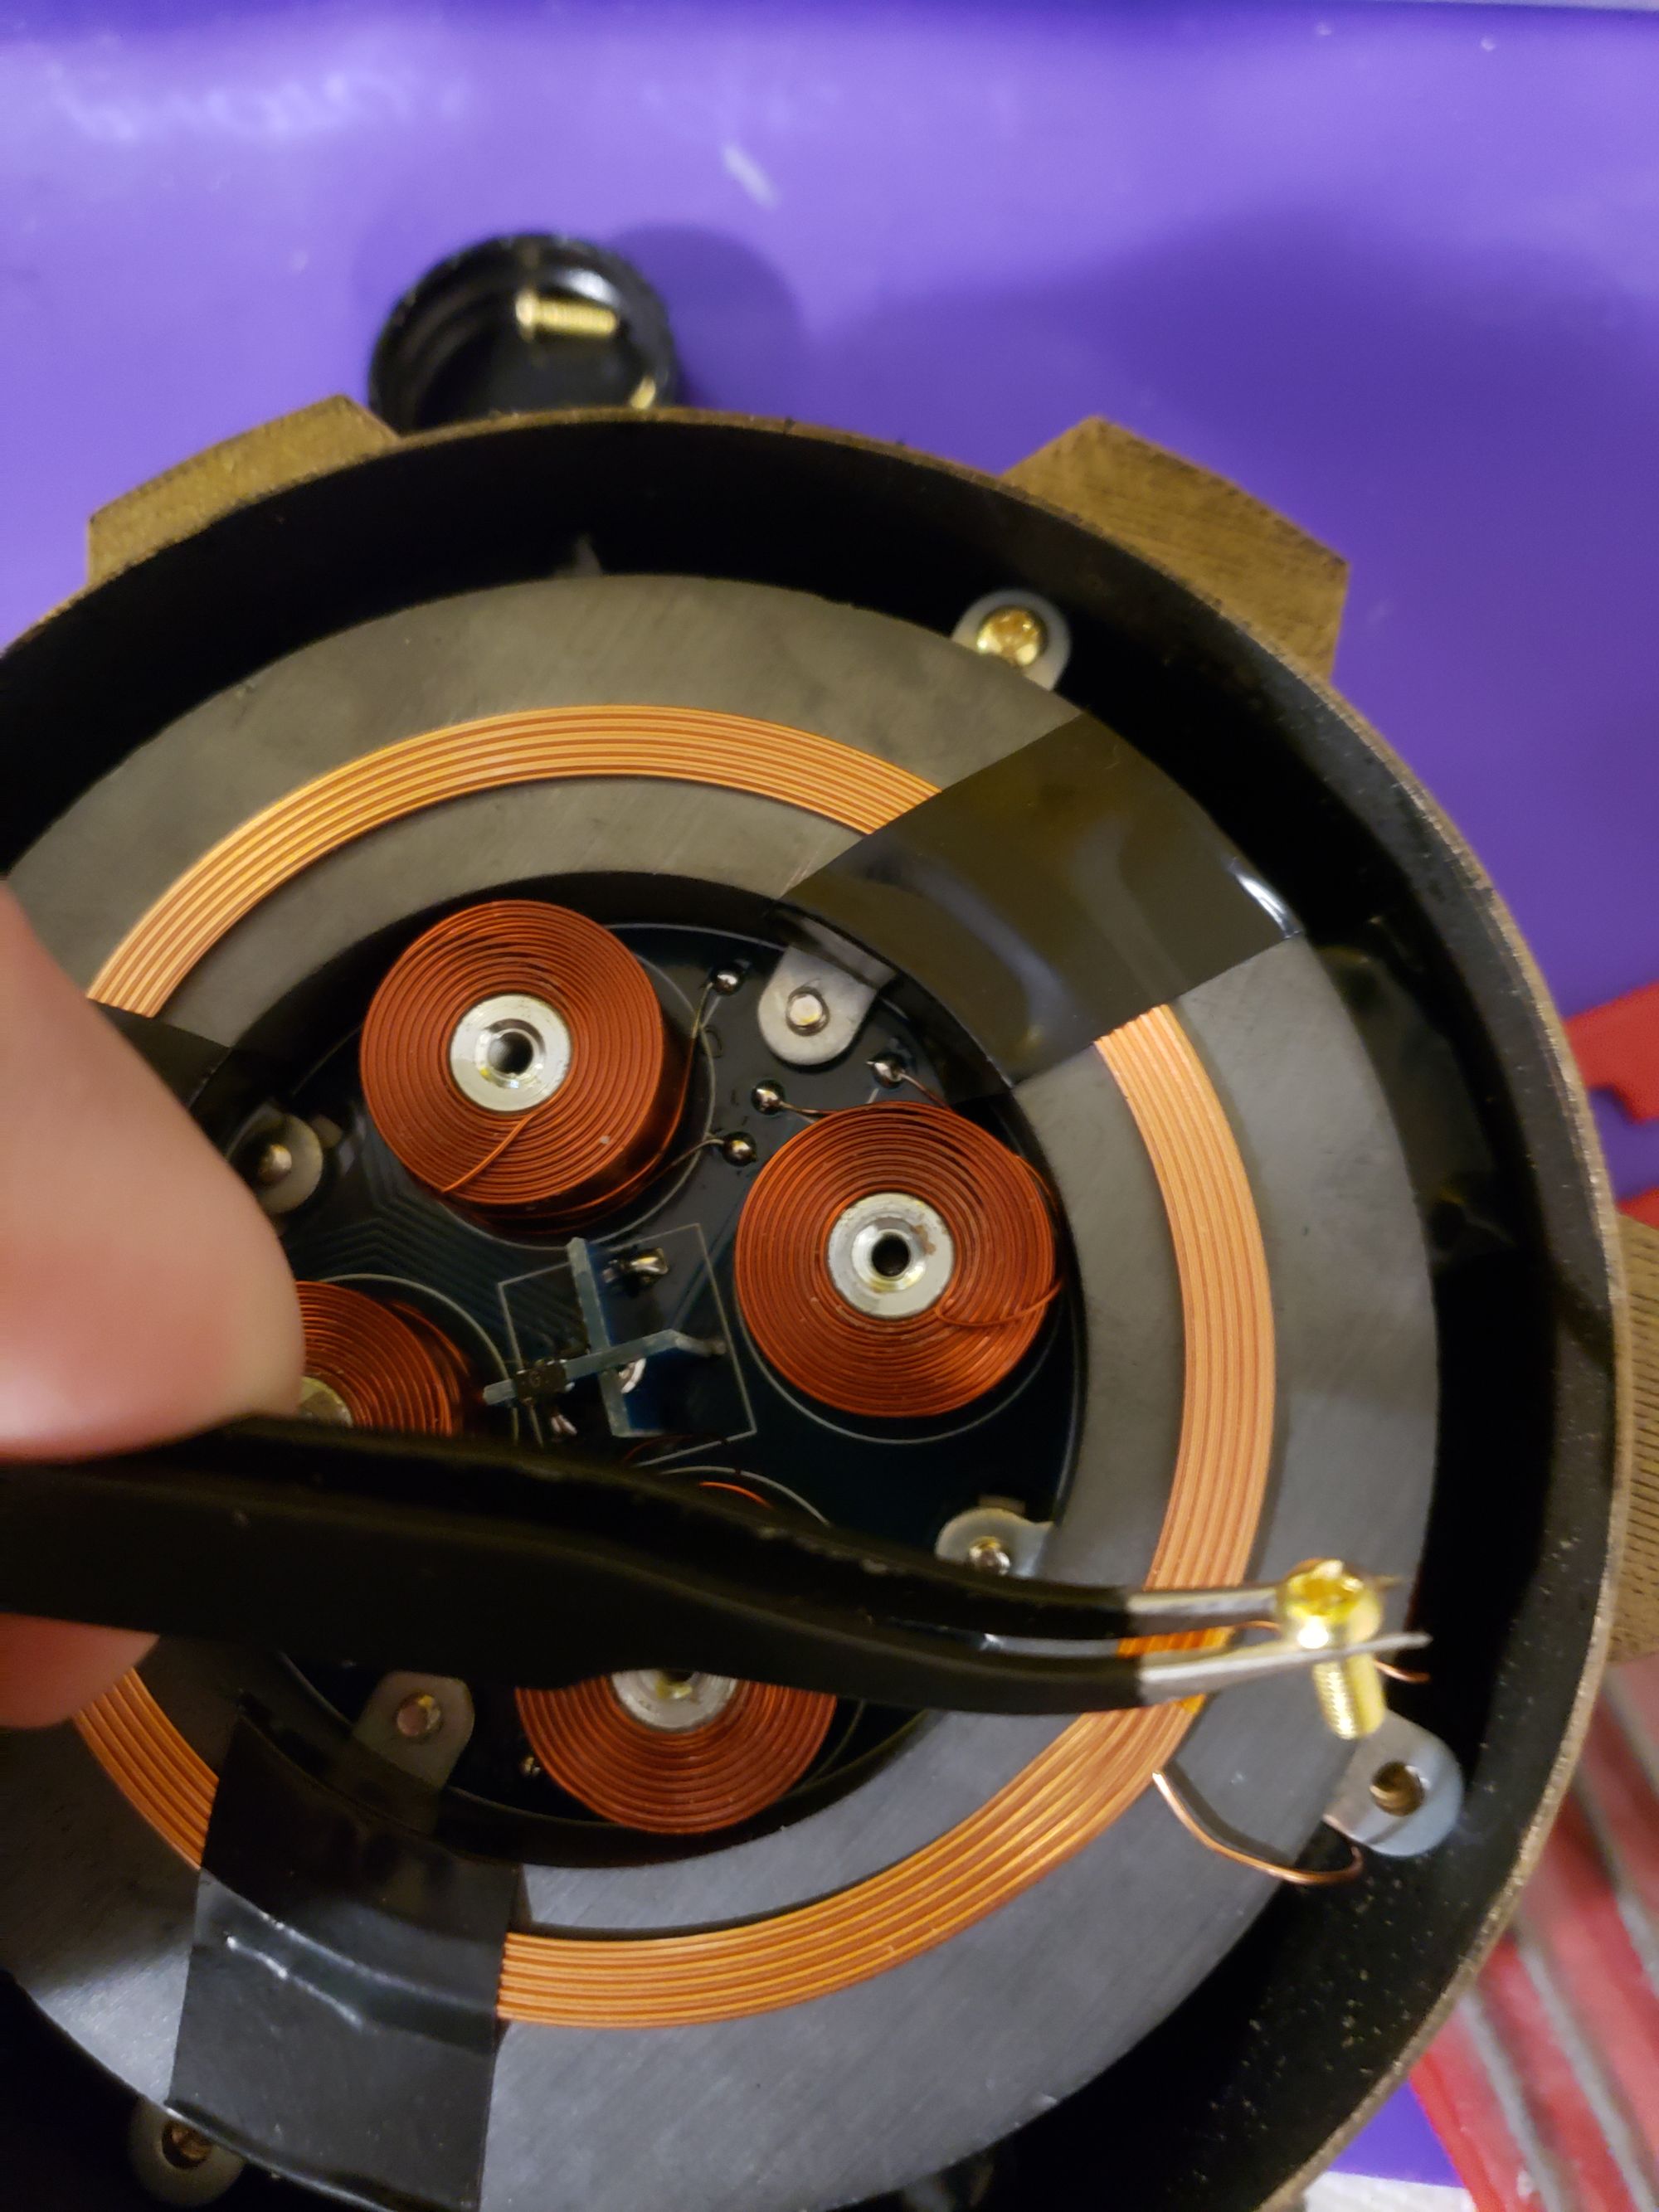
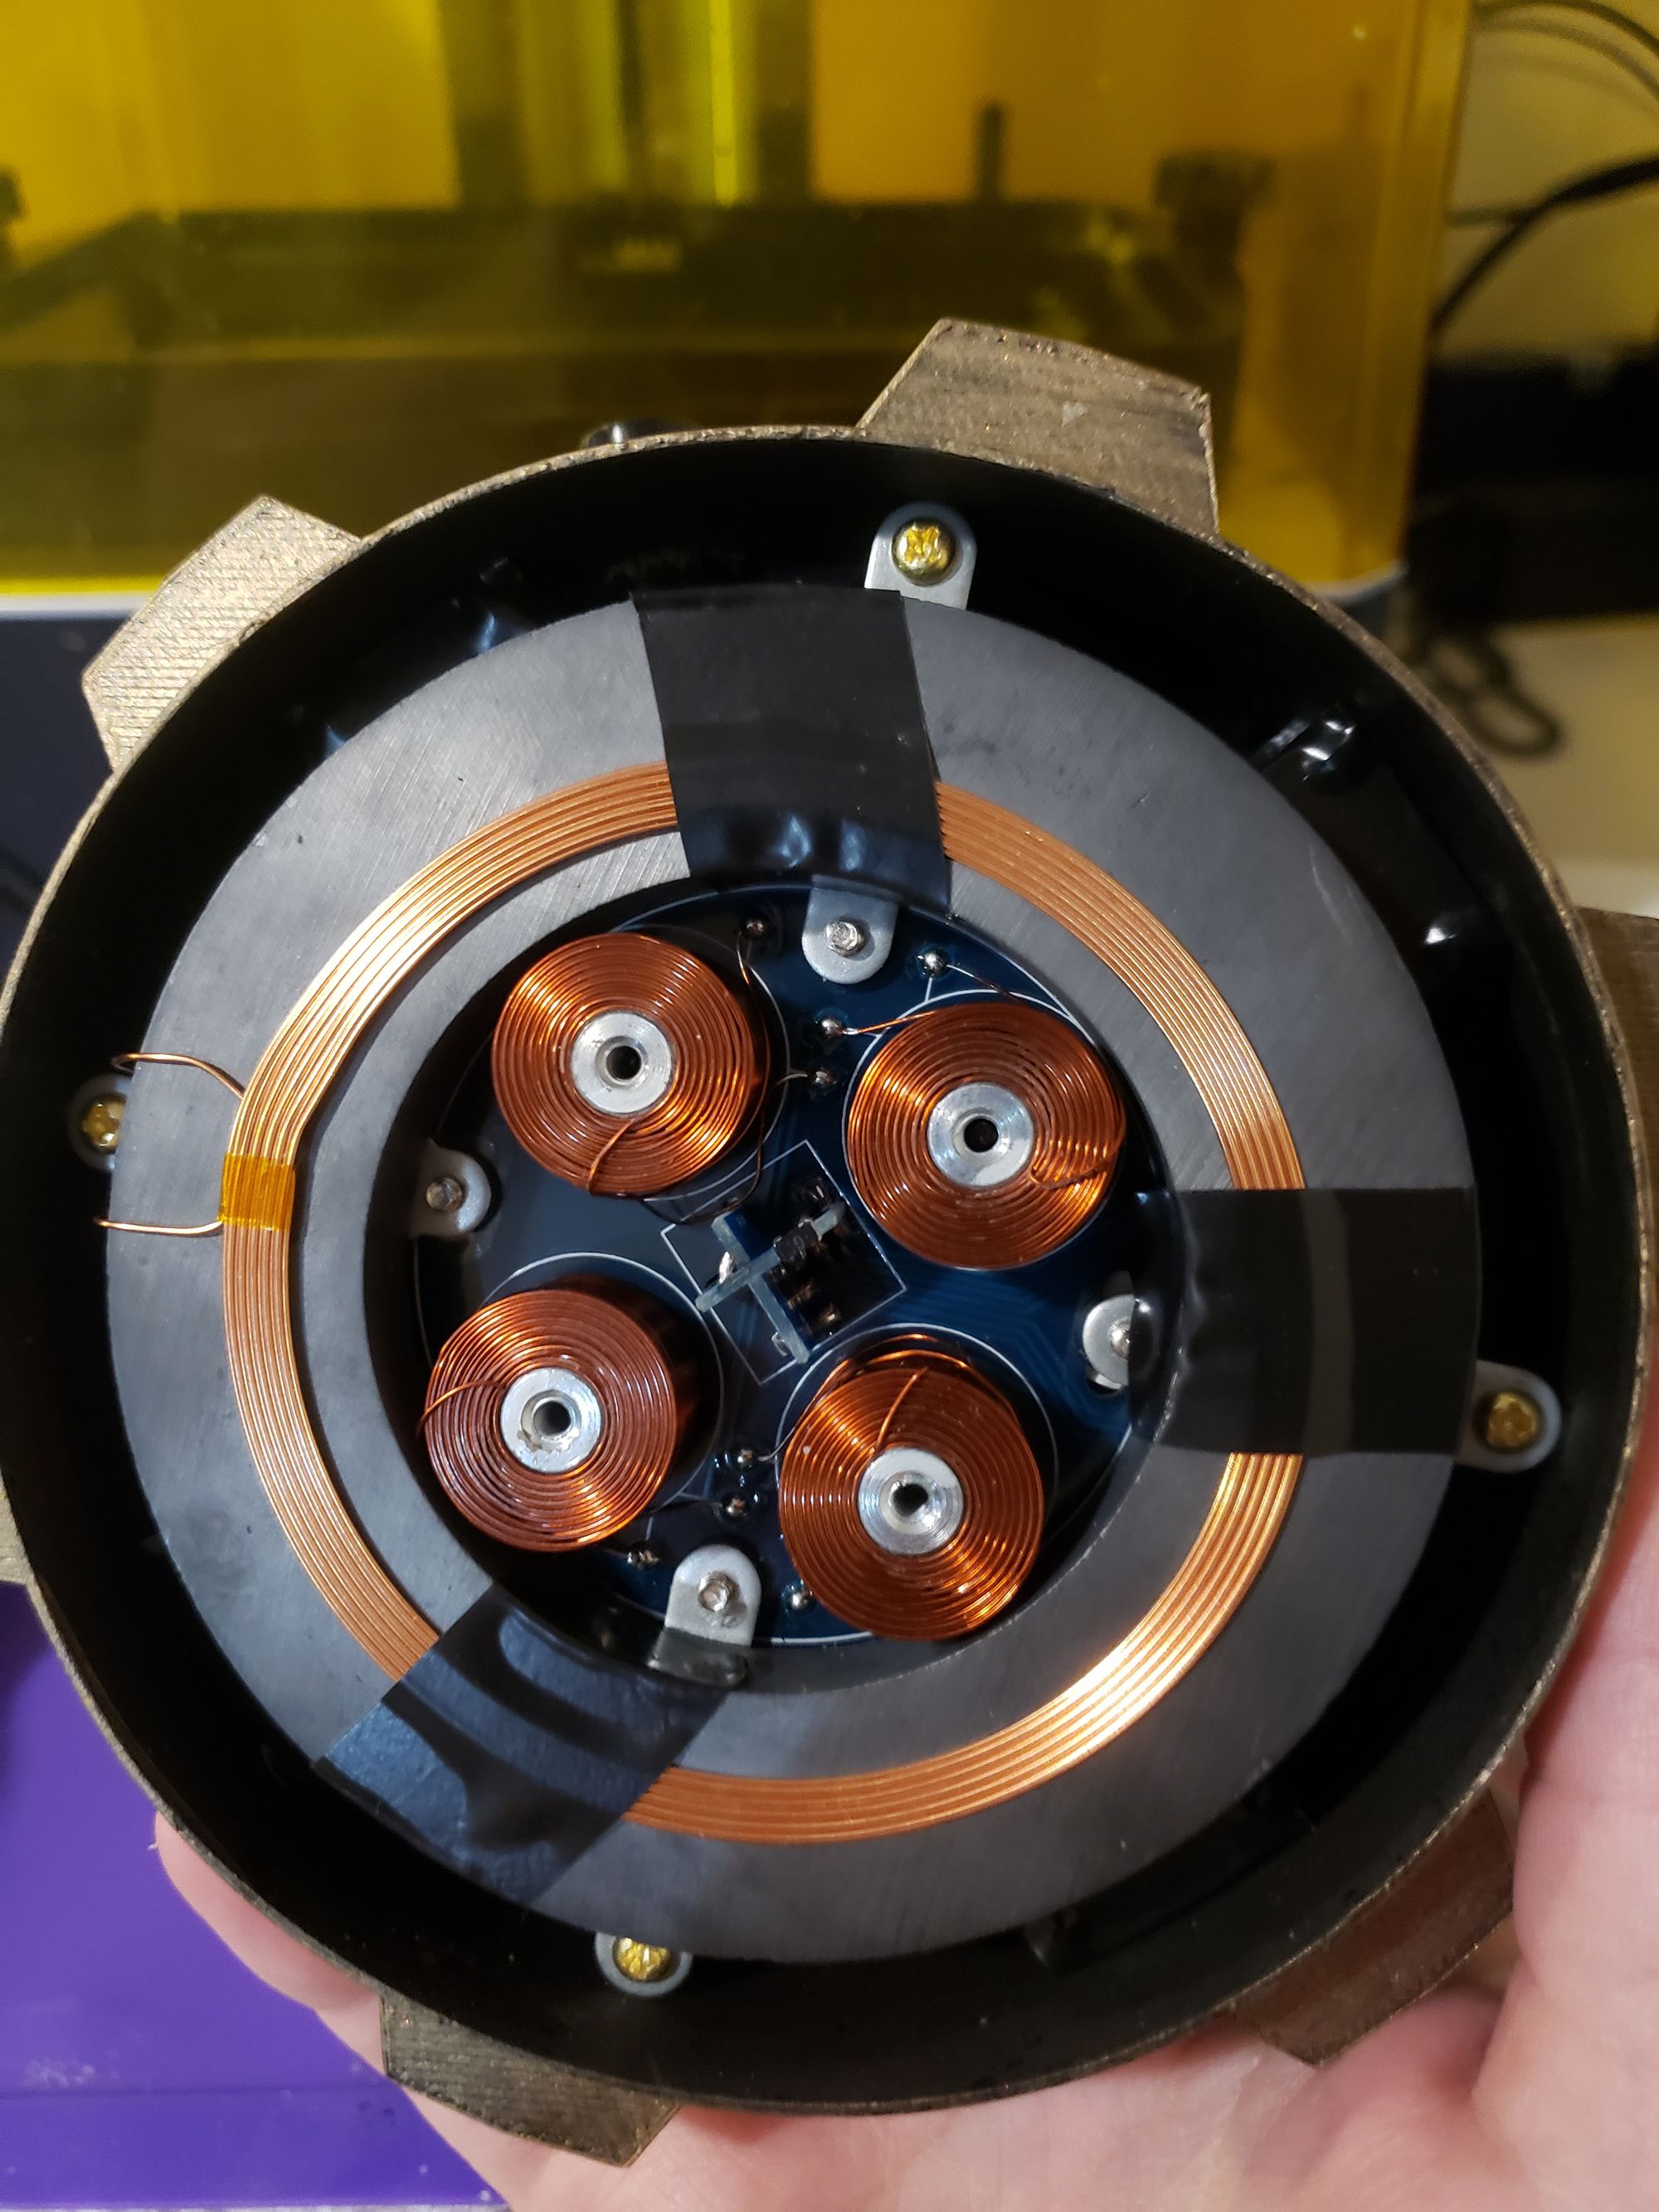
Magnetic Levitation Base
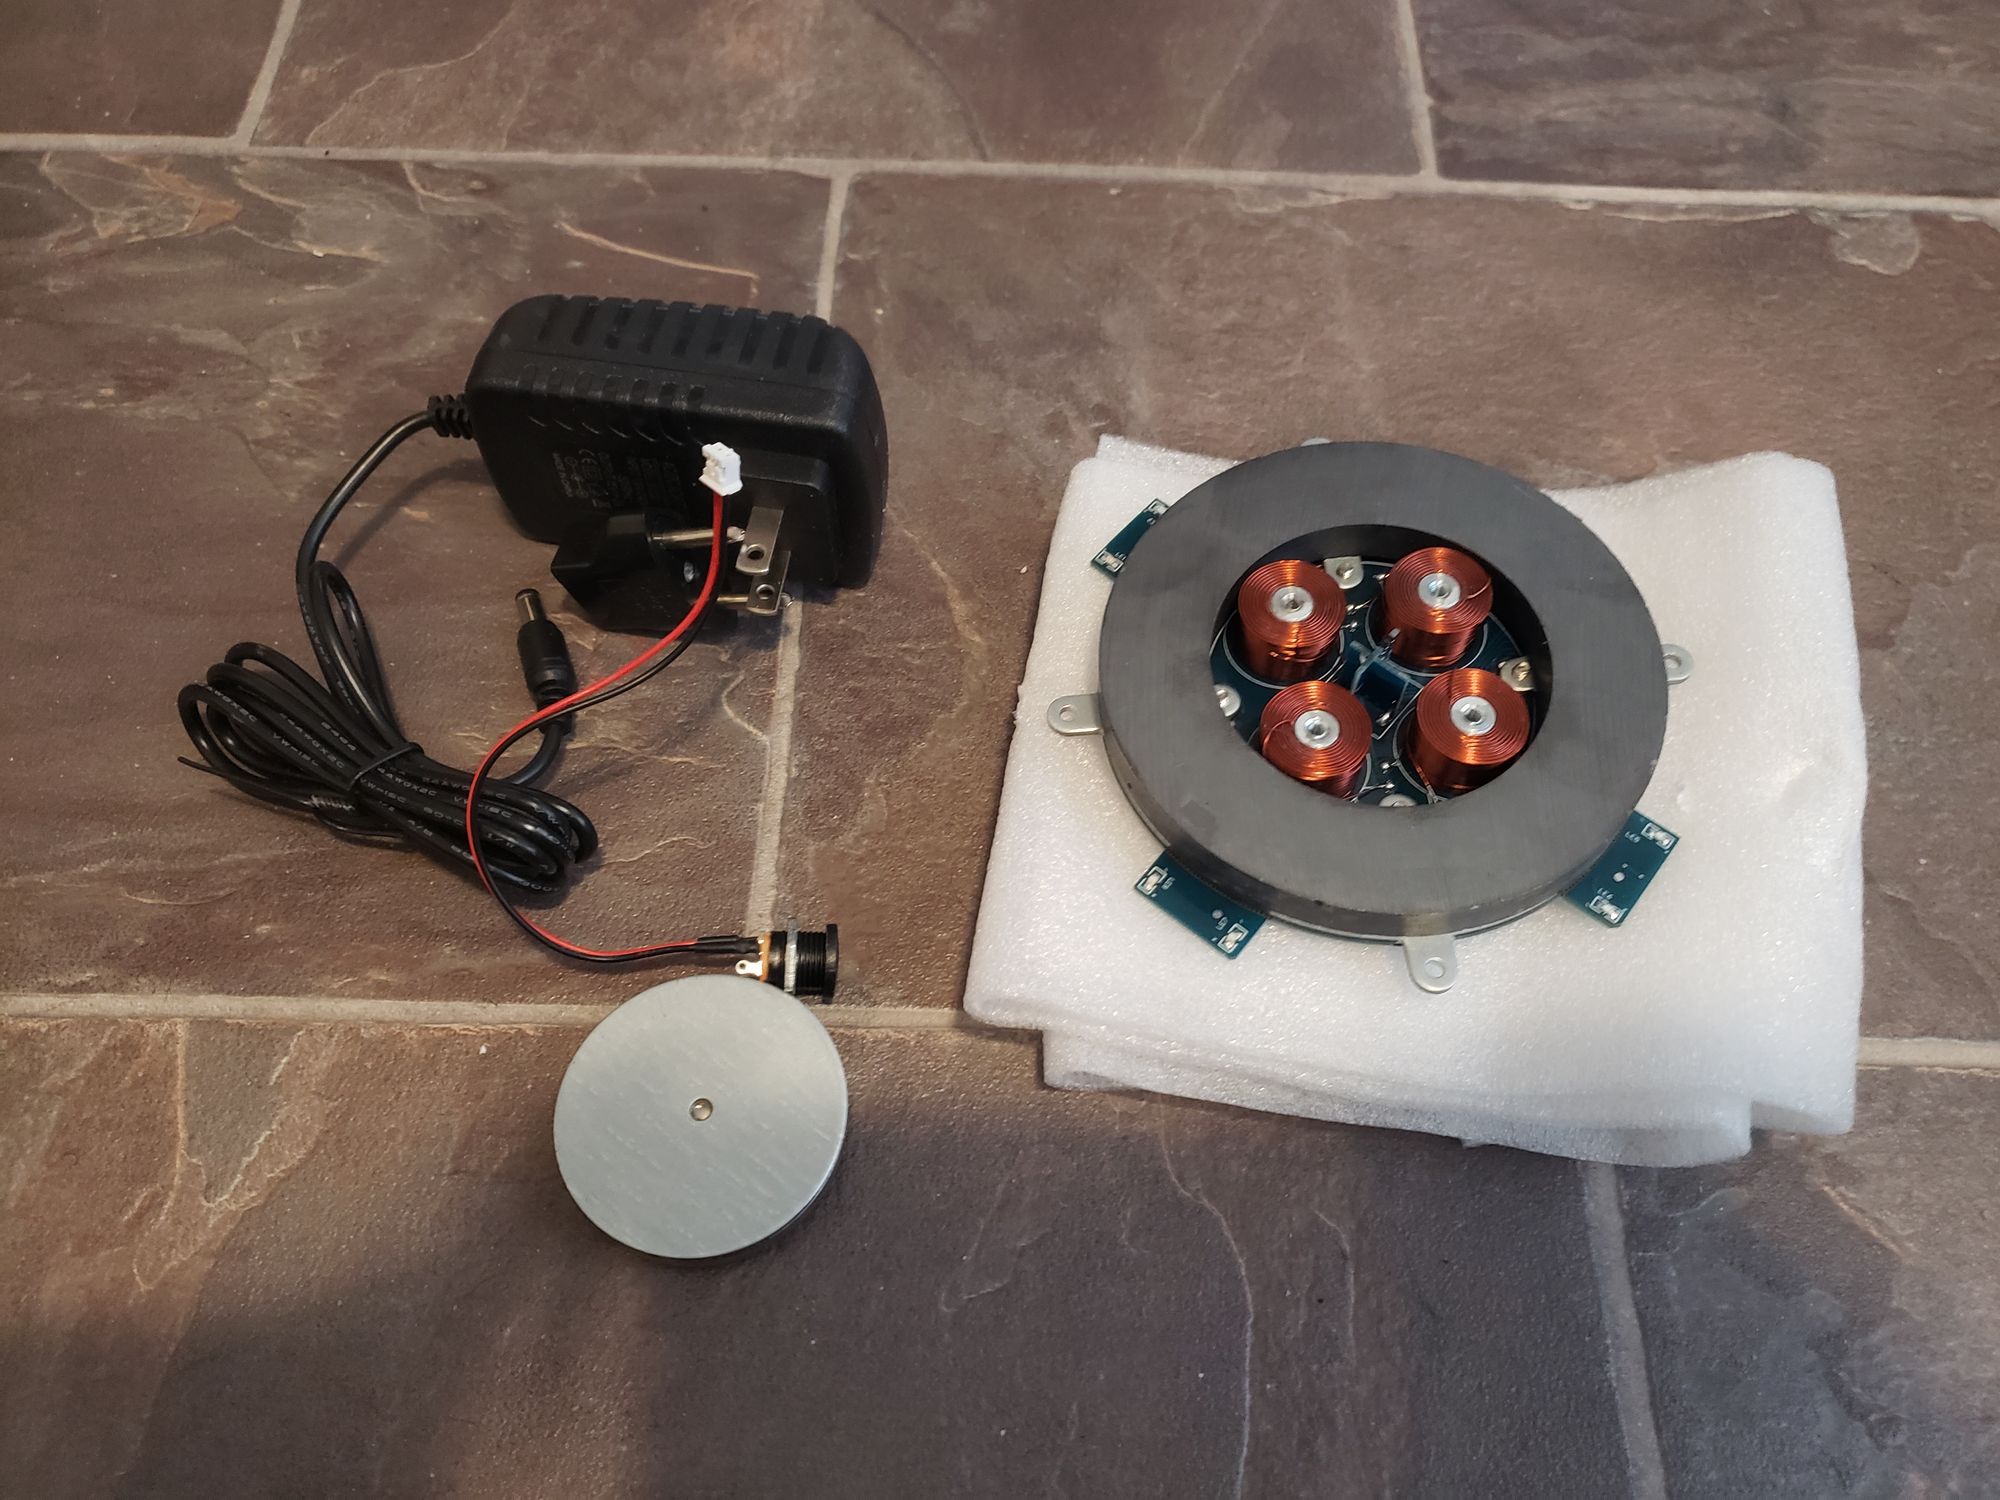
The magnetic levitation base I ended up going with is a bit overkill for the application. This one can levitate up to around 500g in addition to the weight of the floating magnet, of which the cube is maybe half of.
The reasoning was for expandability, as well as it was actually denser, compact, easier to come by, and was one of the only ones I could find with those screw holes.
The four blue PCB tabs on the sides are guiding LEDs, which I think may be removable but for simplicity's sake I just taped over them so the light doesn't leak out of the base.
The power supply that comes with it is 12v, 2A, and the plug just connects into the bottom of the base. It's just that easy. It even comes with an EU plug adapter.
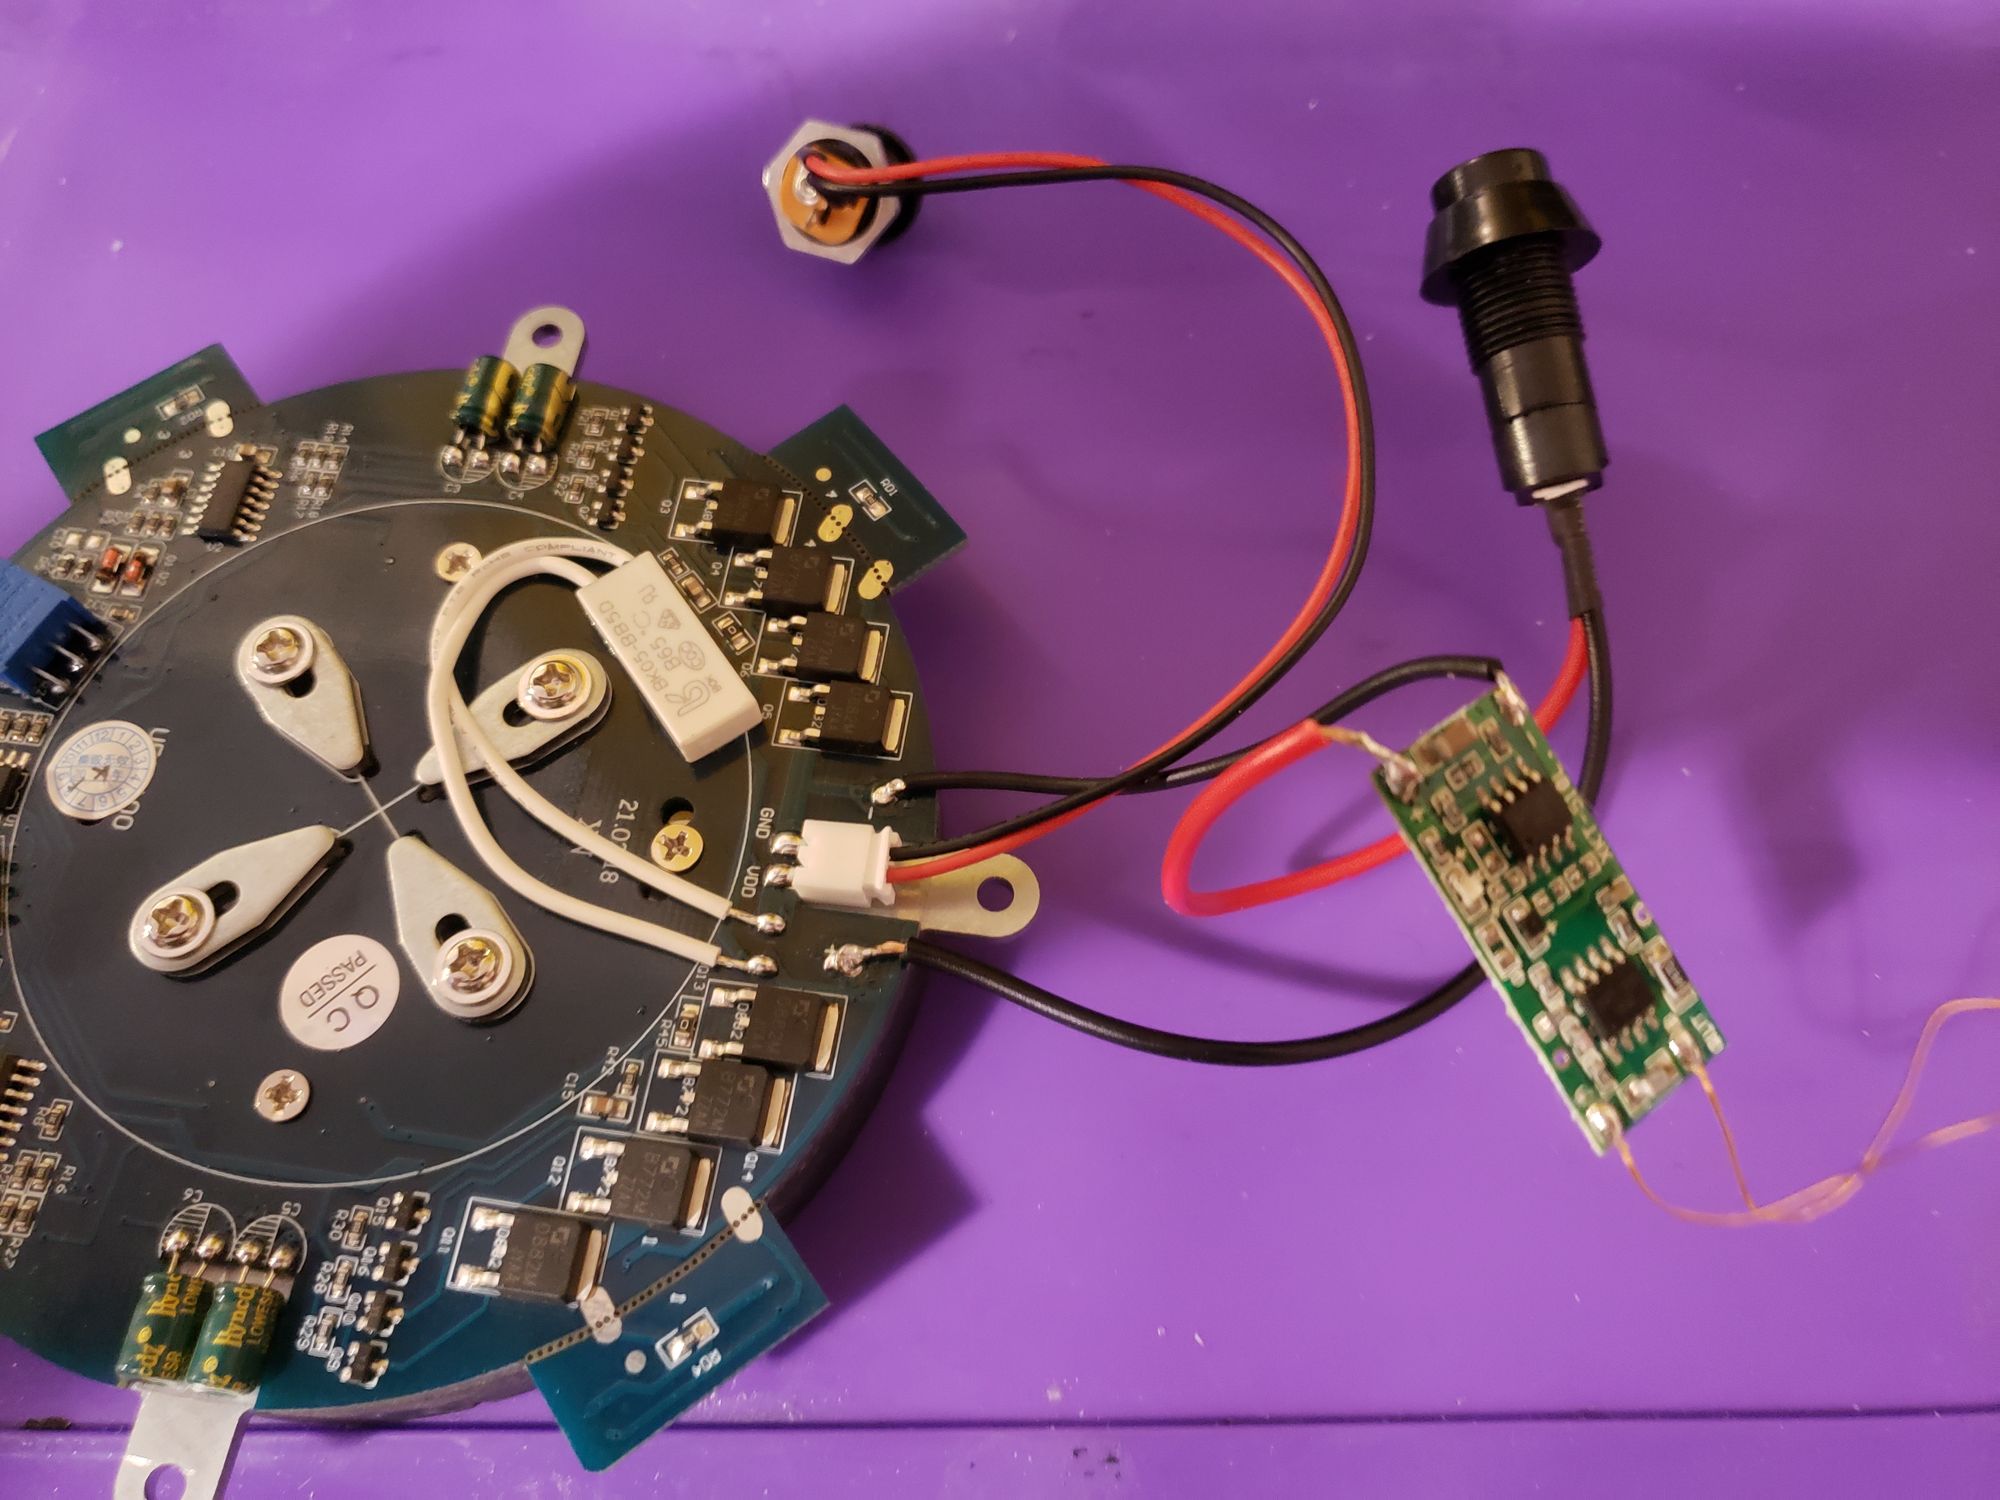
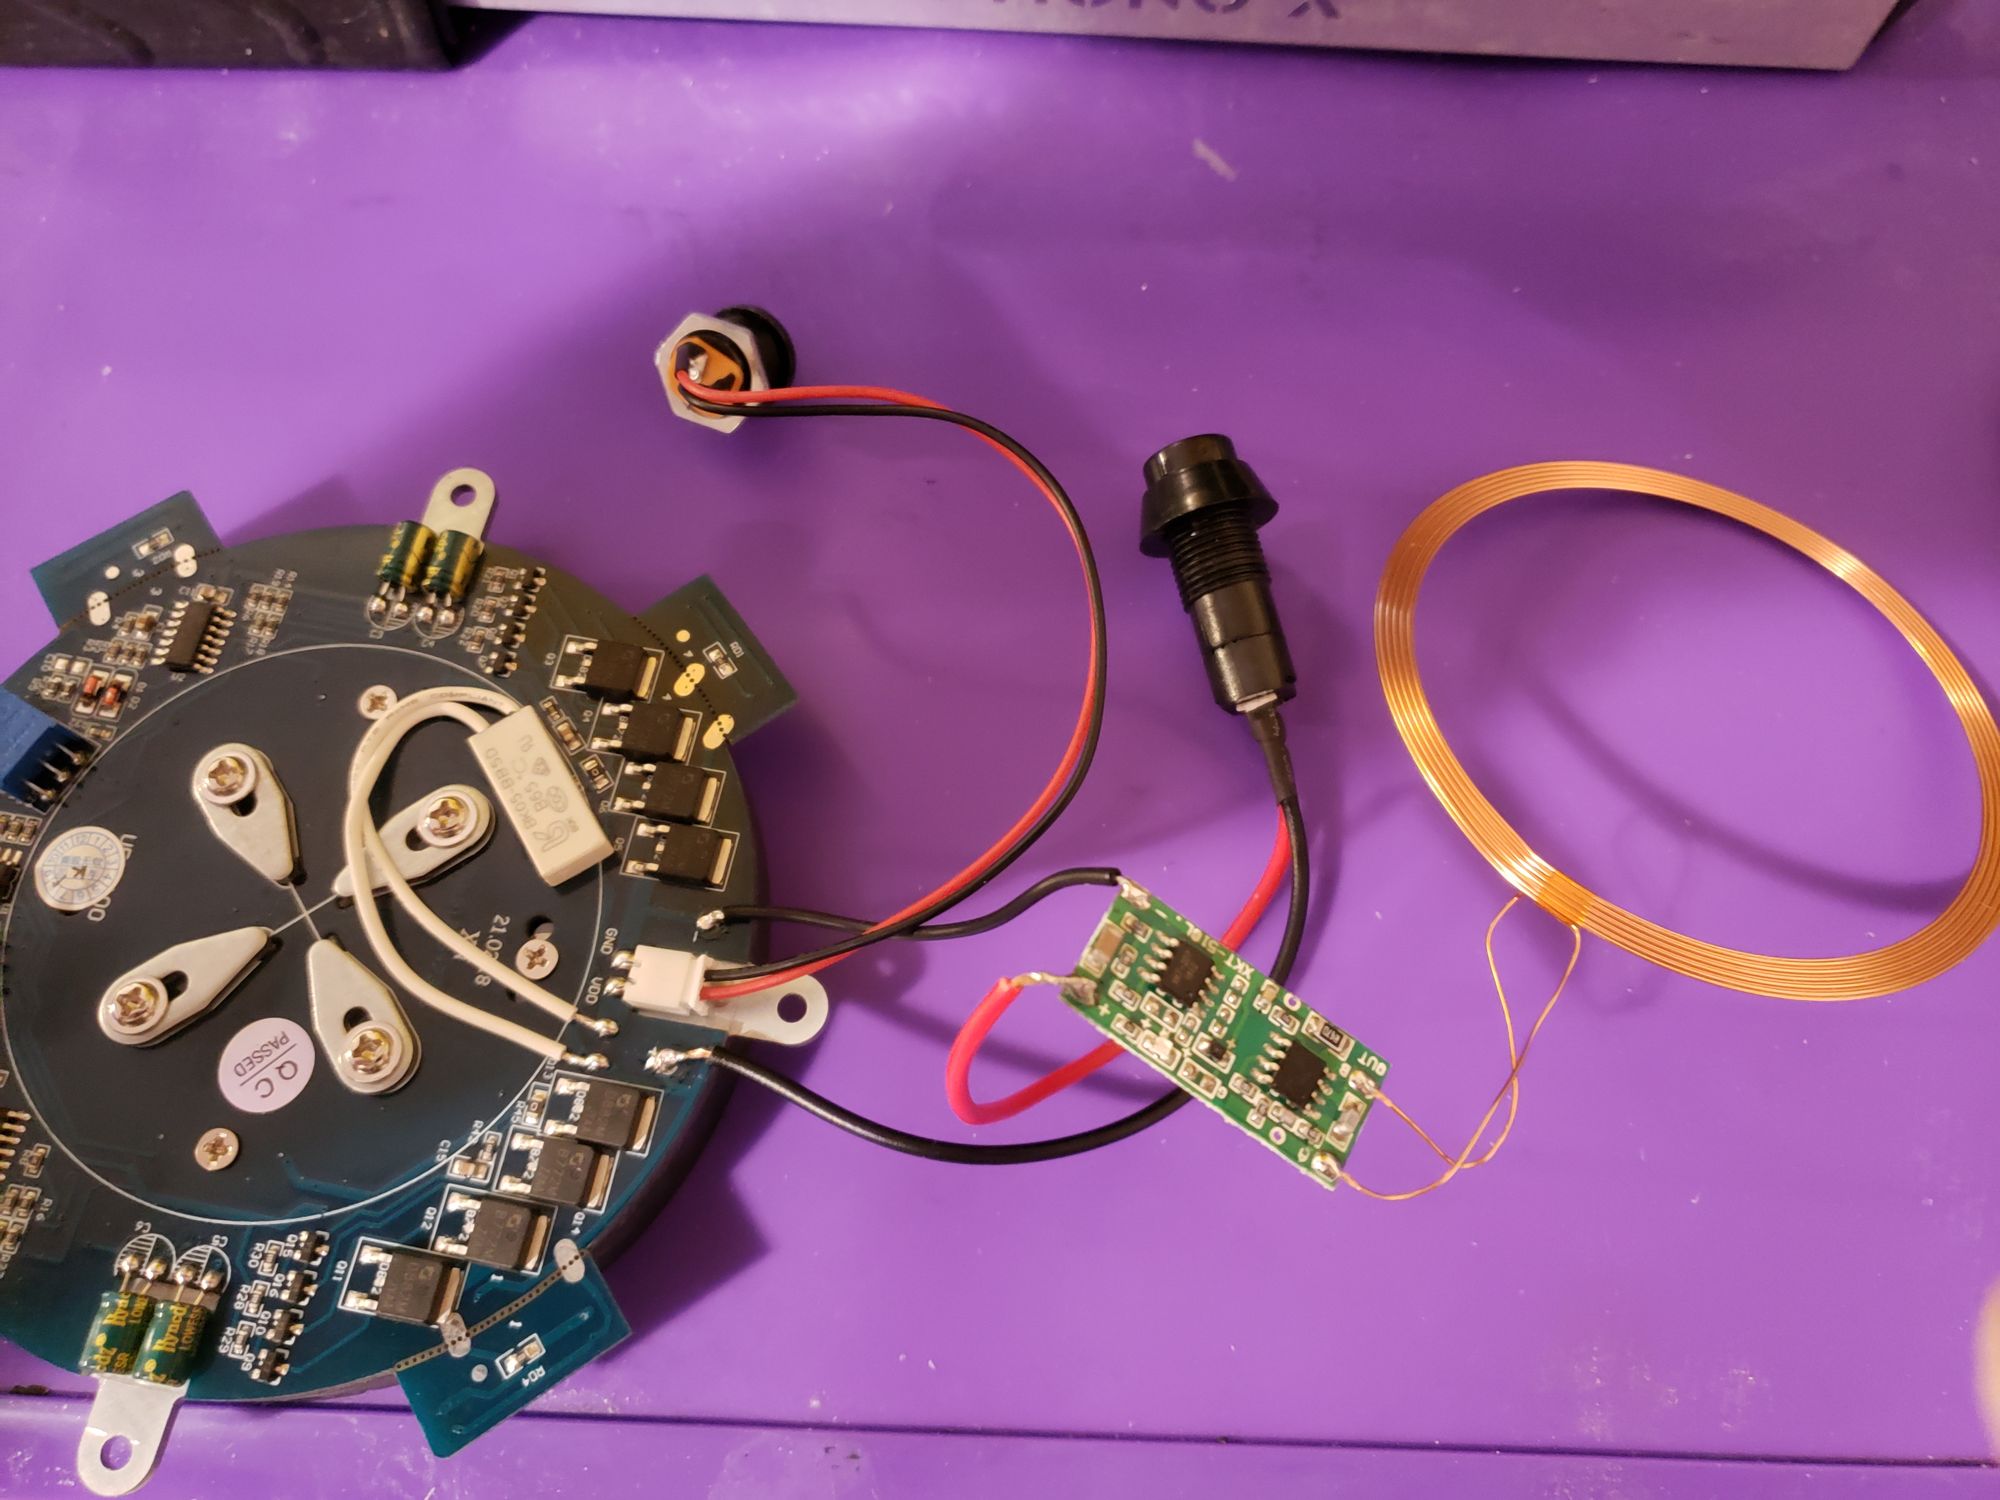
Wireless Power Setup
The wireless power setup is more or less in two parts, with one modification.

First there is the wireless power transmitter, which accepts 12v and transmits it at about 600mA wirelessly over a short distance - around 2-5cm for consistent power for some LEDs, anything beyond will be dim. Well, it's more complex than that, since the DC input (12v) is converted to AC power, and creates a magnetic field coming from the coil.
Then there is the receiver. This takes the wireless power and directs it back into DC after it's resonated with from the receiver coil, and then powers the LEDs.
LEDs
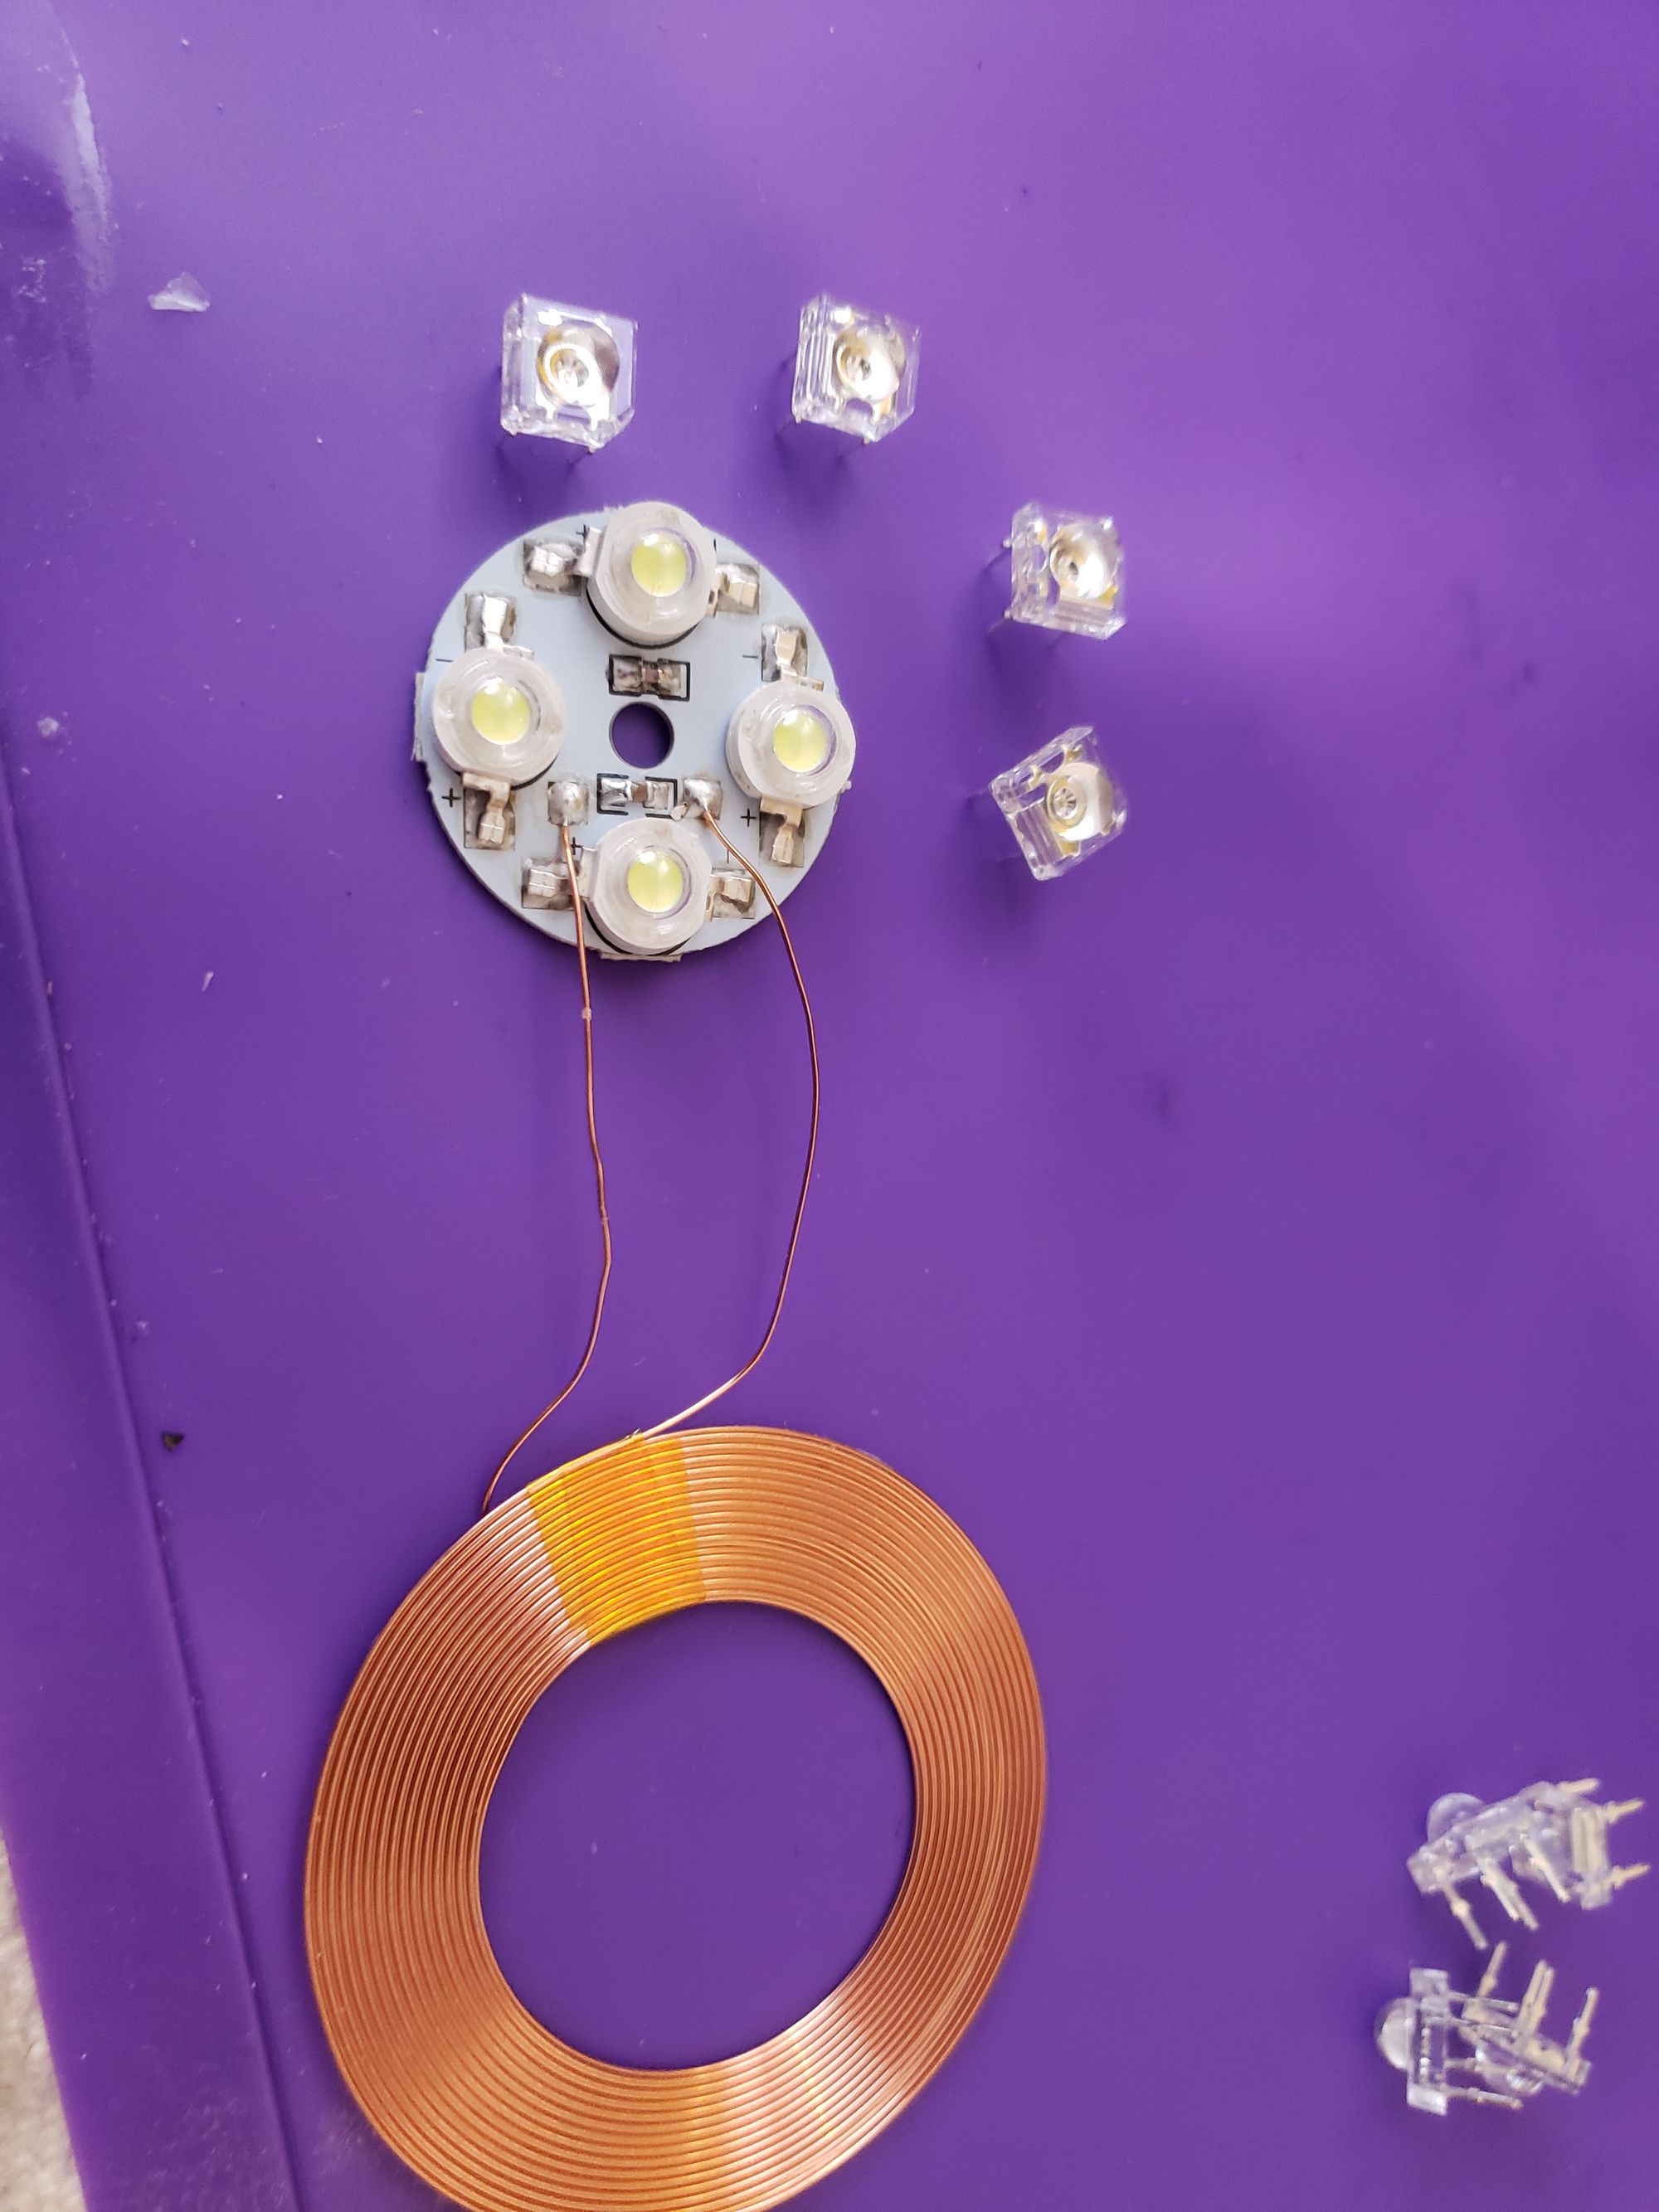
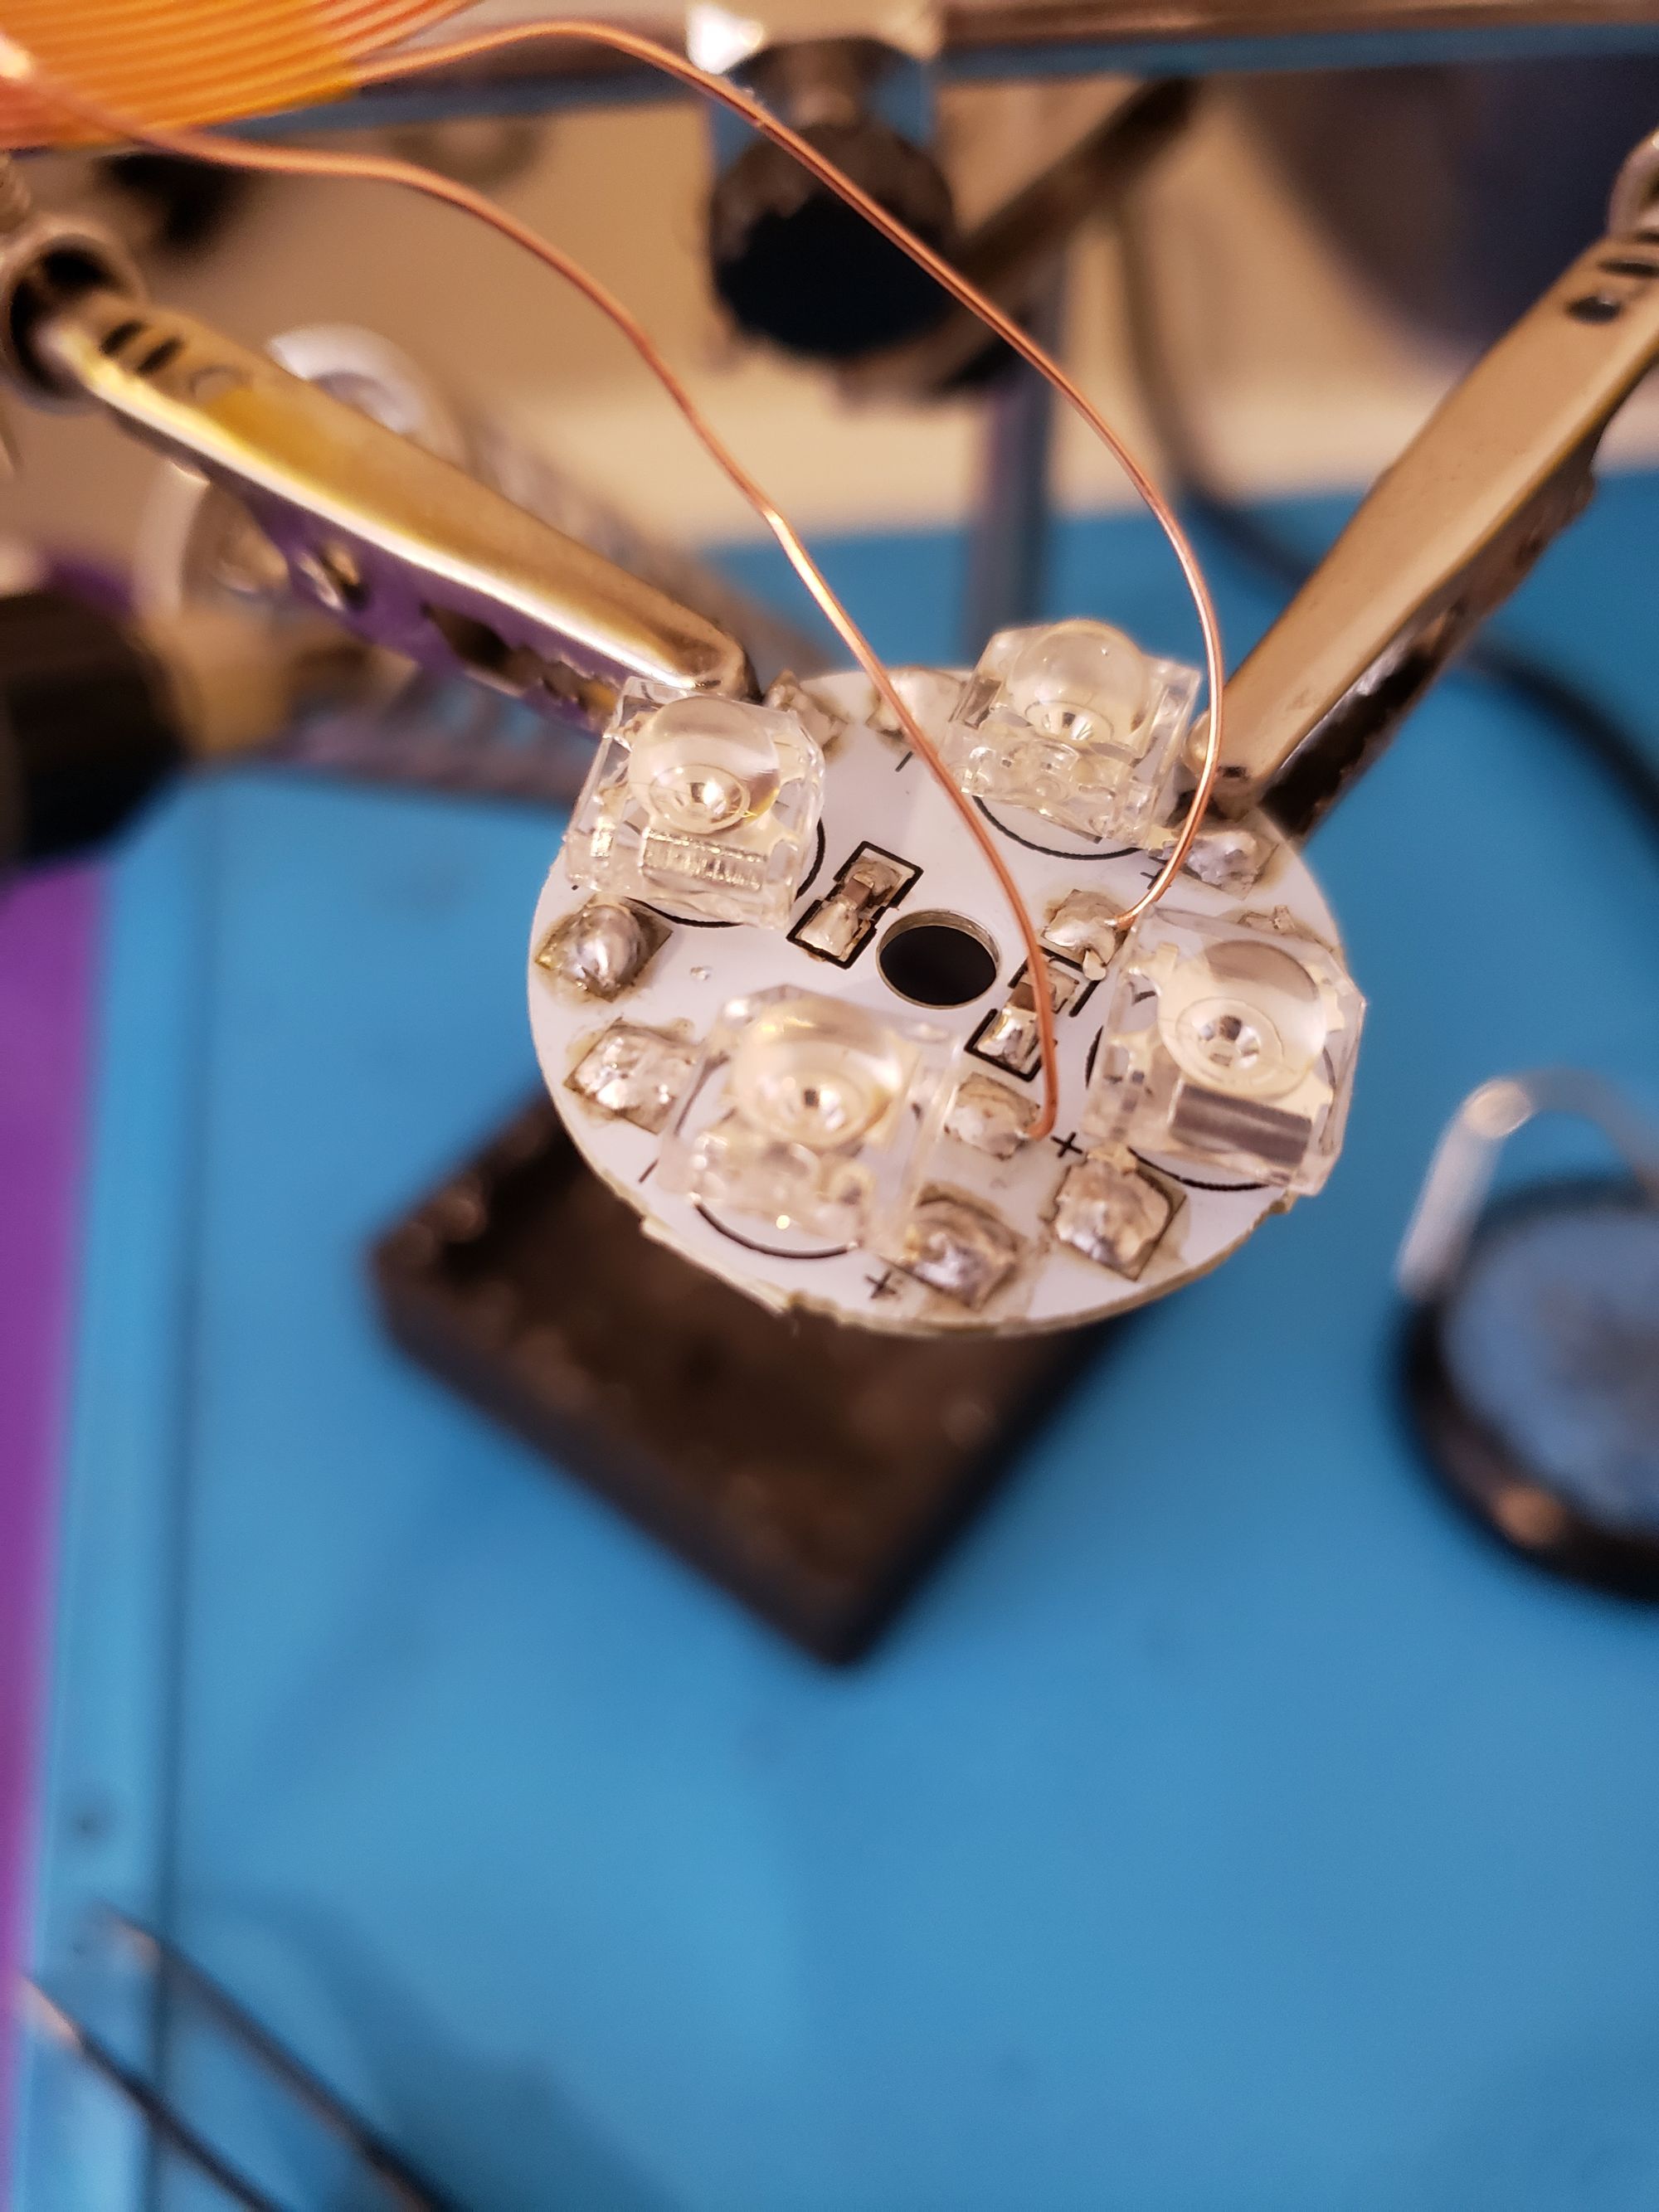
The receiver coil that comes with the set uses four white LEDs. These are nice since they have a metal backing on a metal plate, so they should last a lot longer due to being able to dissipate heat better.
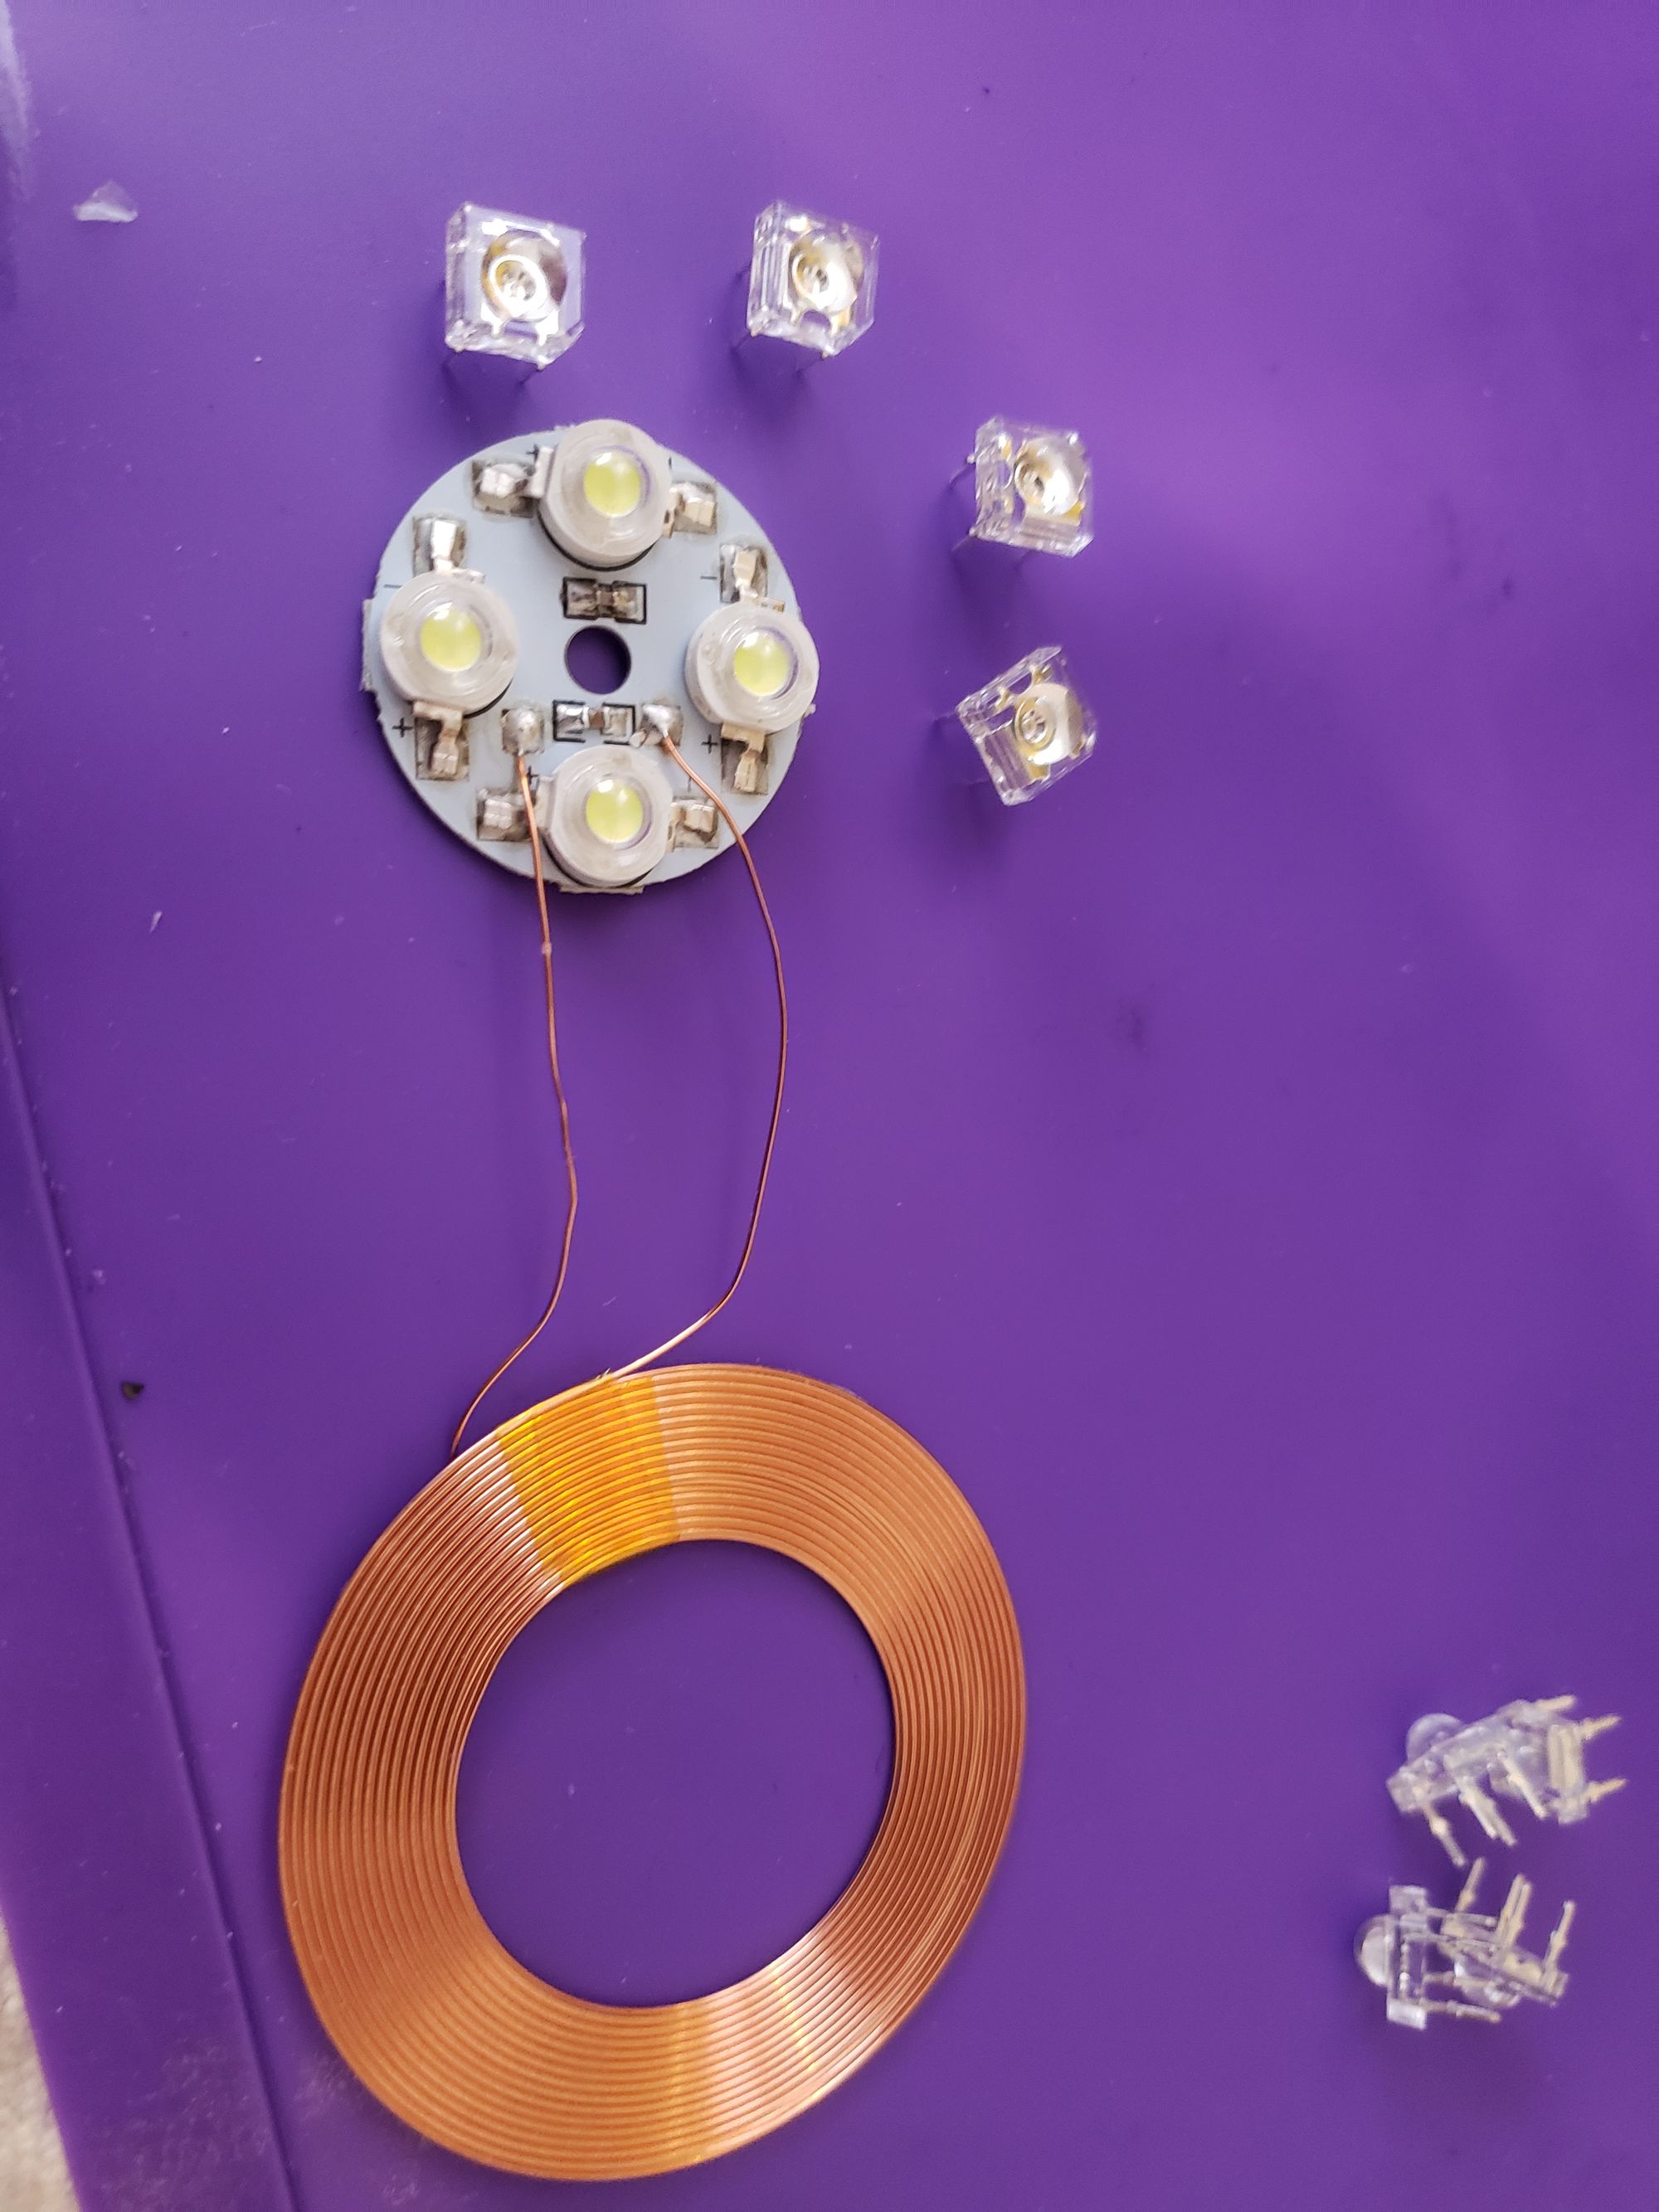

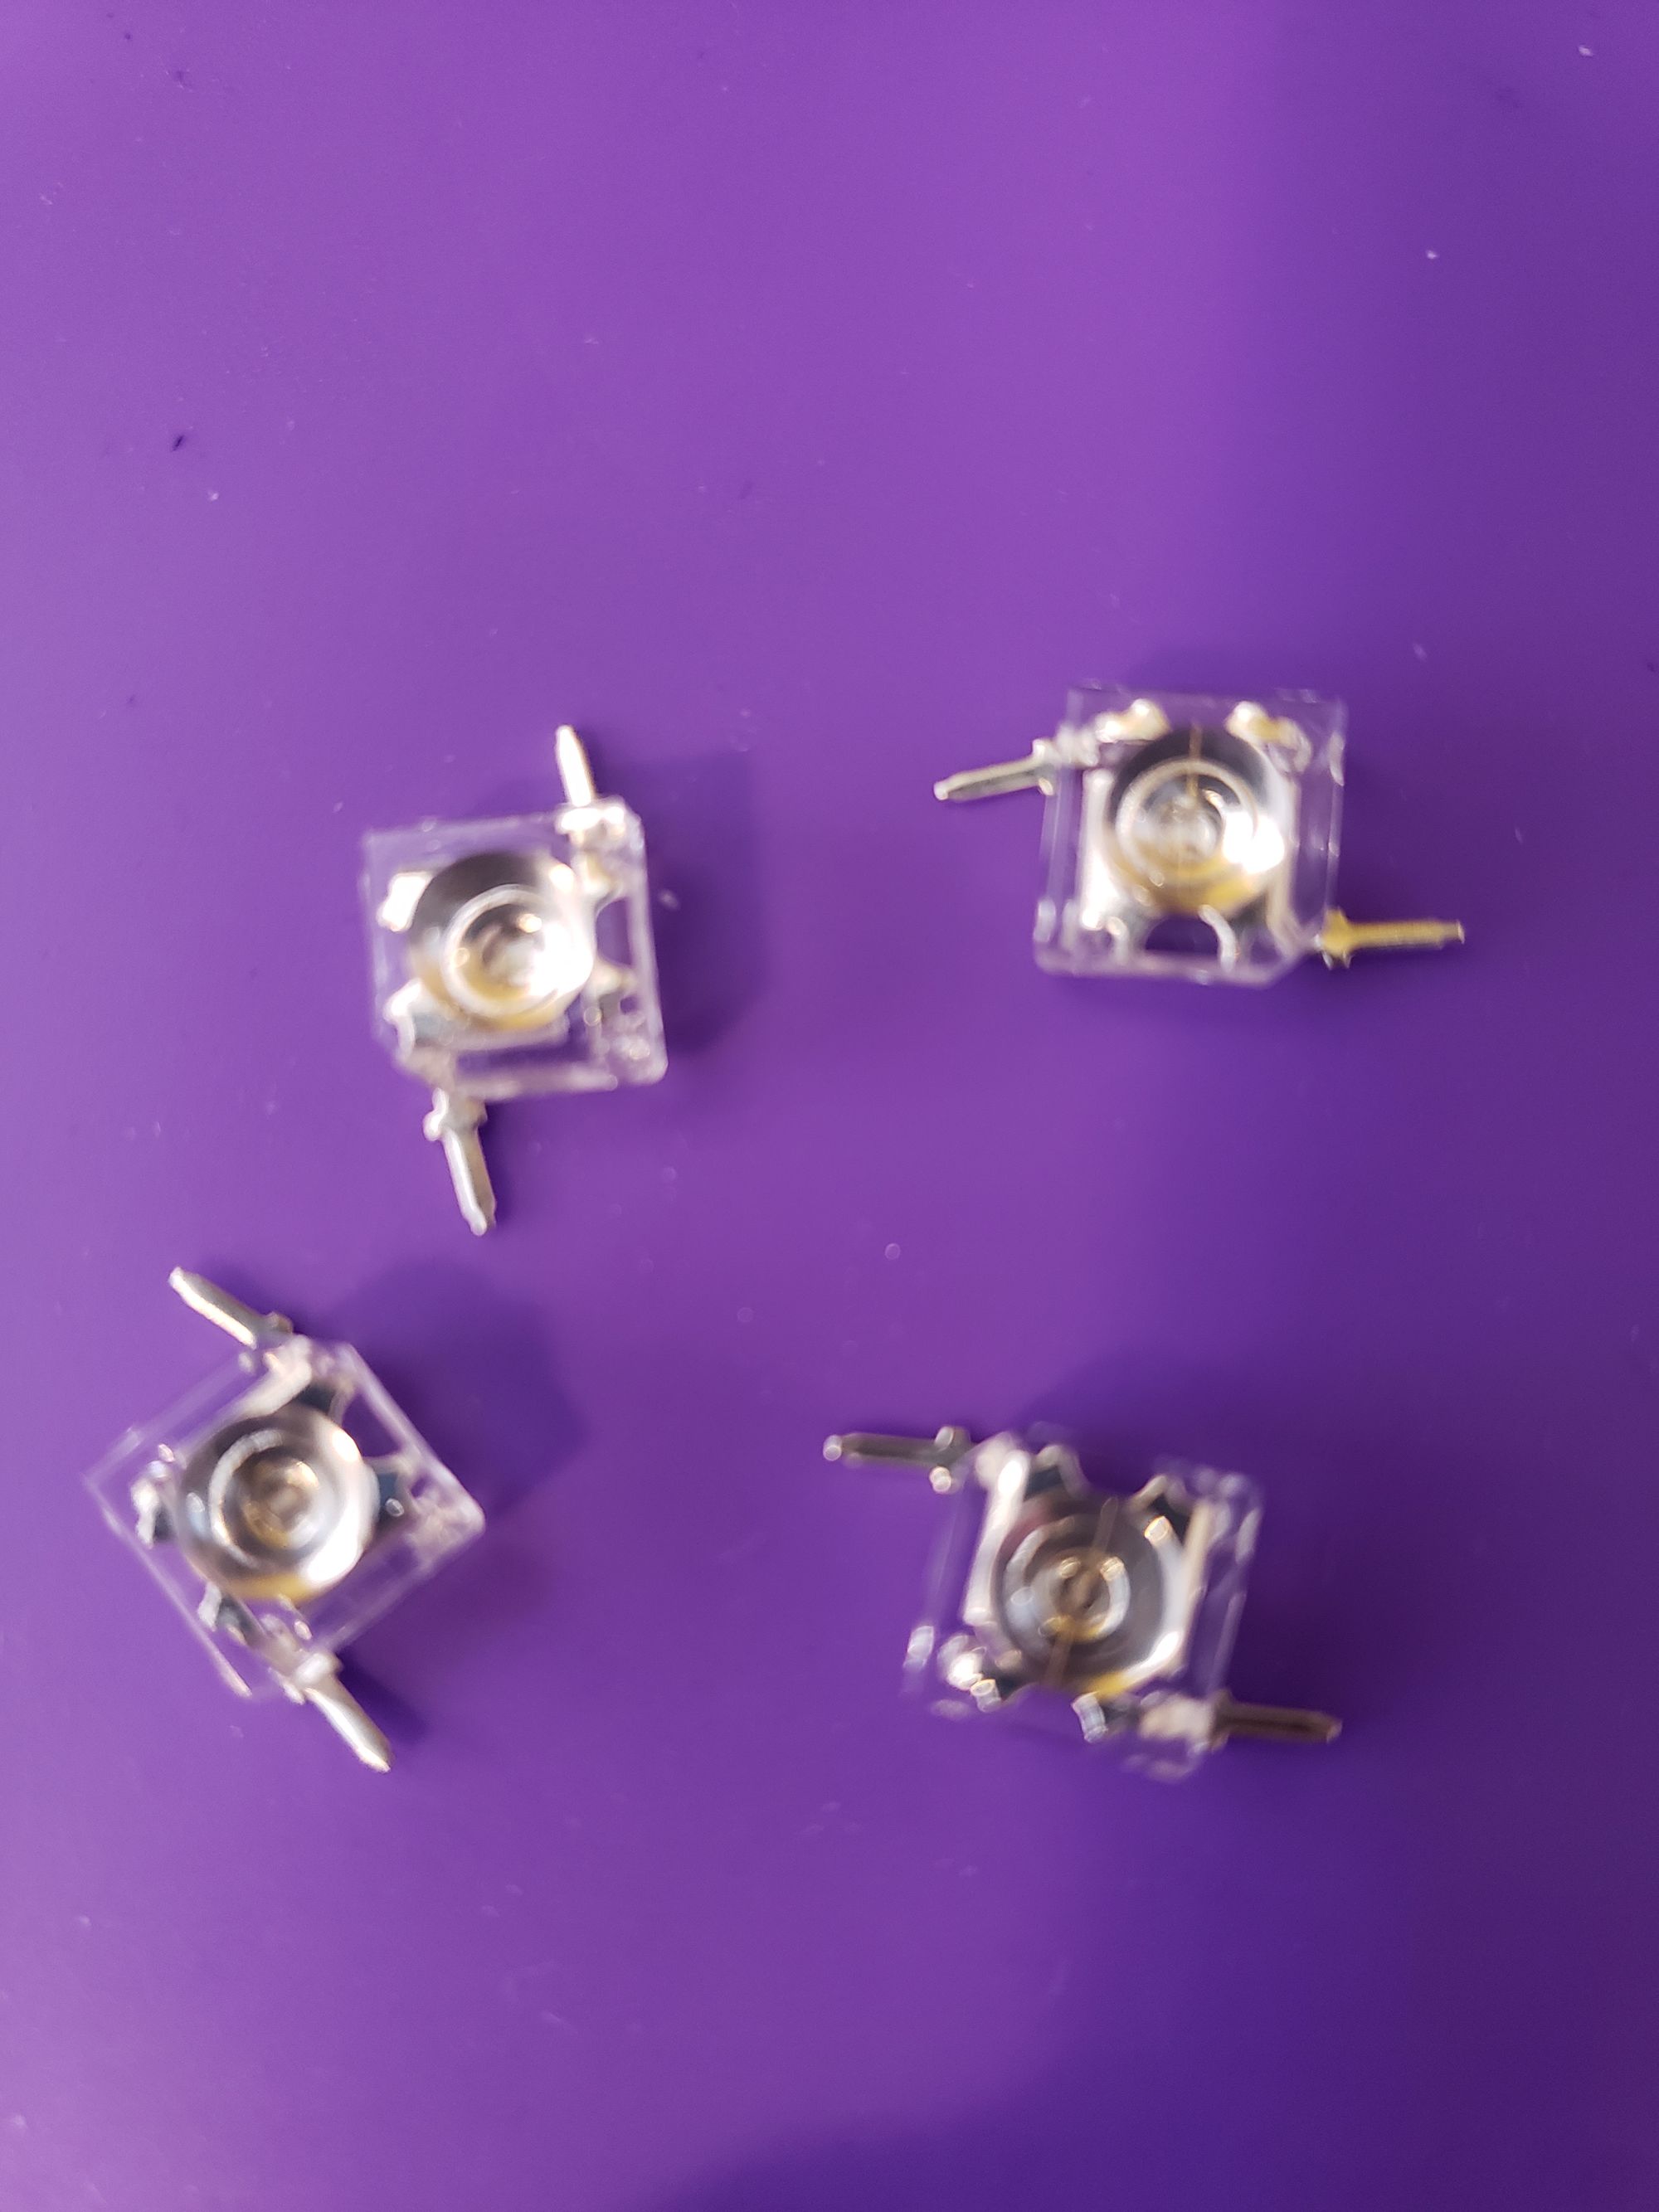
Left: LED Power Receiver. Centre: Replacement LEDs. Right: Diffuser Dome over the LEDs
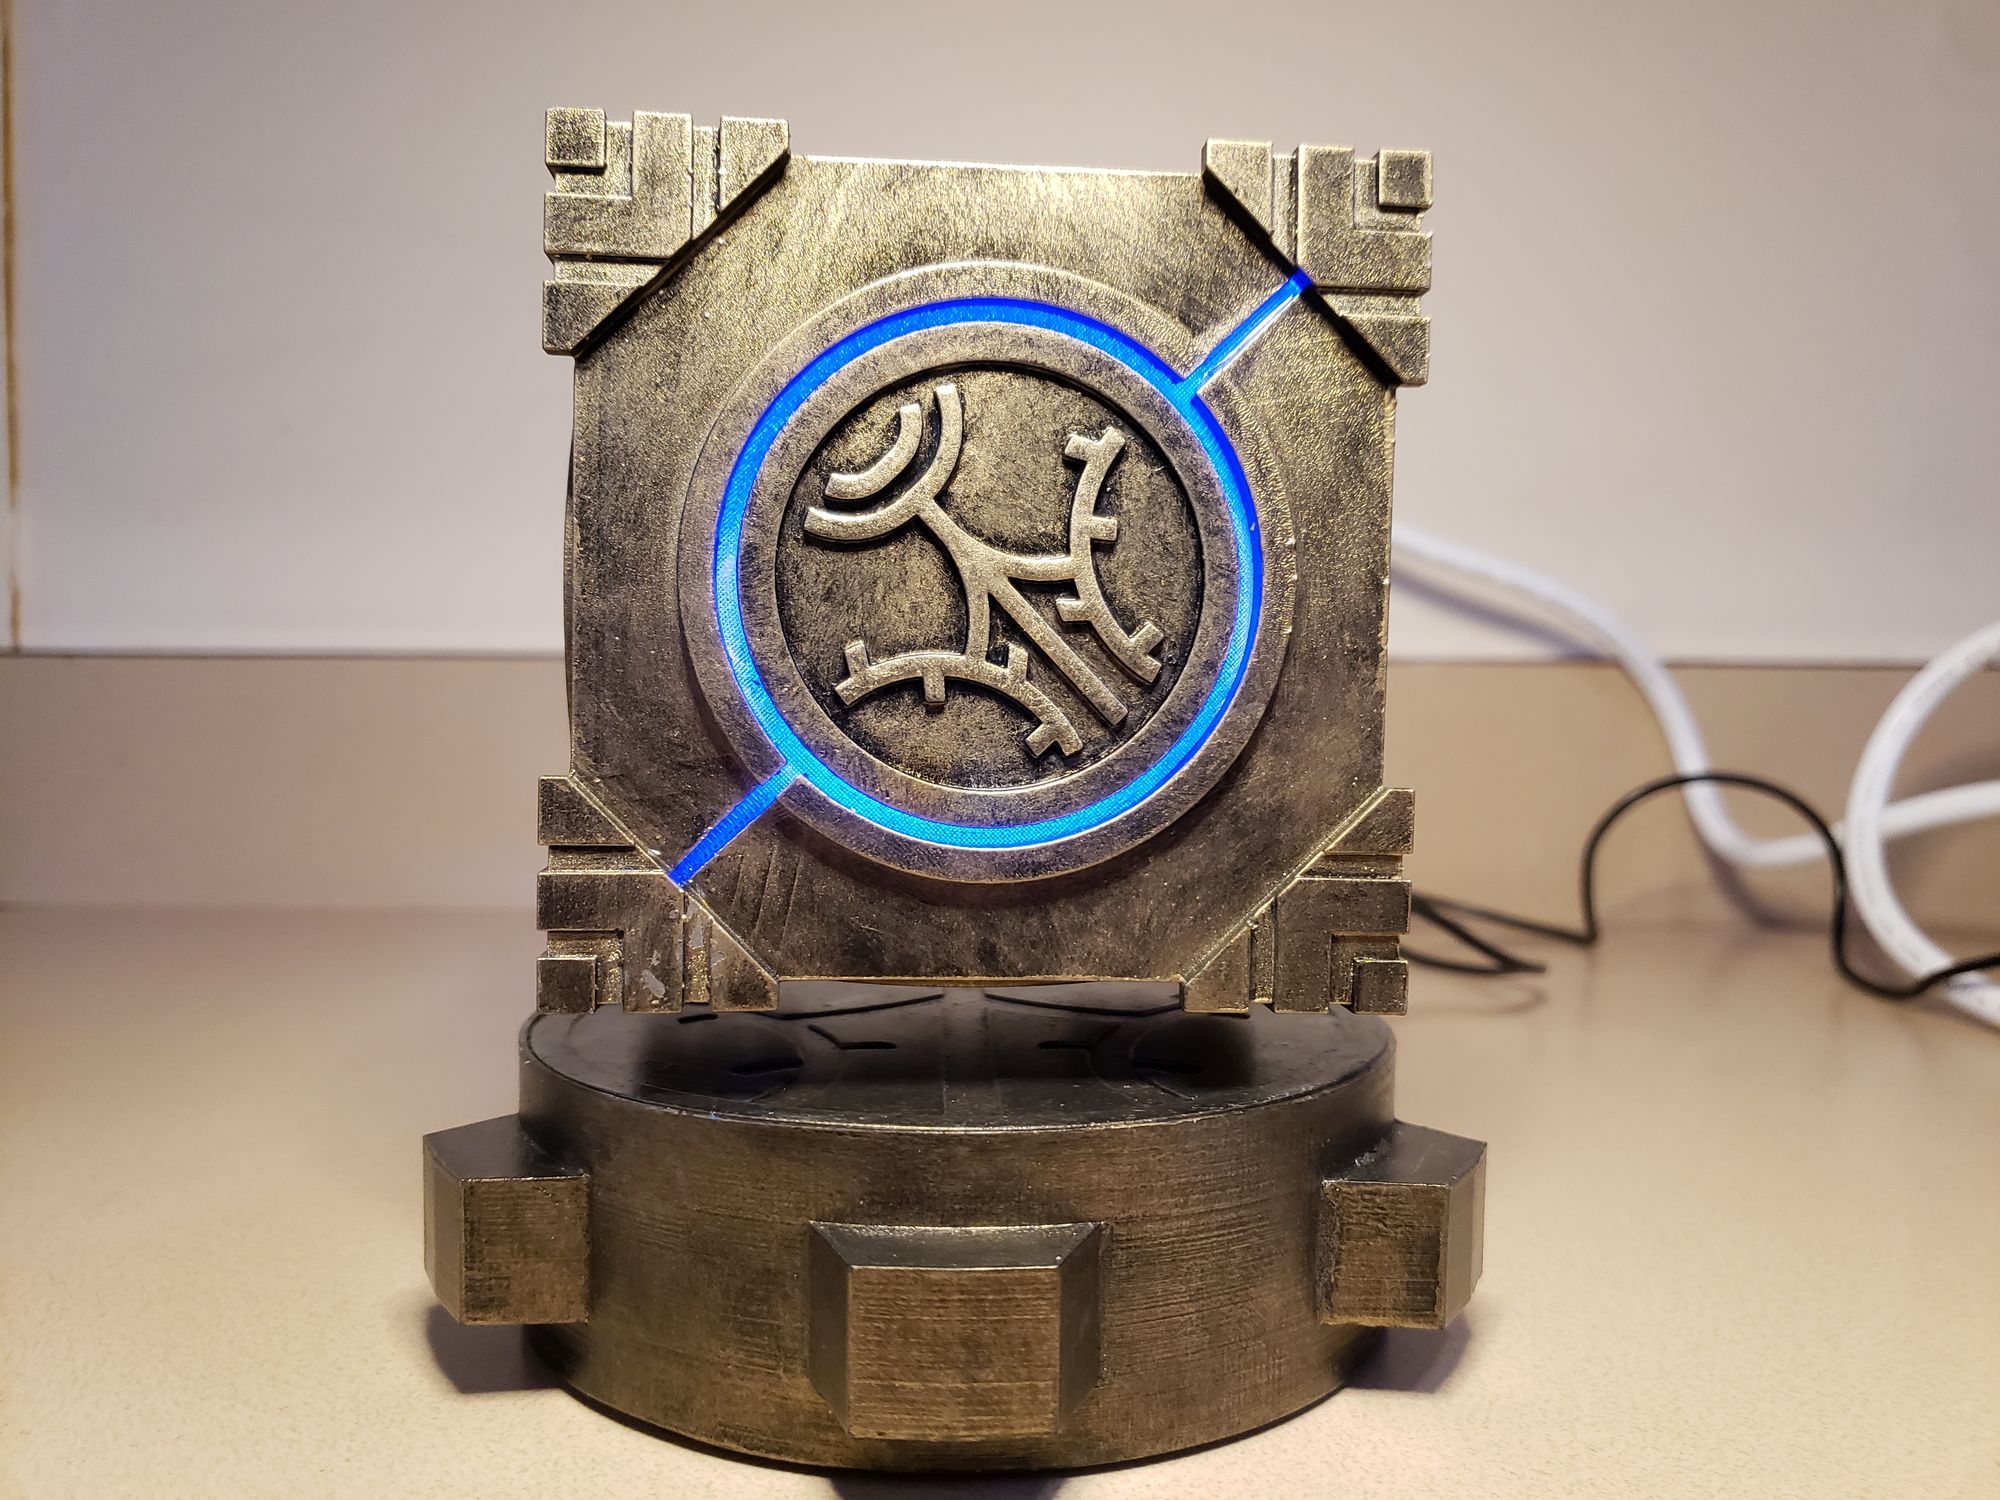
However, I opted to replace them with small blue LEDs. Masking the original white ones with a blue film/gel covering didn't work out as expected, so a replacement was a quick fix, and it was worth it. They still will last a long time, relatively speaking,
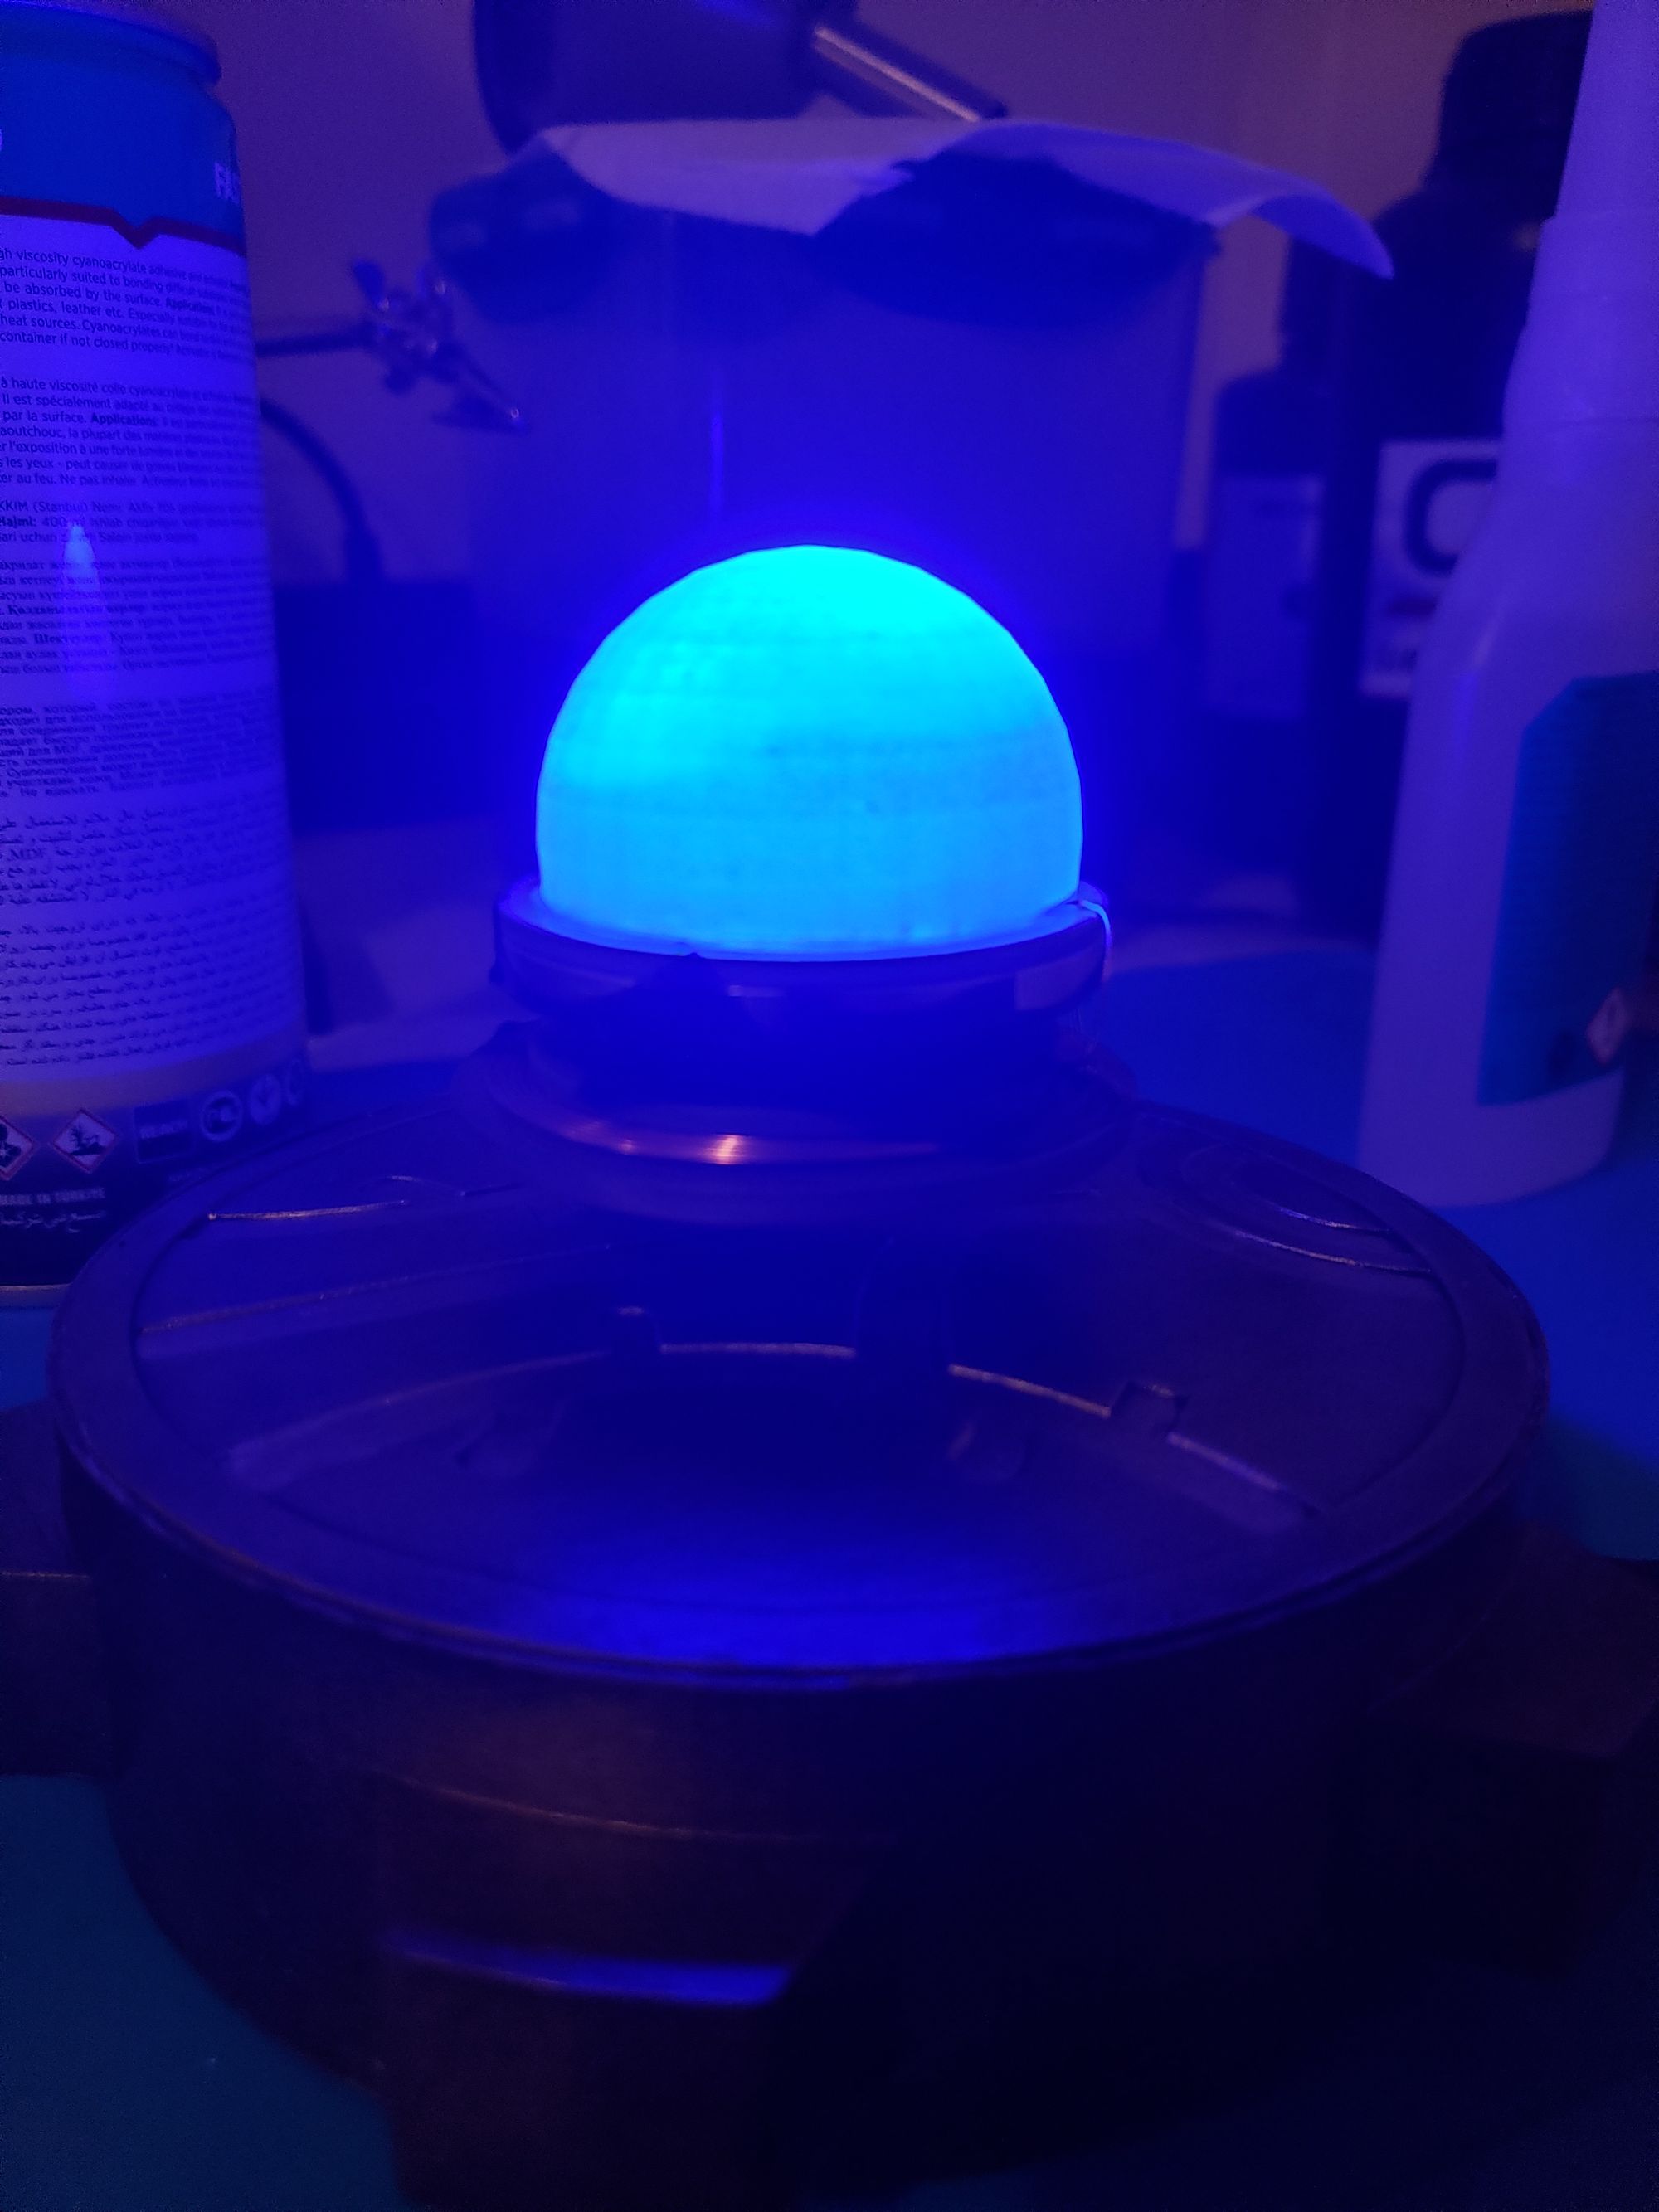
The diffuser dome that I printed will go on top and help evenly spread the light around more, and this effect is better the brighter the LEDs are.
Post Processing
Since the only FDM printed parts that would be seen was the base, I decided to print it at a higher quality such that I wouldn't need to do much sanding or smoothing. I still did a tiny bit, but in the end, layer lines were covered by my painting technique.
For the clear parts, I sanded them and painted a thin water-diluted white paint on them as well to further diffuse the light coming through.
As for the rest of the resin parts, due to the nature of how high quality resin printing is, there was very little I had to do. Areas where supports were I lightly filled in with wood filler instead of bondo spot putty, simply because it was easier to work with at the time. Once it dried, I lightly sanded the areas and then everything was prepped to paint.
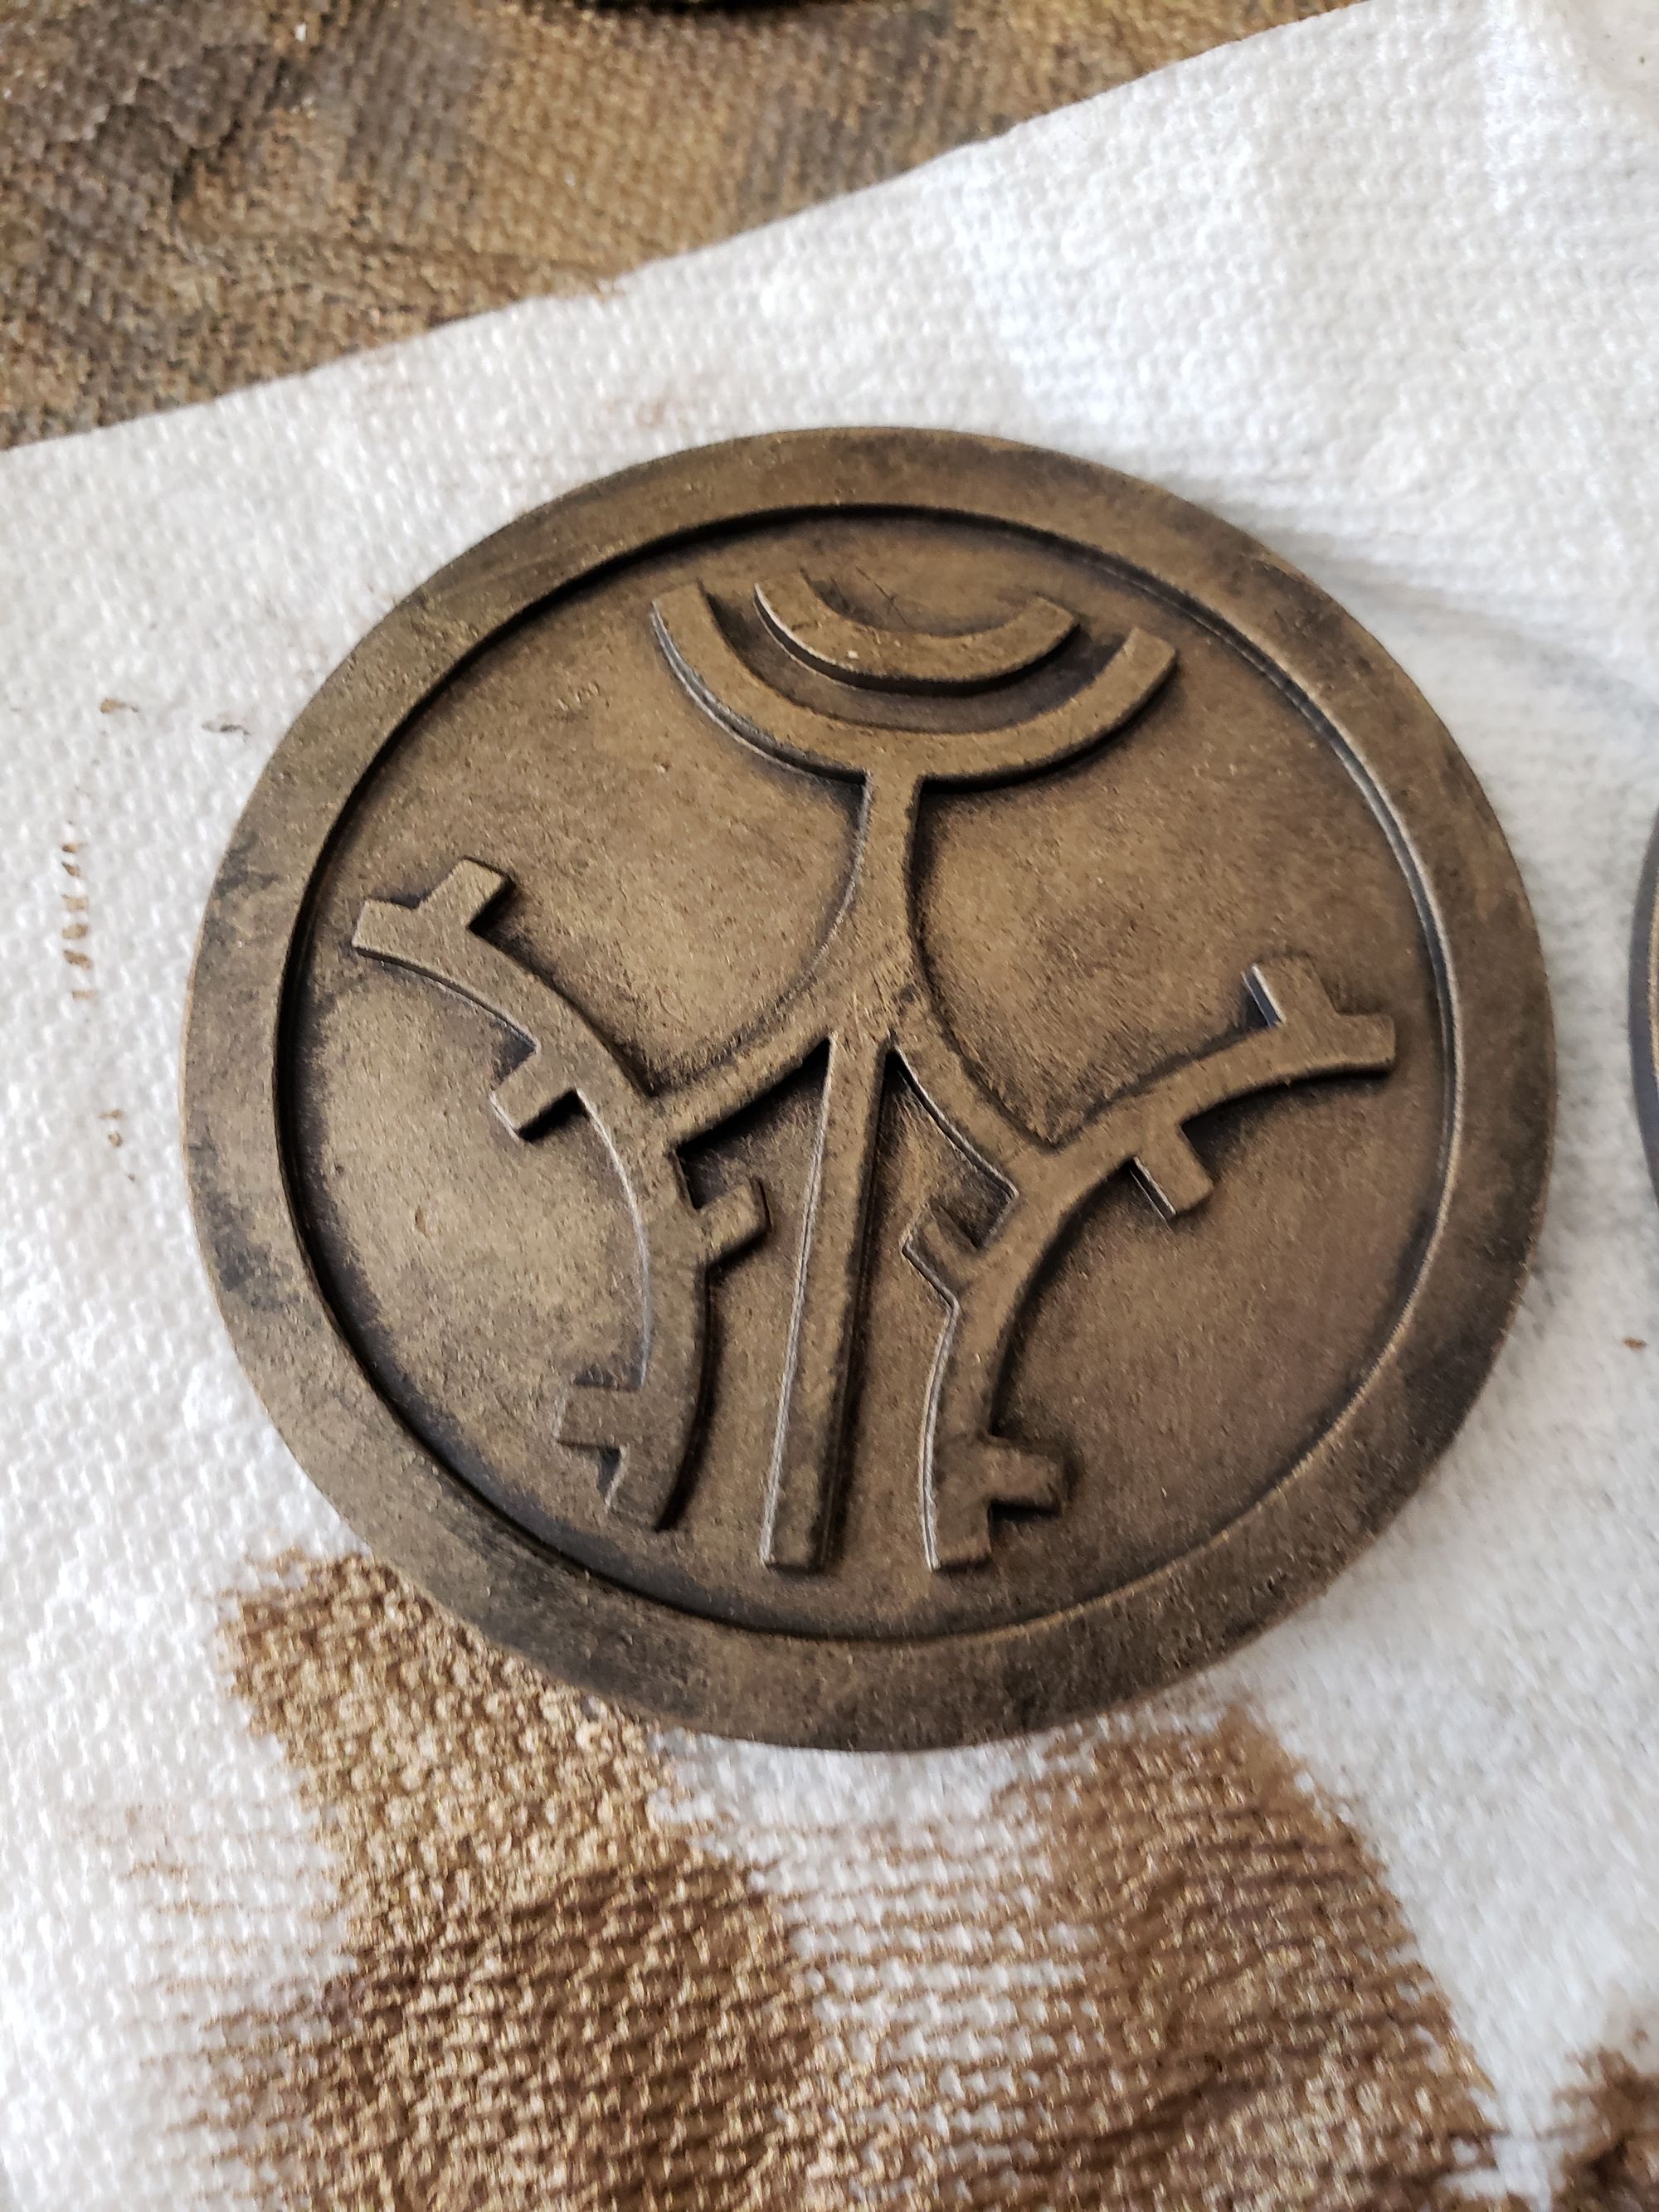
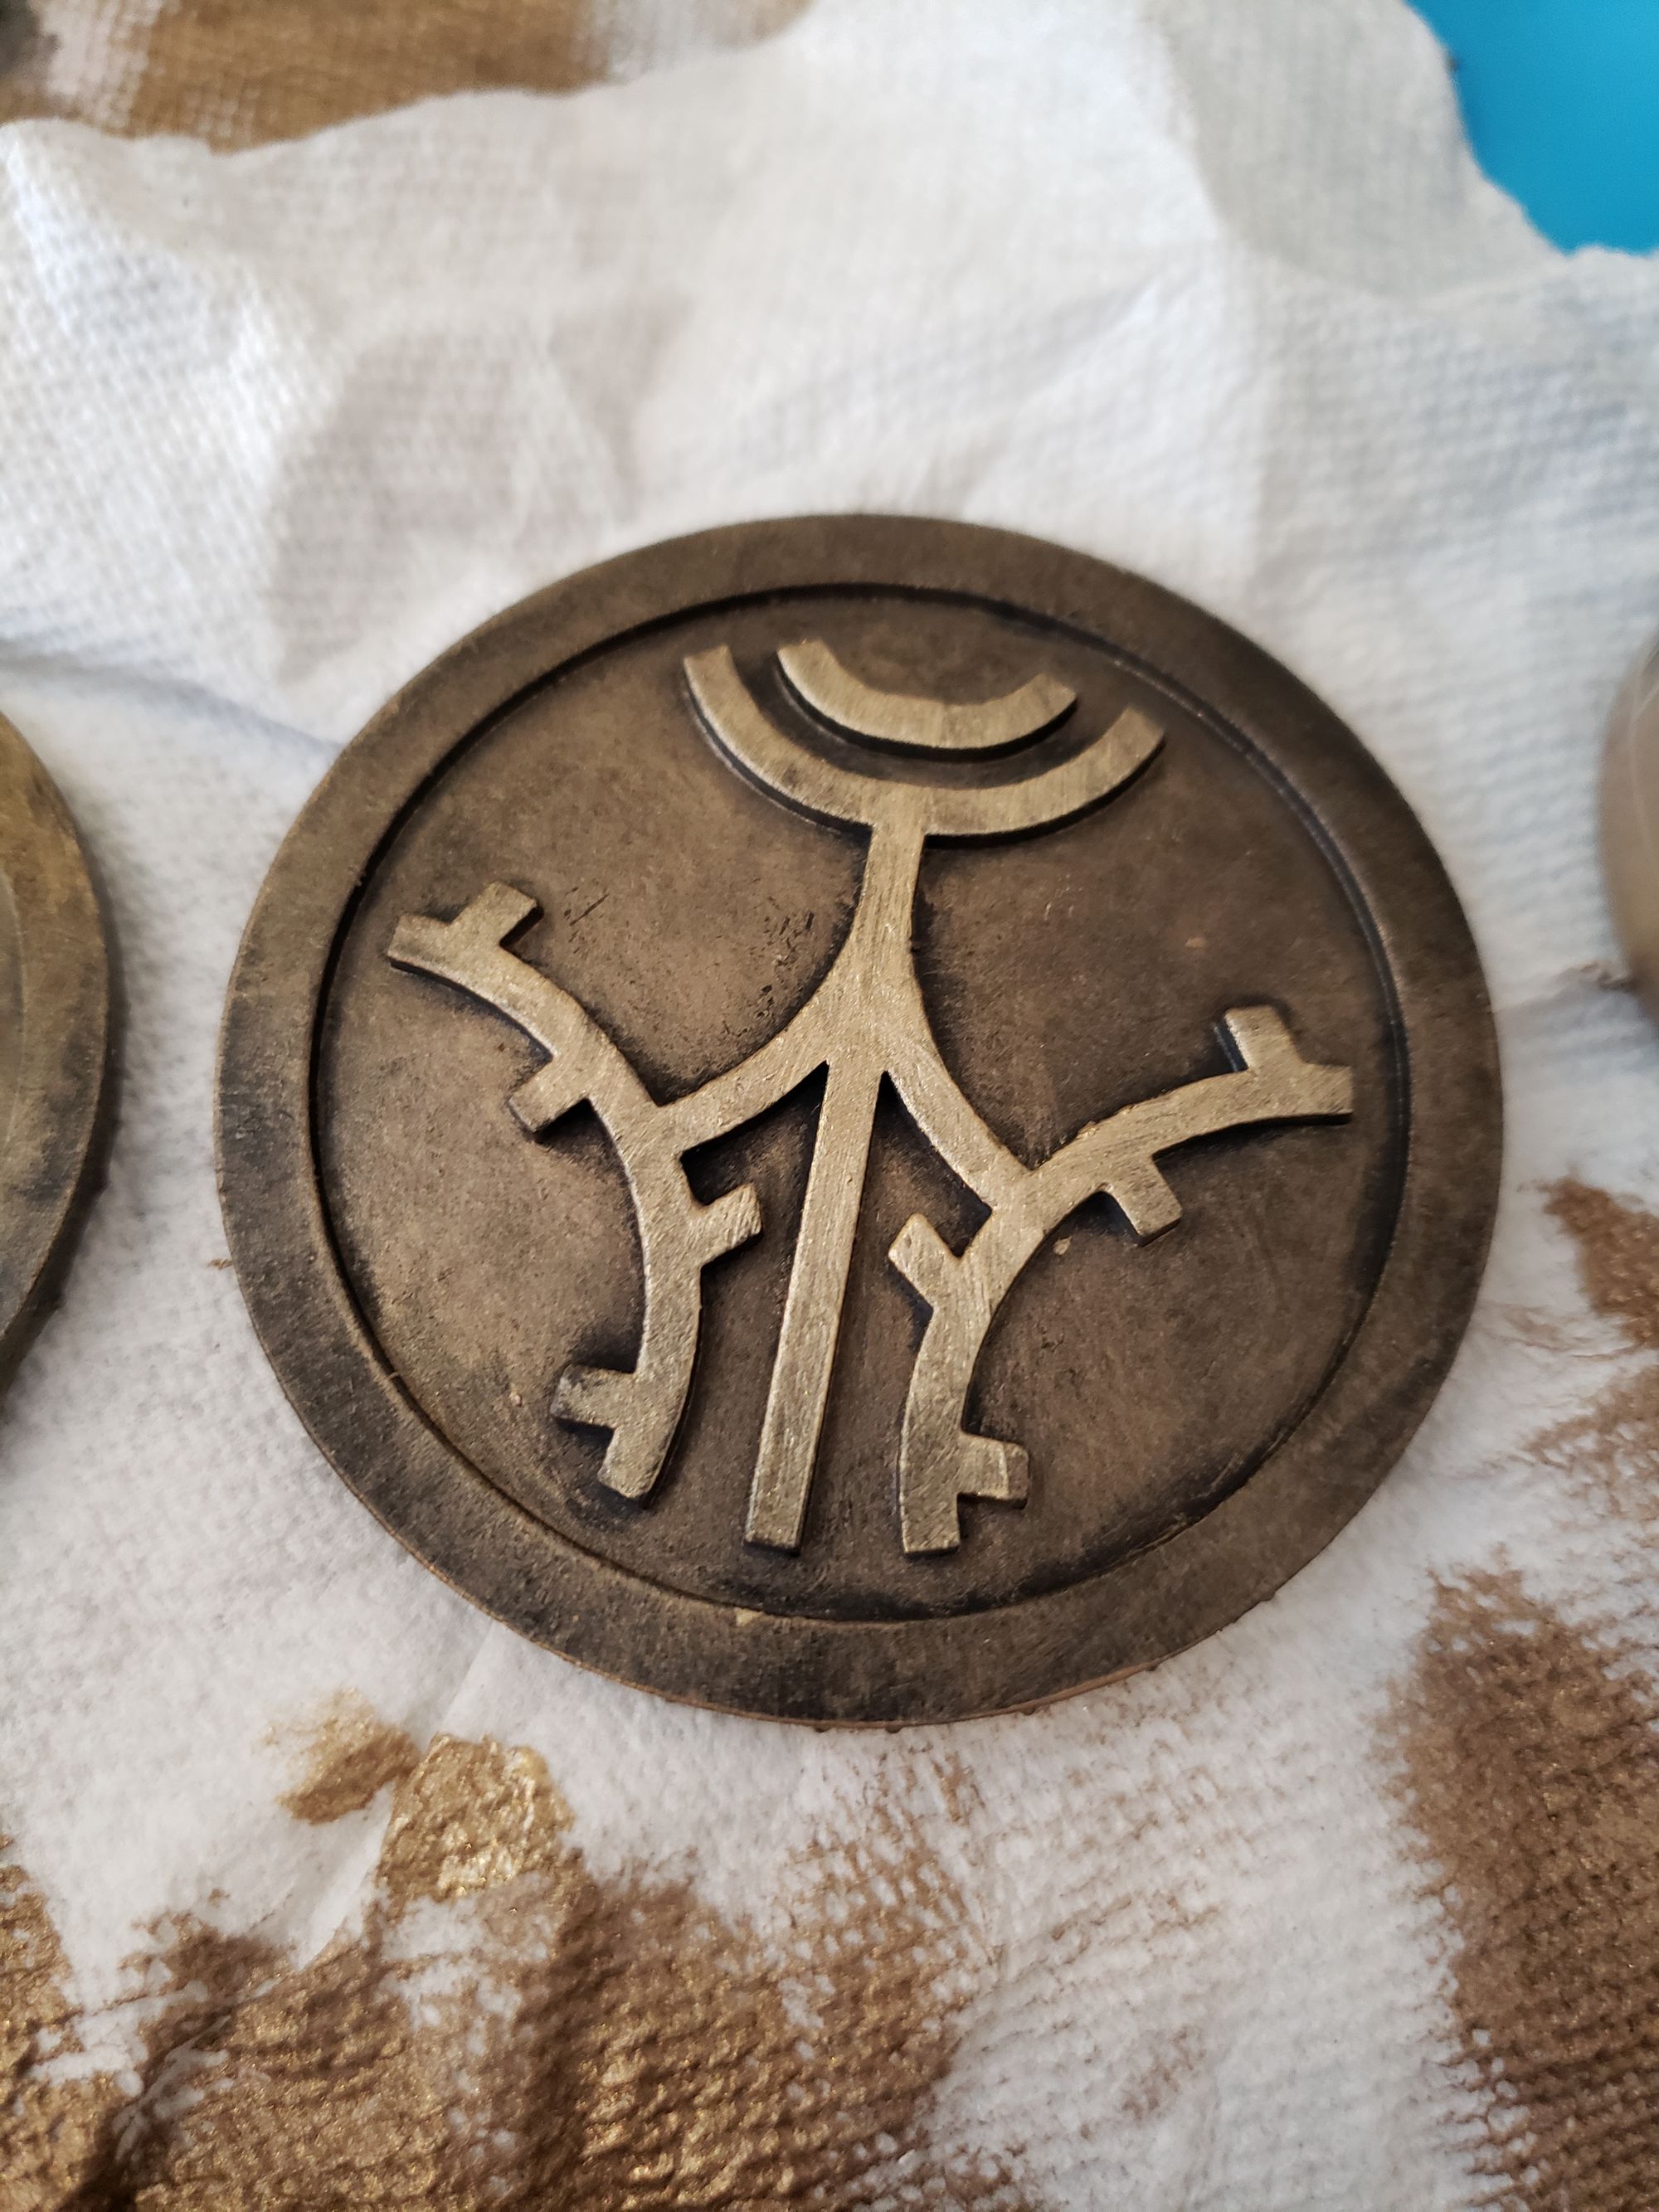
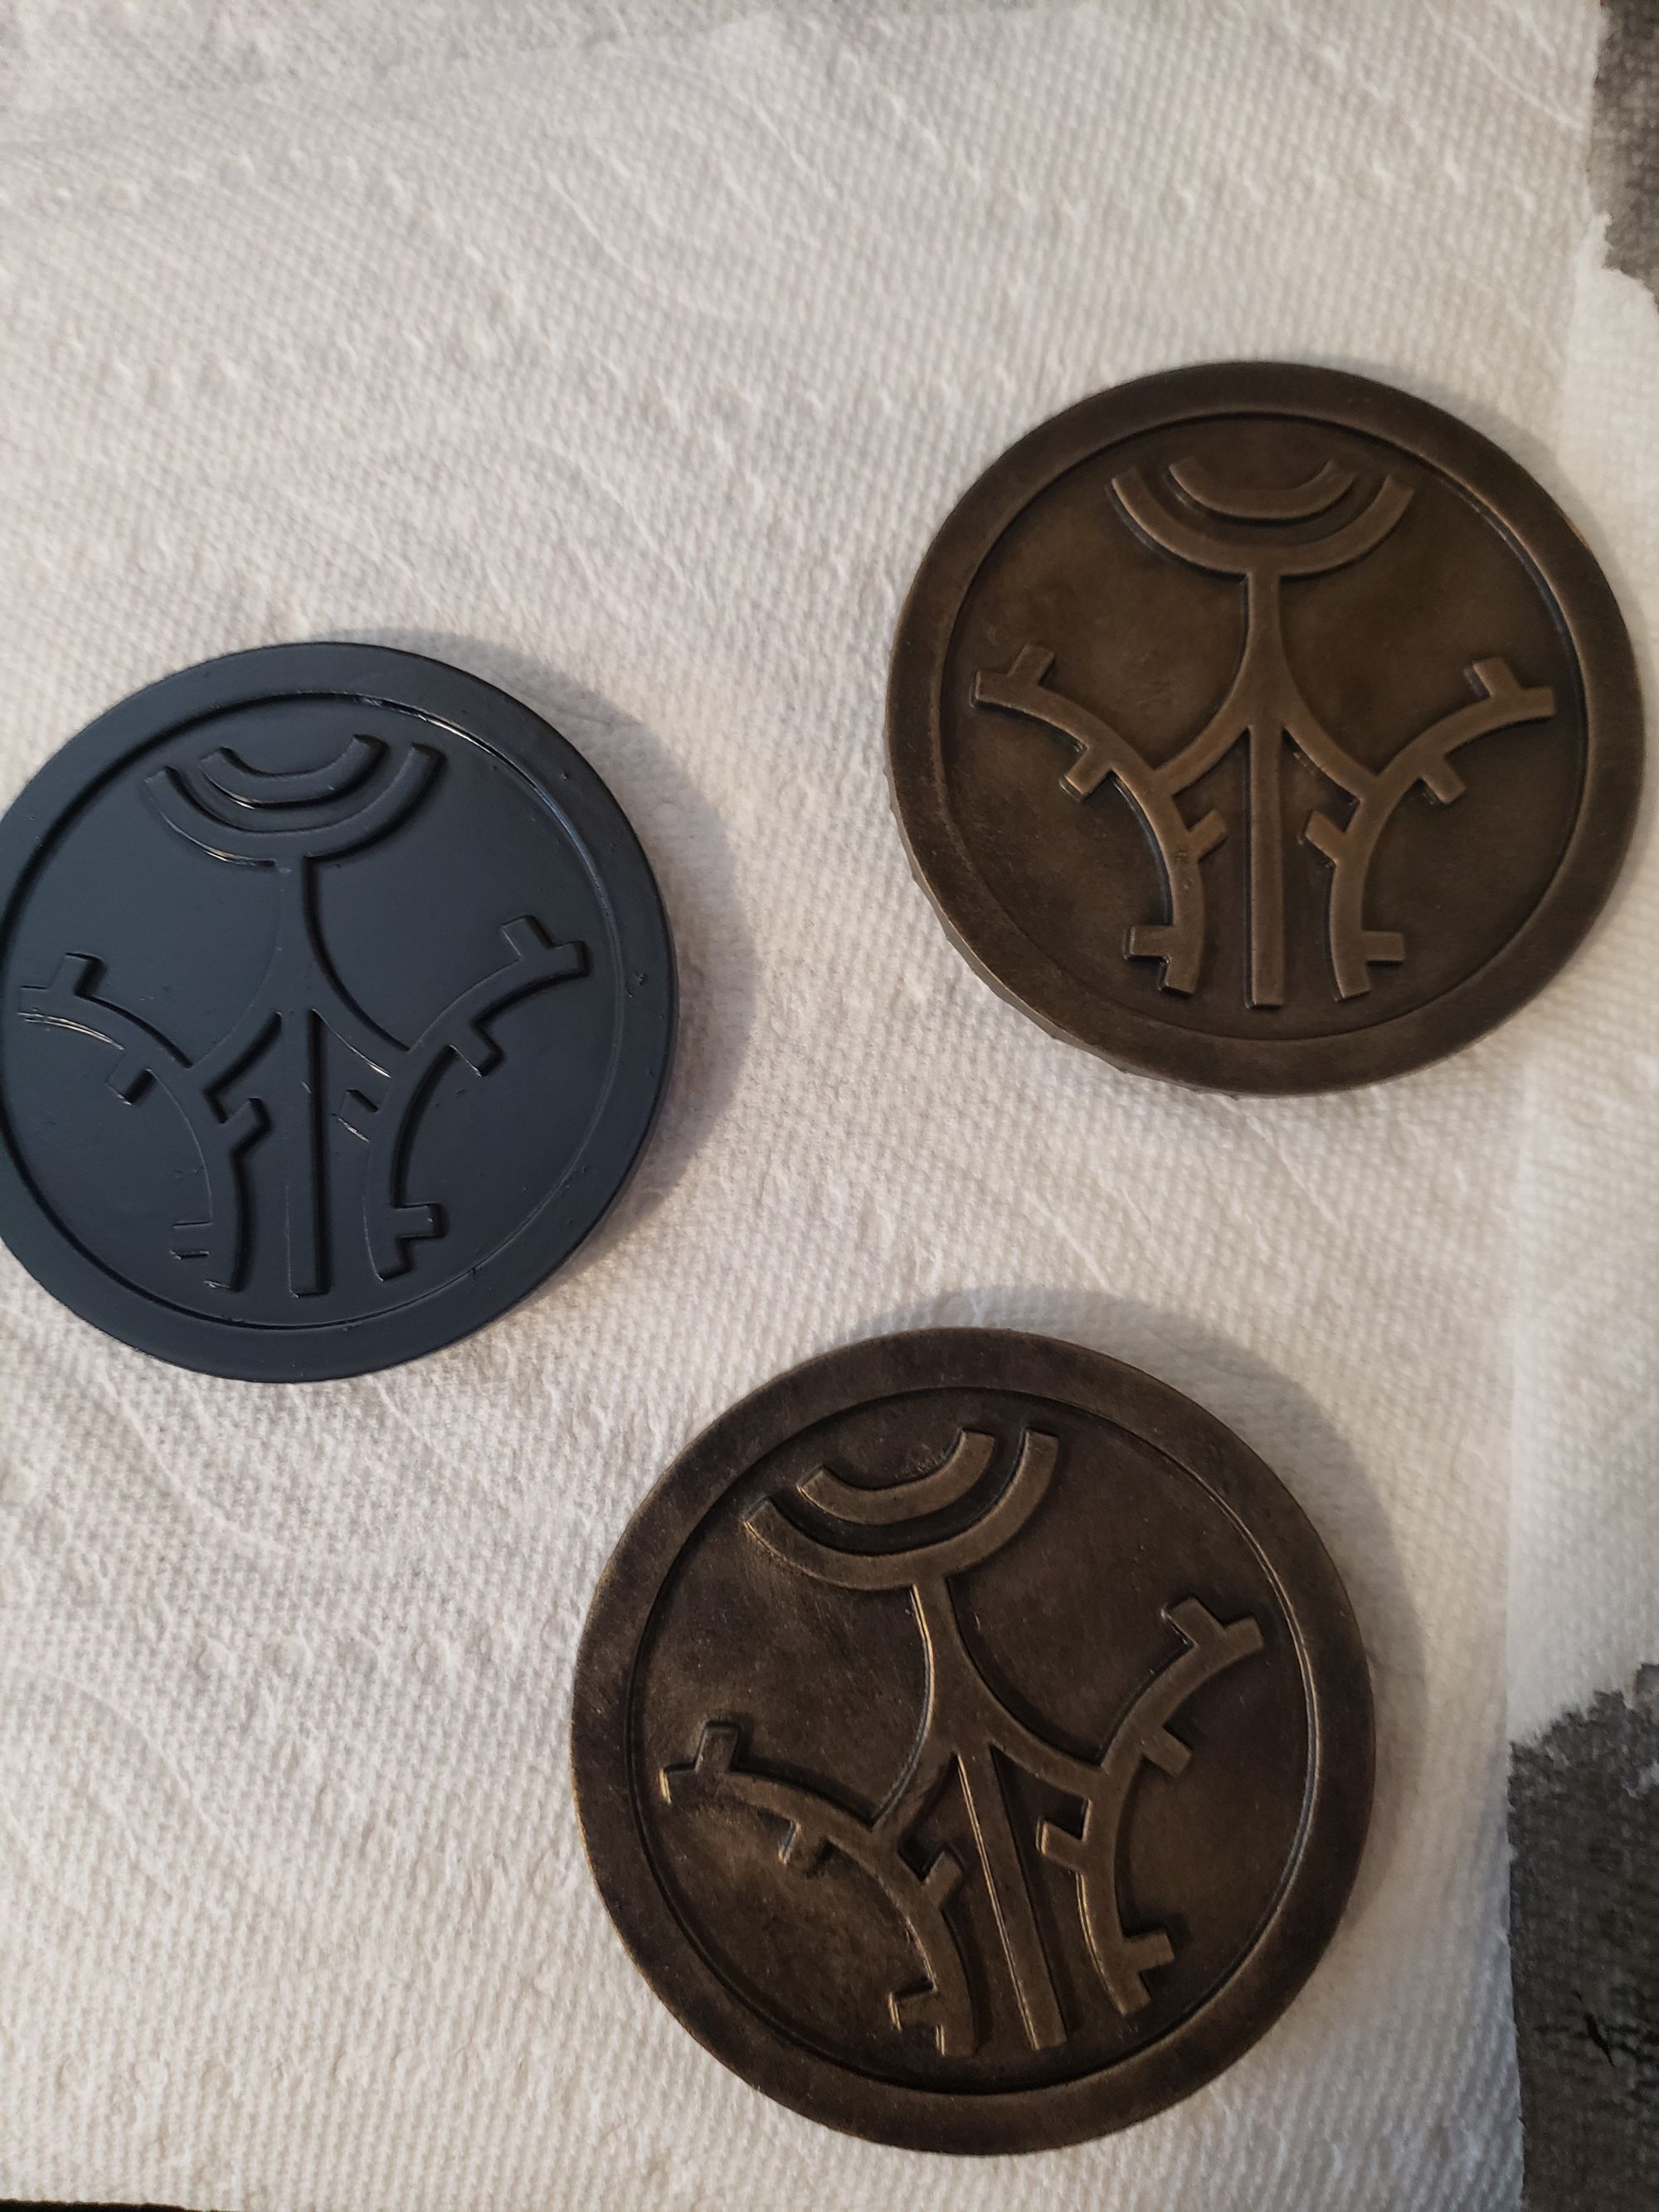
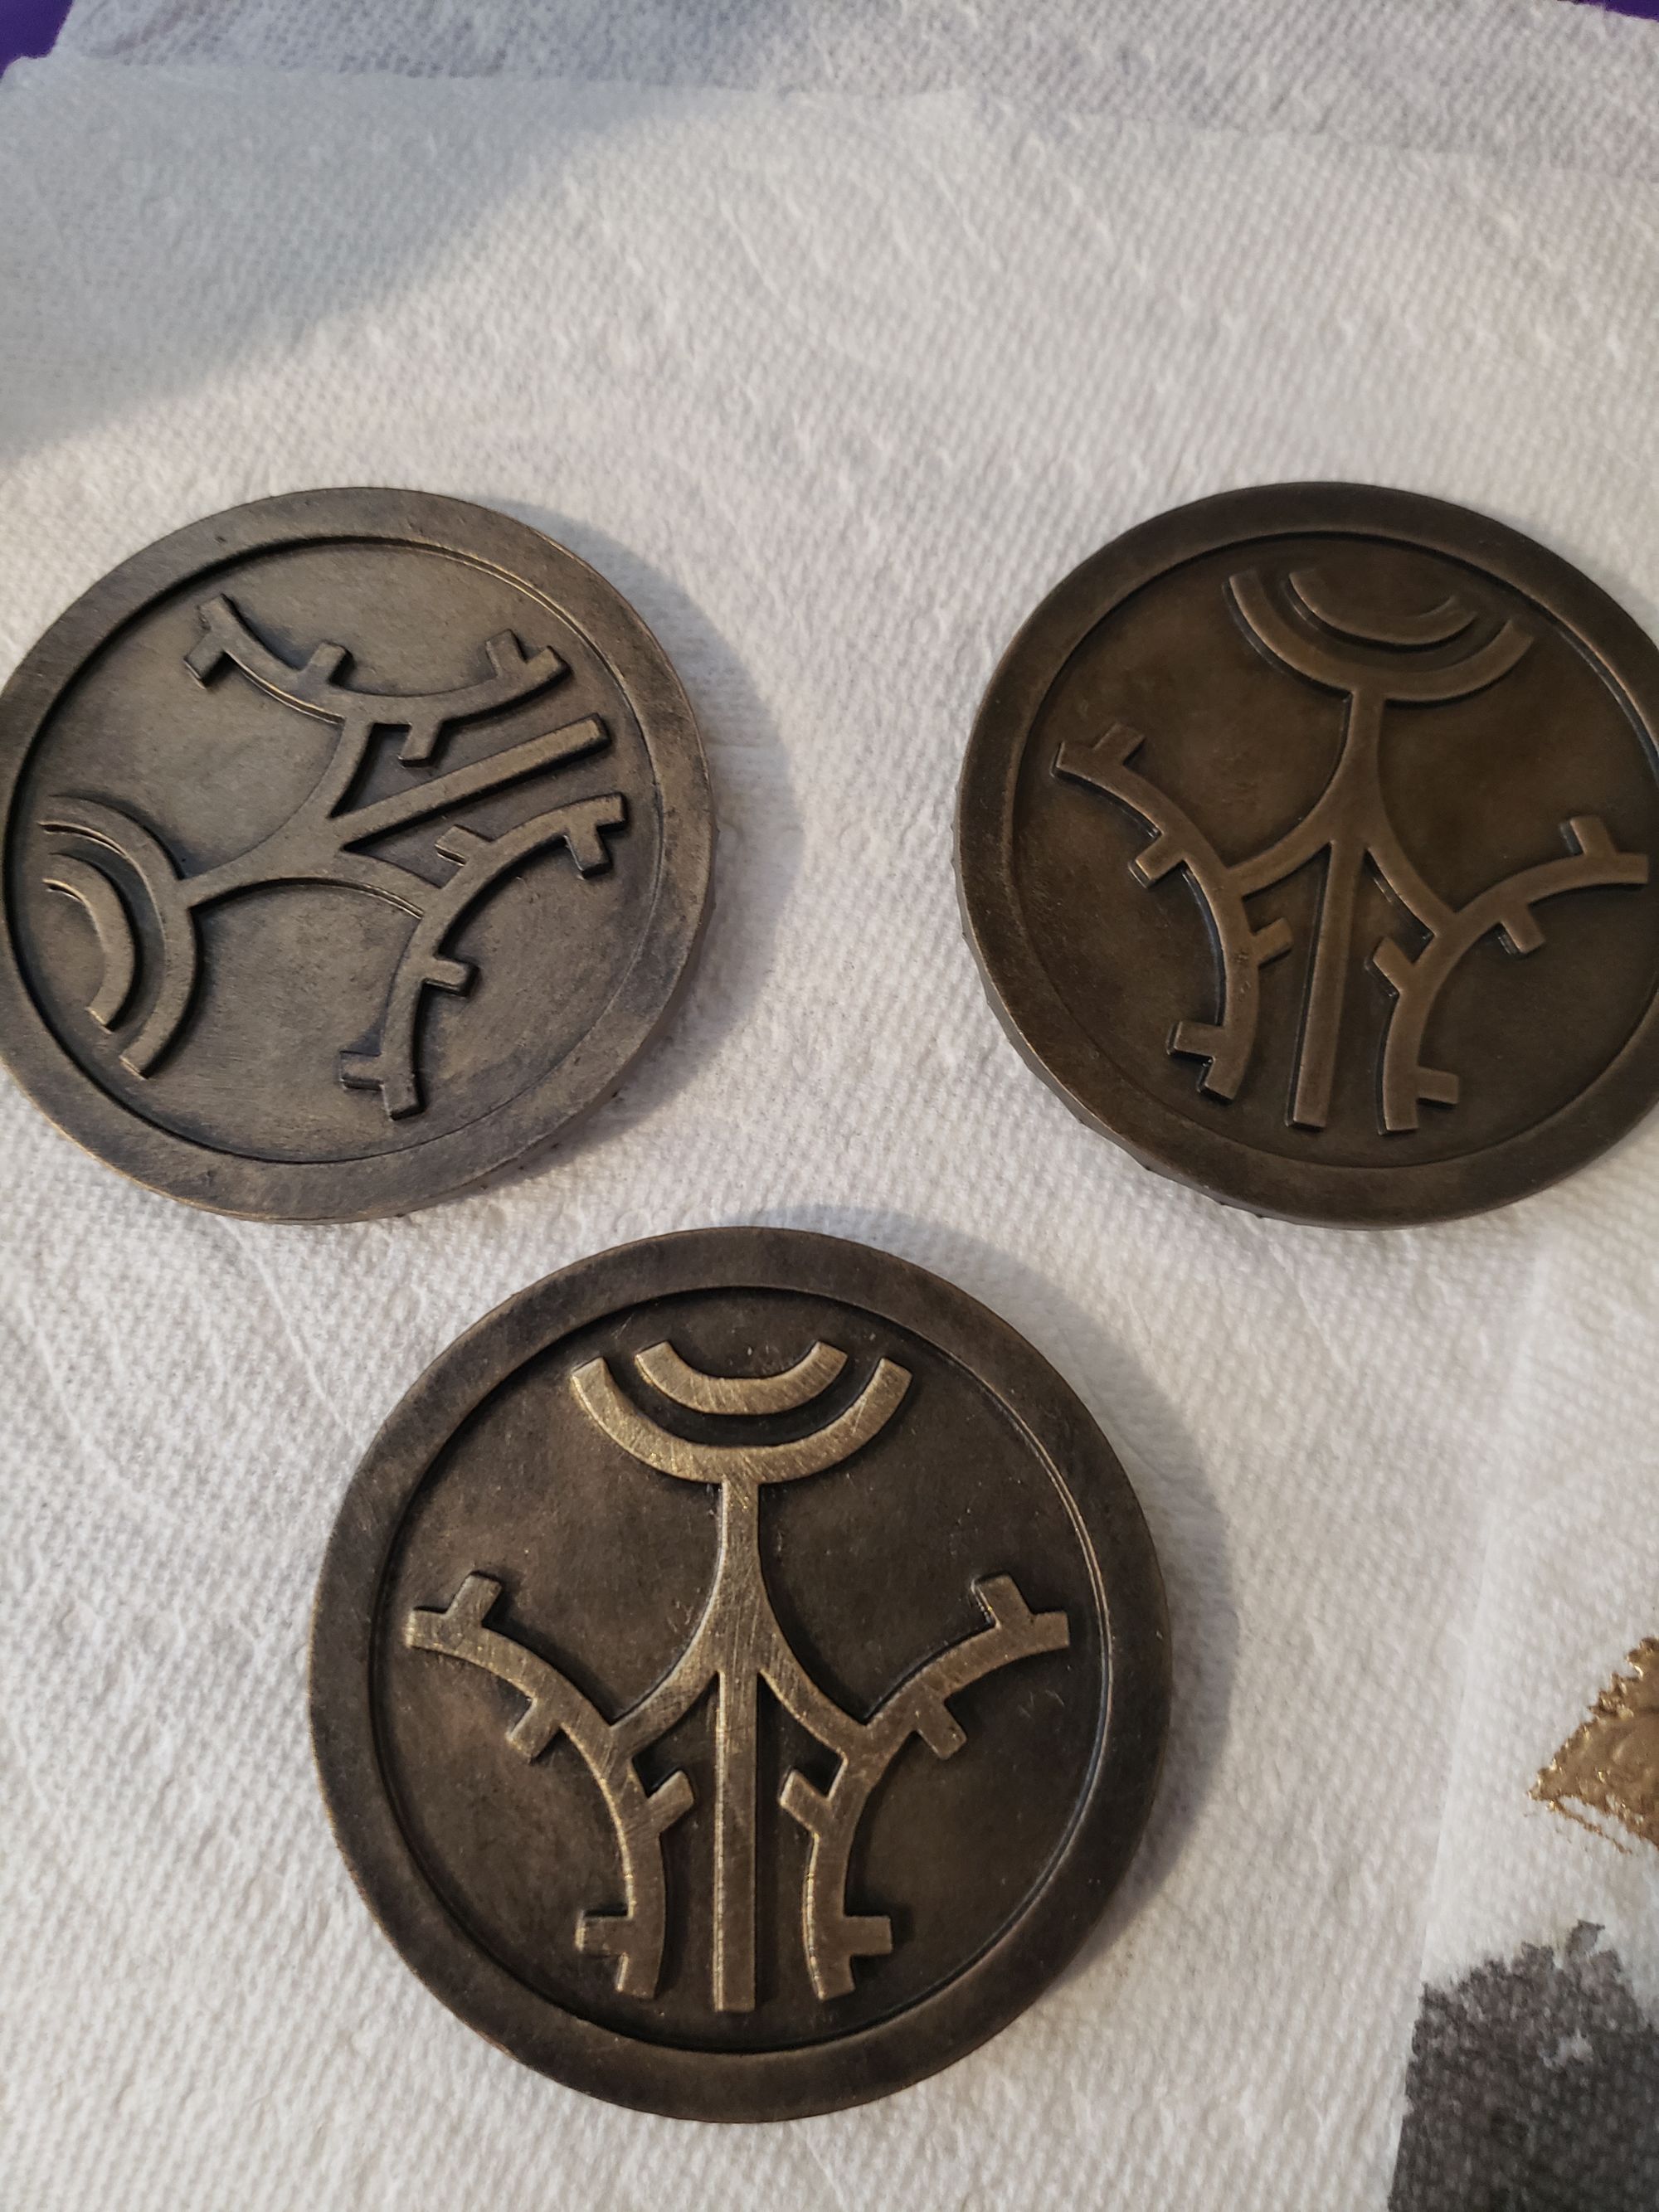
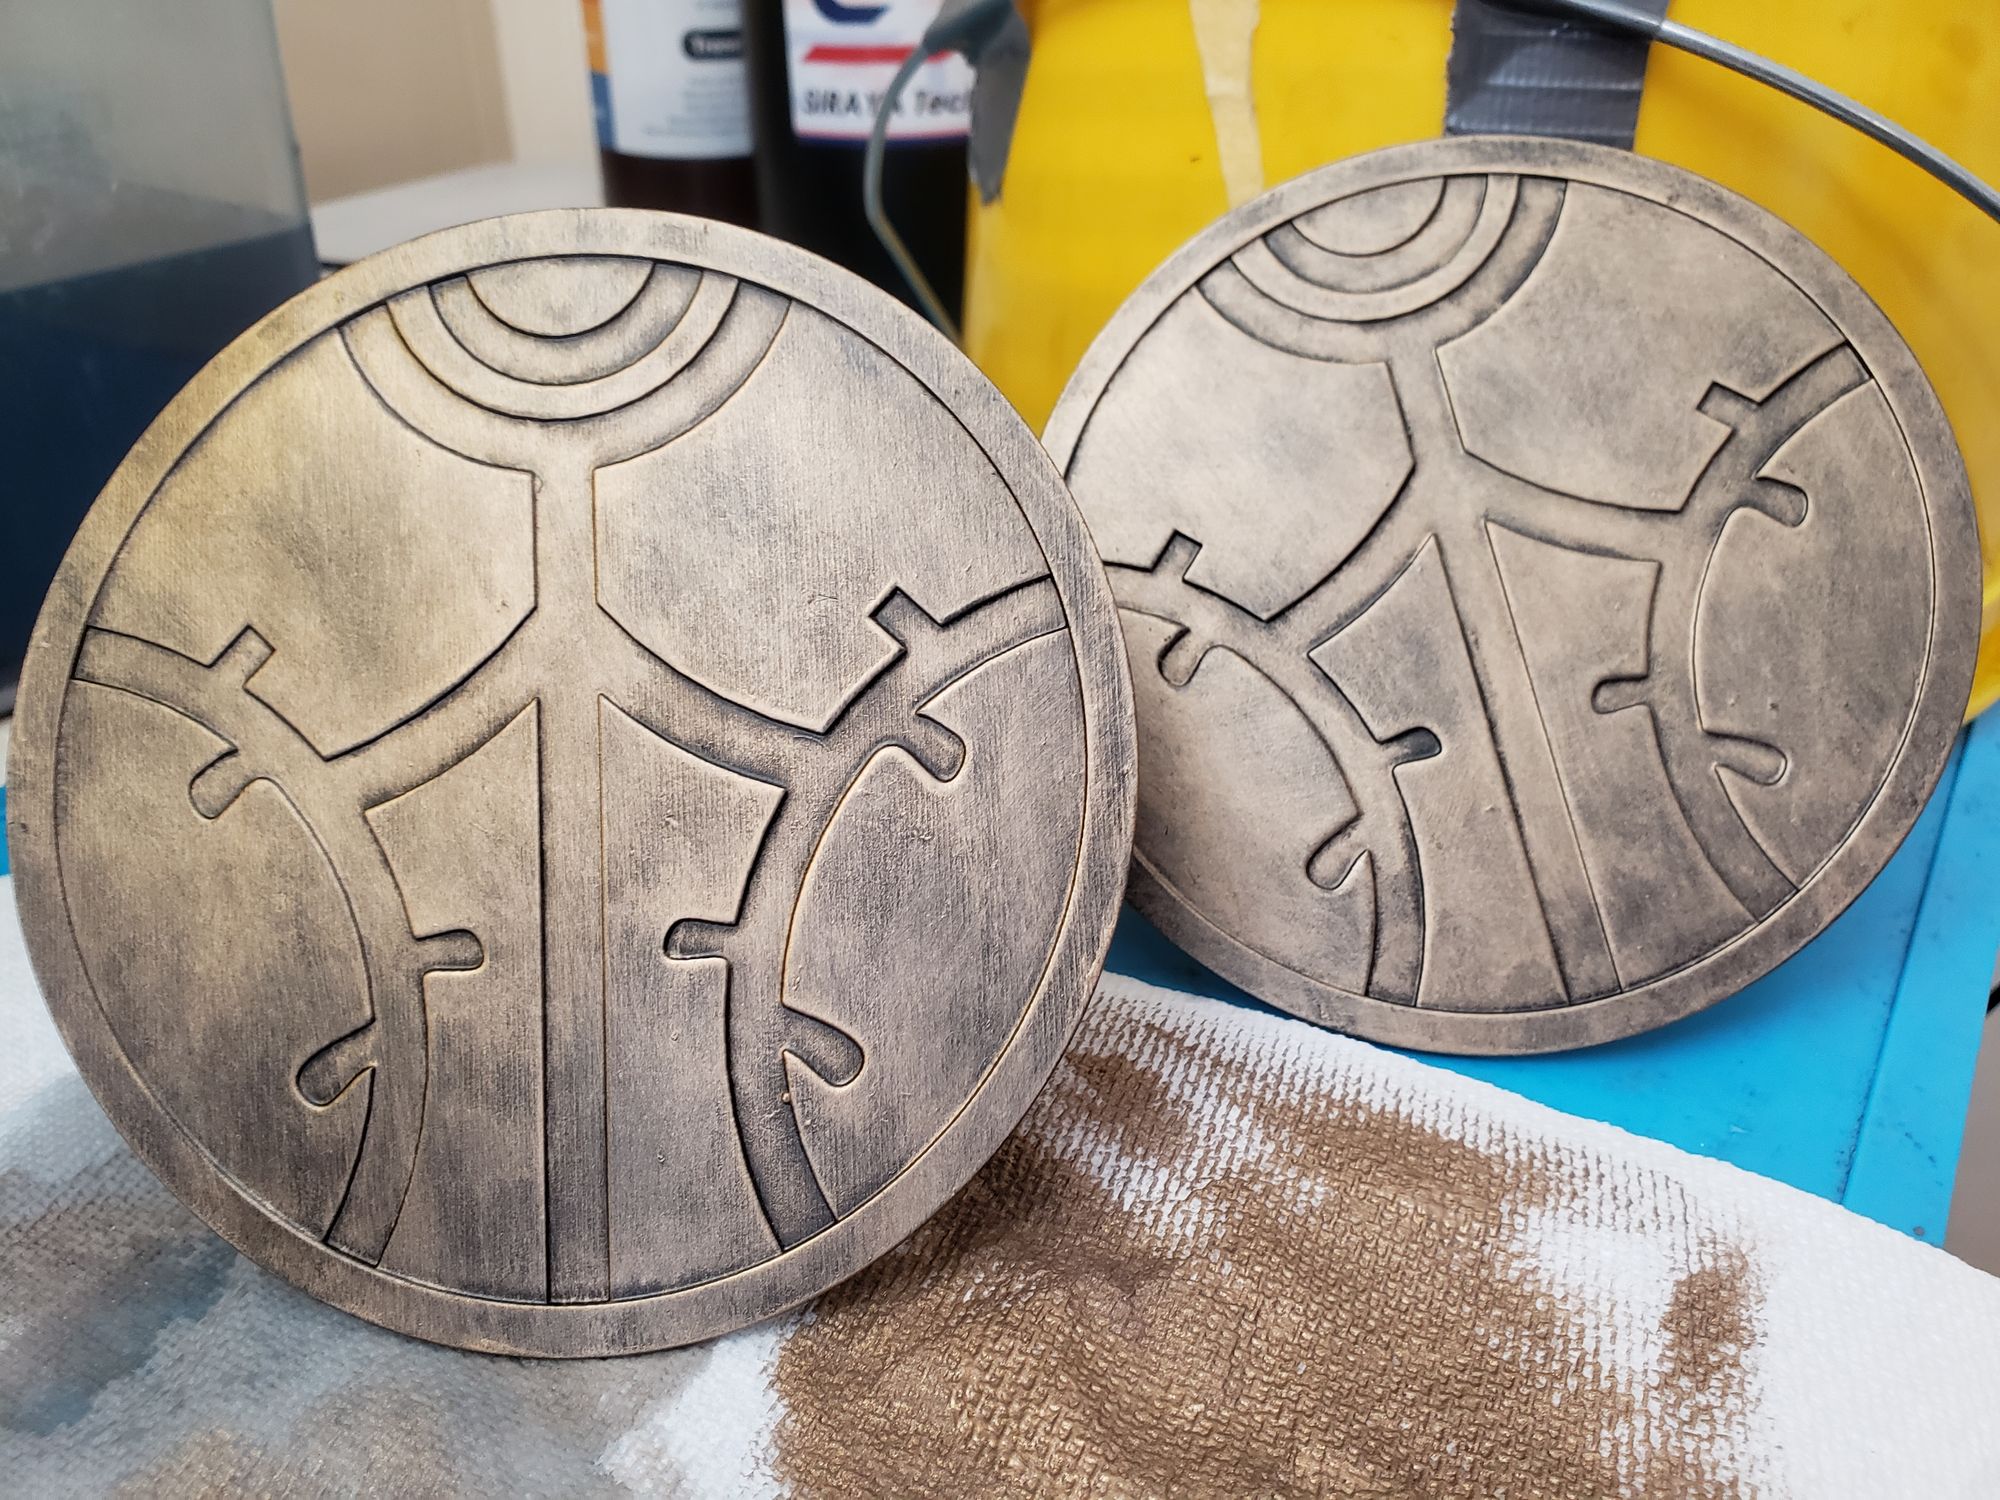
Everything needed a metallic finish, which I accomplish in just a few easy steps. Note: while an airbrush would also work and no doubt get some better, even results, the technique I use also makes it look weathered and beaten, like a real object. Two birds one stone kind of deal, y'know?
So here are the steps on how I make my prints look metallic using paint.
- Step 1: Primer coat over each piece. It's especially important on the back of the medallions, else there may be some light leaking as they are thin.
- Step 2: Black Glossy Primer over each piece and let dry for half a day. You can use a flat/matte black as well, just Step 3 becomes non-optional and maybe repeated twice.
- Step 3: (Optional) Glossy clear coat over each piece, let dry for at least 3 hours between coats, and 6 hours to a full day before step 4.
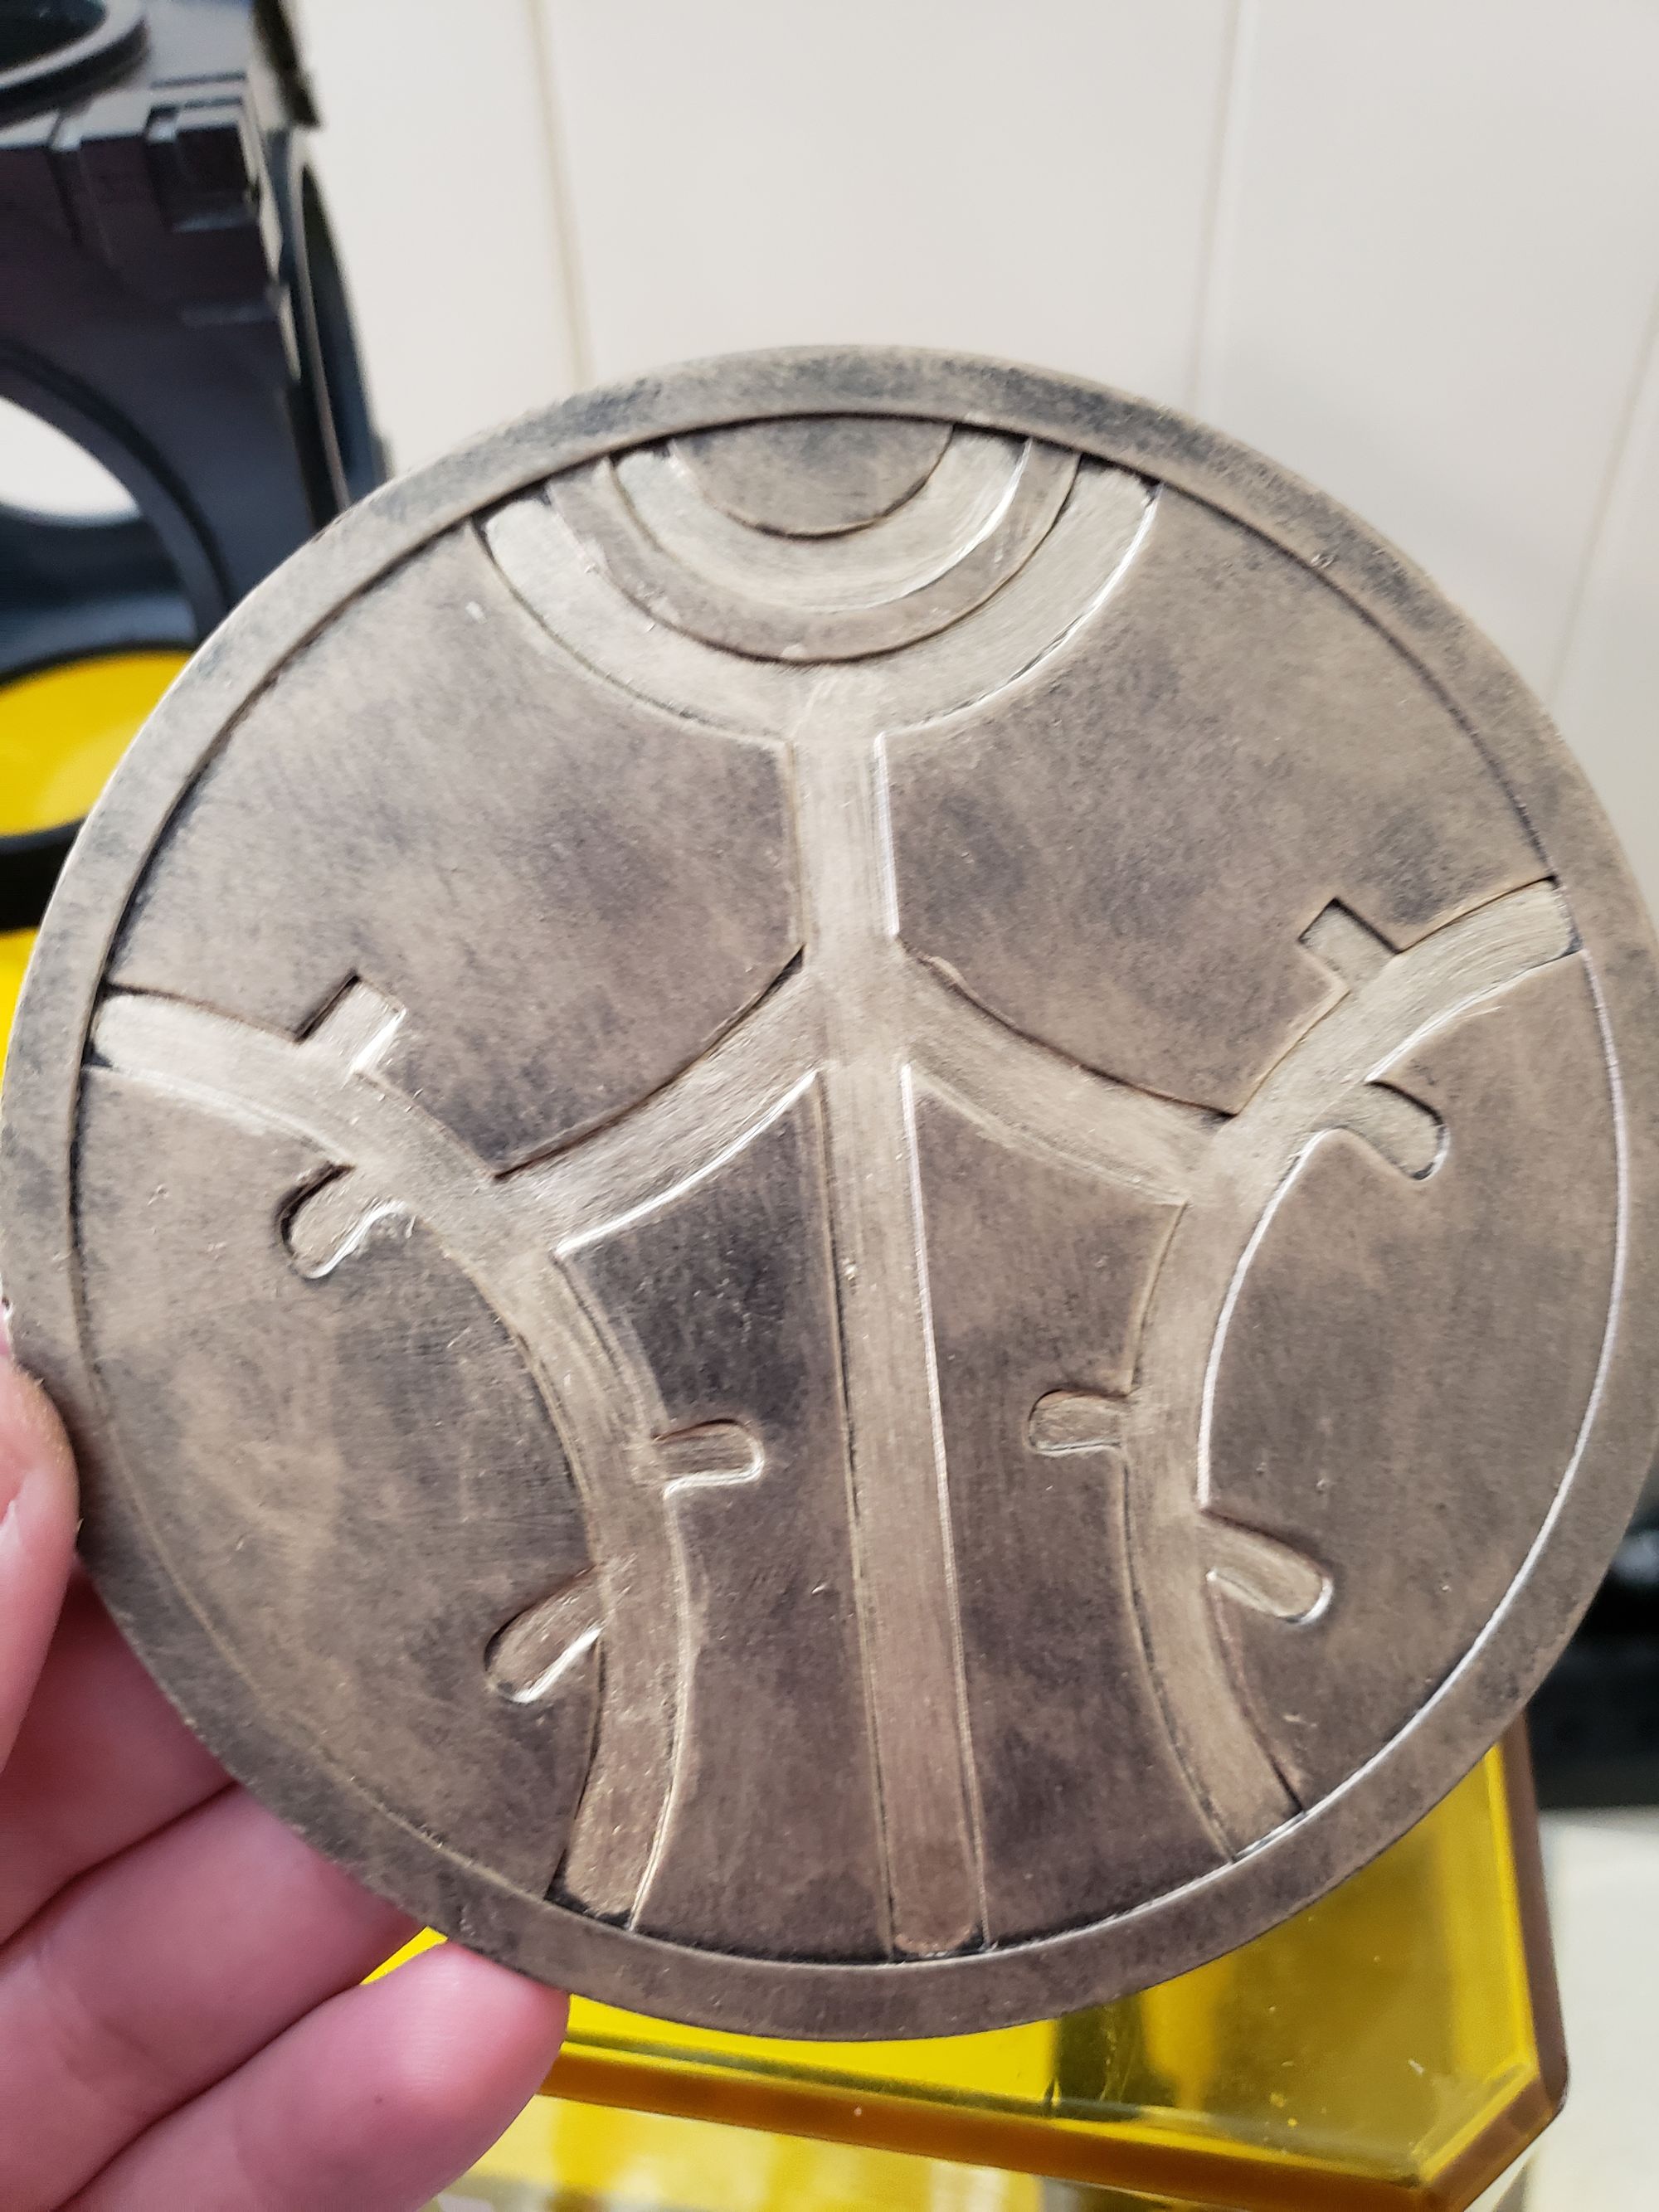
- Step 4: Dry brush a metallic paint over each piece. This will take multiple coats and contrary to most uses for dry brushing, you do want to get not just the high points but also the low points a bit. There will still be some black coming through in the end, trust me. Dry brushing involves getting a dry brush with a tiny bit of paint on it, barely anything, then wiping it off on a rag or paper towel a few times, then quickly brushing the piece until you basically run out of paint on the brush.
- Step 5: (Optional) If you want it shinier and to seal it, another glossy clear coat will do the trick. Wait at least a full day after dry brushing to do this. Additionally, you can use a matte clearcoat to tone it down, or a semi-gloss to keep it around the same but still seal it.
And here's a video of my attempting to dry brush with only one hand, since I had to film it... This is not what it's supposed to look like. It kept moving around so it was hard to film. It's a two-handed operation.
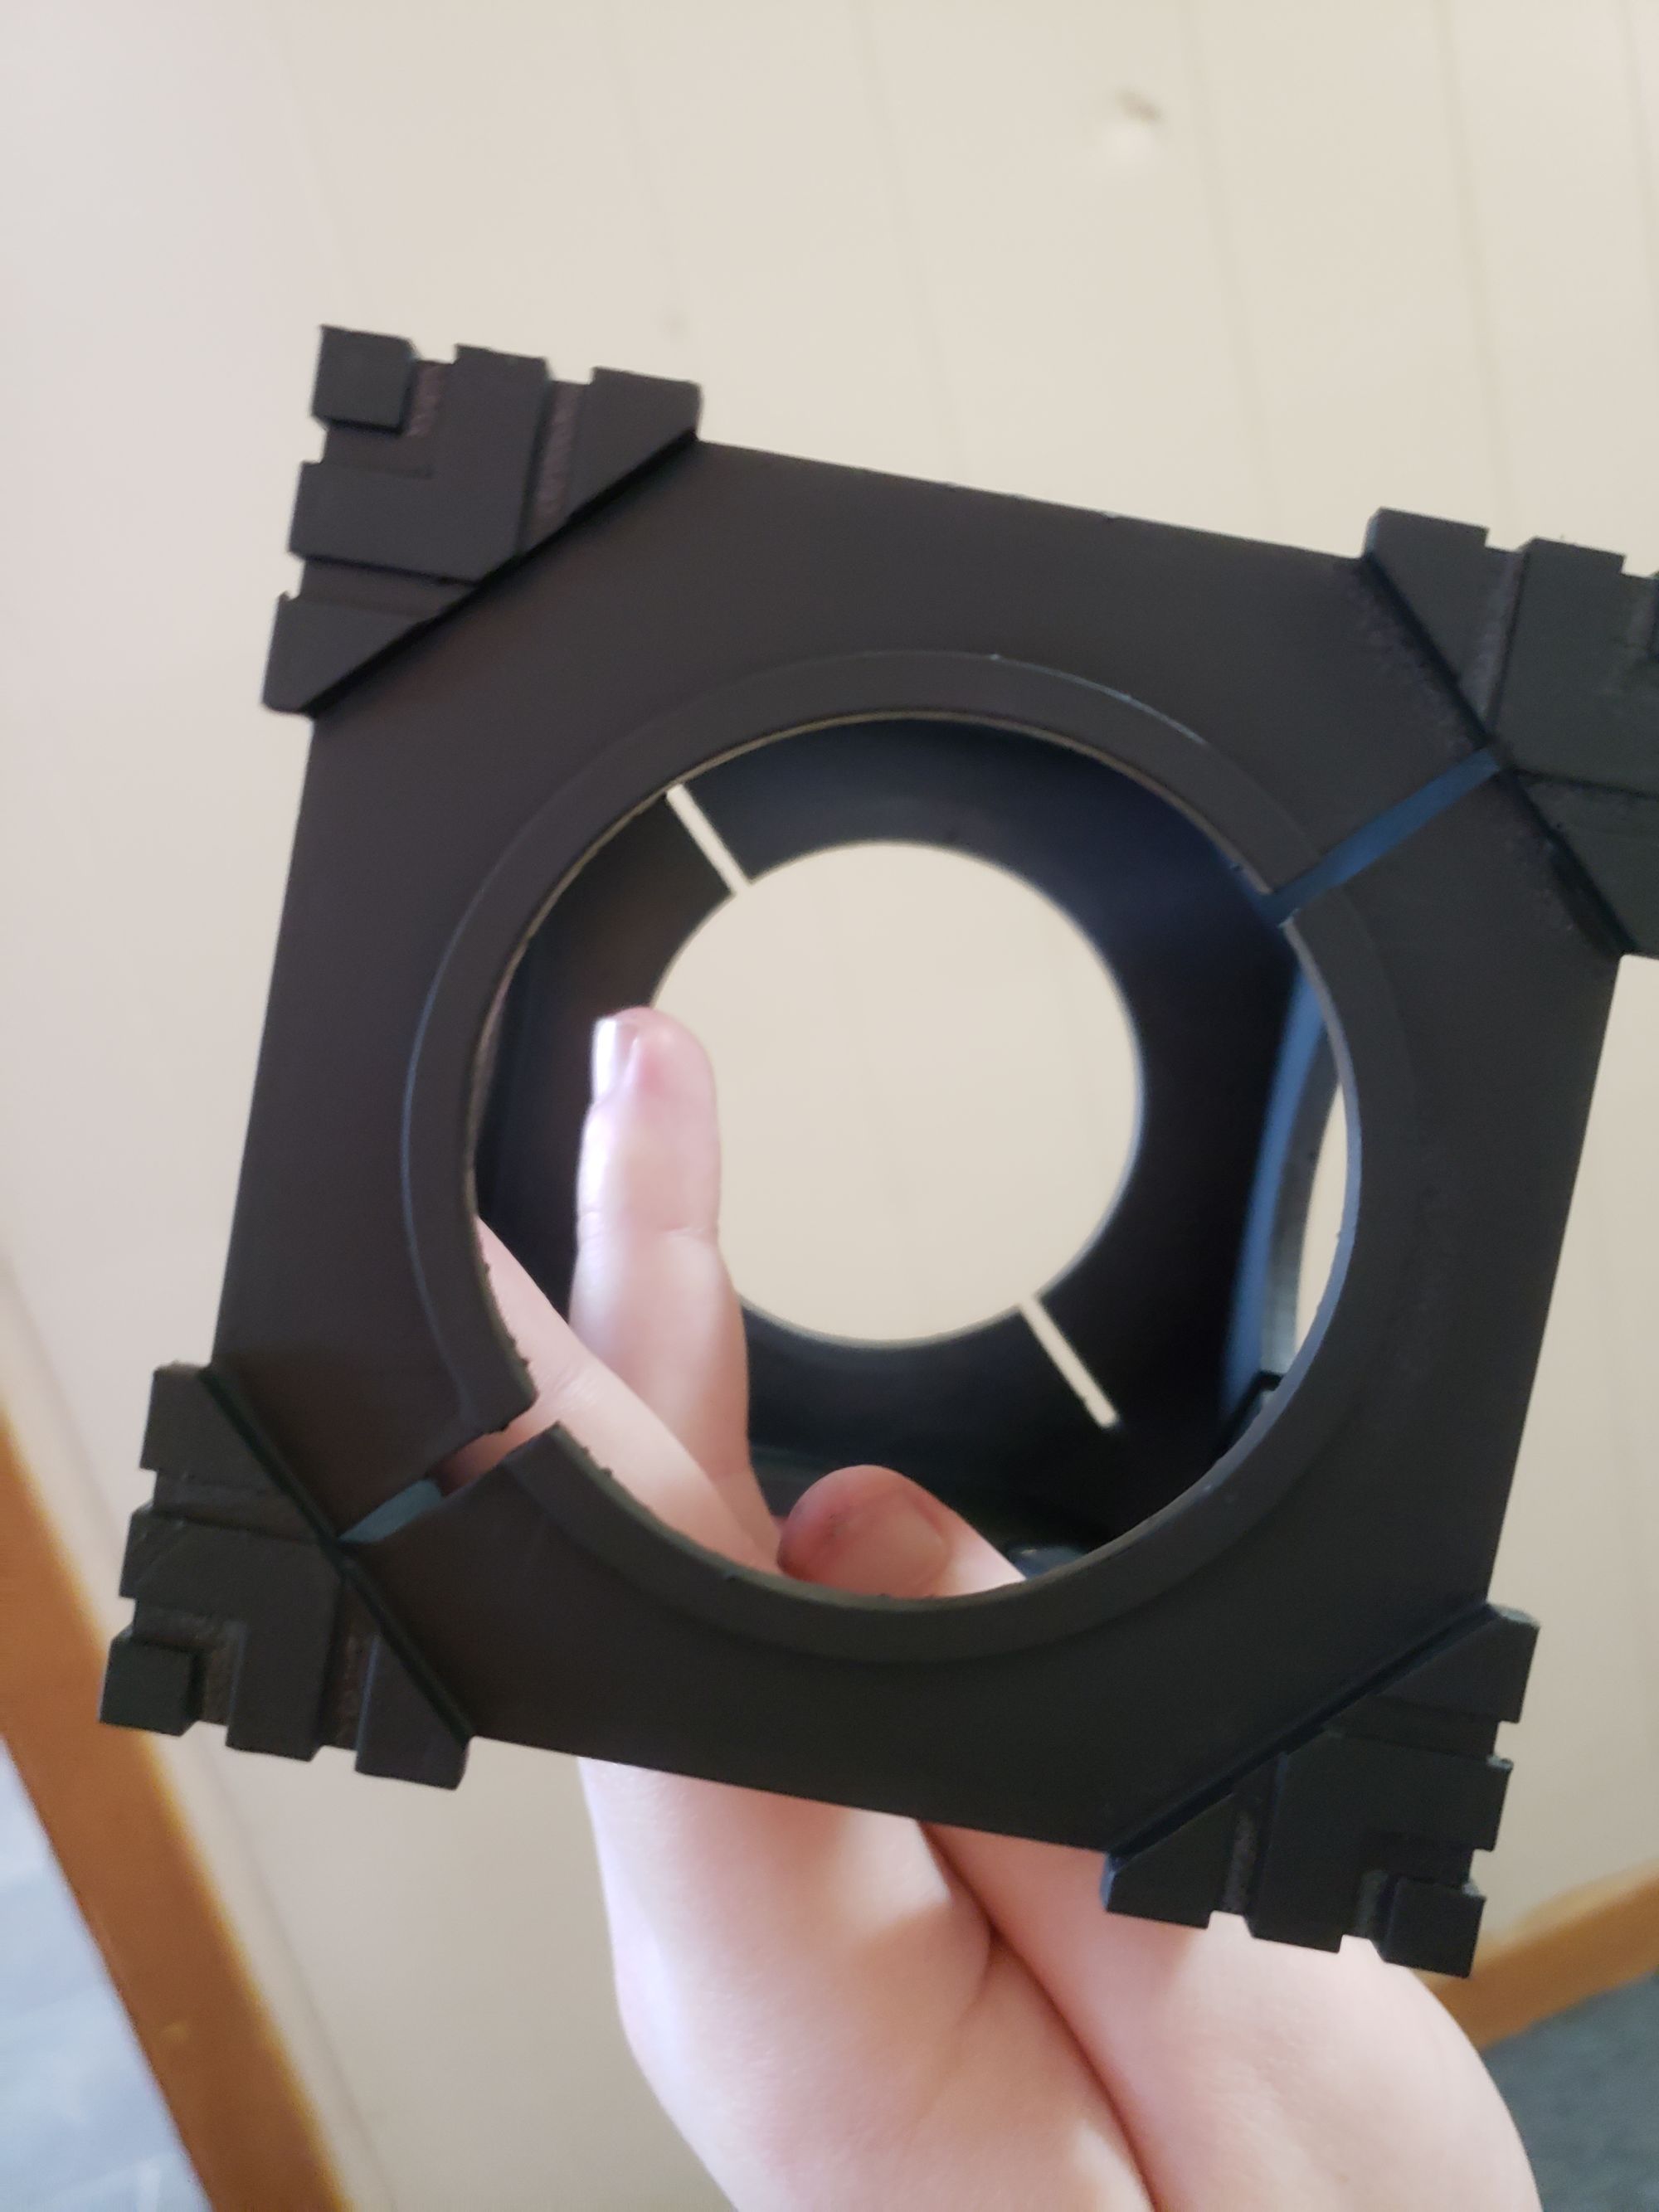
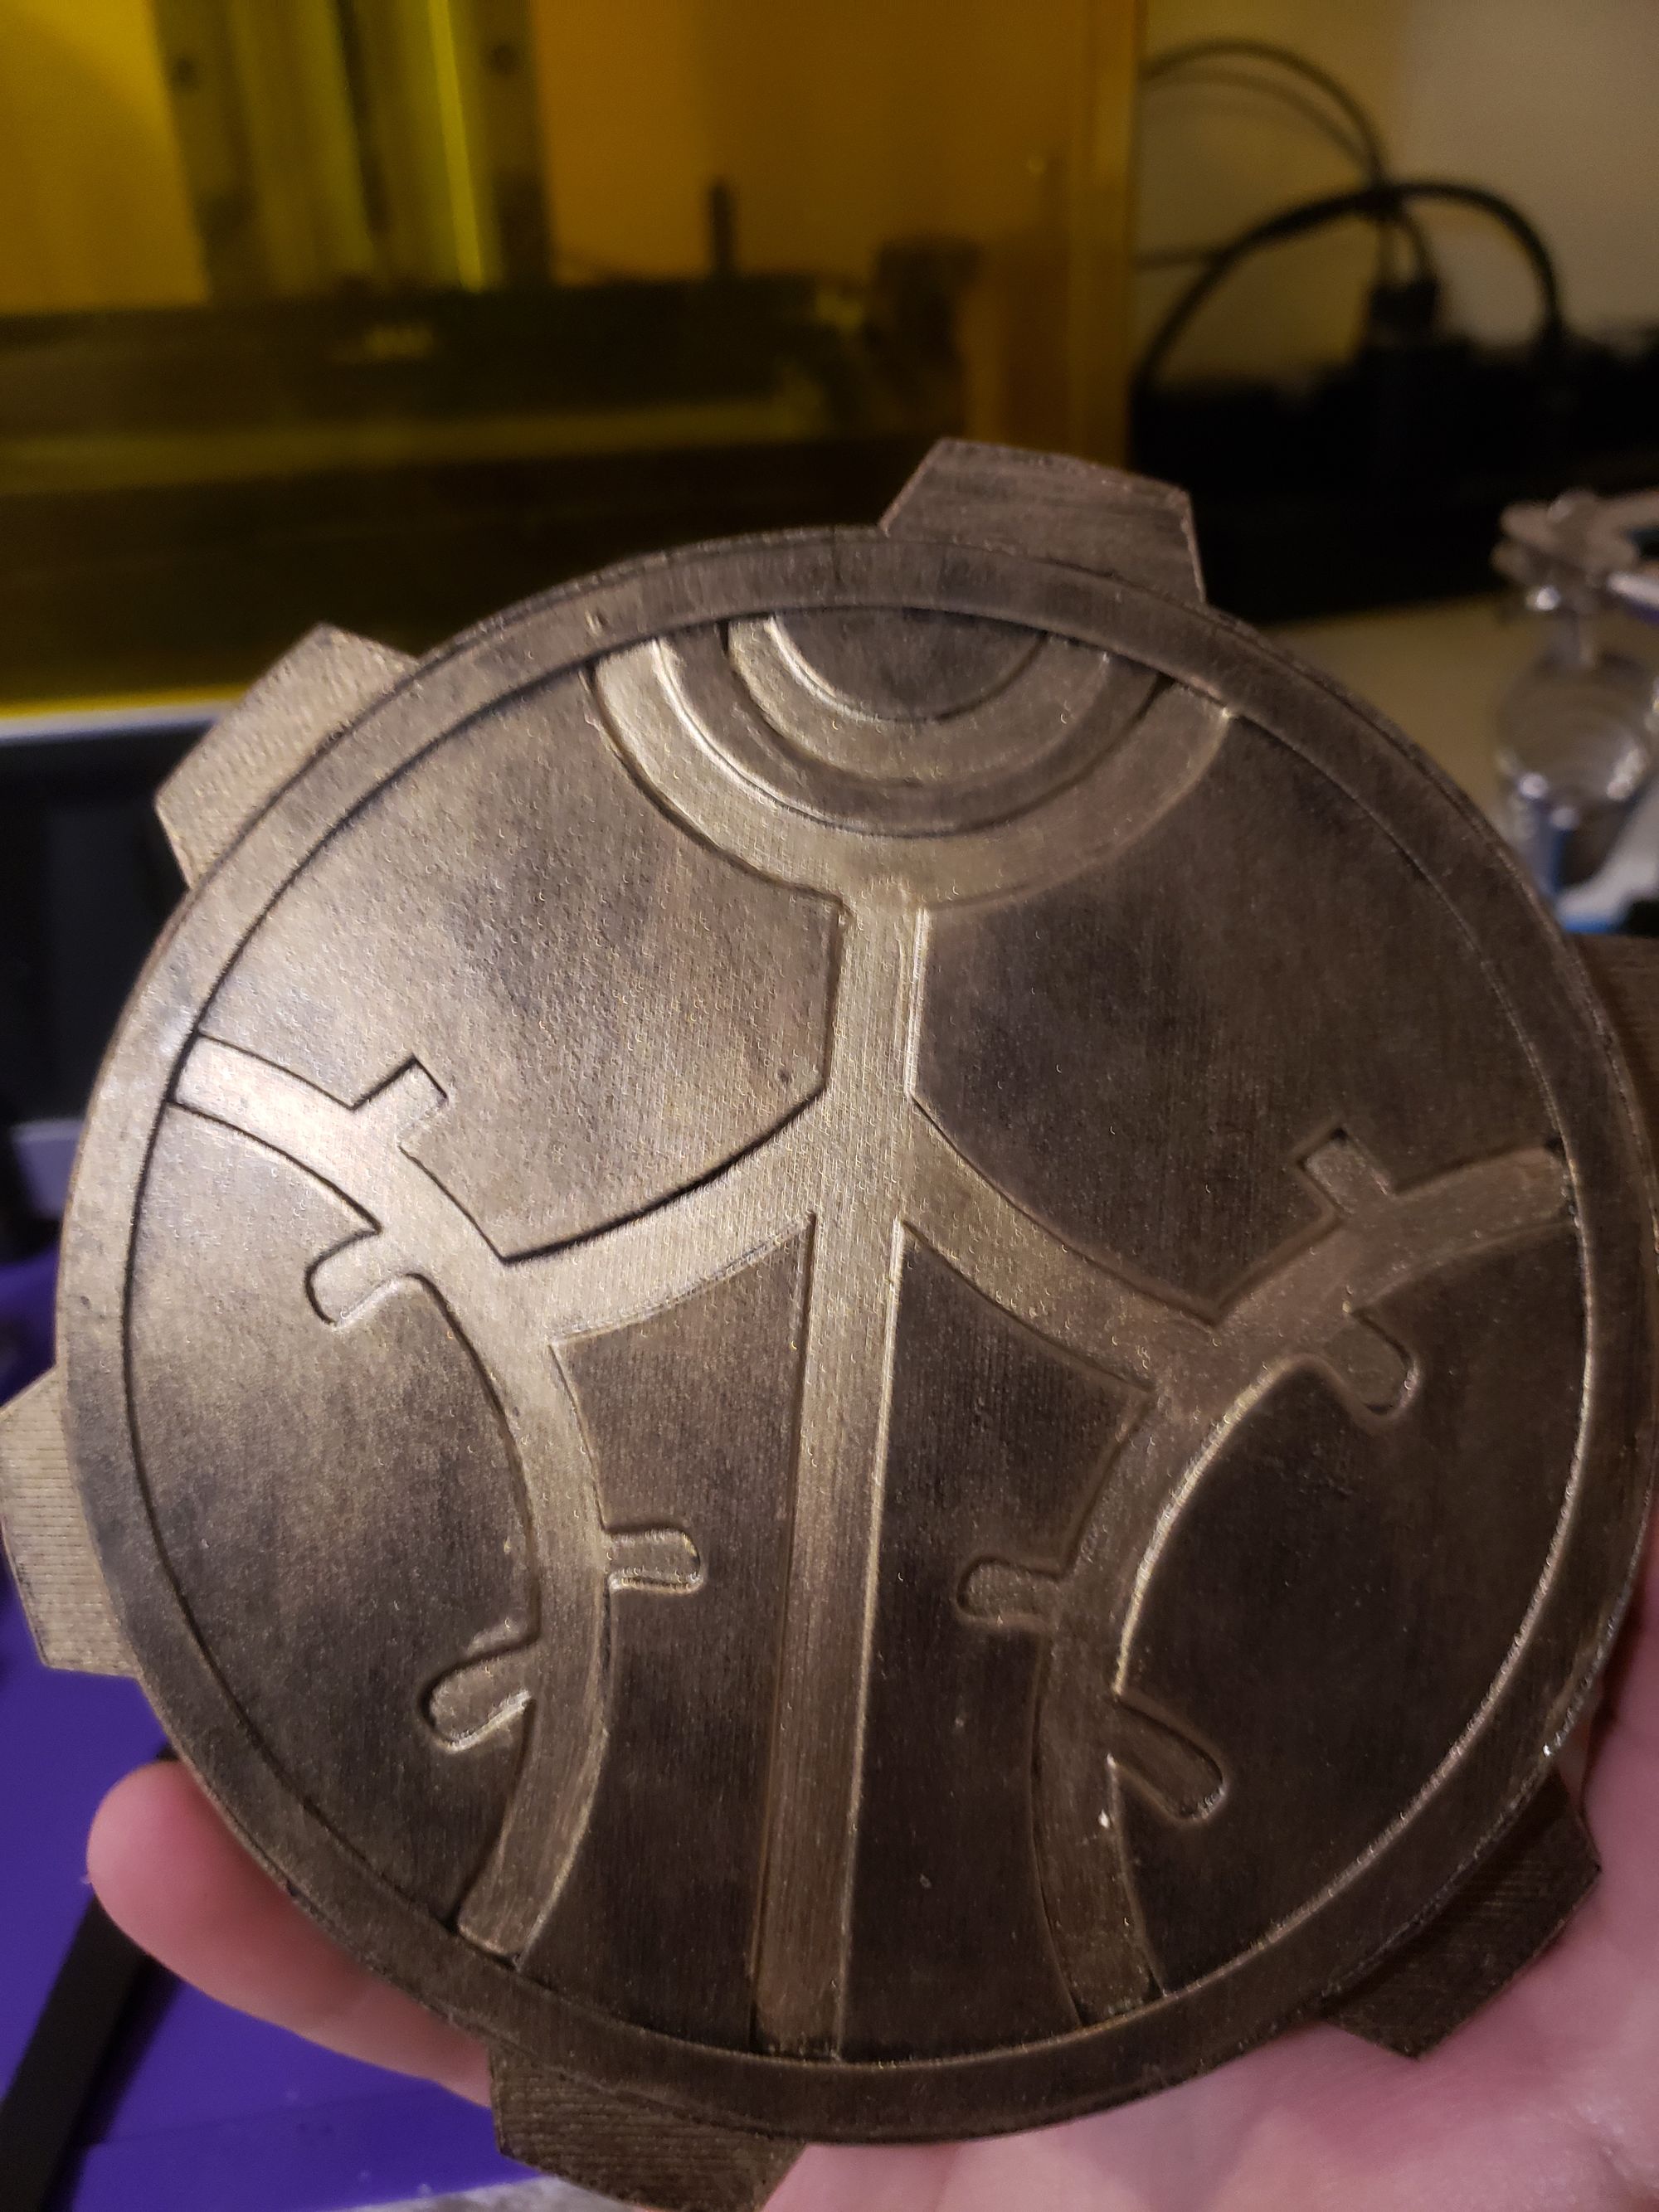
This technique was applied to the cube, base, base cover and all the medallions. The paint used was a brushed-metal bronze. I accented the deep lines of the cube's corners, and the emblem on all the medallions and base cover with a gold paint to give some distinctions. This accenting is done using a finer brush with just normally painting it on.

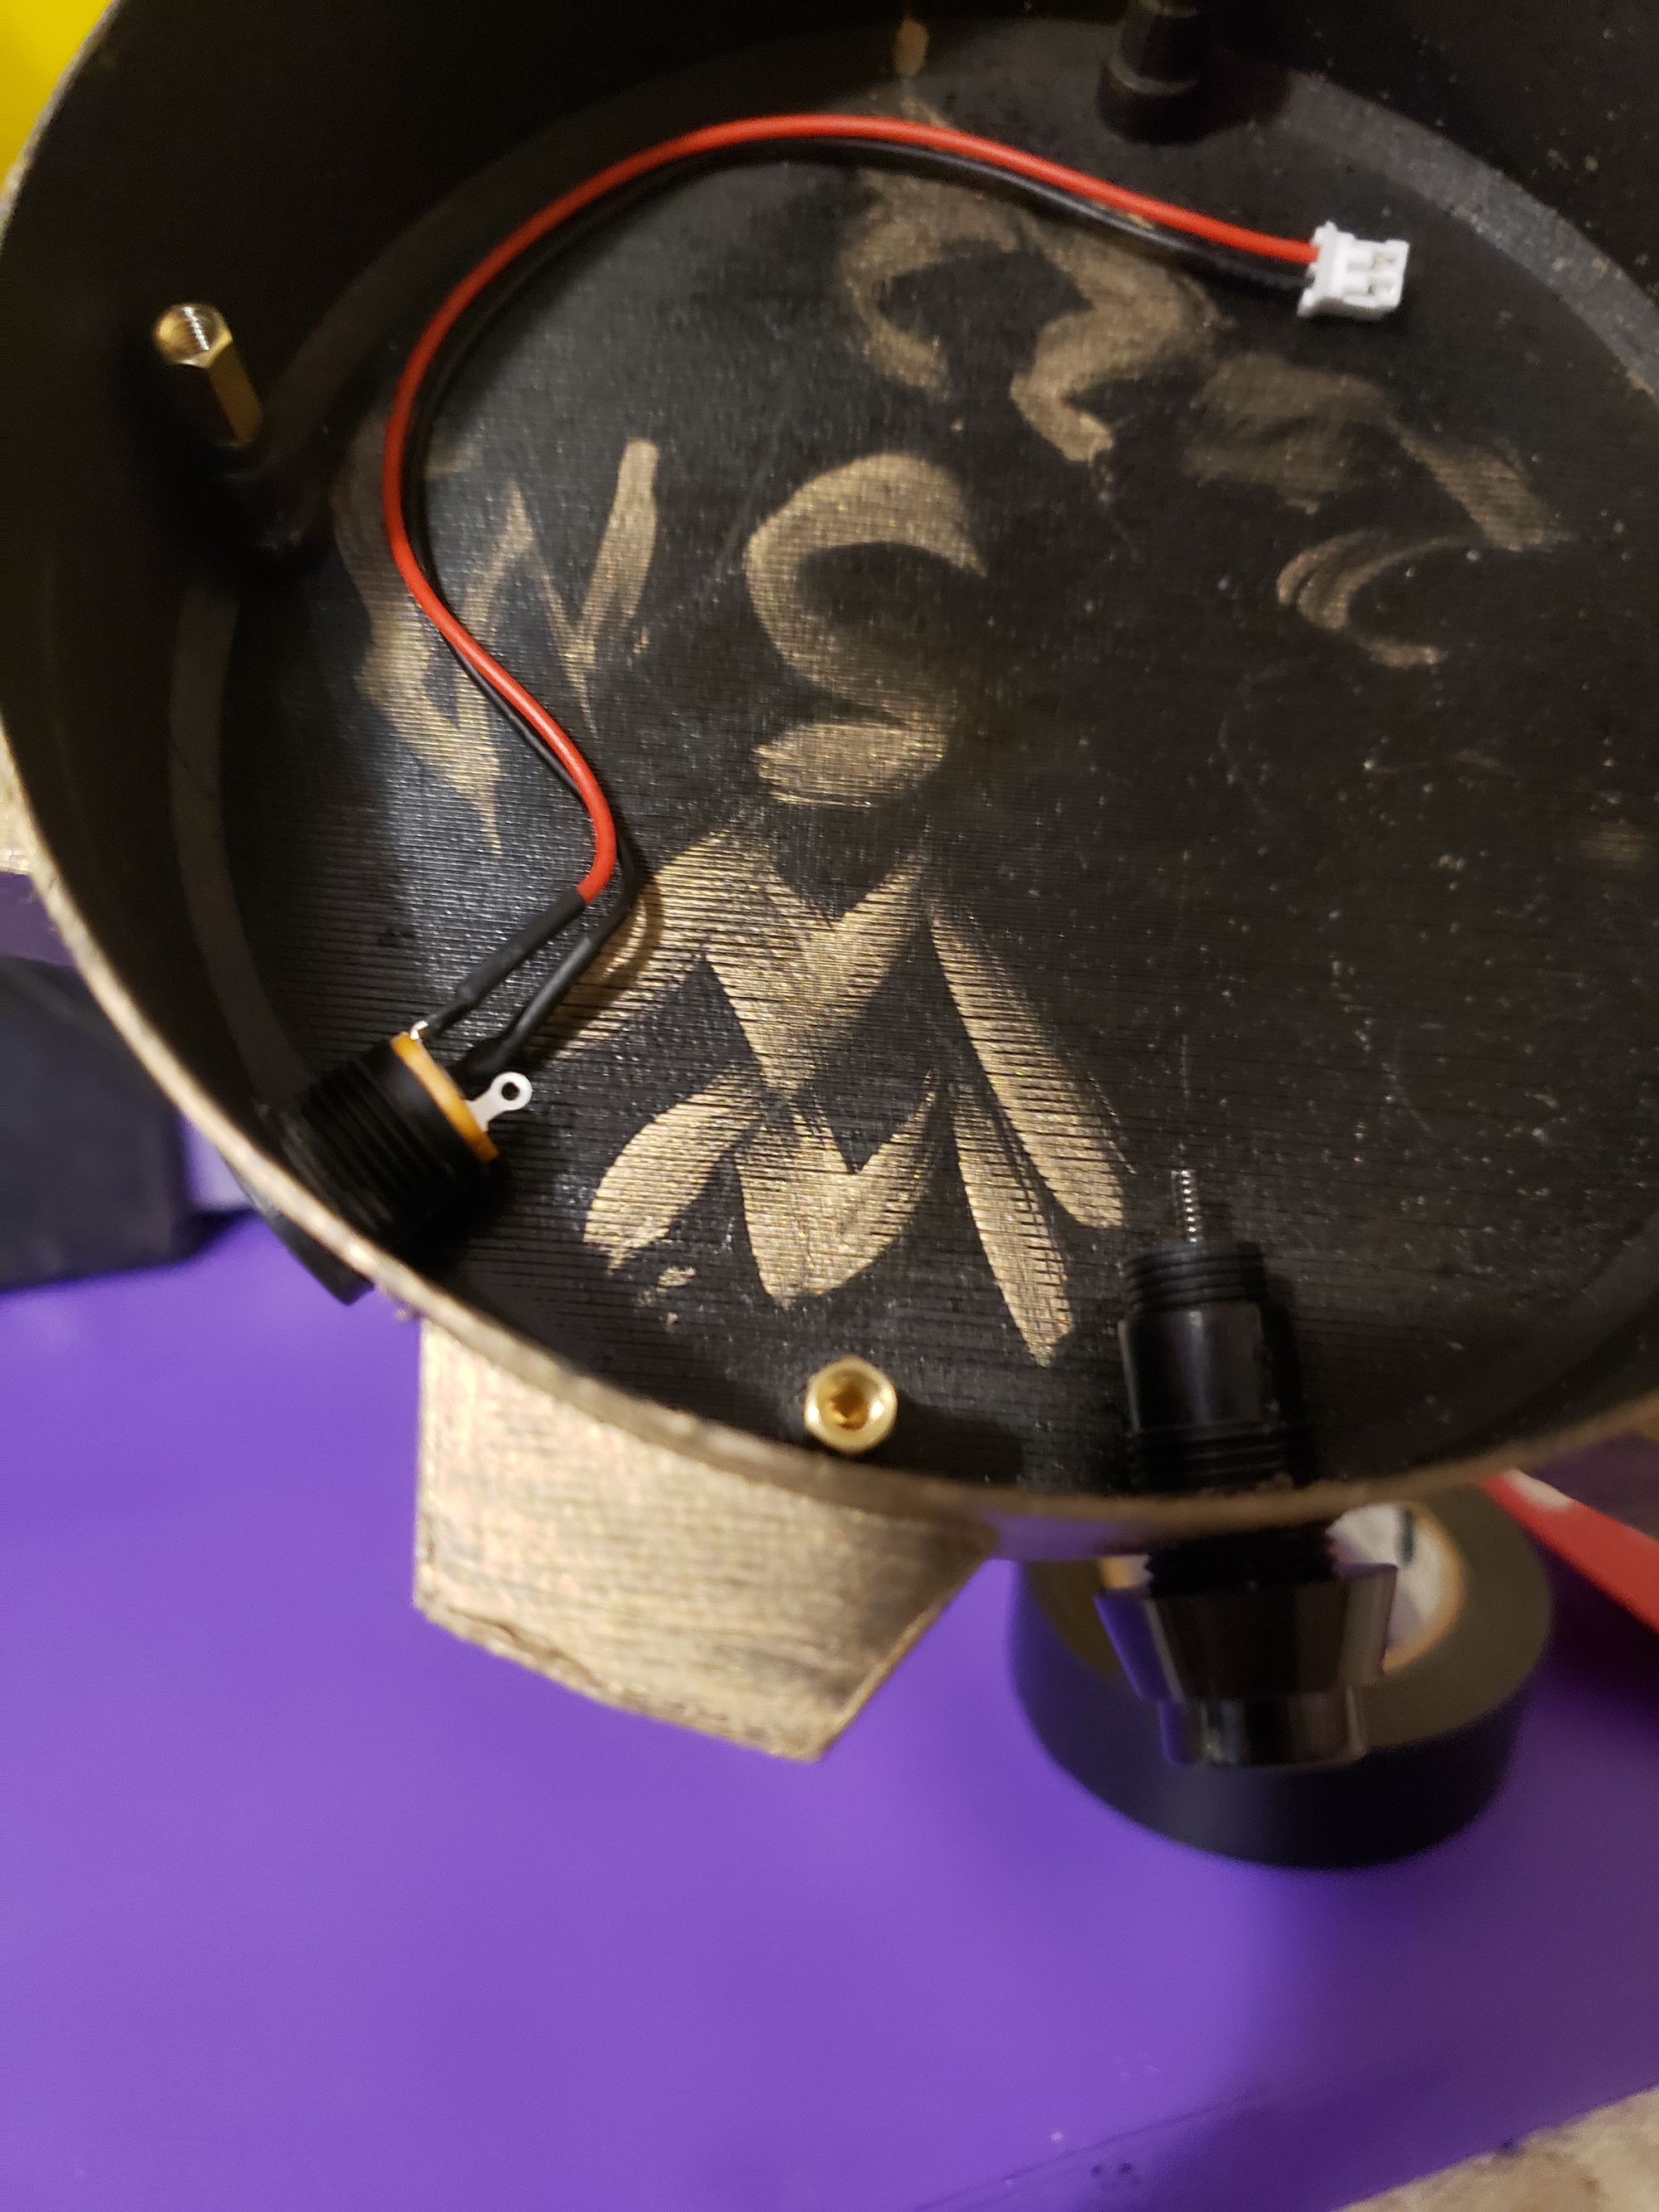
Assembly
Base Assembly
After it was all painted and ready, the base needed to be assembled. I start off by screwing in the standoffs for the screws into the pillars that are in the base, threading right into the plastic instead of using inserts, since they don't really move much. I did this by putting the screw into each one and screwing it down all the way it could, then clamped it and unscrewed the screw, keeping the standoff in place.
Then, as I mentioned before, the holes for the plug and button aren't perfect fits, so I used a tiny file set to make them a tiny bit bigger, testing until each had a good fit. The plug hole was, if anything, too big, but enough that it could be super glued in place. The other one for the button needed quite a bit of filing. I keep the plug glued in, but not the button yet.
Before putting the button in, I need to do some soldering. The plug needs to be connected to the wireless power transmitter, and the magnetic levitation base. Conveniently, there are two 12v pads just for this. The power plug also has it's own connector. I recommend only plugging that in after it's already seated through the hole in the base. The button can be unscrewed later for this.
Next, we need to hide the LED guiding lights on the sides of the magnetic base. Technically, I think these could be snapped off and still work, but for functionality maintenance sake, I just taped over them with electrical tape. I also used electrical tape to hold down the wireless power transmitter on top of the magnetic base. Once this was all done, it was time to assemble the full base.
Starting off, I plugged in the power connector, then unscrewed the button end of the button wire. I then carefully screwed this into the hole but not all the way, about 1 or 2mm out still. There is a spring and small system inside here that could fall out so it's important to do it carefully. Once it was mostly in, I then took the other end I screwed off and put it back on, then screwed it the last 1-2mm to go in and it fully connected.
Then came putting the magnetic base into the plastic base. Aligning it with the screw holes for mounting, I carefully push it down. Then I take the screws I have (M3, I think they were 5mm, not more than 8mm, something like that).
And yes, I did sanity check that the button and power worked prior to screwing it in. You only make that mistake 8 times.
Only two more steps to go. For the base cover, since I was lazy and just made it a flat top with no real mounting strategy, I just placed it inside, friction fit. It wasn't exactly perfect due to minor things, so I used super glue and an accelerator on the edges, pushing it down as I glue around.
Lastly, I put five rubber feet pads on the bottom, so that it won't just slide on a desk or anything!
Cube Assembly
The cube's assembly is a bit trickier and time consuming. To start with the 'easy' part, we will assembly the magnetic floating part with the lights.
LED Floating Magnet
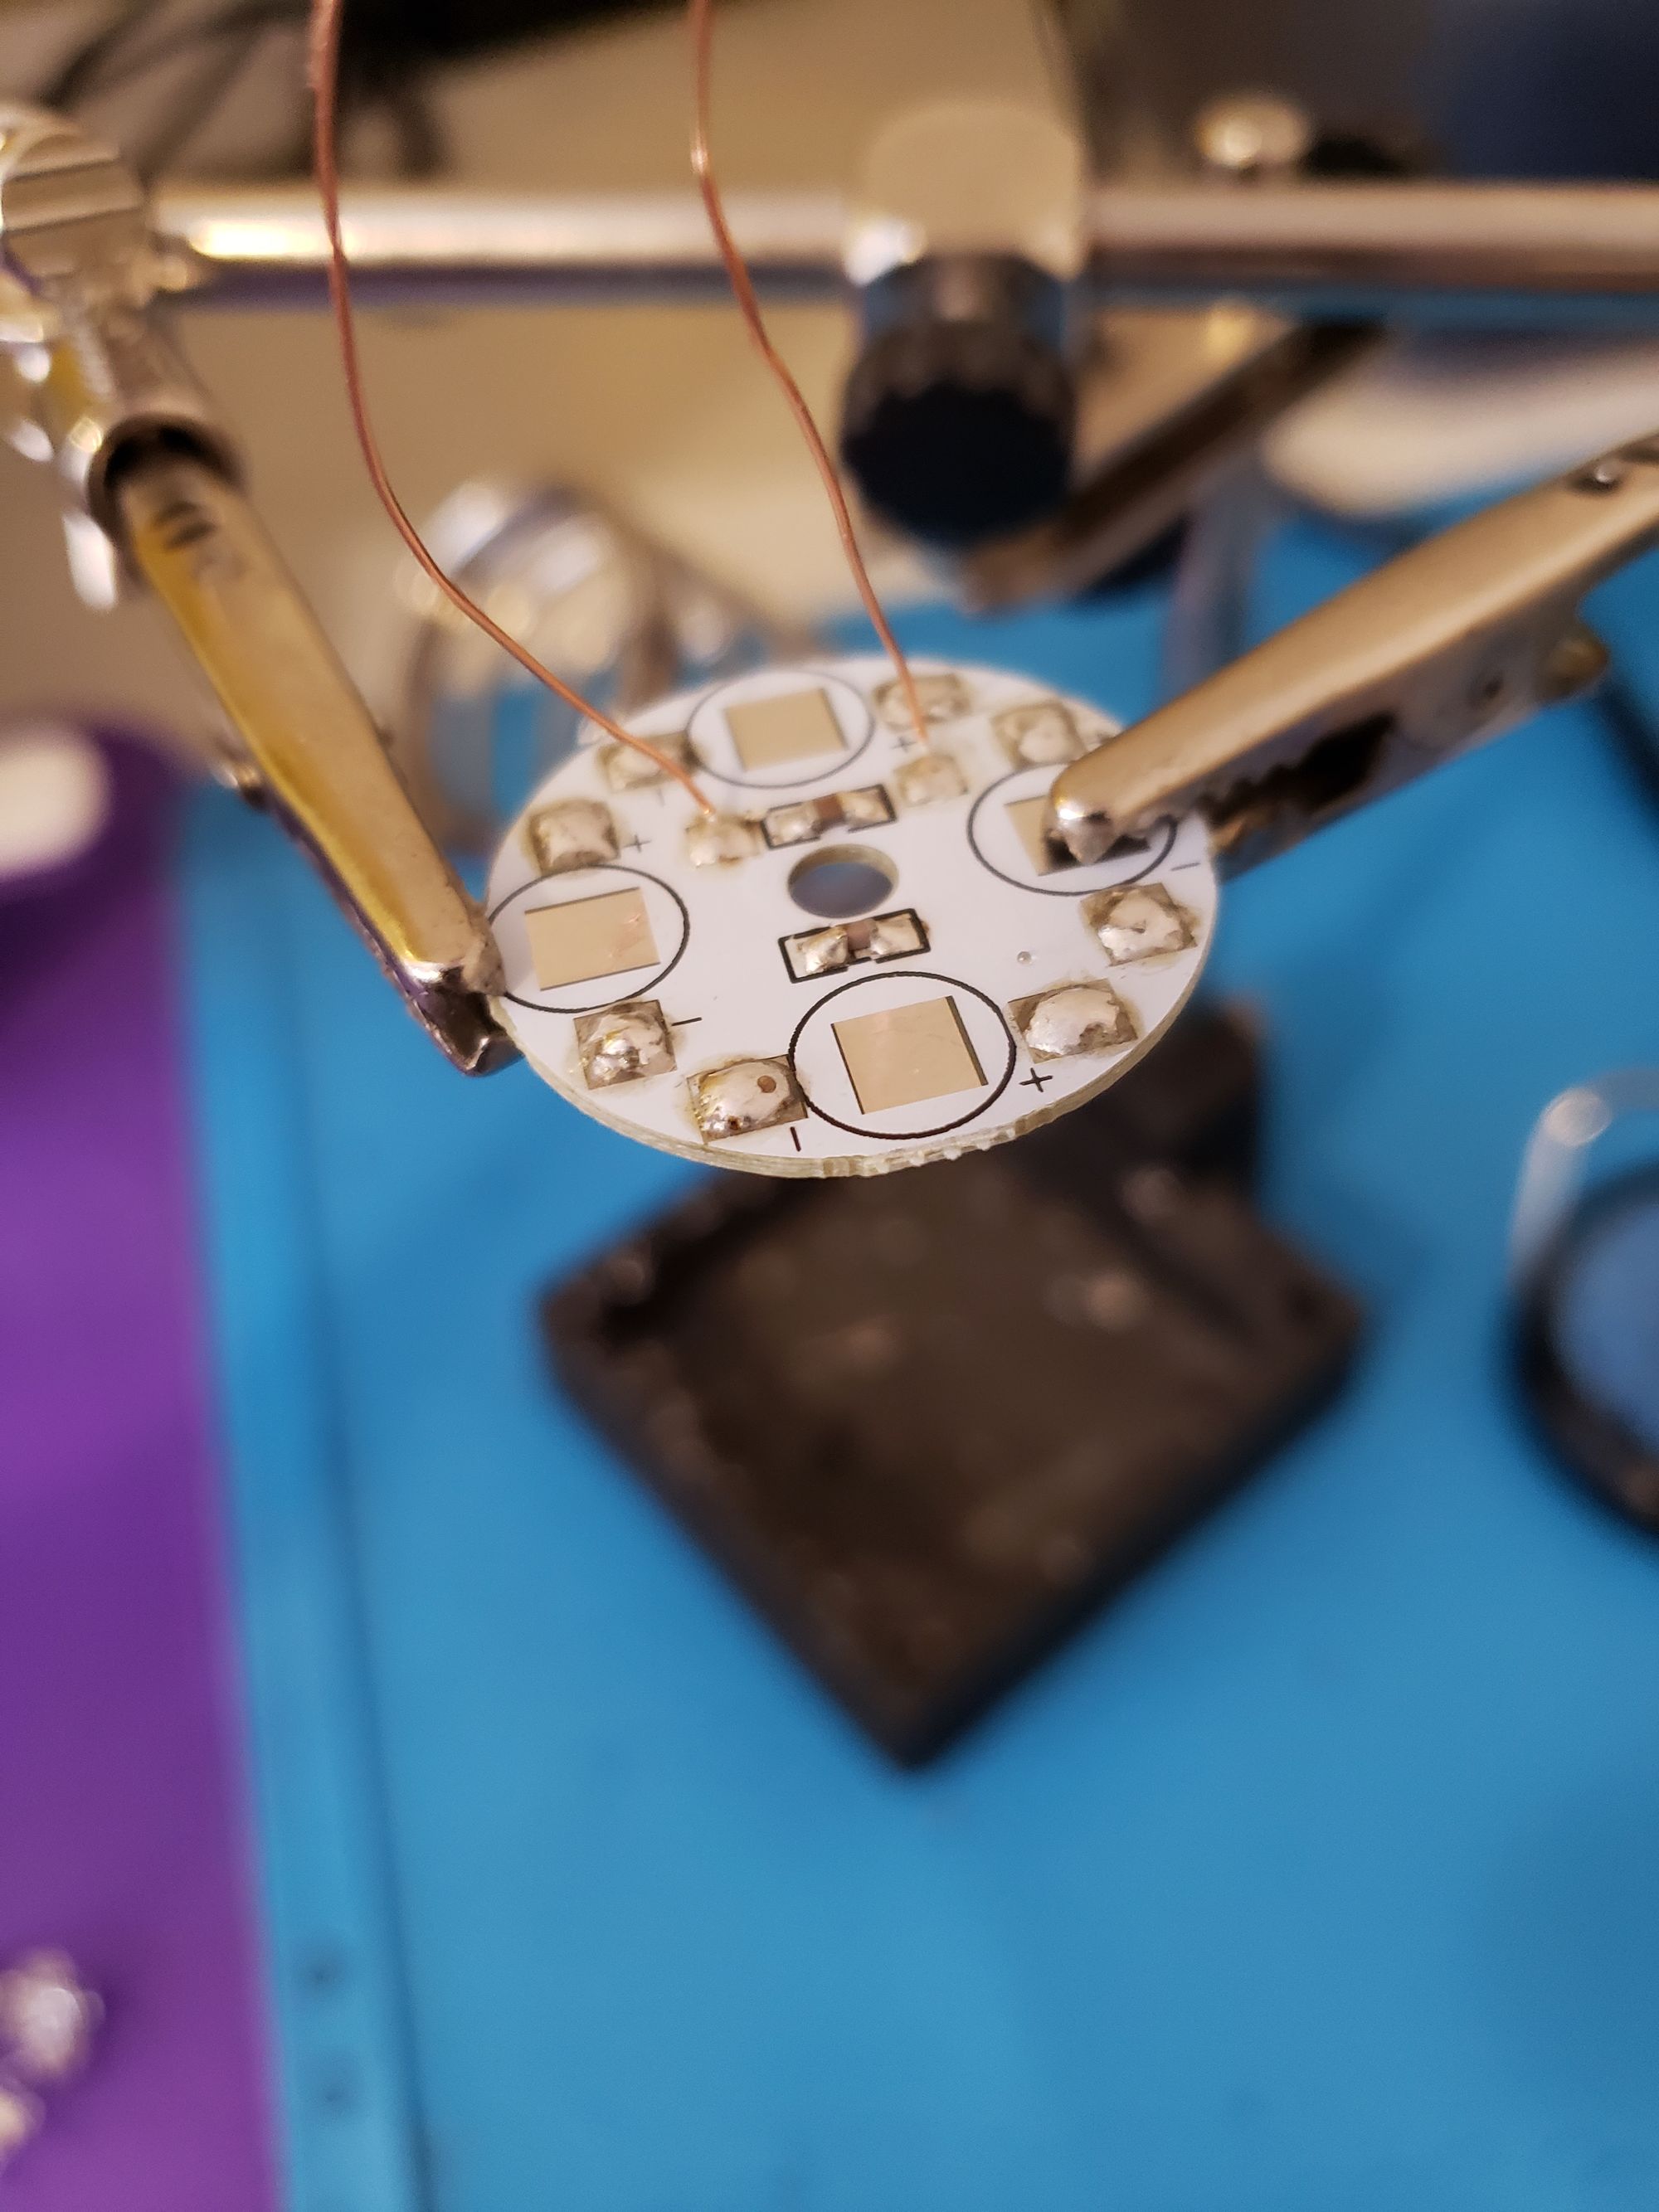
The first step is to remove the white LEDs of the wireless power receiver and swap them for some blue LEDs. Removing them was as simple as heating up the solder and pulling them off with tweezers, but also out of laziness I clipped some off then removed the remainder with just the soldering iron. The blue LEDs had four pins, two sets for each positive and negative. I just snipped off the extra of each and kept two diagonal from each other and soldered them on accordingly.
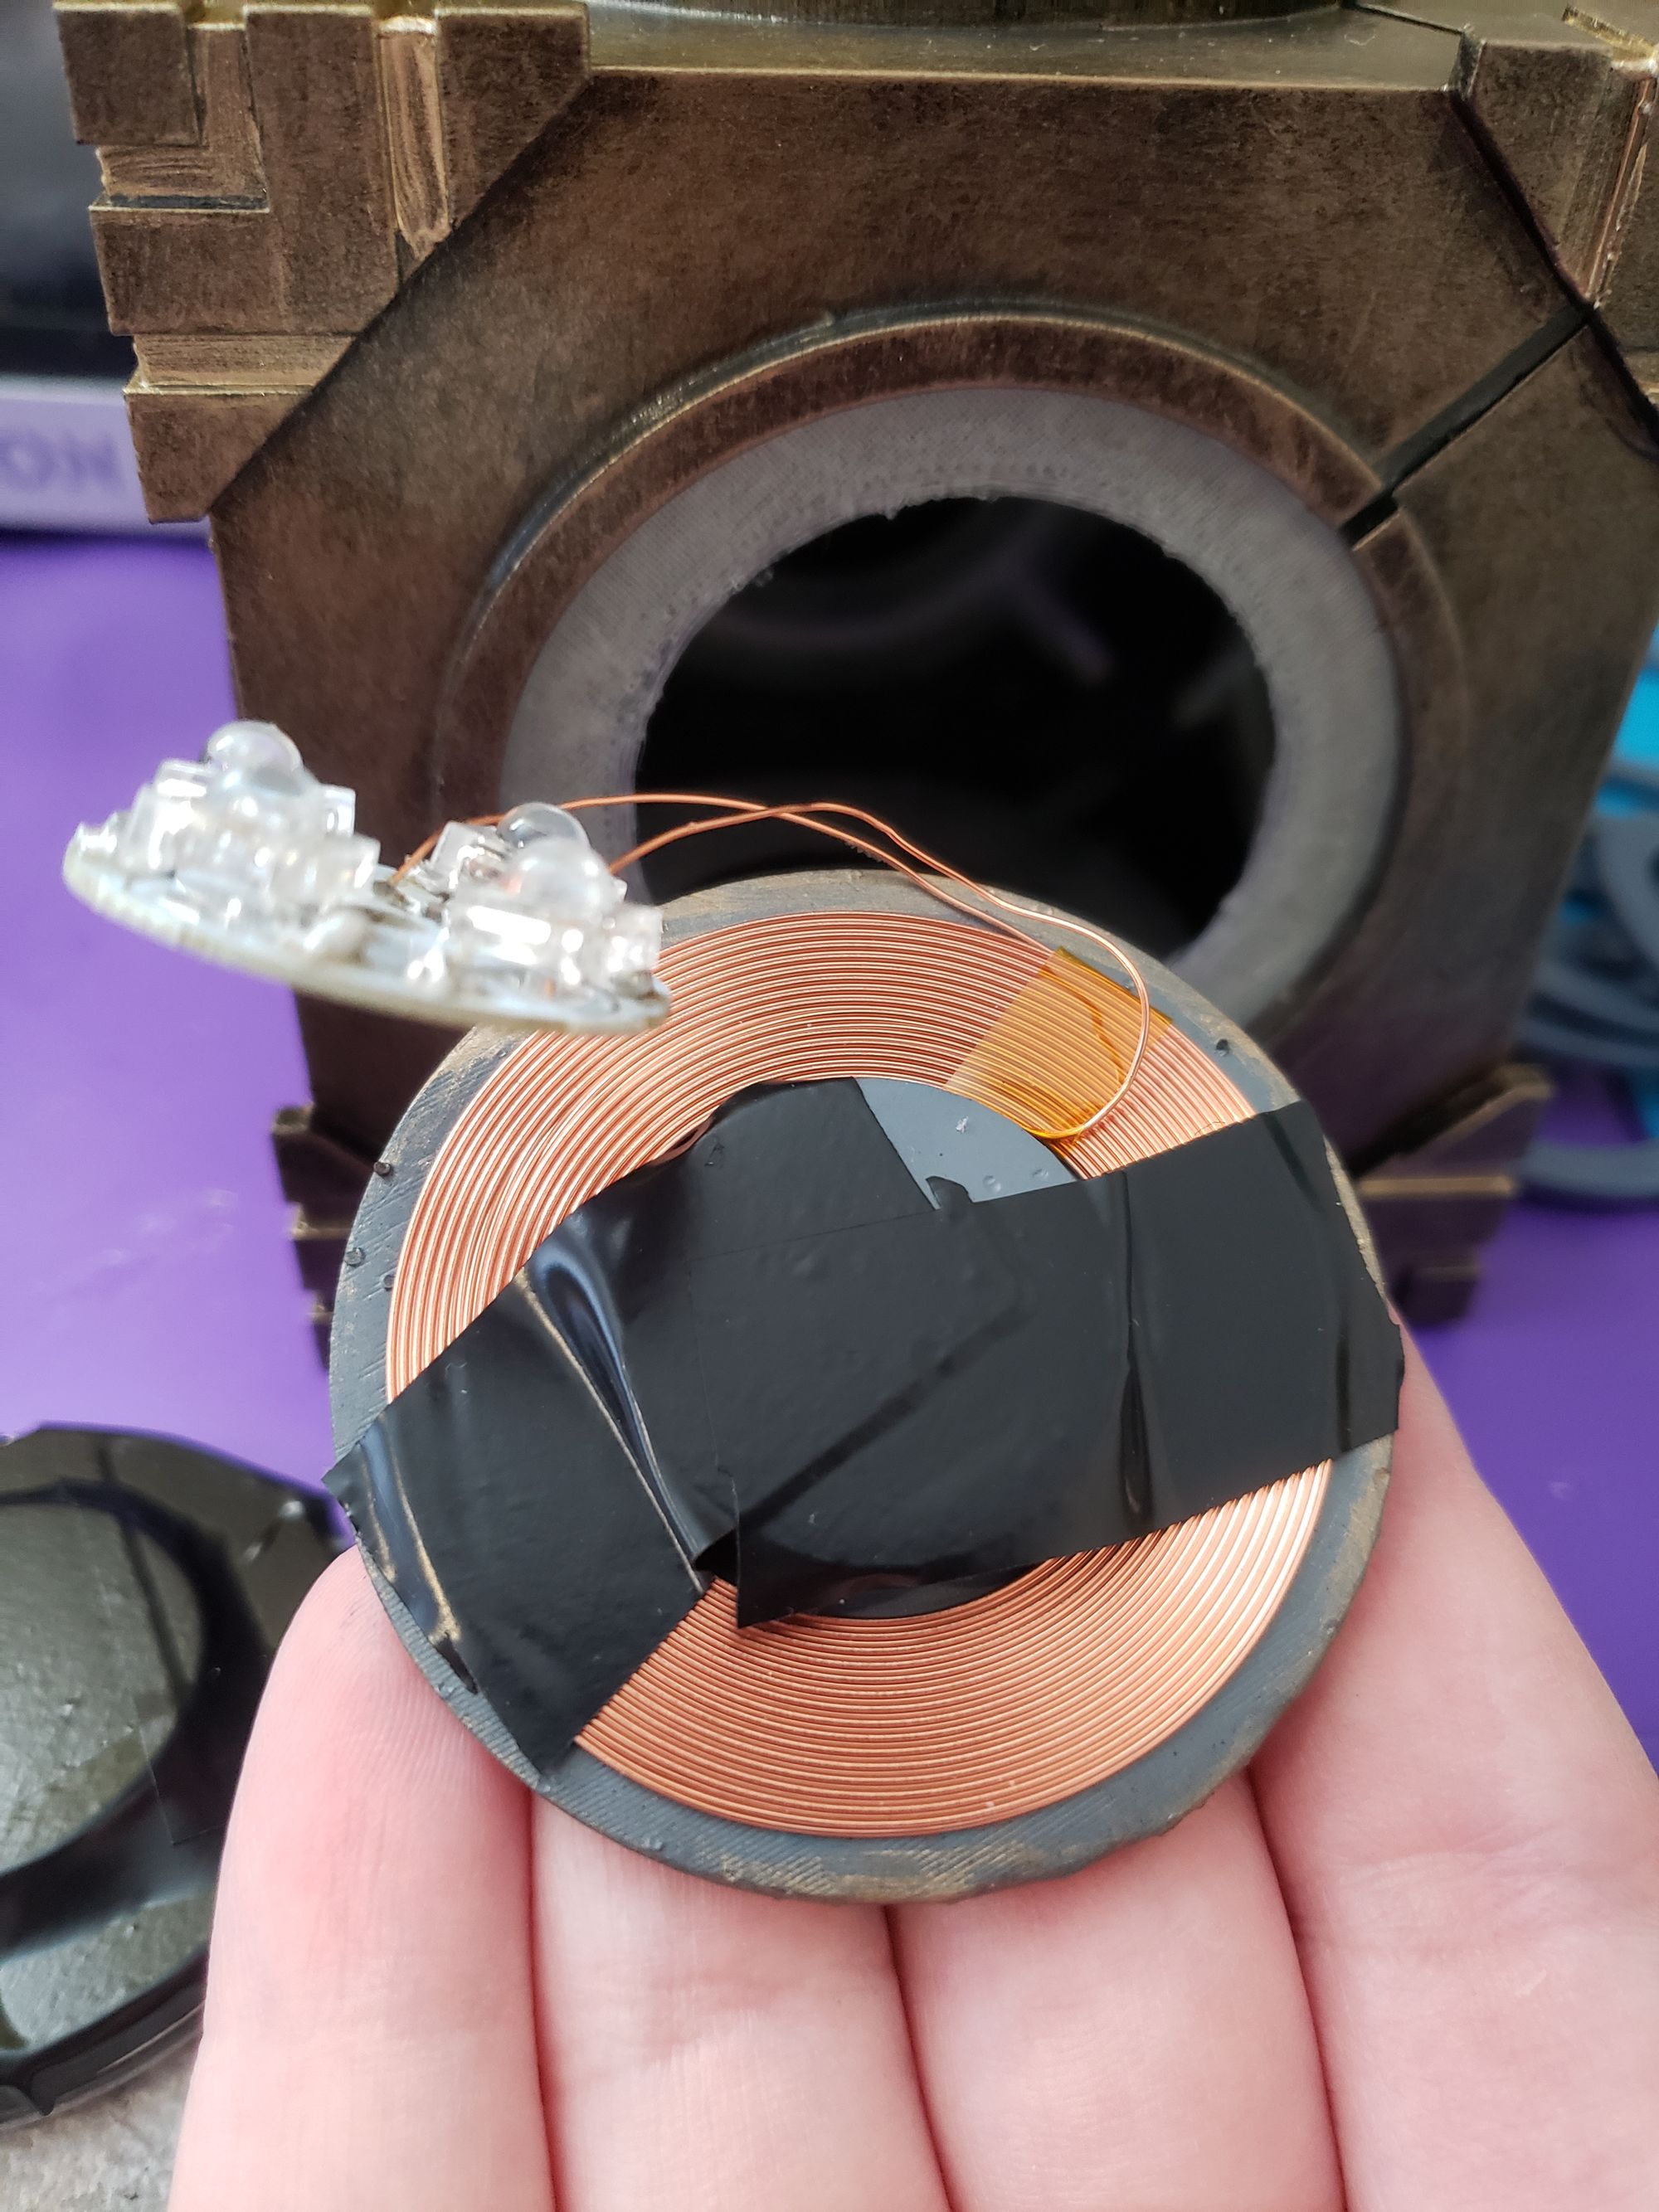
Next, I used a little bit of electrical tape to place the copper coil down on the back of the small medallion piece with the circular bump. I try to get it perfectly around the middle. The bump is smaller than the hole in the coil to allow for some wiggle room.
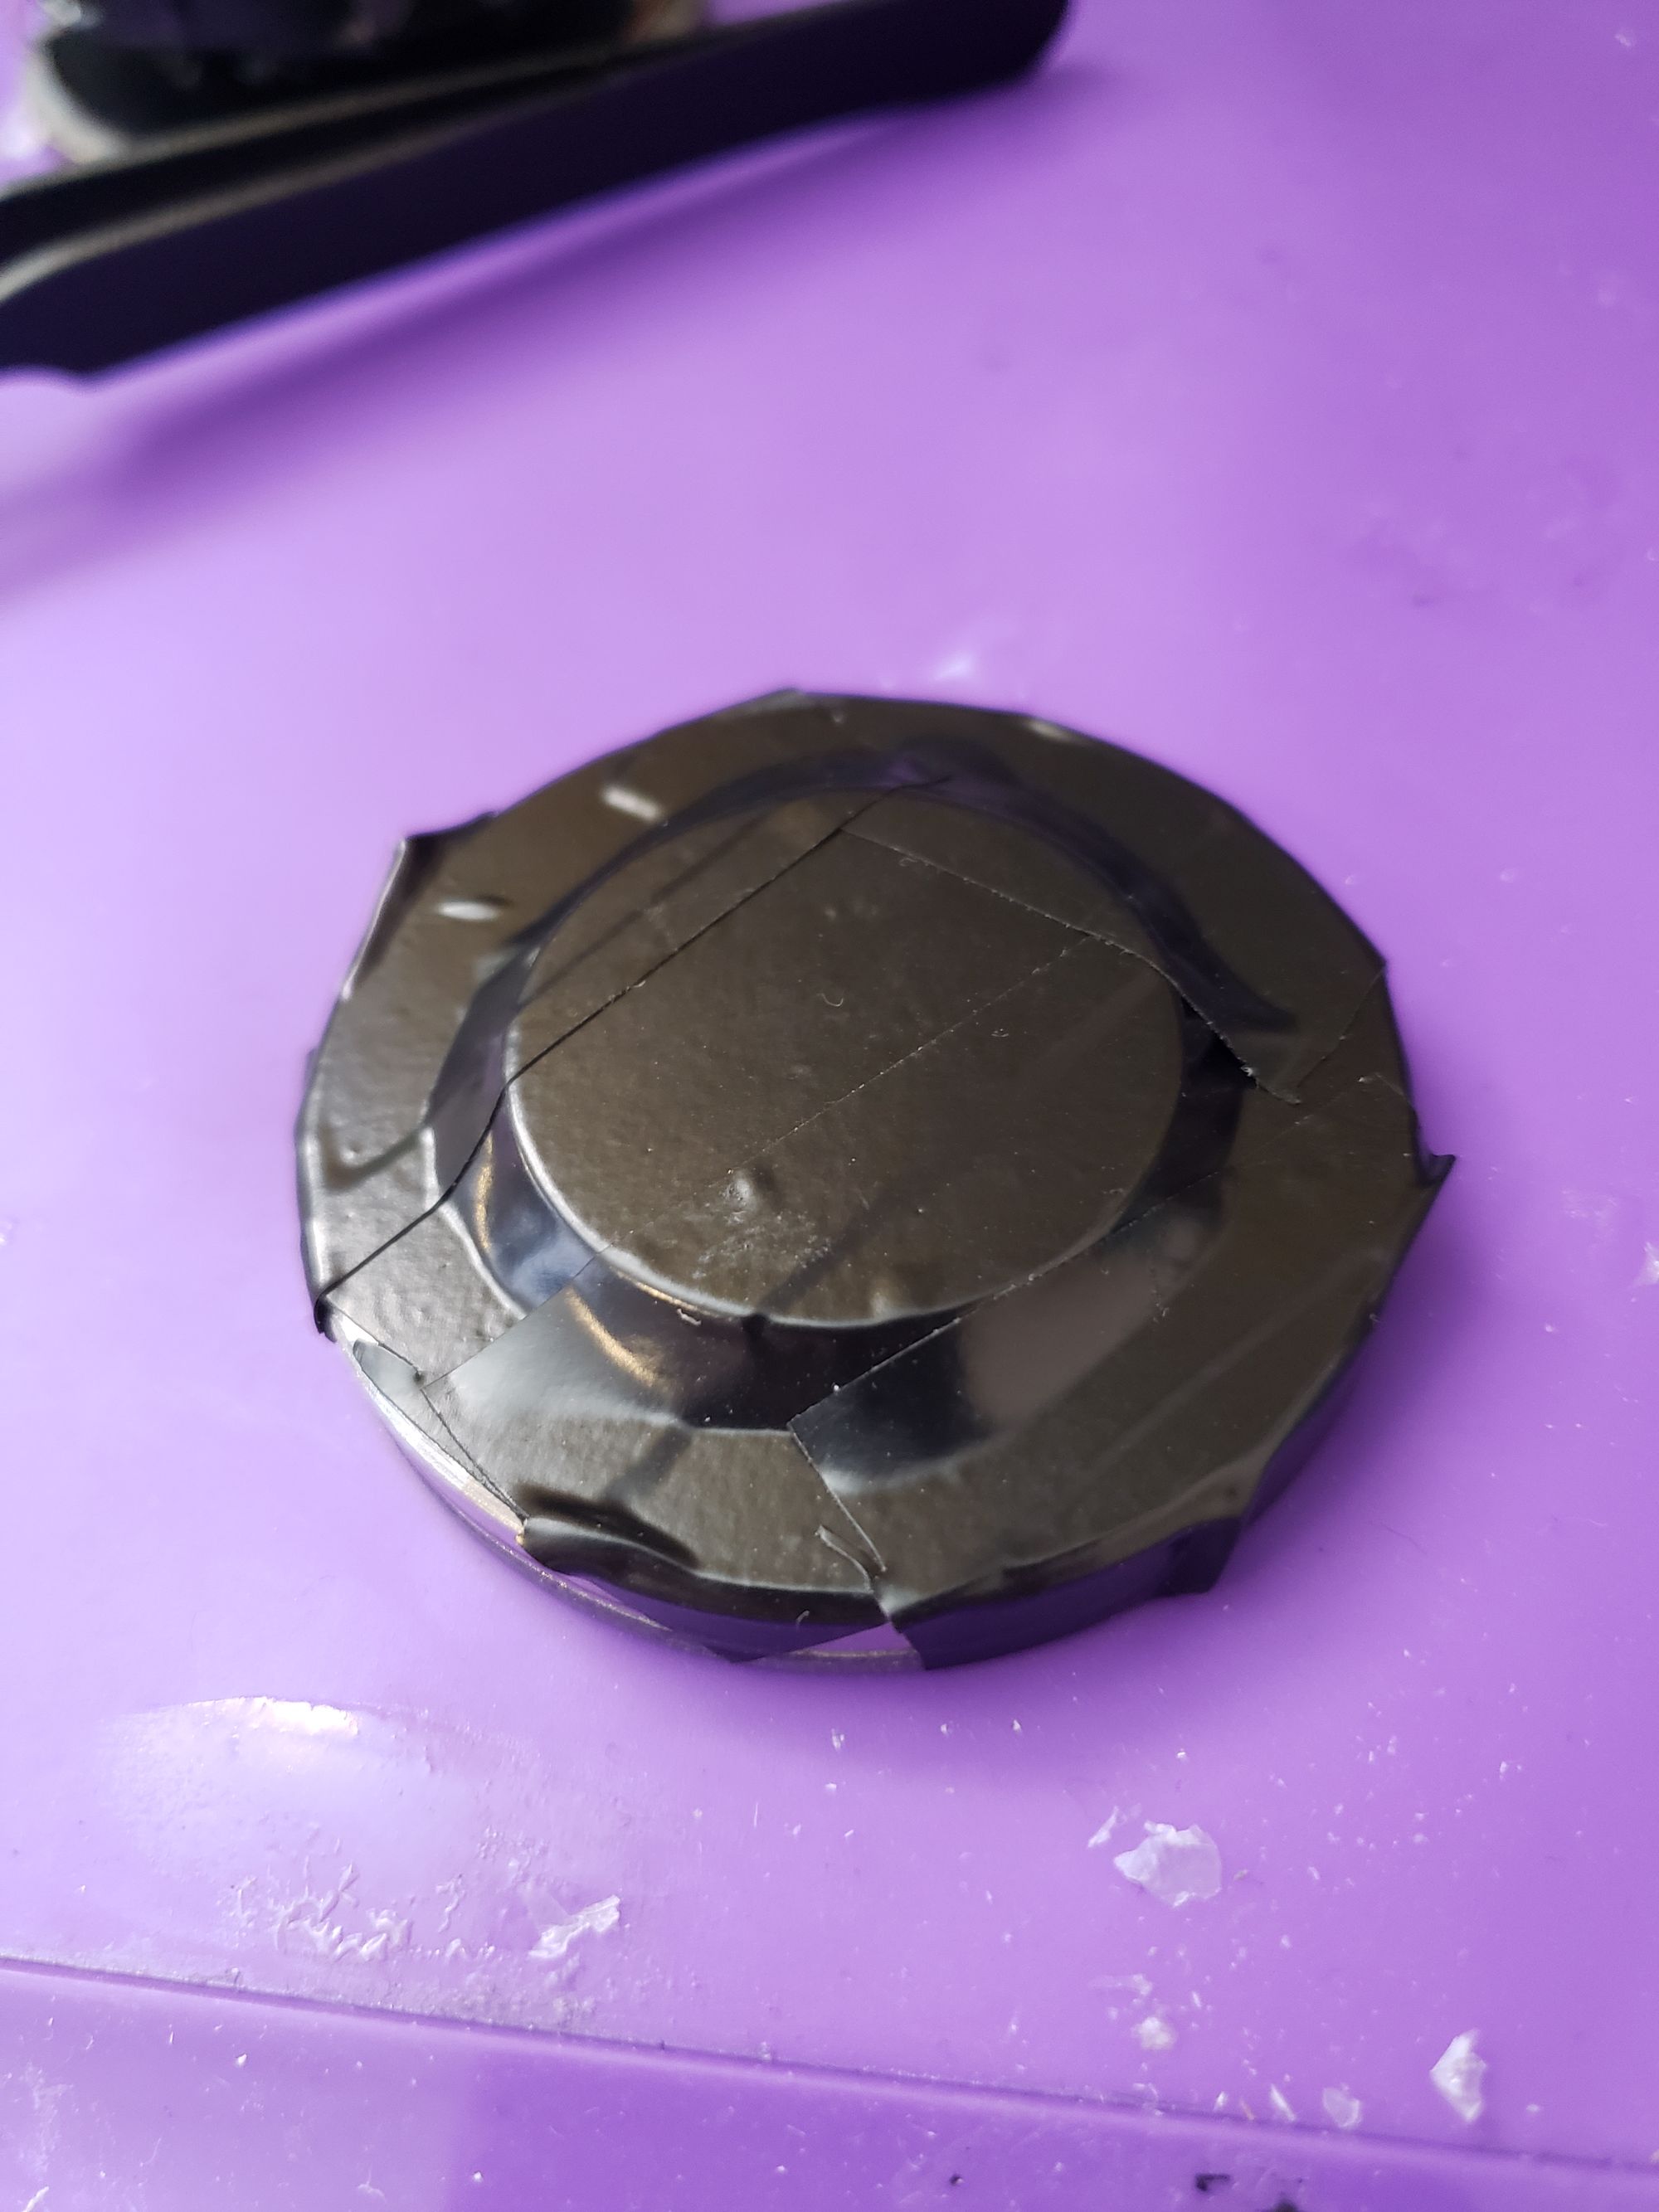
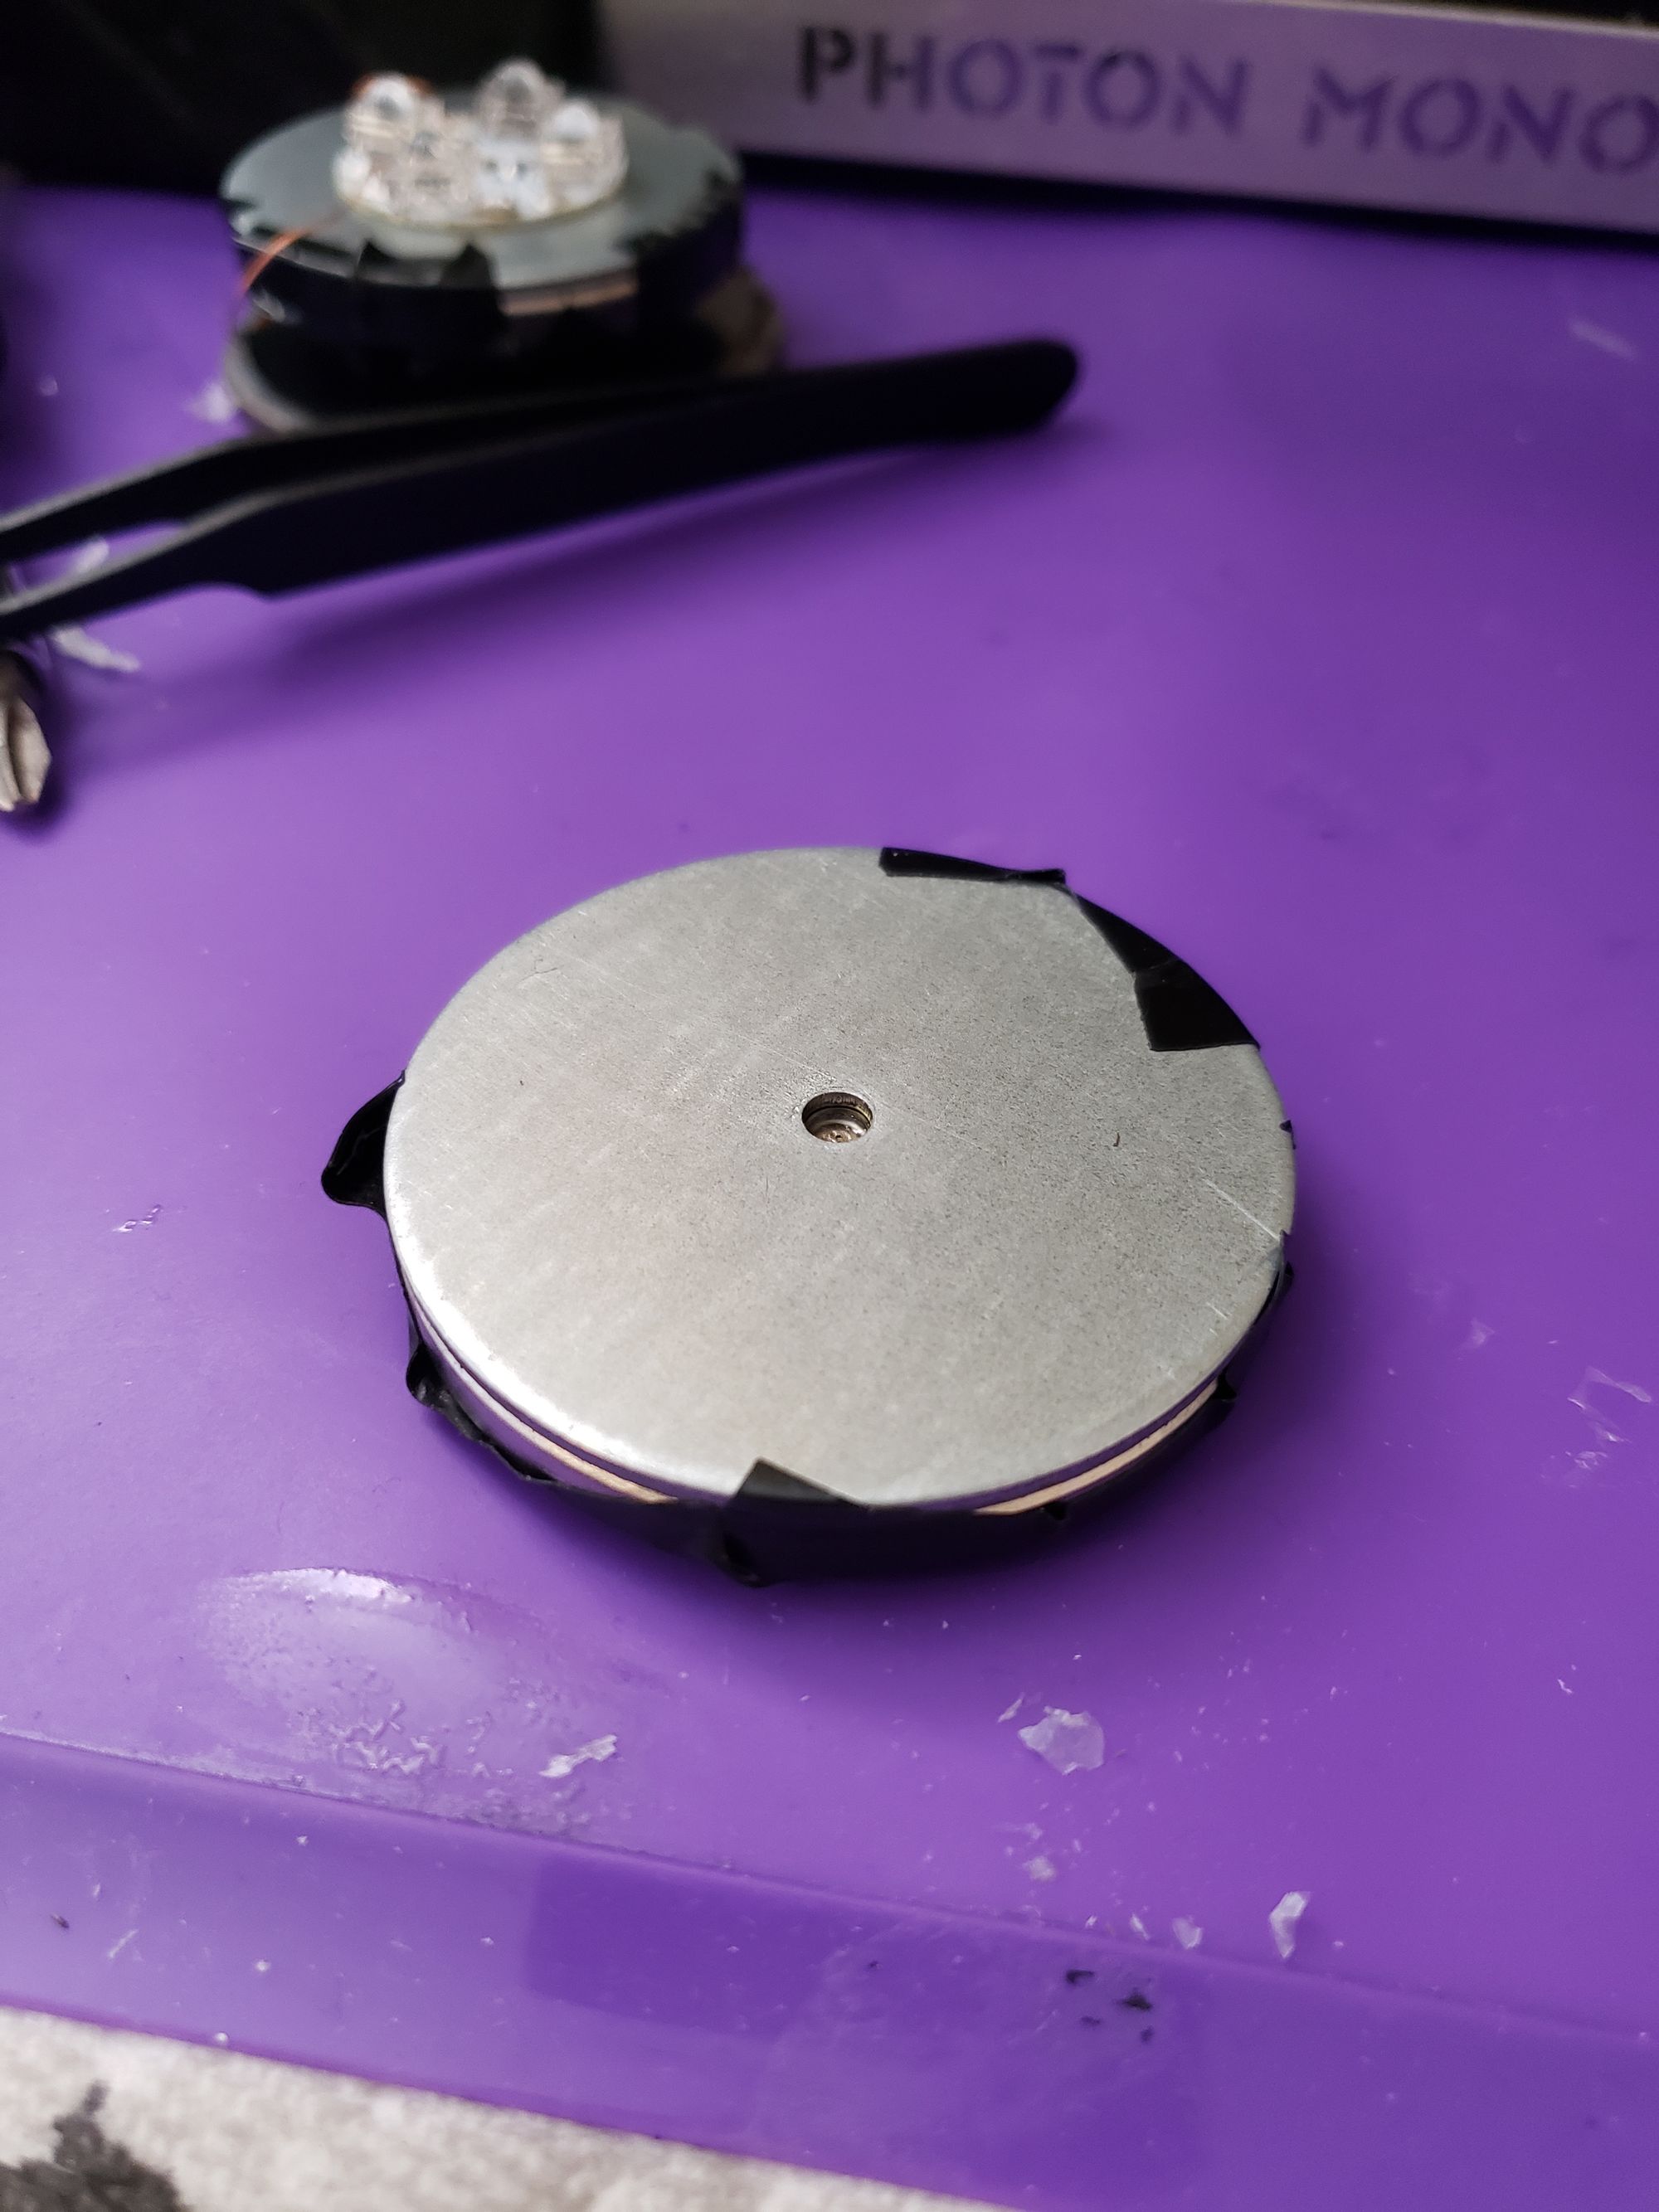
Once this is done, I then wrap the entire bottom of the magnet in electrical tape. I do this as it seems to help block the magnet from interfering with the wireless power coil. It was either this, or more distance and material in between. It isn't perfect but it helps enough to get it to light up perfectly while floating at it's natural height. The magnet with the electrical tape part is then super glued to the medallion bump as close to the centre evenly as possible.
In some of them, I also had a small 3d printed spacer included to assist in blocking some of the magnet's effects on the wireless power field, but it wasn't really necessary.
Lastly, I push over the LED panel of the receiver and with a dab of glue, centre it on the magnet. Then I glue on the diffuser dome over this.

Cube Sides
Now came the tedious part that would often get redone a few times.
Unfortunately for this section, I don't have detailed photos of the process.
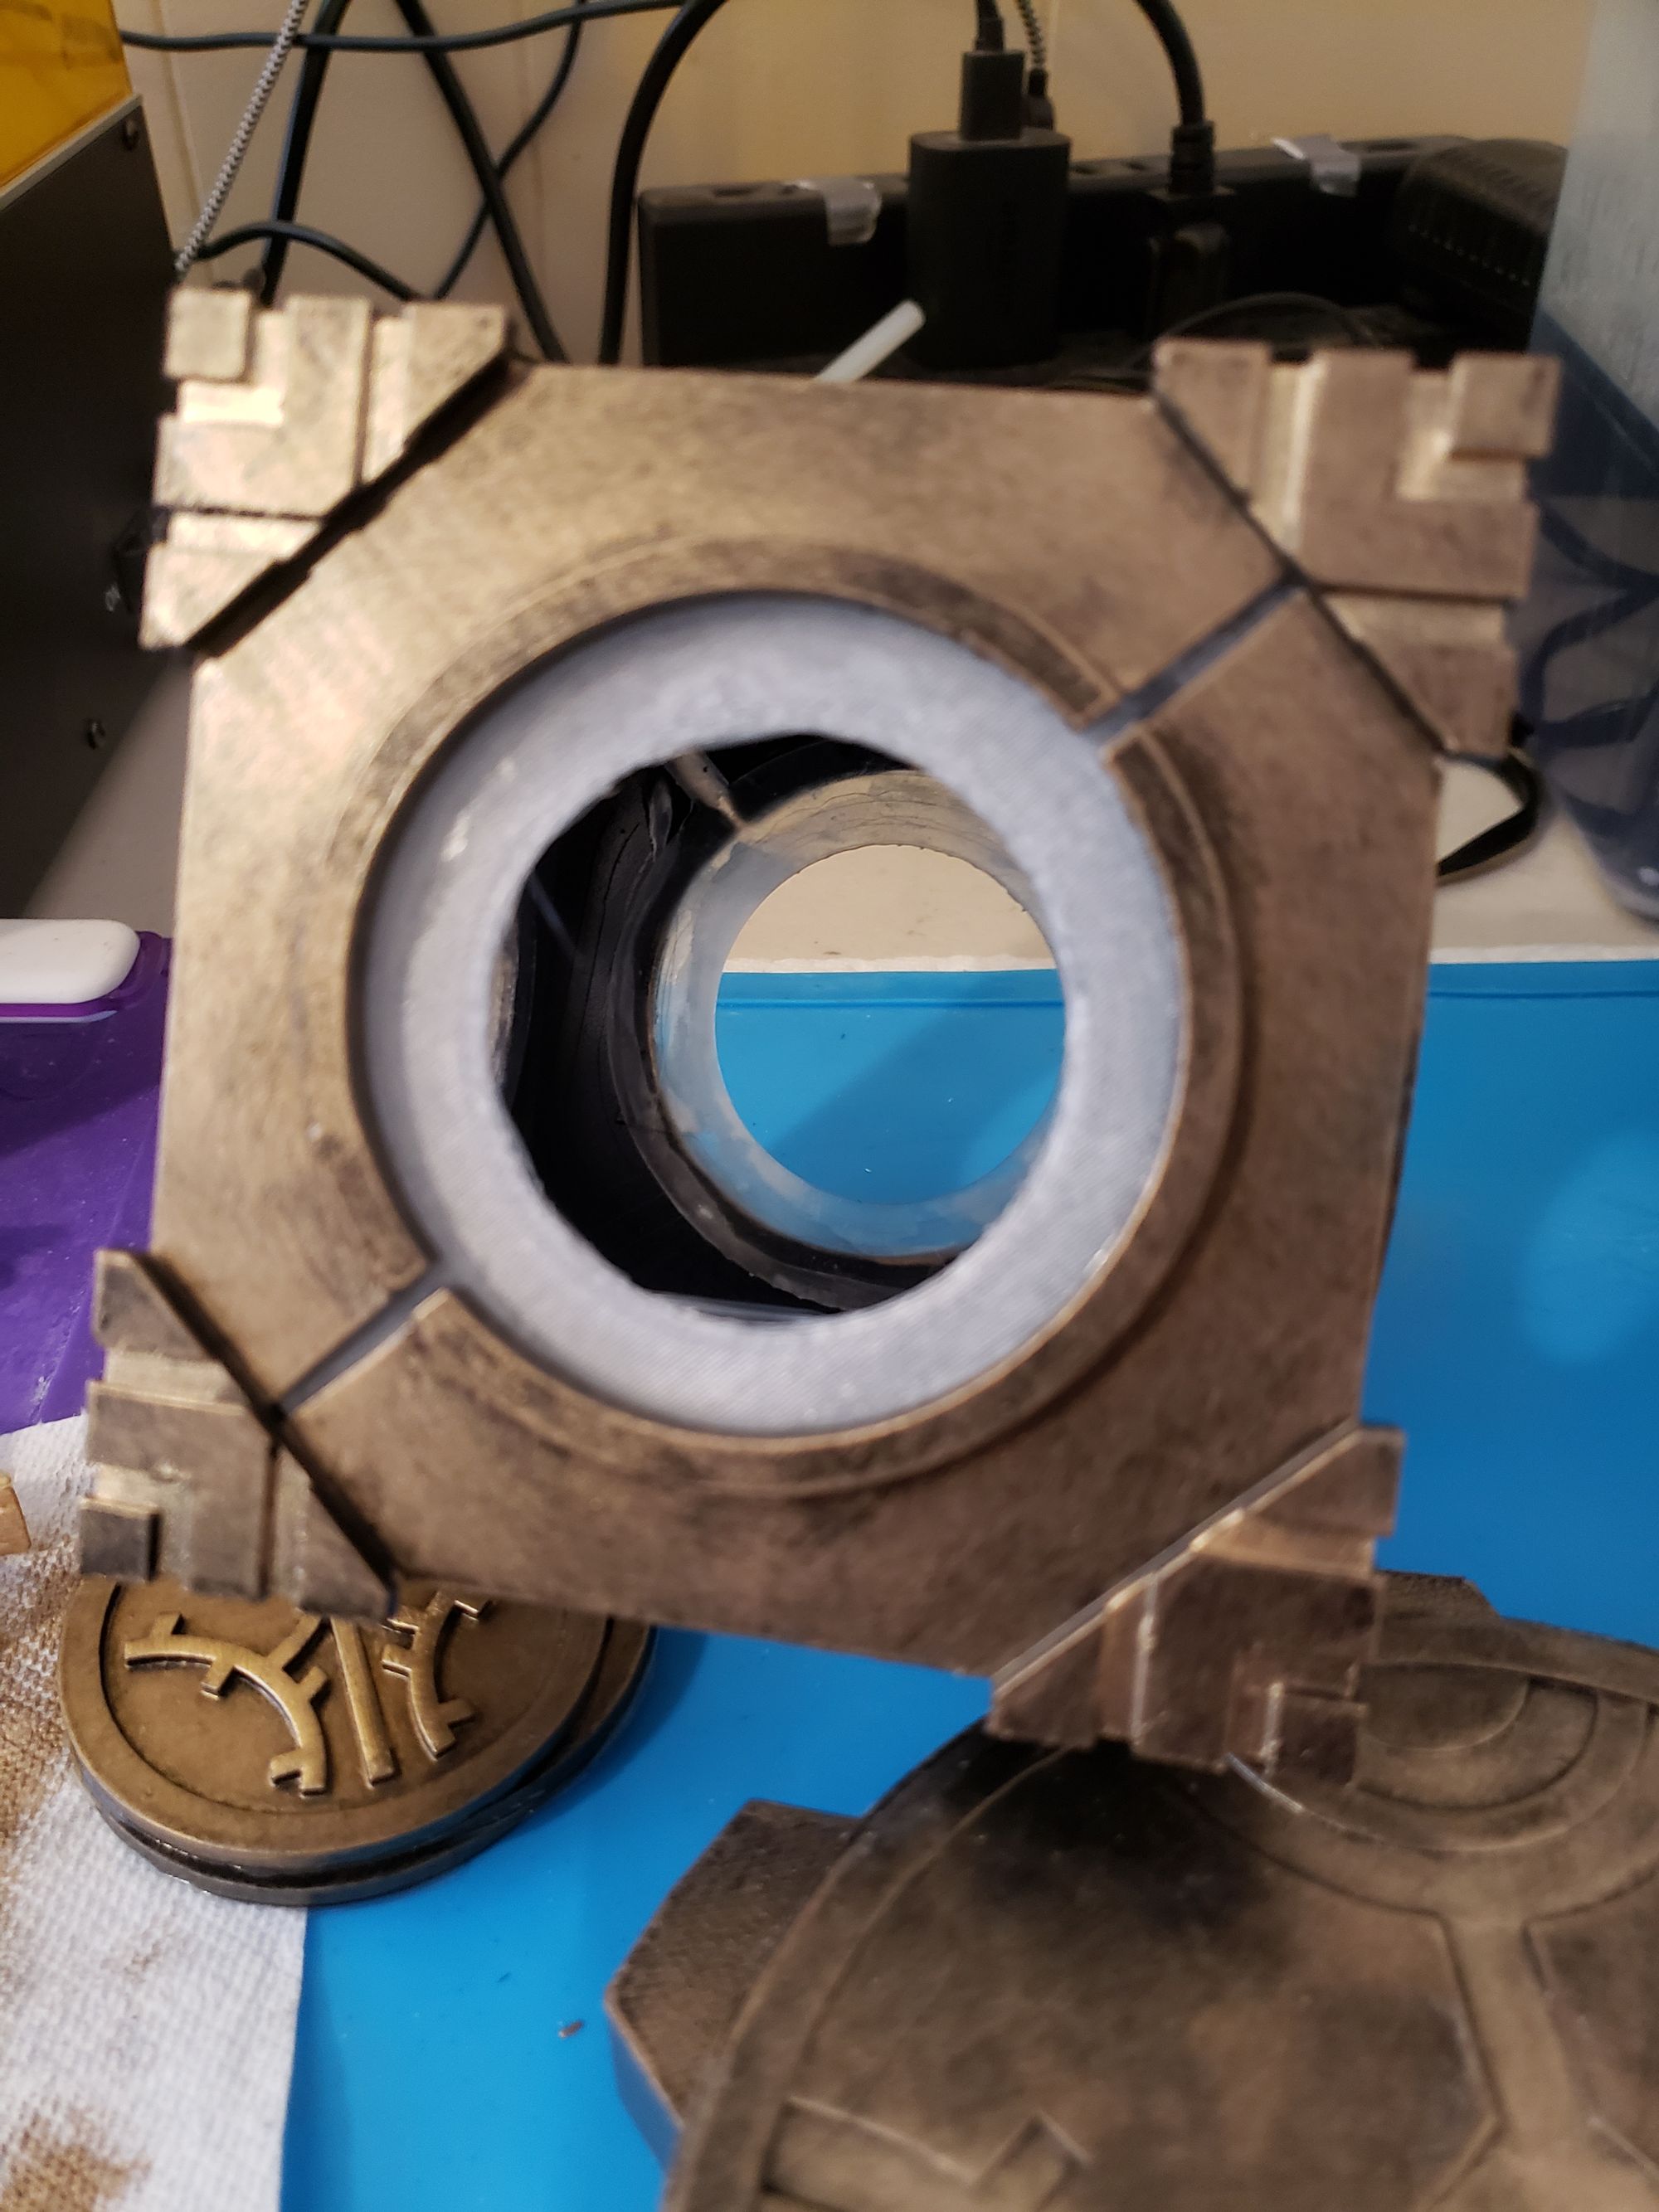
Each of the transparent pieces needs to be super glued inside the cube, lining up with the sides. Before I started using an accelerator with my super glue, this would take several hours per side, six sides per cube. After, I could do each of the sides in about 30 minutes. I used clothespins to help hold it down flat while I glued one part of it. I found the easiest method was to go around the perimeter inside the cube side with glue, fumble in the transparent part, then align it perfectly before curing the glue.
Video showing it light up without the medallions in place.
Once all six sides were done, then I did the hardest part first - gluing in the magnet medallion. I chose a side to be the "bottom" and aligned the direction of the emblem with my reference. then I pushed it inside the transparent part.
Note: The transparent part for the bottom needs to be trimmed. The hole is not big enough for the magnet. It must be trimmed to be big enough to push it through, but small enough to not let the medallion part through.
Once it was pushed in and aligned, I used a different type of super glue without an accelerator here. This is because the second type I used is much easier to pry apart without damaging anything. Why would I want to do this? Because aligning the magnet part to be both in the centre physically and by weight is a #@!%.
Once happy, I then did the other sides. One by one, placing, aligning to my reference, and super gluing. I do prefer to use the non-accelerant compatible super glue for these parts in case I need to take them off, but realistically I only need to do it to one or two of them to troubleshoot if need be. Without the accelerated super gluing, this would take hours per side and using spacers to align it. Now the remaining five sides take only 10 minutes.
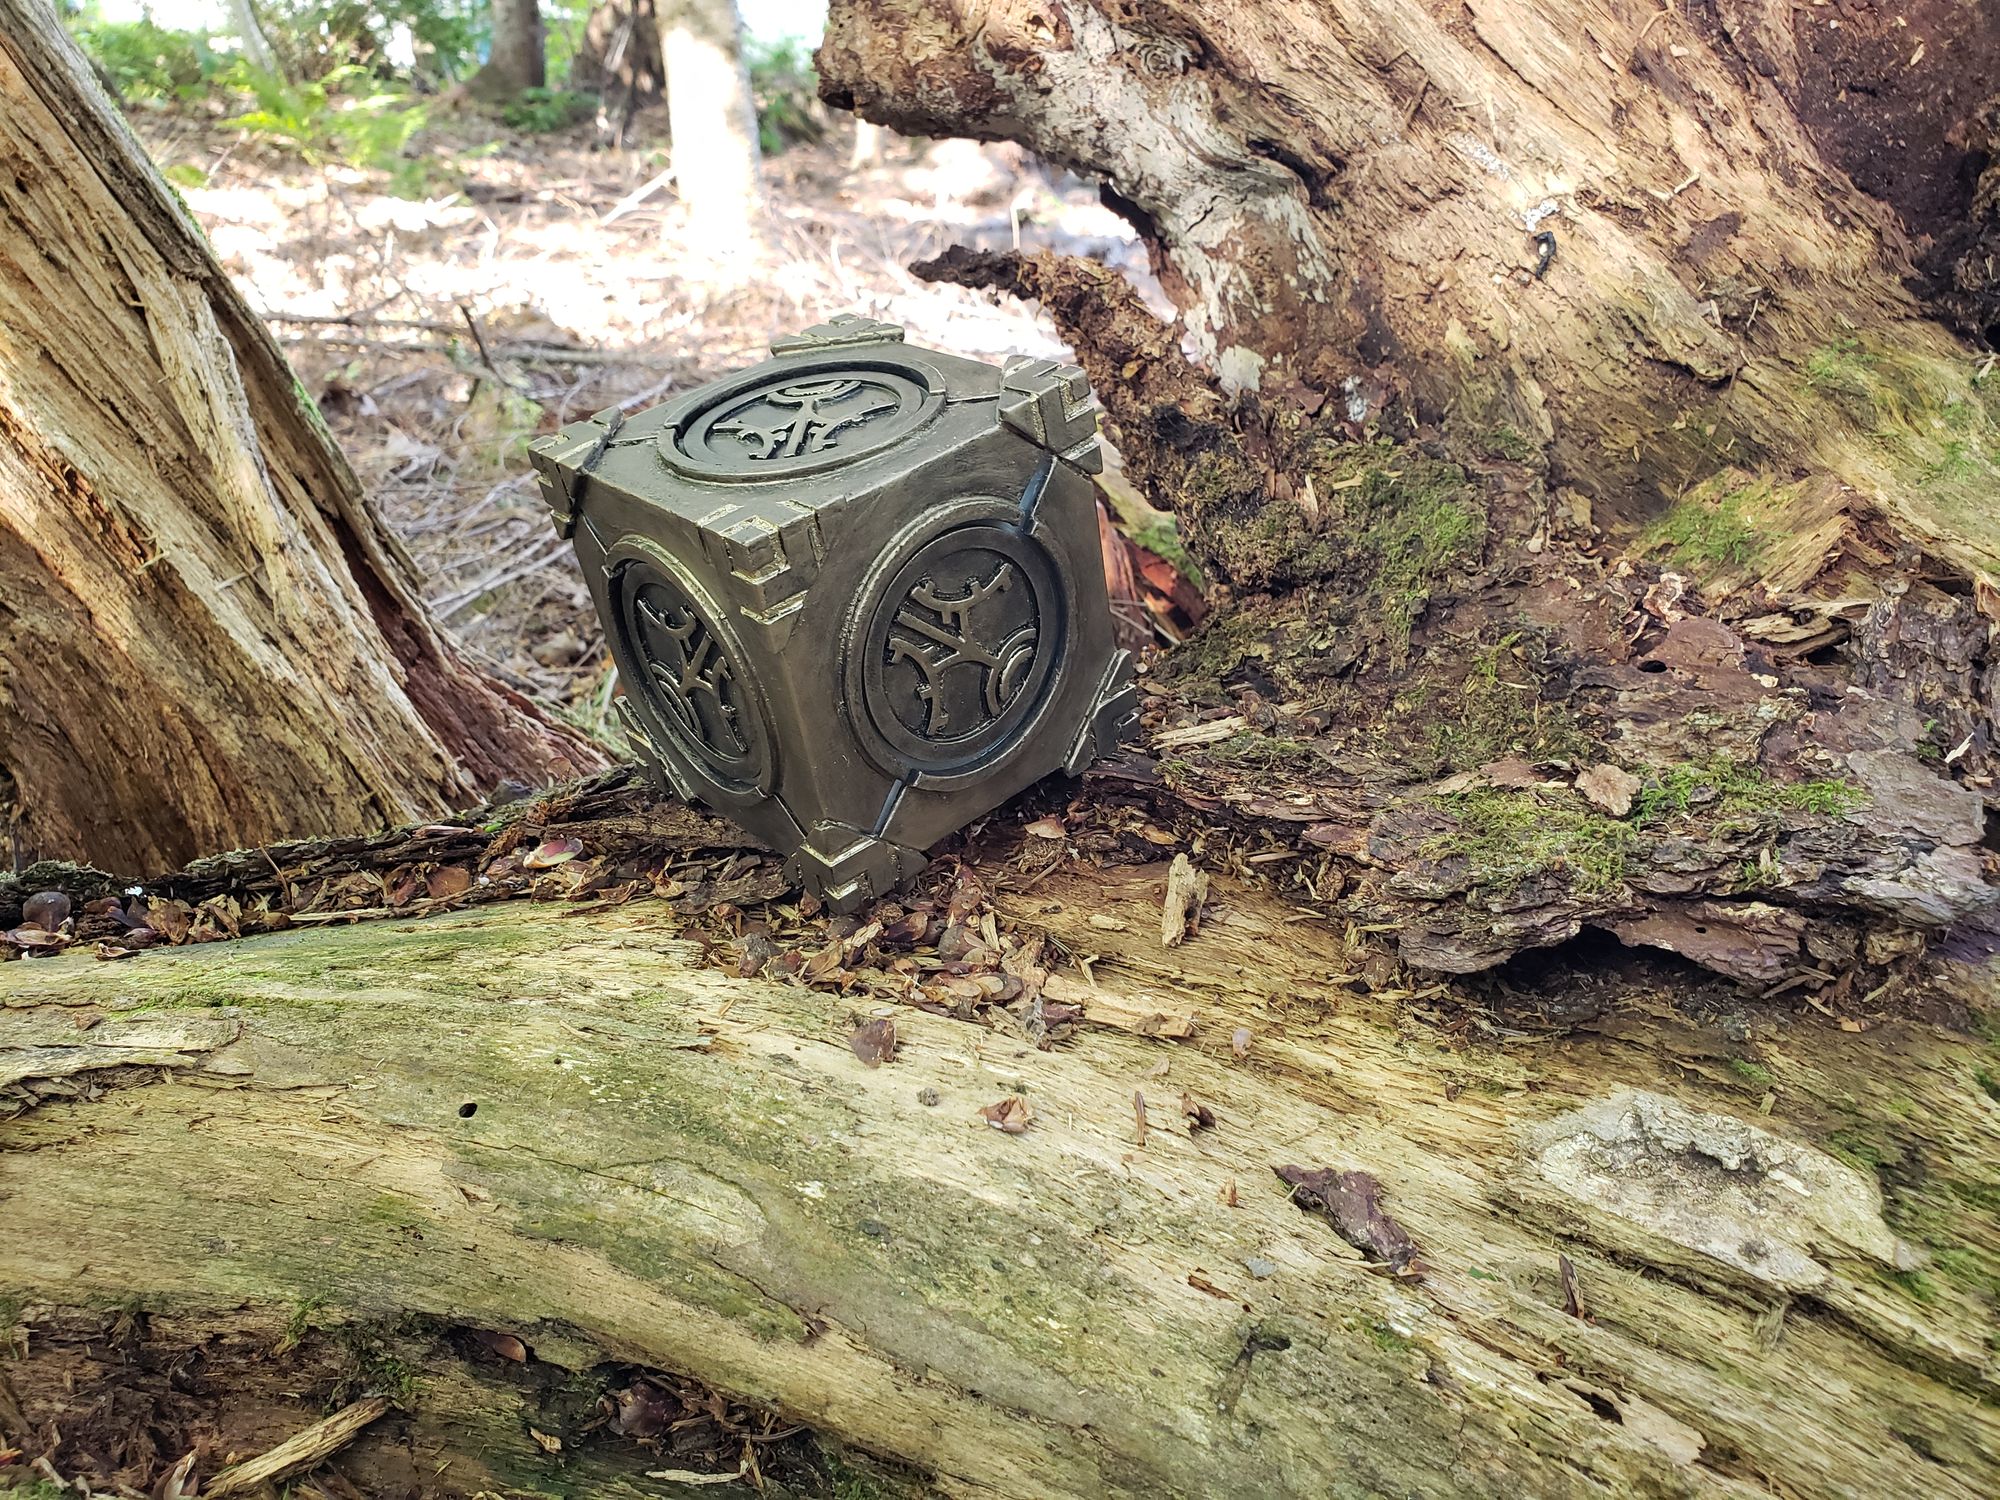
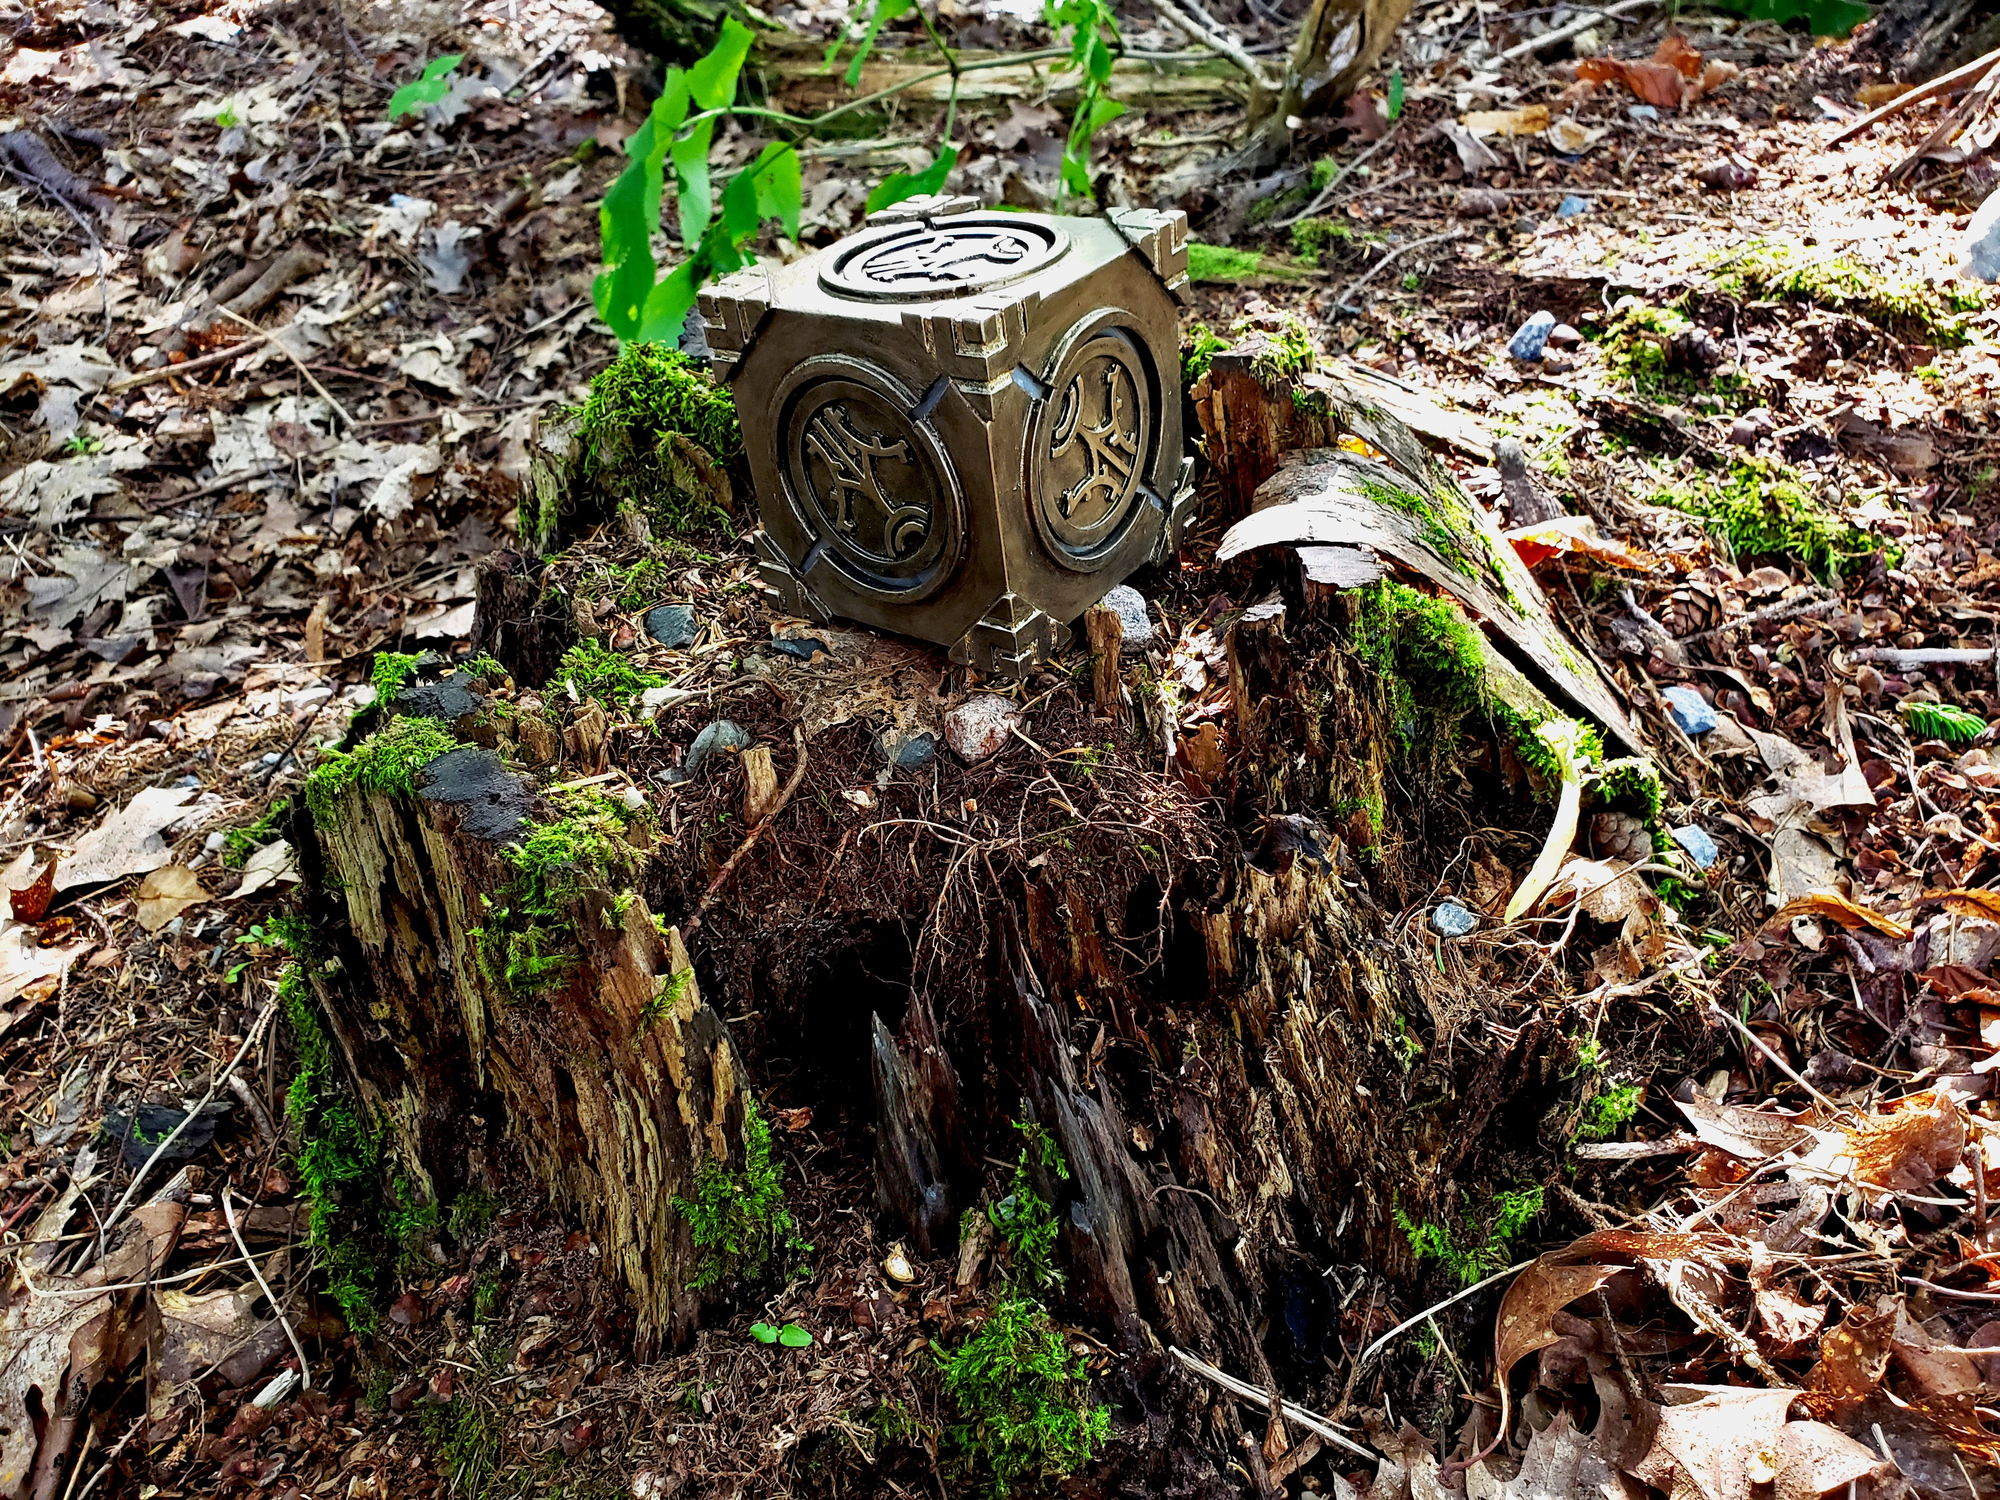
And that's that! The cube is assembled!
Completion
And bonuses!
It's finally done, after many iterations and as of writing this article (finally in late May, 2022), I have made about 10 of these in total. One was the first version, then one personal one that broke. A third personal one, and then three more that I sold on Etsy. Plus one that had to be remade from selling as some shipping company decided to crush one of them for lulz.
And the remaining three? I'm also planning to sell them. Not sure if it'll be on Etsy or somewhere else, but they are ready. I'm just waiting until I have some more free time really. Here is the link to the Etsy page though!
I'm glad that this project did get some recognition as it helped push me to finally actually document things for once as I make them. So going forward, things will be "better" documented. I swear, maybe. #%!@&.

Resources
Everything I used and file resources for you
My Files
Materials
- 3D Printing ABS-Like Tough Resin (Coloured & Clear)
- FDM Filament, PETG or PLA (Coloured & Clear)
- Brushed Metal Bronze Paint (Folkart)
- Mayan Gold Paint
- White Paint
- Primer Spray Paint (Any Colour)
- Black Glossy Primer Spray Paint (Krylon works well)
- Clear Glossy Clear Coat Spray Paint (Rustoleum is what I used)
- 4x Flat Blue Piranha LEDs
- Magnetic Levitation Base with power cord (500g load bearing)
- Wireless Power LEDs Transmitter and Receiver Set
- 4x M3 Standoffs (Screw length - 8mm, standoff/top length 8mm)
- 4x M3 Screws (8mm)
- Electrical Tape
- CA Glue & Accelerant
- Gorilla Super Glue
- 5x Rubber Feet
- Wood Filler
Tools & Equipment
- FDM 3D Printer (Modified CR-10 v1)
- Resin 3D Printer (AnyCubic Photon Mono X)
- Resin Print Washing Setup (Isopropyl Alcohol)
- Resin Curing Station (UV Lights, or the Sun should suffice)
- Paint Brushes (some really raggedy old ones preferred for dry brushing bits)
- Various Sandpaper Grits
- Soldering Iron & Solder