Bambulab to Home Assistant NodeRed Configurator
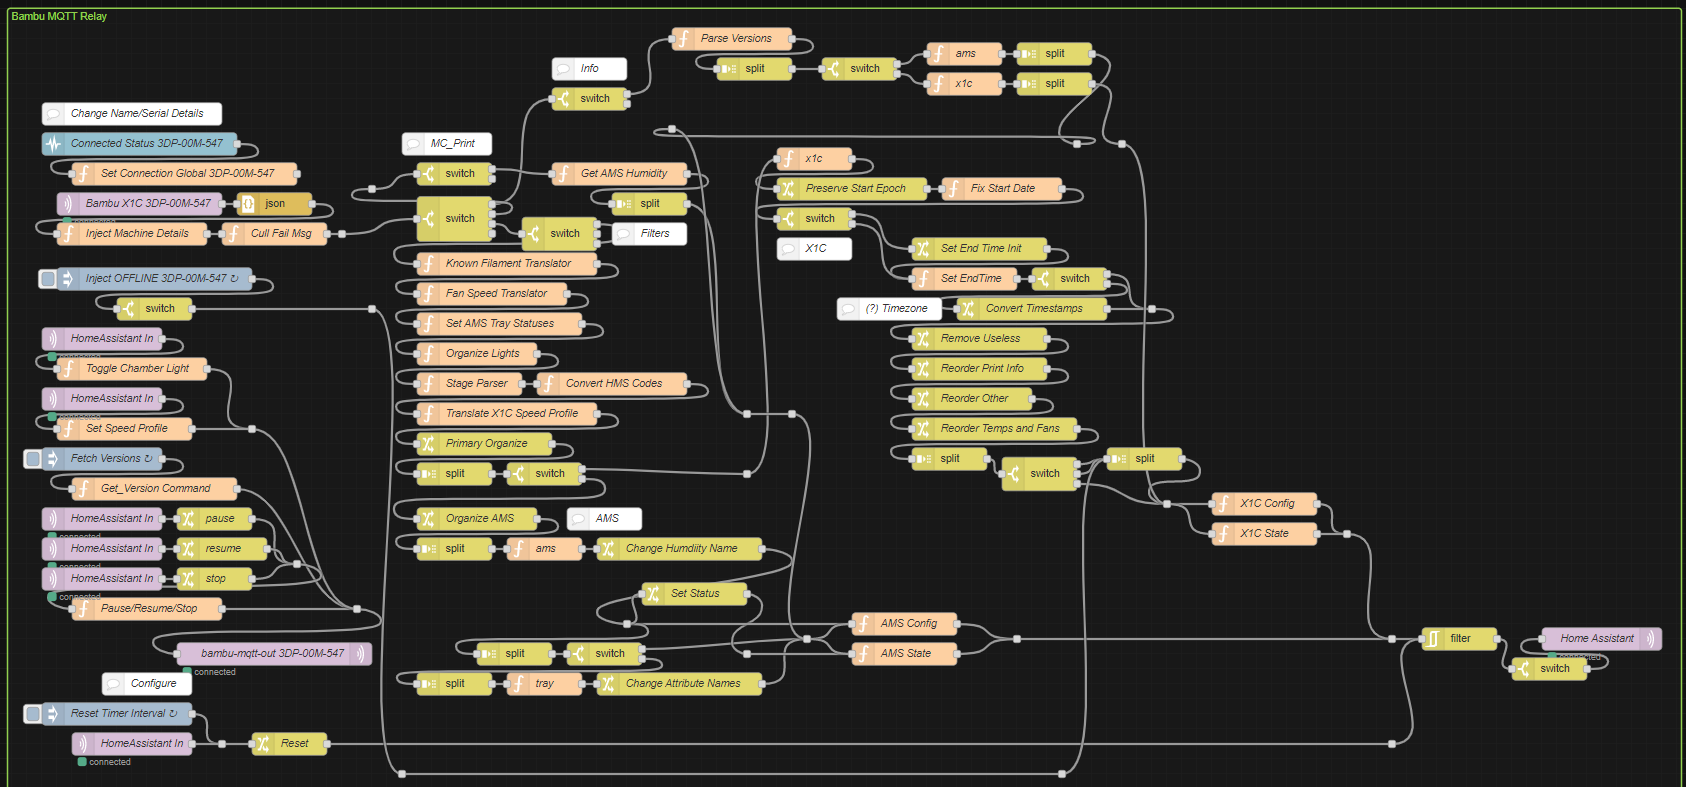
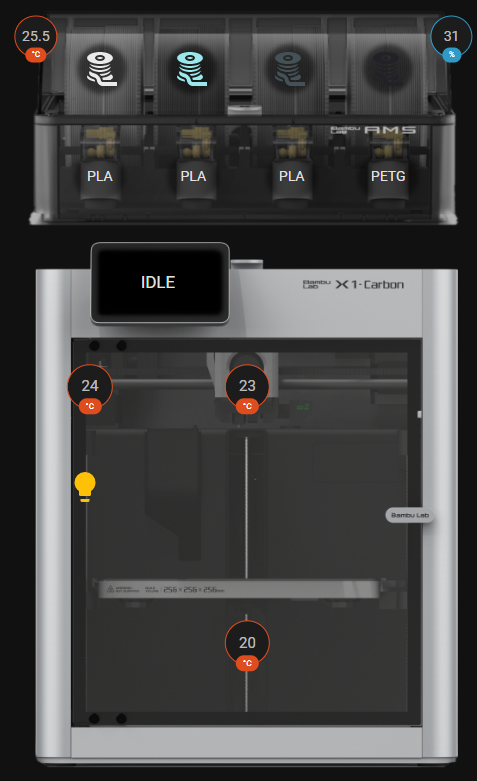
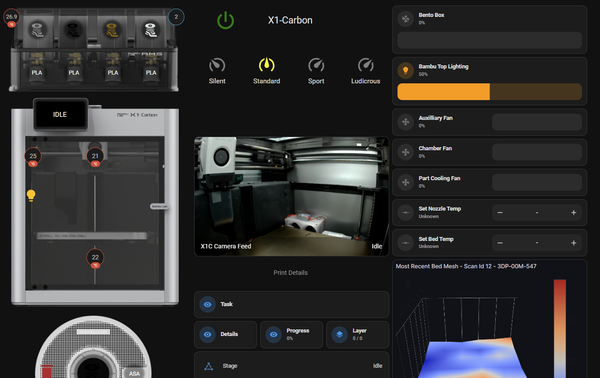
Left: Preview of the NodeRed Flow. Right: Preview of the HomeAssistant Device
Works with X1Plus! (Not required)
Highlight new feature in 2.1.1 & 2.1.2: Custom Speed % Slider and Toggle Print Options!
Check out a list of features my integrations can provide here!
 WolfwithSword
Basic Implementation
Requirements
- Home Assistant (Core or HassOS, either works)
- MQTT Broker Connected to Home Assistant
- NodeRed (No extra palettes needed)
First, fill out the following form below appropriate for your printer. Click Generate and it will download the NodeRed flow for your specific printer.
You can find the Serial Number in your printer's touchscreen, Bambu Studio or the Bambu Handy App. I also recommend setting a static IP for your printer in your router's settings. While on your printer, also get your LAN Access Code.
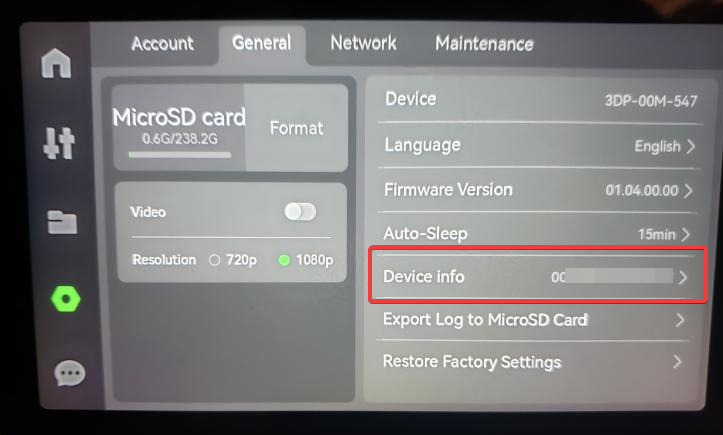
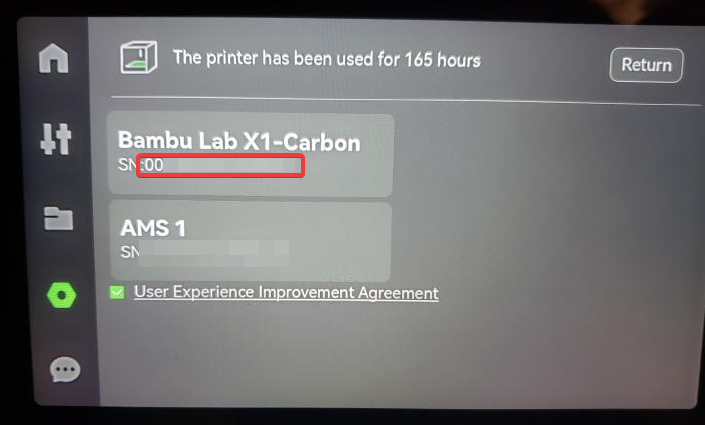
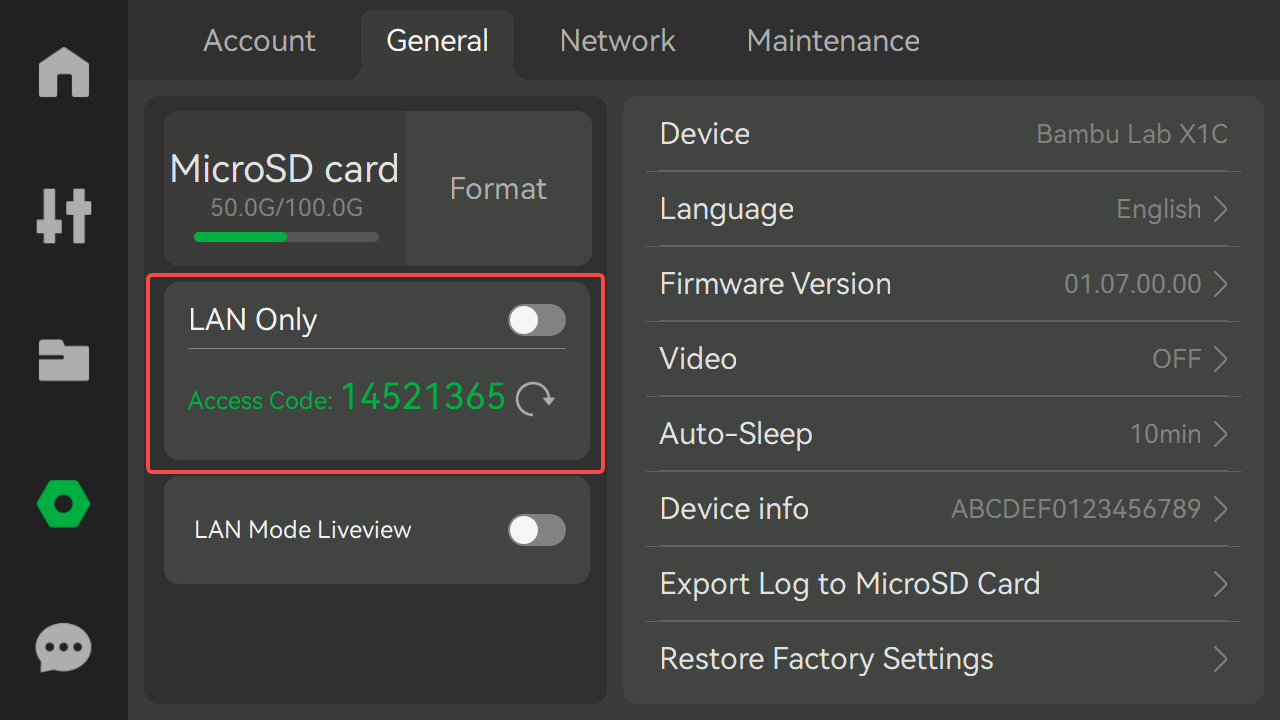
Where to find the Serial Number in the printer touchscreen. May be easier in App or Slicer. Last panel shows where to find the Access Code
For the HomeAssistant MQTT server details, this will depend on your HA setup (Using Hassio with addons, in a docker container, running HA-Core in a docker etc). If using Hassio with the Mosquitto MQTT addon, your default username and password are your HomeAssistant credentials. If that doesn't work, check the configuration tab of the MQTT addon for a really long password, and then your username is default homeassistant, unless otherwise configured. Your ip/host is localhost.
For other setups where your MQTT broker is external, such as in HA-Core docker, you will need to enter in the appropriate settings for your setup. If you don't know or do not have it setup, I recommend following some tutorials for setting up MQTT or mosquitto mqtt containers for homeassistant (avoid any that say "addon").
Note: Your printer-name must be unique and if you choose to do the other configurators from my guides, must remain consistent when generating for that specific printer. Do not use the serial number, or the model of the printer to avoid confusion.
MQTT Cloud Connection Note
Use of cloud connection is not fully recommended
Use of the cloud connection flow may result in a temporary ban. Additionally, it is only useful for P1 or A1 owners who are not in LAN Mode who wish to control stuff such as temperatures. In this case, please use LAN mode, the only thing you will miss is remote Handy App. If you do use this flow, please be 100% sure your input data is correct. Additionally, only do it AFTER verifying the basic-flow works standalone in LAN mode with the cloud option set to "No". Do note that the issue causing a temporary ban was fixed in version 2.1.6.
If you are on a P1 or A1 series printer, or your current firmware (any series, including X1) has disabled local MQTT connections when in cloud mode, select "Yes" to use the Cloud MQTT server if you run your printer in cloud mode - only if you have issues. Note - this should only have disabled certain controls such as temperature setting, and not local connections outright.
If you run your printer in LAN mode, then select "No" in the dropdown that appears in the configurator and that is it. Skip to "NodeRed Import" section.
Otherwise if you have cloud enabled and currently have issues (ex, A1 series data not updating) or on any printer you have no access to local MQTT, FTPS or Camera, download the following flow into NodeRed. There are rumours of firmware versions across all printers after 2024-05 that lock local access to only LAN mode (for camera, mqtt and ftps), and in cloud mode you only have mqtt access.
If you are using my Advanced Flow, and are on firmware that locks local communication when in cloud mode, it will still work for tracking prints due to downloading via HTTPS, but it will not be as flexible.
Final note: If you do use the cloud server with the P1/A1 series and use my dashboard setup, you may not have start/end times or layer information. Though this may have been partially fixed.
You can change this setting without re-importing the node at any time by changing the variable in this image back and forth from true/false. I recommend experimenting if using the advanced flow which is more reliable for you.
While I could make this configurable, because it requires your BambuLab email and password, even though this website does not log anything, I do not feel comfortable asking strangers to input that data here. Instead, follow these steps:
1) Import the downloaded Login Flow into NodeRed (see steps below for general import instructions)
2) Click on the NOTES node and give it a read for detailed instructions
3) Click on the Config node and edit your email and password for your bambu account


If you log in via a third party, such as Google, simply go to the Bambulab website, log out if logged in and then select "Forgot" your password. Complete the reset process with your linked email to create a new password. Now you have both a email/password login and your third party login still works.
4) Deploy this flow when saved then continue with the steps below for the main NodeRed flow.
You will only need to do this once regardless of now many flows/printers you have setup. Once this flow is added once in a new tab, to make any printer basic flow use the cloud login, just setup the "P1P_CLOUD_MODE" variable to true. Ignore that the value says "P1P" in the name. This is leftover from when only P1 series needed it. It works for all printers.
Update November 4th & 22nd, 2024
Bambu has now *required* logins to the cloud service to require an email verification code. I cannot fully automate this, so I have provided a workaround in the flow version 2.1.8/2.1.9. Update your cloud login flow and configure as before, then deploy. It should request an email code to you, if not, there is a button in the flow to click to request an email. Once received, input the code into the Config node "ONETIME_EMAIL_CODE" value, then deploy and run again. You should only need to do this once every 3 months as long as nodered keeps your data between deploys (it will be lost if nodered restarts). It used to be a year, but they changed how long it lasts and messed up how I can get the username on Nov 21st. Otherwise, if it fails to login, you will need to repeat this process. Hence why another reason I do not recommend the cloud flow unless necessary.
NodeRed Import
Next, import it into NodeRed.

Then click the big red Deploy in the top right. This is how NodeRed "saves" and deploys the flows. Any changes are not done until it is deployed.
If you have multiple printers, repeat the configurator and in NodeRed, create a new empty flow to import it in. When you import the flow, please ensure you click Import Copy when it complains about duplicate nodes.
Duplicates of the same flow-group import are not meant to be on the same flow-tab, treat each flow-tab as separate for each printer.
For upgrading flows to a newer version of this flow, make a backup of your existing flow by exporting it (top right) as json and saving it on your PC. Then delete the contents of the entire flow. Repeat for each printer then redo the configurator as per this guide. Ensure the printer-name is the same as before and it will load in correctly.
(Optional) Custom Configuration
There are a few more options for custom configuration of the nodered flow. These config changes are at your own risk to expand the functionality of the nodered flow.
These options are not configurable on this page due to potential risk associated with them. As such, I will do my best to help if you run into trouble, however I provide no guarantee for actions done after changing these specific settings.
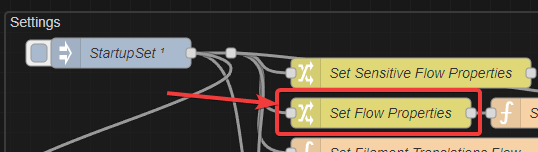
You can modify these variables (and other settings post install) via the two "Flow Properties" nodes in the Settings group.
"Sensitive" flow properties include access code or serial number. The other flow properties handles all flow options from configuration and more.
- Arbitrary GCode
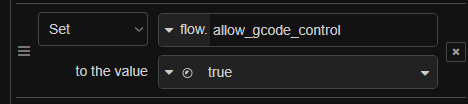
To enable sending arbitrary gcode commands to your printer over HomeAssistant, go into "Set Flow Properties" and find the entry for flow.allow_gcode_control and set the value below to true.
- Custom MQTT Root Topic
If you are not using HomeAssistant, this nodered flow can still be useful. By default, all sensors/control are published with their topics and settings setup for HomeAssistant auto-discovery via MQTT. However, you can change the root topic to anything you want by changing the flow.root_topic value in the "Set Flow Properties" node.

The format for config, state, set topics and more will still be HA formatted, but can be adapted. Some users have done this to integrate into HomeSeer and other applications.
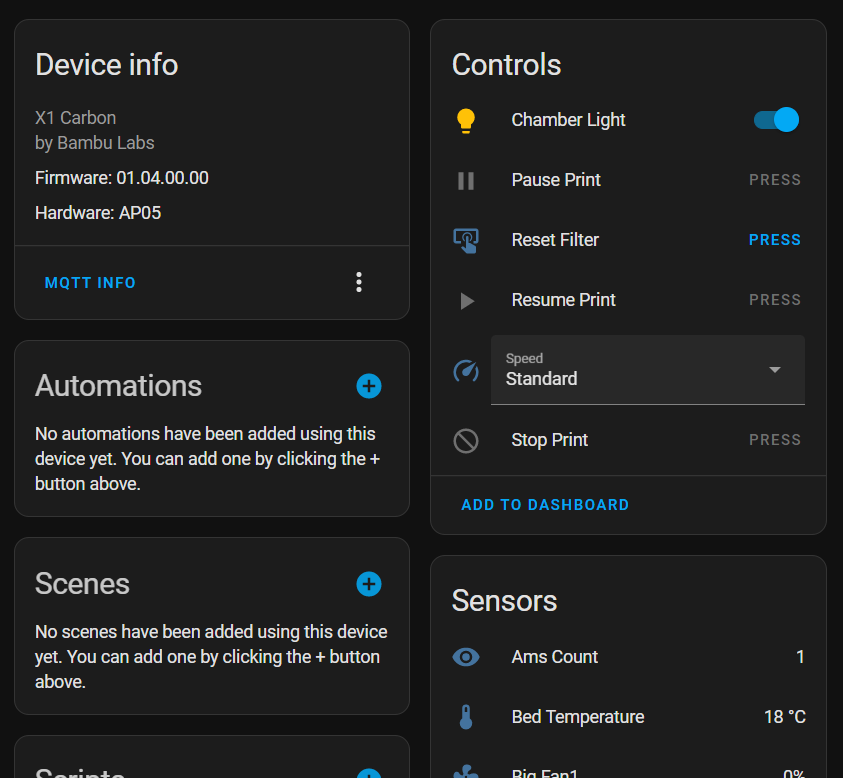
That's it! You now have the Bambu Printer (and any attached AMS units) available in Home-Assistant. It offers plenty of sensors and control.
If you have any issues, leave a comment below (requires joining) or leave an issue on the (new) github for these flows, which contains more detailed information. You can also message me on Discord (@wolfwithsword), or anywhere listed here.
Additional findings and ideas can be discussed on the Home-Assistant forum too!
 WolfwithSword
If you run X1Plus, consider testing out my WIP X1Plus integration flow.
WolfwithSwordNotes
- The configuration form will always be up to date with the latest github changes
- You do not need to enable LAN Only or keep it enabled for the access code to work. It does not change unless you regenerate it
- If the printer is continuously offline, and NodeRed has messages in the debugger that the printer is not reachable, verify that the printer is not randomly disconnecting from the network. If you have multiple VLANs/networks or a non-simple home-network setup, this may be the cause. Either move the printer and NodeRed's host to the same VLAN/network, or allow some stuff through the firewall rules.
- The "reset filter" button is not for the printer, but for the NodeRed flow. Clicking it will force sensors to "clear" and be updated when new data comes through. If you have sensor data issues and this does not solve it, you may need to debug and delete some topics in HomeAssistant MQTT using MQTT Explorer
- If you restart HomeAssistant, sensors may be unavailable and seem "broken". Wait about 5 minutes and it will be fixed if your printer is online - it's just HA not updating from MQTT until I reset it, which I force every 5 minutes. Without it, your HA logs would be bombarded every second.
- If any sensor is unavailable and you expect it to be there, wait 6 minutes, if still unavailable, click the "force reset". If still unavailable after another few minutes, then leave a comment to ask about it.
- There are number-boxes which can set the target temperature of the bed and nozzle. They have limits but use at your own risk. They are useful for pre-heating the chamber in a script or modifying on the fly, for example.